How to connect to notebook via SSH
When creating a notebook, you can securely access it remotely via SSH to transfer files and perform tasks.
SSH access to notebooks is supported only for default provided images. You can check the default provided images in Supported notebook images.
Configure SSH
-
When creating a notebook, enable Enable SSH Connection at the bottom.
infoIf you do not assign a volume during notebook creation to the user directory
/home/{user-name}created when accessing via SSH, the contents of that directory may be lost after stopping and restarting the notebook.
For safe operations, assign a volume to a mounted directory or to the user directory as shown in the image.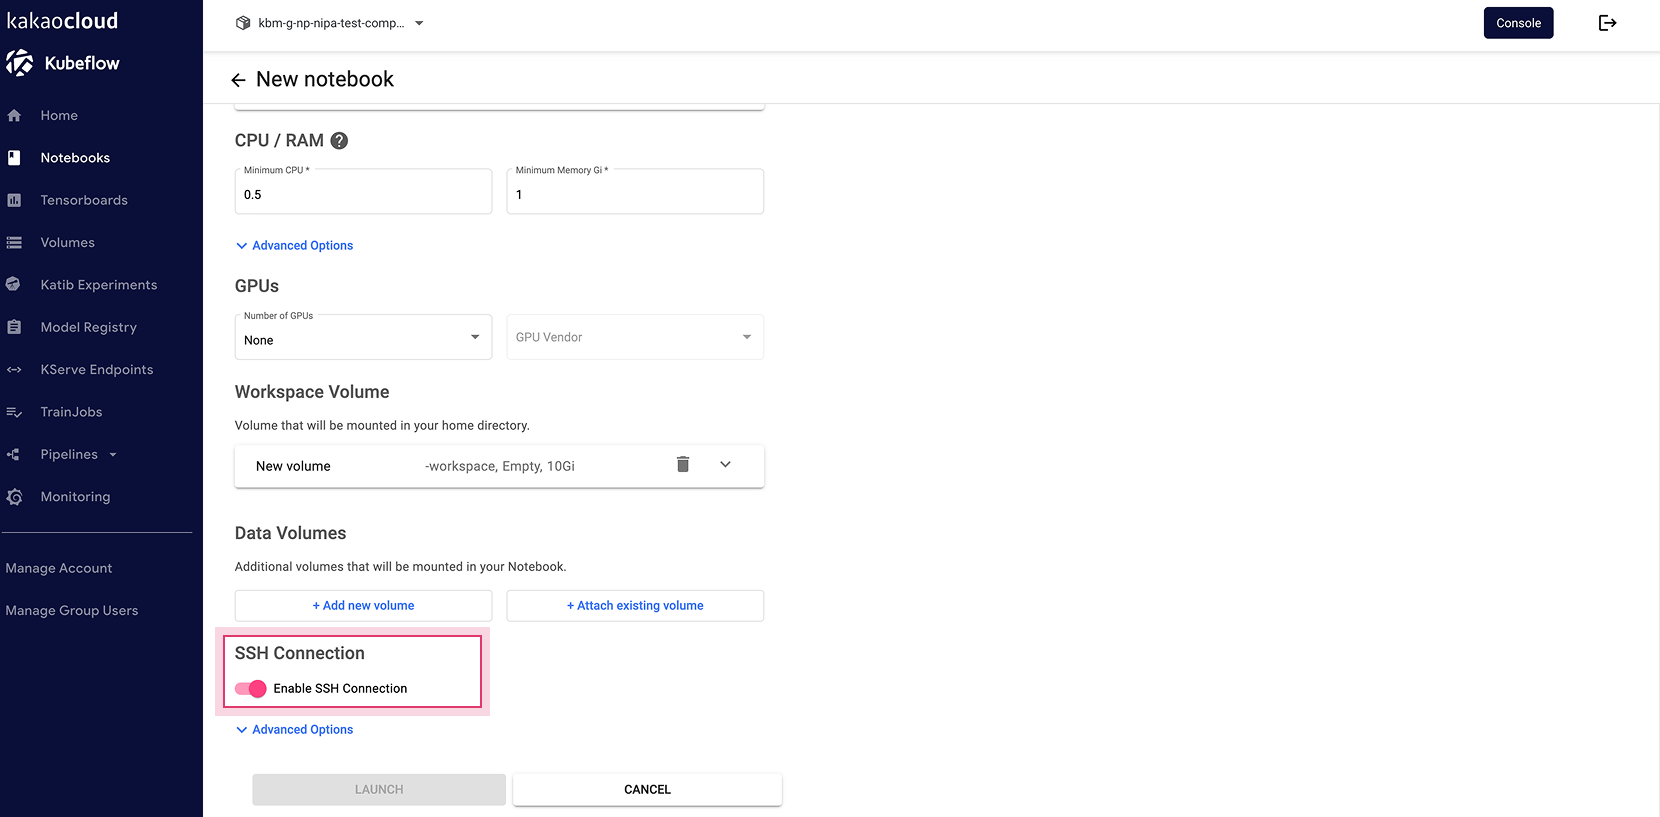 Enable SSH Connection
 -
After the notebook is created, hover over Use SSH in the menu to check the
SSH command random port.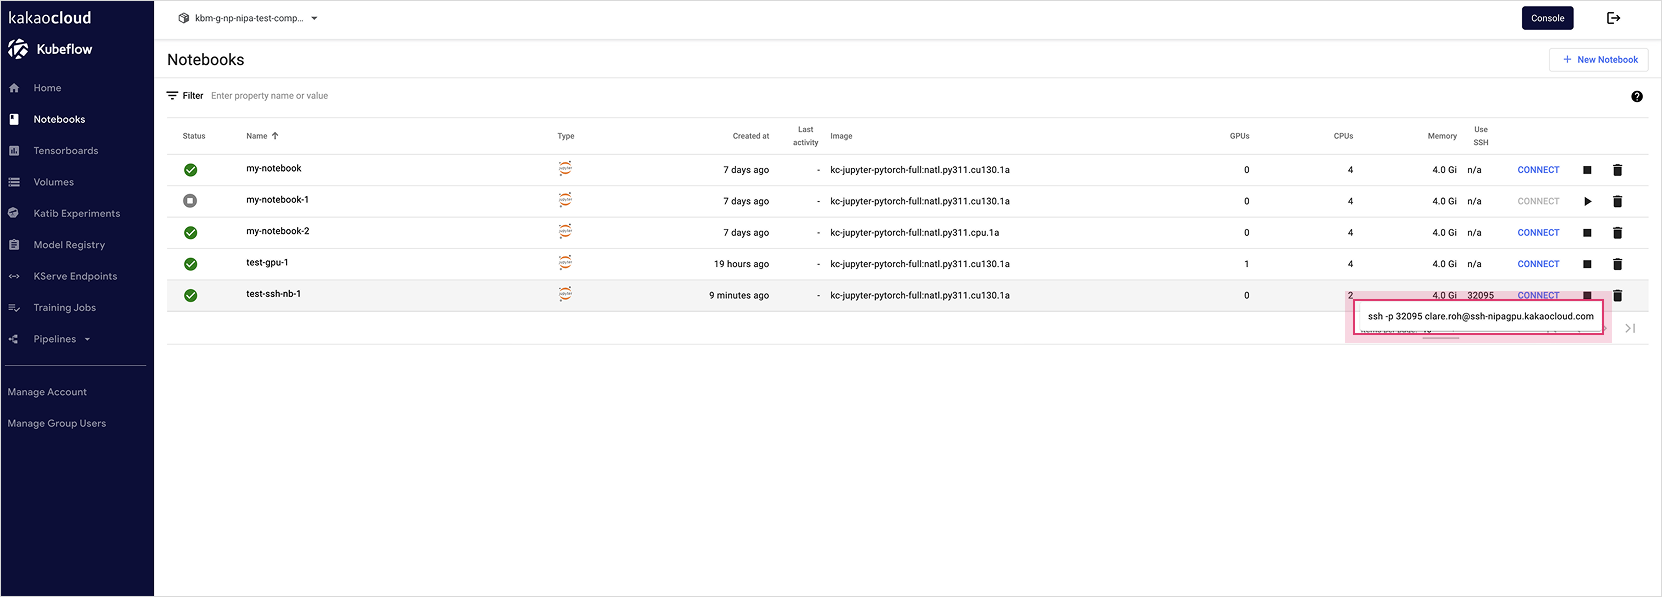 Check SSH random port
 -
Click the [Manage Account] button in the left Kubeflow menu to check the SSH password.
infoThe SSH password is exposed identically to users within the same namespace.
-
Try accessing via SSH from a local terminal.
info- When prompted with
Are you sure you want to continue connecting (yes/no/[fingerprint])?, enter yes. - The username used for SSH access is the username included in the notebook creator’s email address. To add users, log in with the notebook creator account and use the
addusercommand.
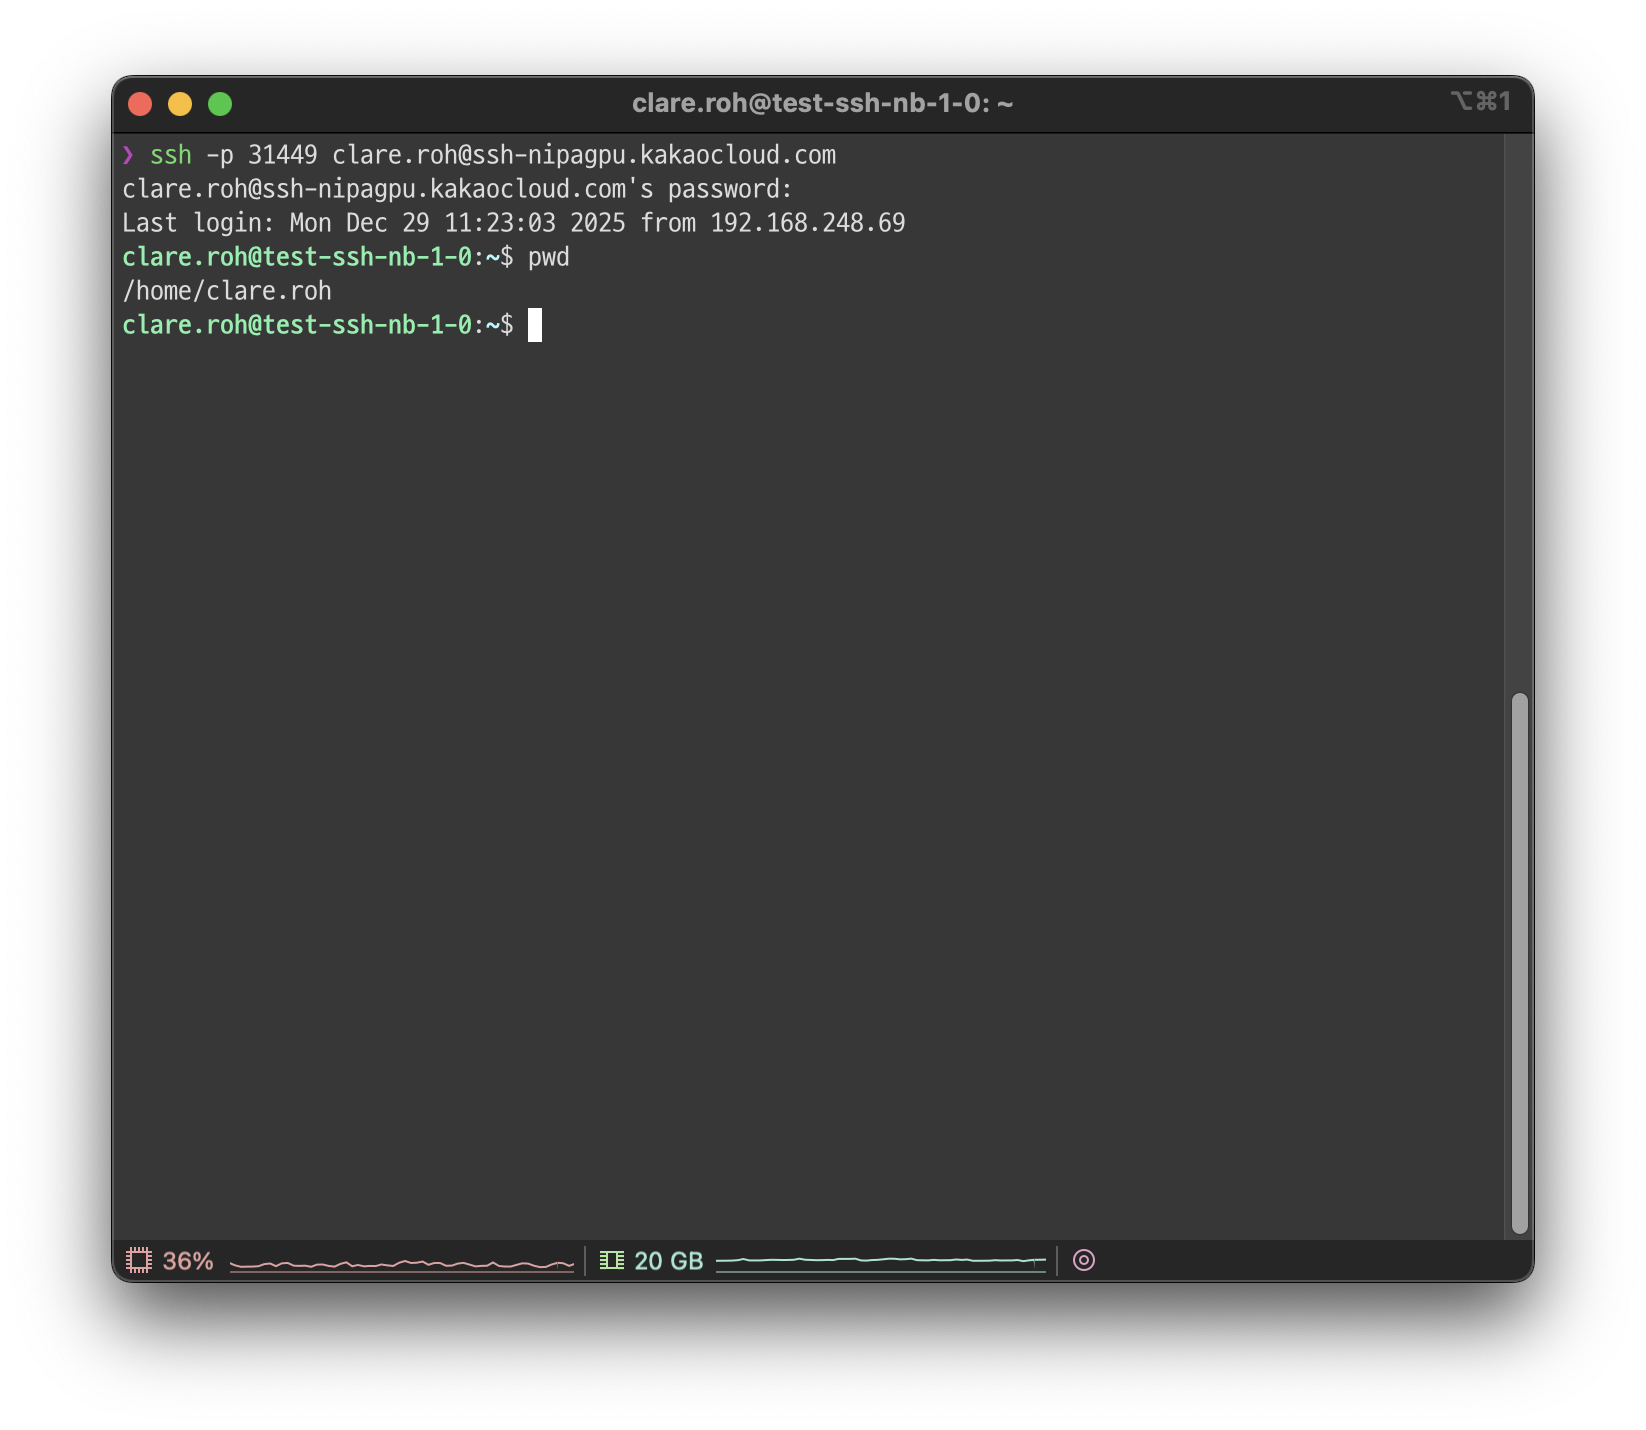 SSH access
 - When prompted with
Verify SSH service status
You can verify whether the SSH service is running properly using the following command in the notebook terminal.
- Running normally
- Not running
$ sudo service ssh status
 * sshd is running
$ sudo service ssh status
ssh: unrecognized service
Use SCP
-
Check the port and account information required for SCP.
infoTo use SCP, Enable SSH Connection must be enabled during notebook creation.
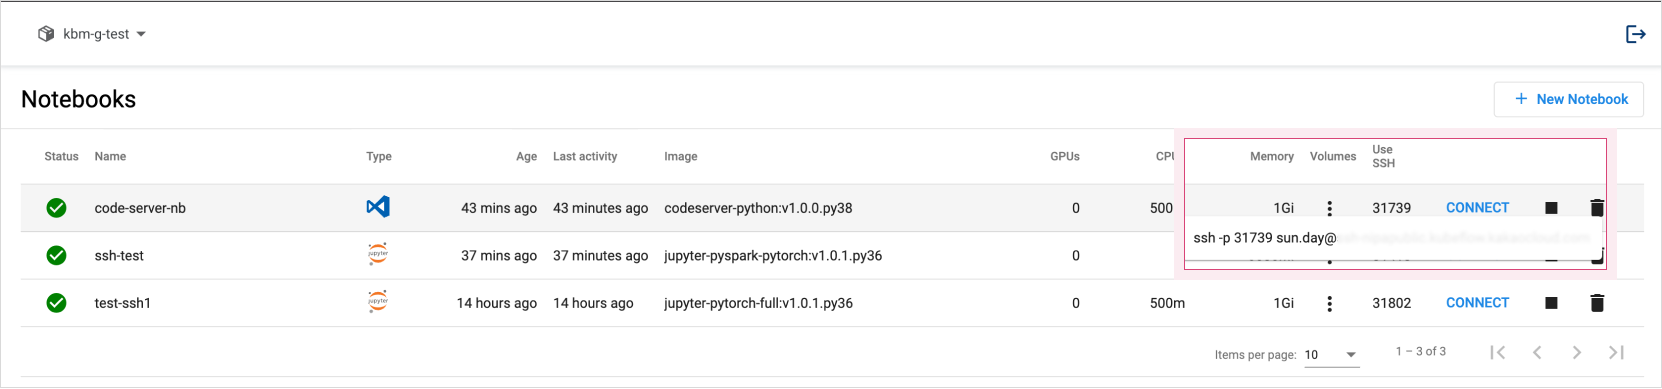 Check SSH random port
 -
Try SCP from a local terminal.
info- Enter
scp -P {SSH command random port} {Source File PATH} {Username@Domain}:{Destination PATH}. - When prompted with
Are you sure you want to continue connecting (yes/no/[fingerprint])?, enter yes.
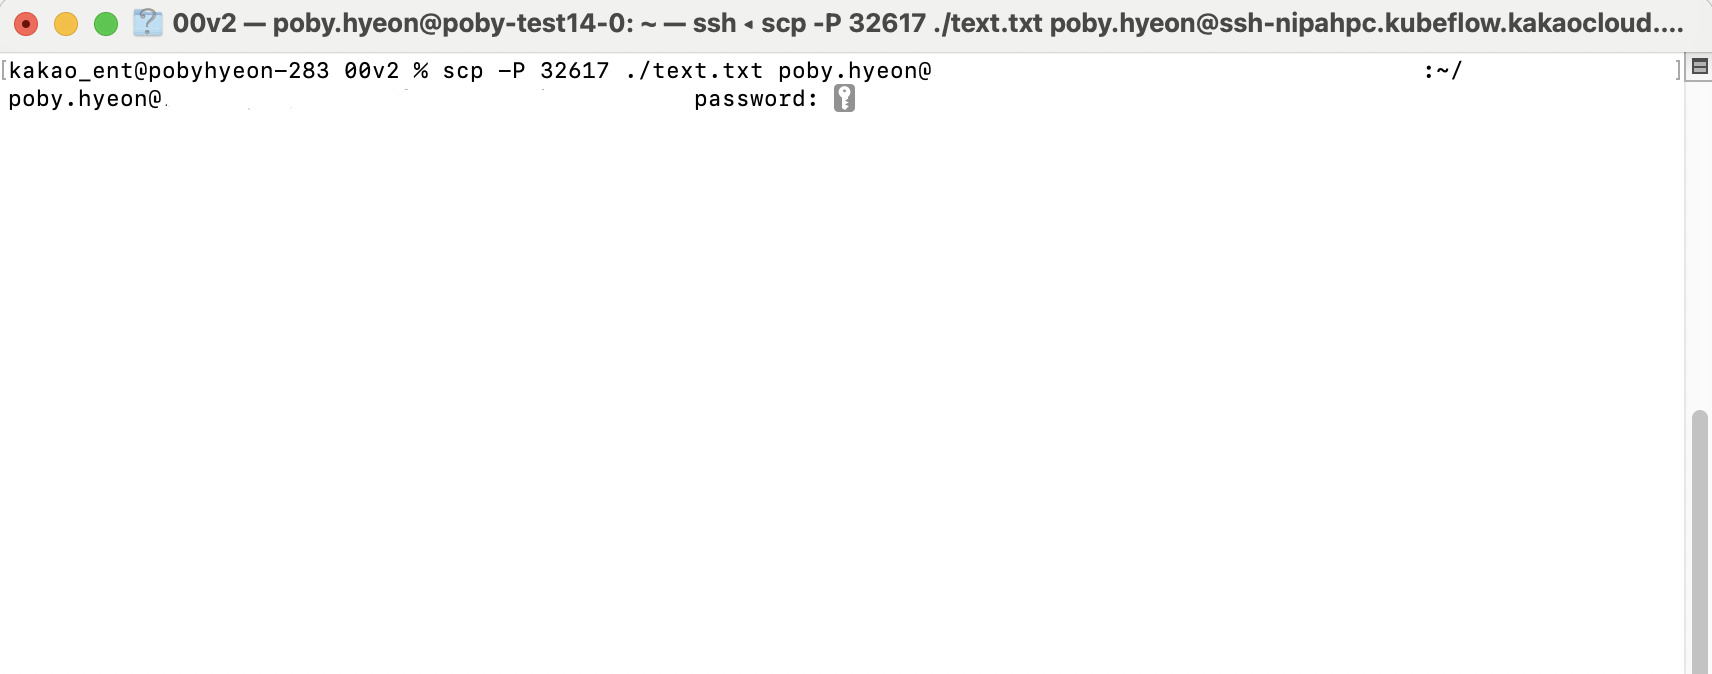 SCP command example
 - Enter
-
Click the [Manage Account] button in the left Kubeflow menu to check the SSH password.
infoYou can check the SSH password from Manage Account in the Kubeflow menu.
-
Verify the file transfer result on the Jupyter Notebook CLI after transferring files from the local terminal using SCP.
info- If you specify the user home directory as in the example, files are saved to
/home/{user-name}, which is the user directory created when accessing via SSH. - You can specify a
Destination PATHfor file transfer.
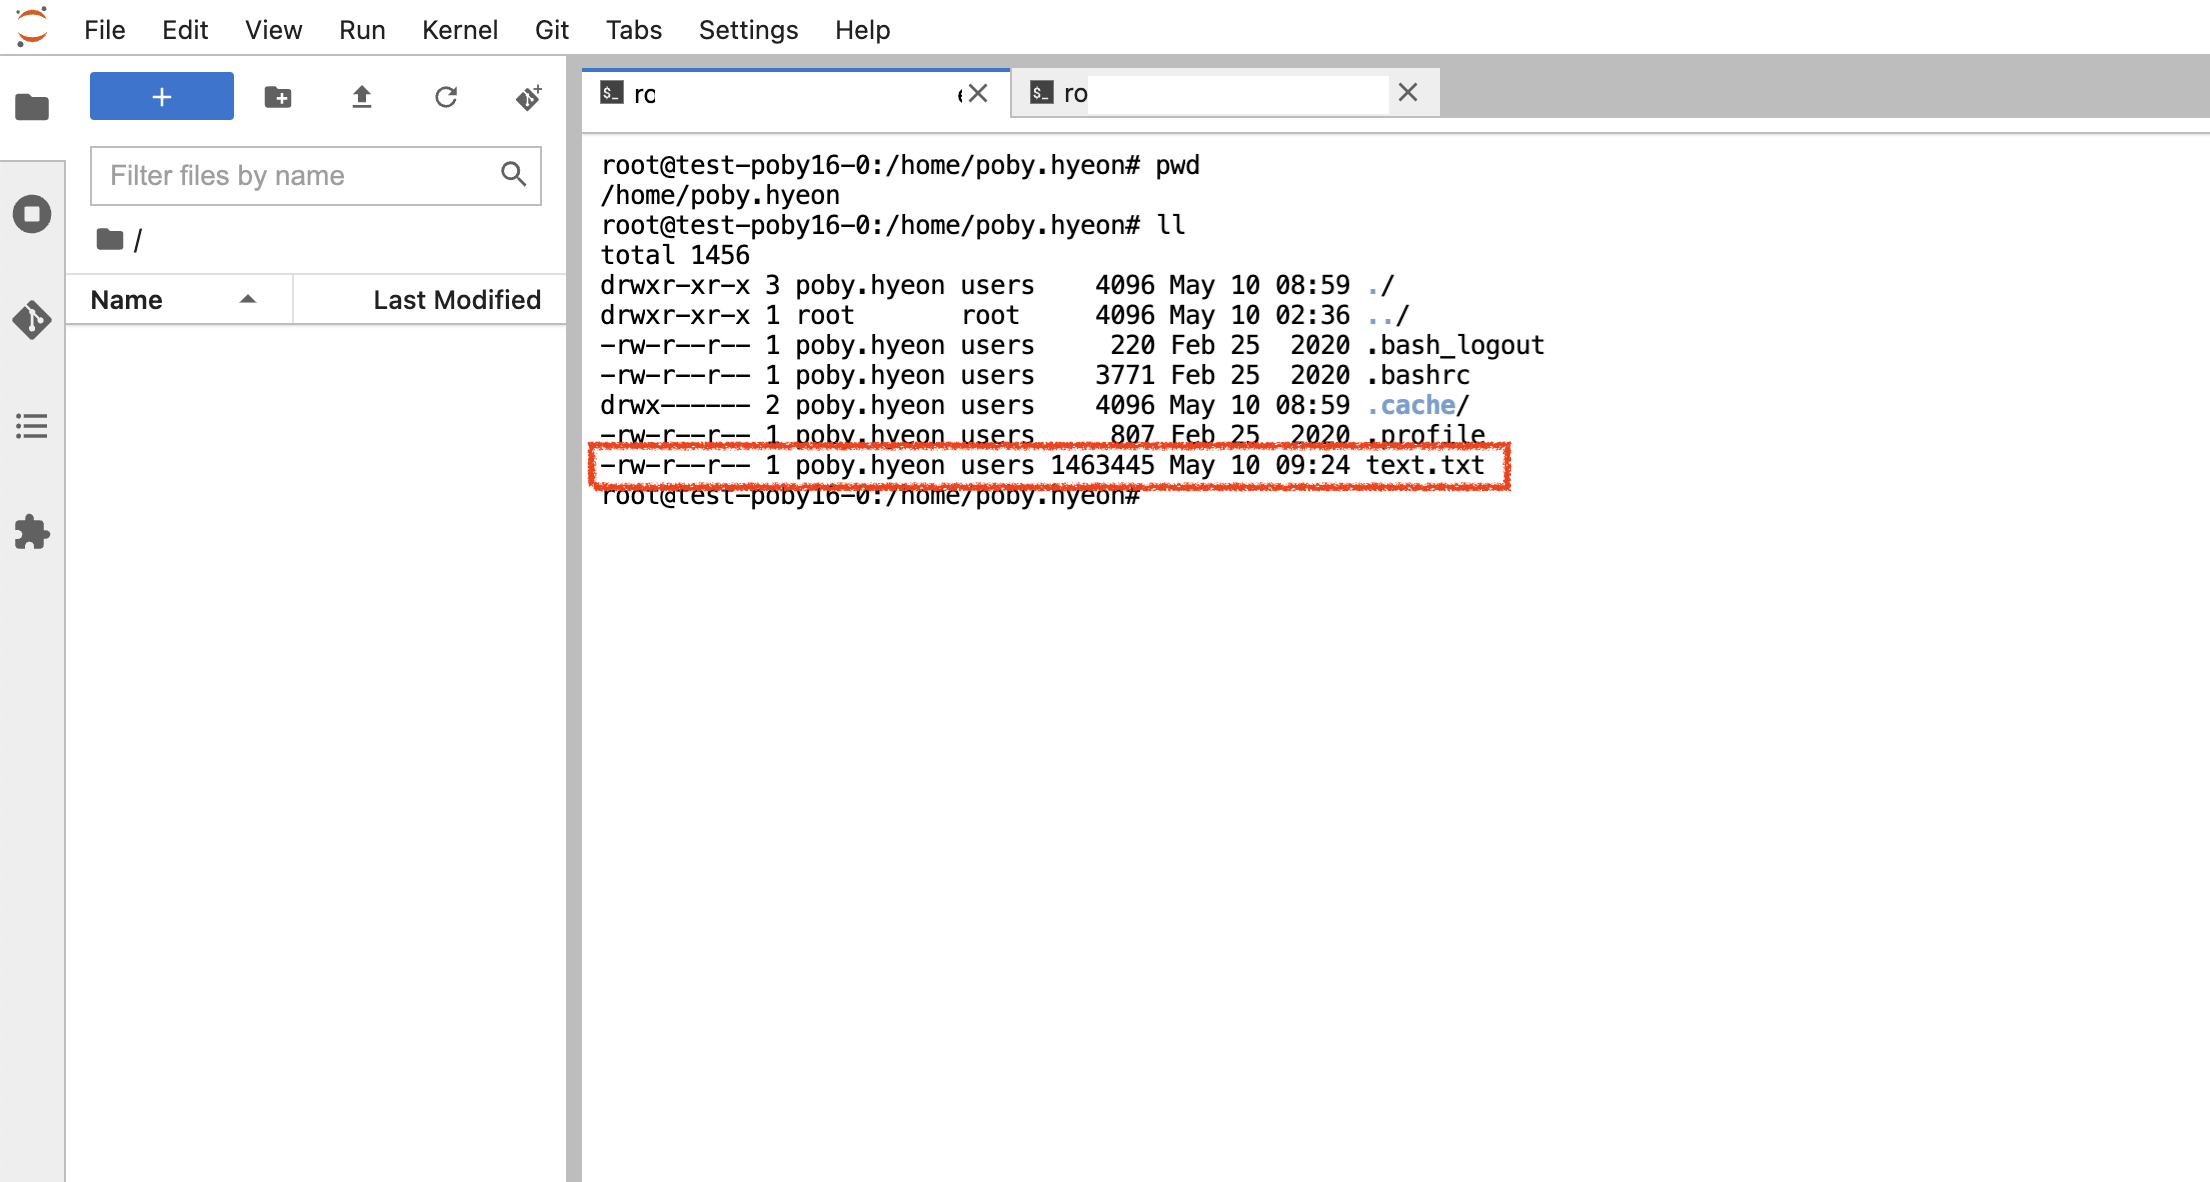 Verify SCP execution result
 - If you specify the user home directory as in the example, files are saved to