Kubeflow hyperparameter tuning
Create an AutoML experiment through a hyperparameter tuning hands-on example.
Supported tools
| Tool | Version | Description |
|---|---|---|
| Katib | 0.15.0 | - Open-source project that provides hyperparameter tuning features - Allows testing various hyperparameter combinations to improve model performance |
Create AutoML experiment through hands-on example
Step 1. Prepare prerequisites
Prepare training data
The hyperparameter tuning hands-on example uses the MNIST dataset.
By following the steps below, the required dataset is downloaded automatically, so no separate download is required.
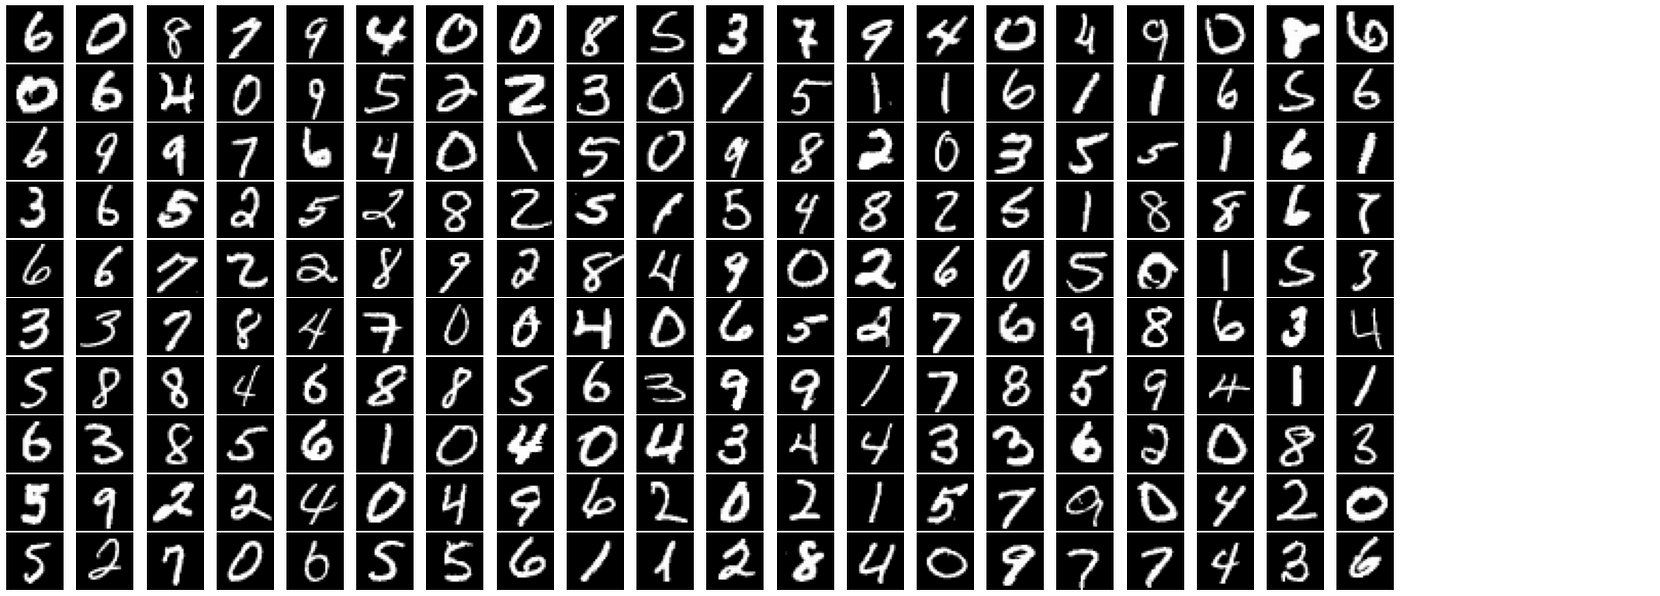 MNIST image dataset
What is the MNIST dataset?
- A large-scale dataset consisting of handwritten digits, widely used in the computer vision field.
- It consists of 70,000 grayscale images of size 28x28 pixels, with 10 categories (digits 0–9), including 60,000 training images and 10,000 test images.
Step 2. Create a new experiment using the hands-on example
-
Access the dashboard.
-
Select the Experiments (AutoML) tab on the left.
-
Click the [NEW EXPERIMENT] button at the top right.
-
At the bottom of the Create an Experiment screen, click the [Edit and submit YAML] button. In the Edit YAML pop-up, copy and paste the YAML script code example below, then click the [CREATE] button.
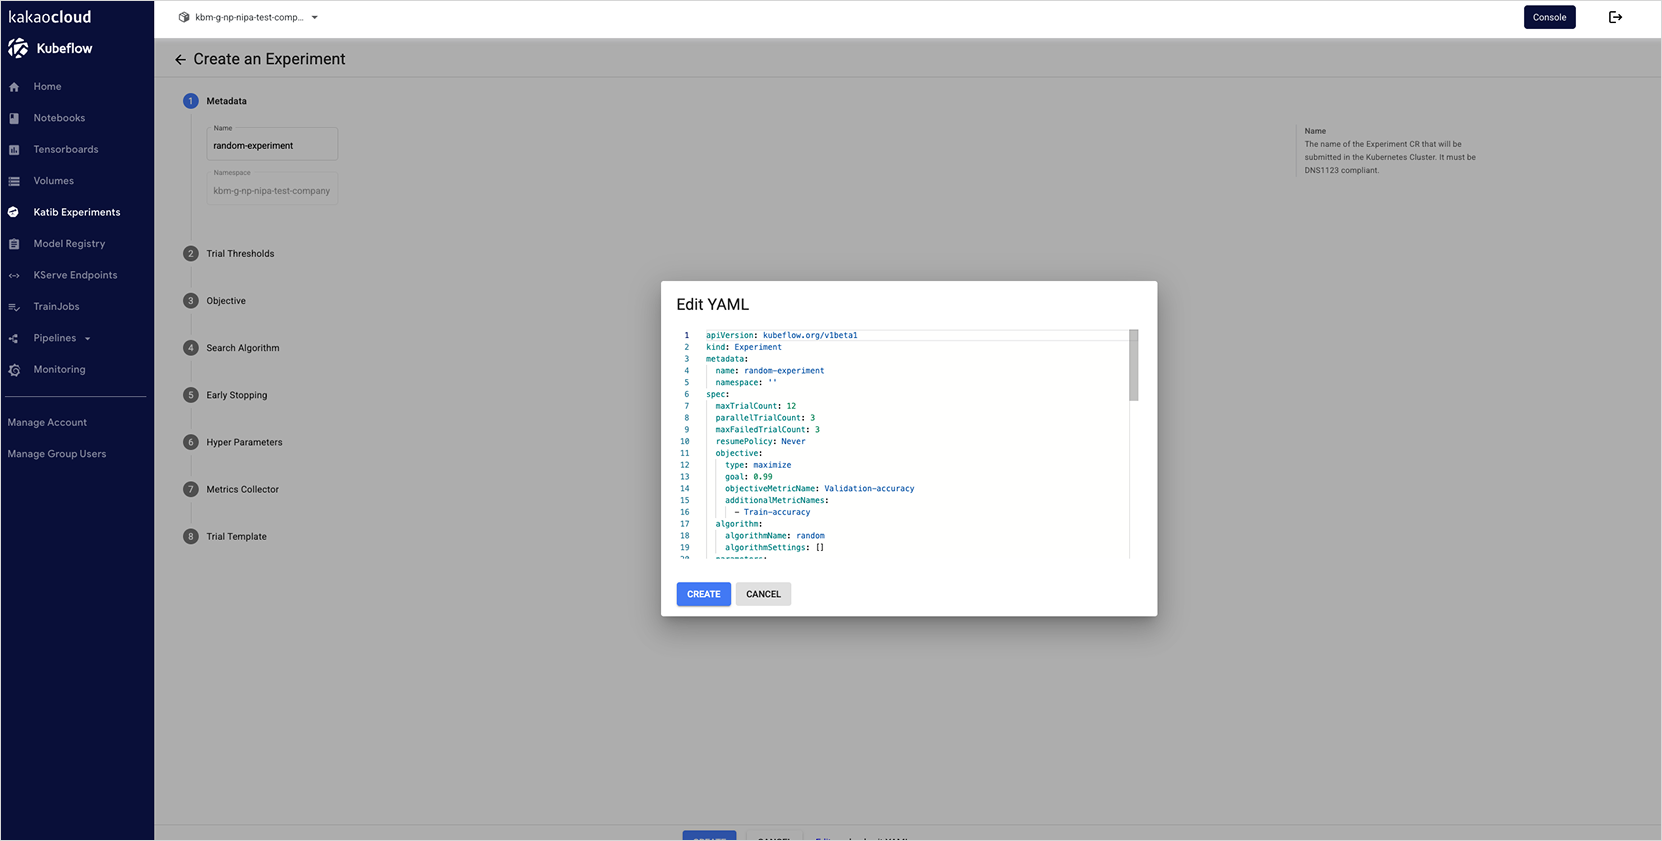 Insert YAML script code exampleinfo
In the example below, you must manually enter the namespace name and AutoML experiment name. How to check the namespace name.
Example: If the namespace name is kbm-g-namespace9999 and you want to set the AutoML experiment name to test-AutoML
namespace: kbm-g-namespace9999
name: test-AutoMLHands-on example. YAML script code exampleapiVersion: kubeflow.org/v1beta1
kind: Experiment
metadata:
namespace: {{ namespace-name }}
name: {{ automl-experiment-name }}
spec:
objective:
type: maximize
goal: 0.99
objectiveMetricName: accuracy
additionalMetricNames:
- loss
metricsCollectorSpec:
source:
filter:
metricsFormat:
- "{metricName: ([\\w|-]+), metricValue: ((-?\\d+)(\\.\\d+)?)}"
fileSystemPath:
path: "/katib/mnist.log"
kind: File
collector:
kind: File
algorithm:
algorithmName: random
parallelTrialCount: 3
maxTrialCount: 12
maxFailedTrialCount: 3
parameters:
- name: lr
parameterType: double
feasibleSpace:
min: "0.01"
max: "0.03"
- name: momentum
parameterType: double
feasibleSpace:
min: "0.3"
max: "0.7"
trialTemplate:
retain: true
primaryContainerName: training-container
trialParameters:
- name: learningRate
description: Learning rate for the training model
reference: lr
- name: momentum
description: Momentum for the training model
reference: momentum
trialSpec:
apiVersion: batch/v1
kind: Job
spec:
template:
metadata:
annotations:
sidecar.istio.io/inject: 'false'
spec:
containers:
- name: training-container
image: mlops.kr-central-2.kcr.dev/kc-kubeflow-registry/katib-pytorch-mnist-gpu:v0.18.0.kbm.1a
command:
- "python3"
- "/opt/pytorch-mnist/mnist.py"
- "--epochs=1"
- "--log-path=/katib/mnist.log"
- "--lr=${trialParameters.learningRate}"
- "--momentum=${trialParameters.momentum}"
resources:
requests:
cpu: '1'
memory: 2Gi
limits:
cpu: '10'
memory: 20Gi
nvidia.com/gpu: '1'
restartPolicy: Never
Step 3. Verify the created experiment
-
In the Experiments (AutoML) list, verify that the experiment was created successfully.
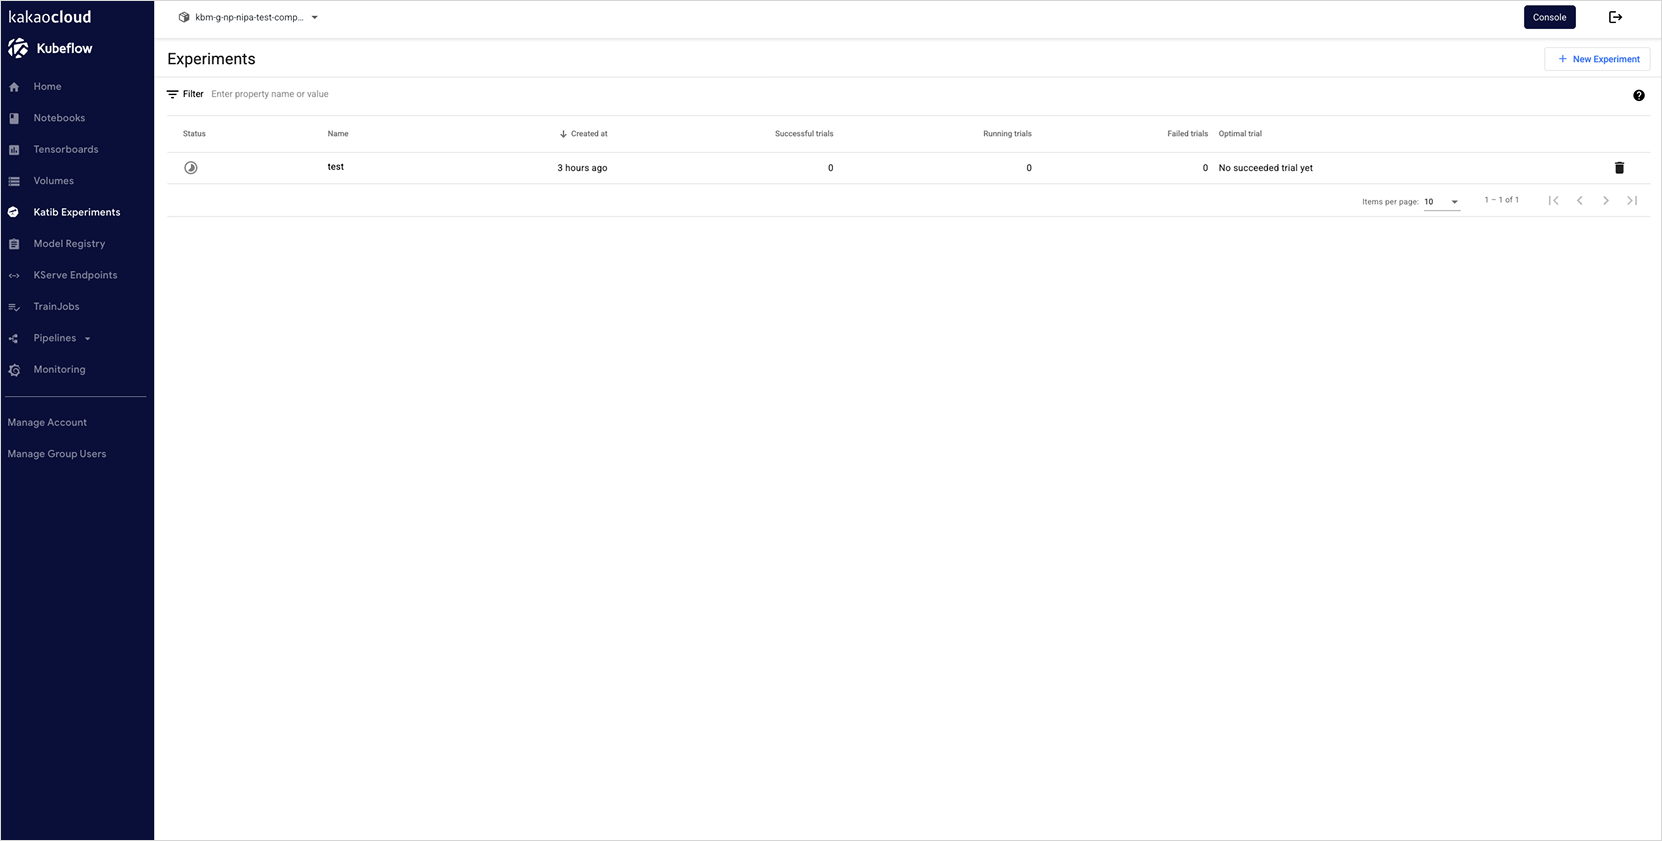 Verify experiment creation
 -
Click the created experiment in the list to review the experiment details.
For more details about Katib, refer to the Kubeflow > Katib official documentation.