Build a predictive model with Kubeflow Notebooks
Practice with a sample dataset in Jupyter Notebook.
Step 1. Prerequisites
Download the training data and use the dataset to complete the exercise in Jupyter Notebook.
- Check the minimum specifications for the node pool used in the exercise.
- Minimum node pool specifications: at least
4vCPUs and8 GBof memory - For option 2: a GPU notebook node pool is required
- To create a GPU pipeline: a GPU pipeline node pool is required
The exercise might not run properly if the node pool does not meet the minimum specifications.
Prepare training data
In this exercise, you build a taxi fare prediction model using a public dataset from New York City.
- Training dataset: regression model training based on the New York Taxi Fare Dataset
Source dataset information
| Item | Description |
|---|---|
| Goal | Build a taxi fare prediction model |
| Dataset | New York City Yellow Taxi fare data from 2009–2015 - Pickup and drop-off locations, passenger count, pickup time, and more |
Step 2. Create a notebook for the exercise
For more information about creating notebooks, see Use notebooks.
Create a CPU image-based notebook
The following example creates a notebook that uses only a CPU instance type. Configure the notebook as required for the exercise.
-
On the Kubeflow dashboard, click the Notebooks tab, and then click New Notebook.
-
On the New Notebook page, enter the required information and click LAUNCH to create a CPU image-based notebook instance.
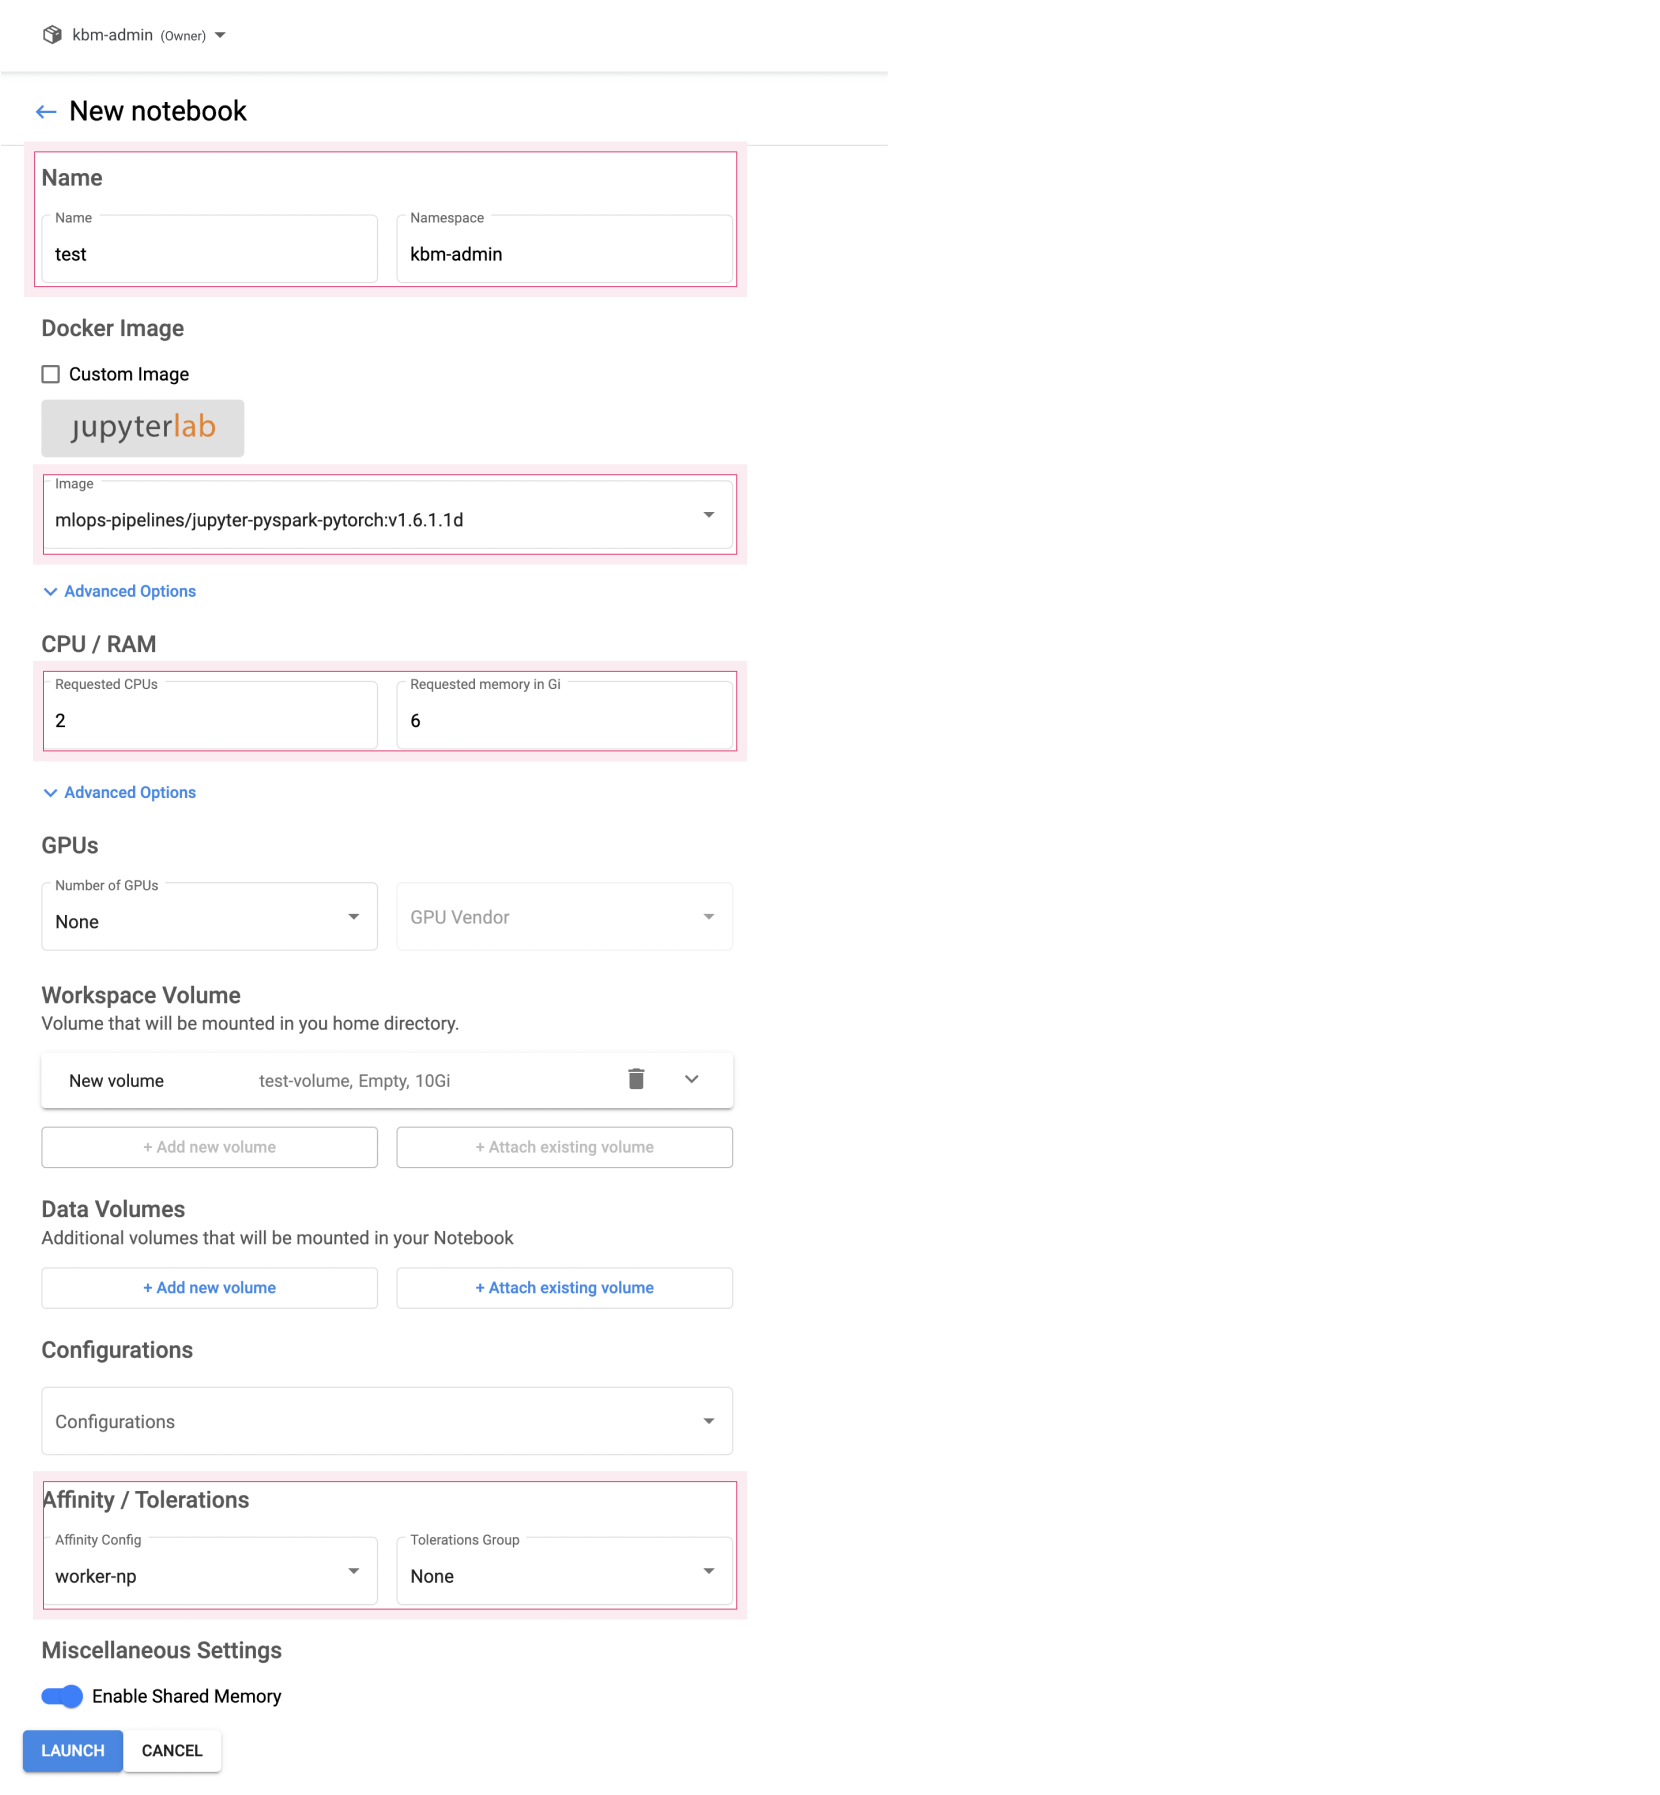 Create a CPU image-based notebook (option 1)
Item Field Description Name Name Name used to identify the notebook instance on the Kubeflow dashboard Namespace Kubernetes namespace where the notebook instance is created Docker Image Image mlops-pipelines/jupyter-pyspark-pytorch:v1.0.1
- Docker image to useCPU / RAM Requested CPUs 2
- Number of CPU cores allocated to the notebook instanceRequested memory in Gi 6
- Amount of memory in GiB allocated to the notebook instanceGPUs Number of GPUs None
- GPU resources allocated to the notebook instanceAffinity / Tolerations Affinity Config CPU node pool where the notebook is created
- Specifies the node on which the notebook instance runsTolerations Group None
- Configuration that permits specific node taints
The Requested CPUs and Requested memory in Gi values must be less than the vCPU count and memory capacity of the node pool selected under Affinity Config.
Create a GPU image-based notebook (option 2)
The following example creates a notebook that uses only a GPU instance type. Configure the notebook as required for the exercise.
-
On the Kubeflow dashboard, click the Notebooks tab, and then click New Notebook.
-
On the New Notebook page, enter the required information and click LAUNCH to create a GPU image-based notebook instance.
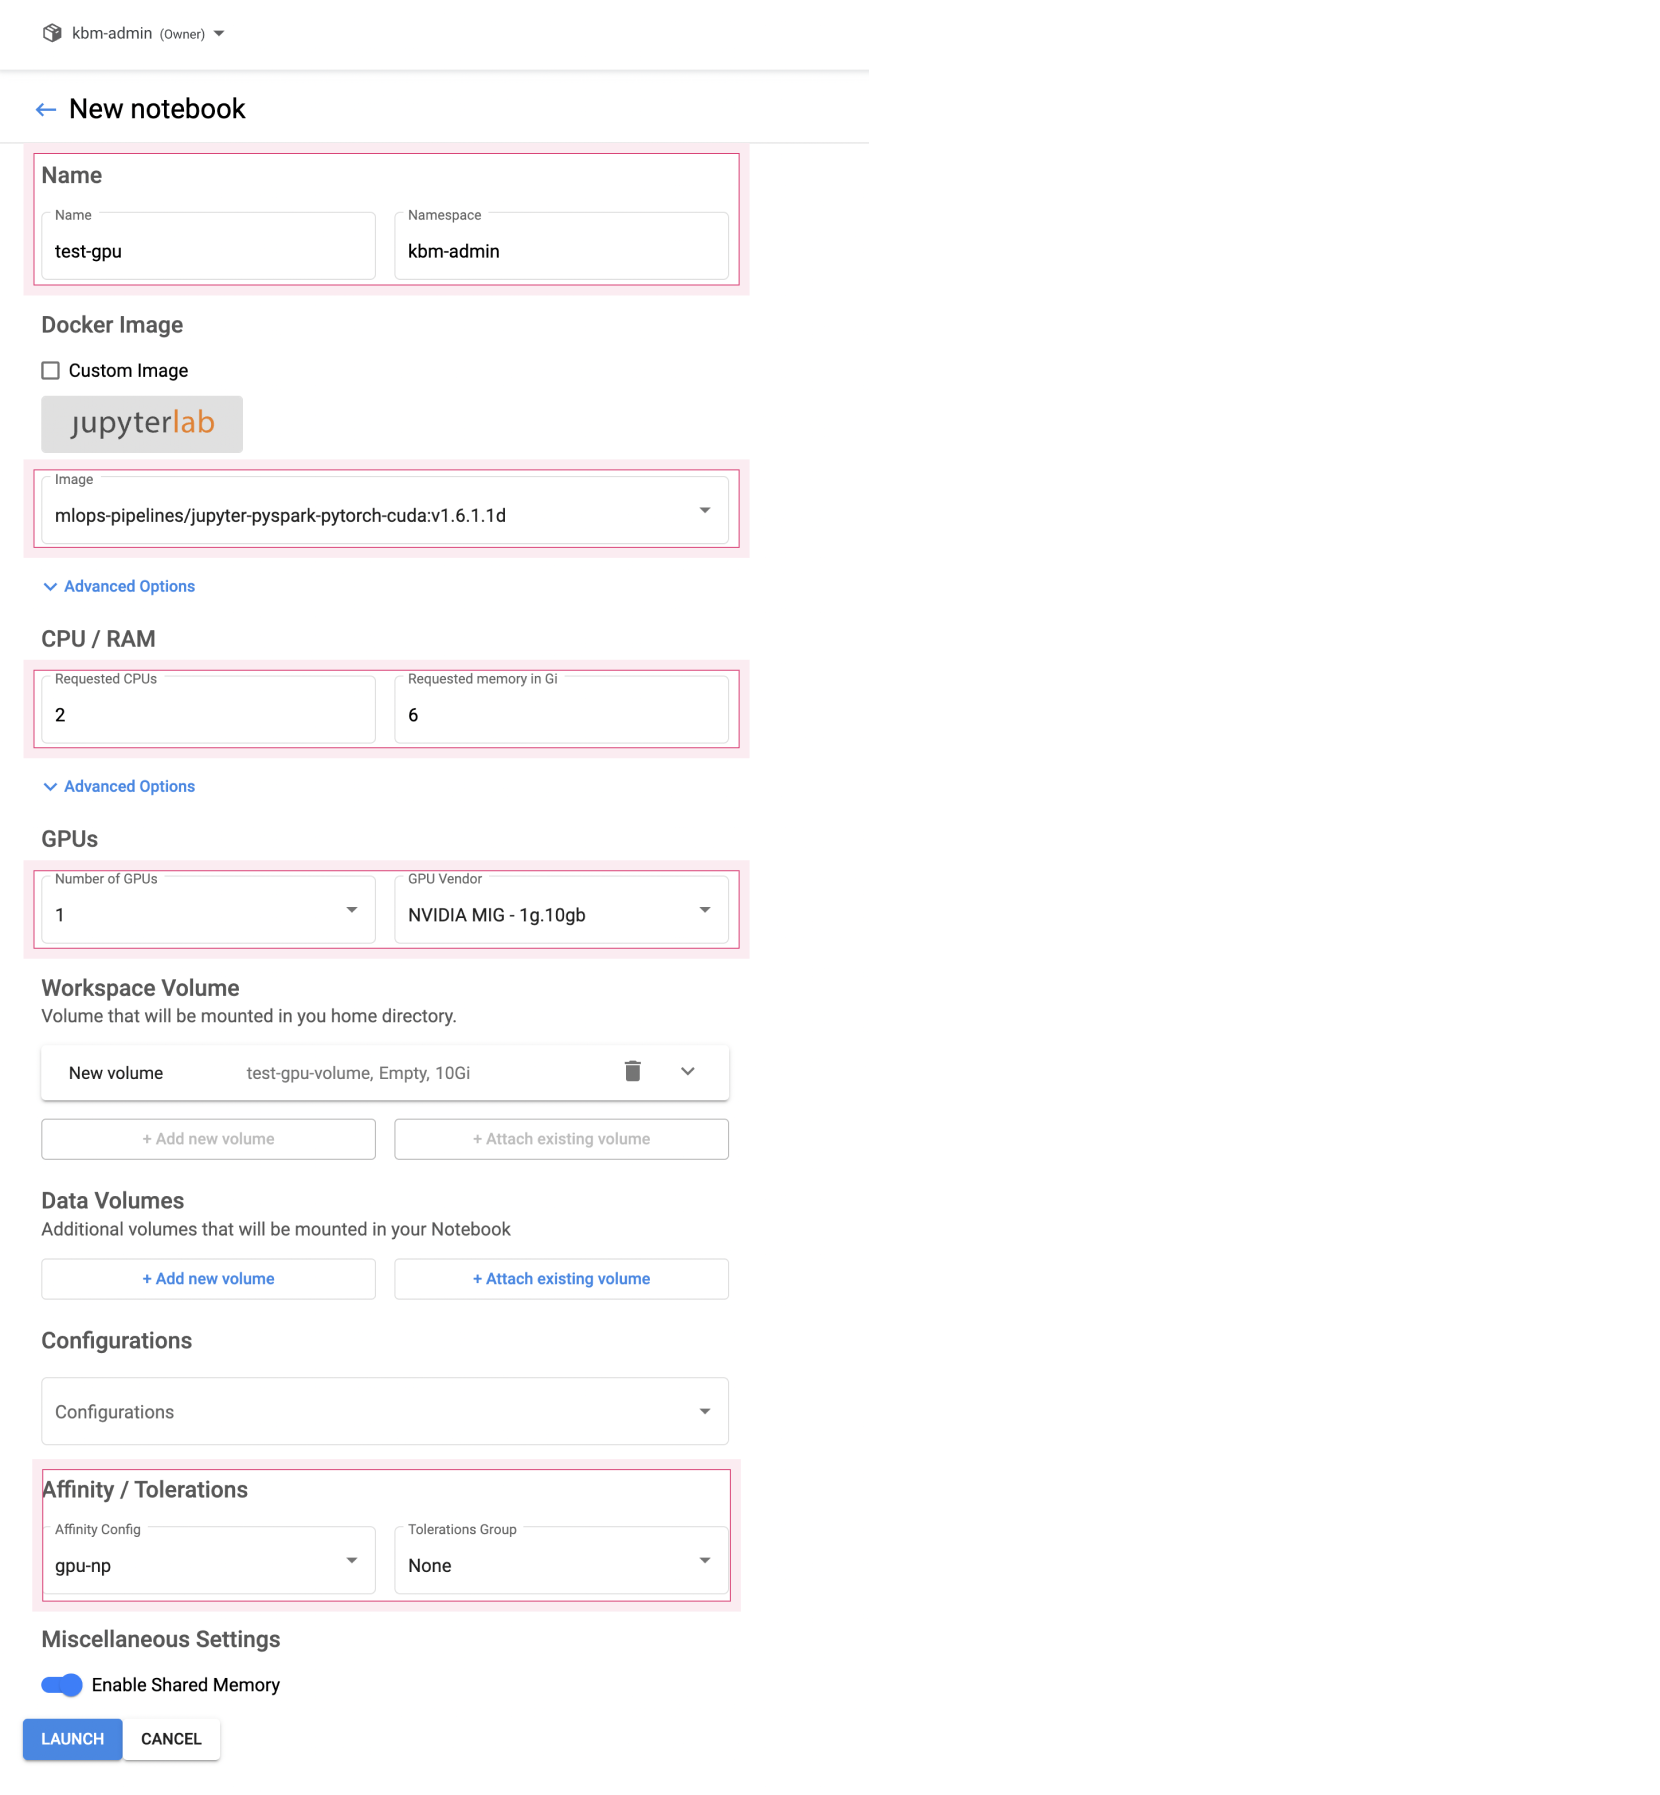 Create a GPU image-based notebook (option 2)
Item Field Description Name Name Name used to identify the notebook instance on the Kubeflow dashboard Namespace Kubernetes namespace where the notebook instance is created Docker Image Image mlops-pipelines/jupyter-pyspark-pytorch-cuda:v1.0.1
- Docker image to useCPU / RAM Requested CPUs 2
- Number of CPU cores allocated to the notebook instanceRequested memory in Gi 6
- Amount of memory in GiB allocated to the notebook instanceGPUs Number of GPUs At least 1
- GPU resources allocated to the notebook instanceGPU Vendor NVIDIA MIG - 1g.10gb
- GPU driver and software toolkit to useAffinity / Tolerations Affinity Config GPU node pool where the notebook is created
- Specifies the node on which the notebook instance runsTolerations Group None
- Configuration that permits specific node taints
Step 3. Train a predictive model in a notebook (exercise 1)
-
Download the following sample file.
- Sample file: nyc_taxi_pytorch_run_in_notebook.ipynb
-
Access the notebook instance you created and upload the file in the browser.
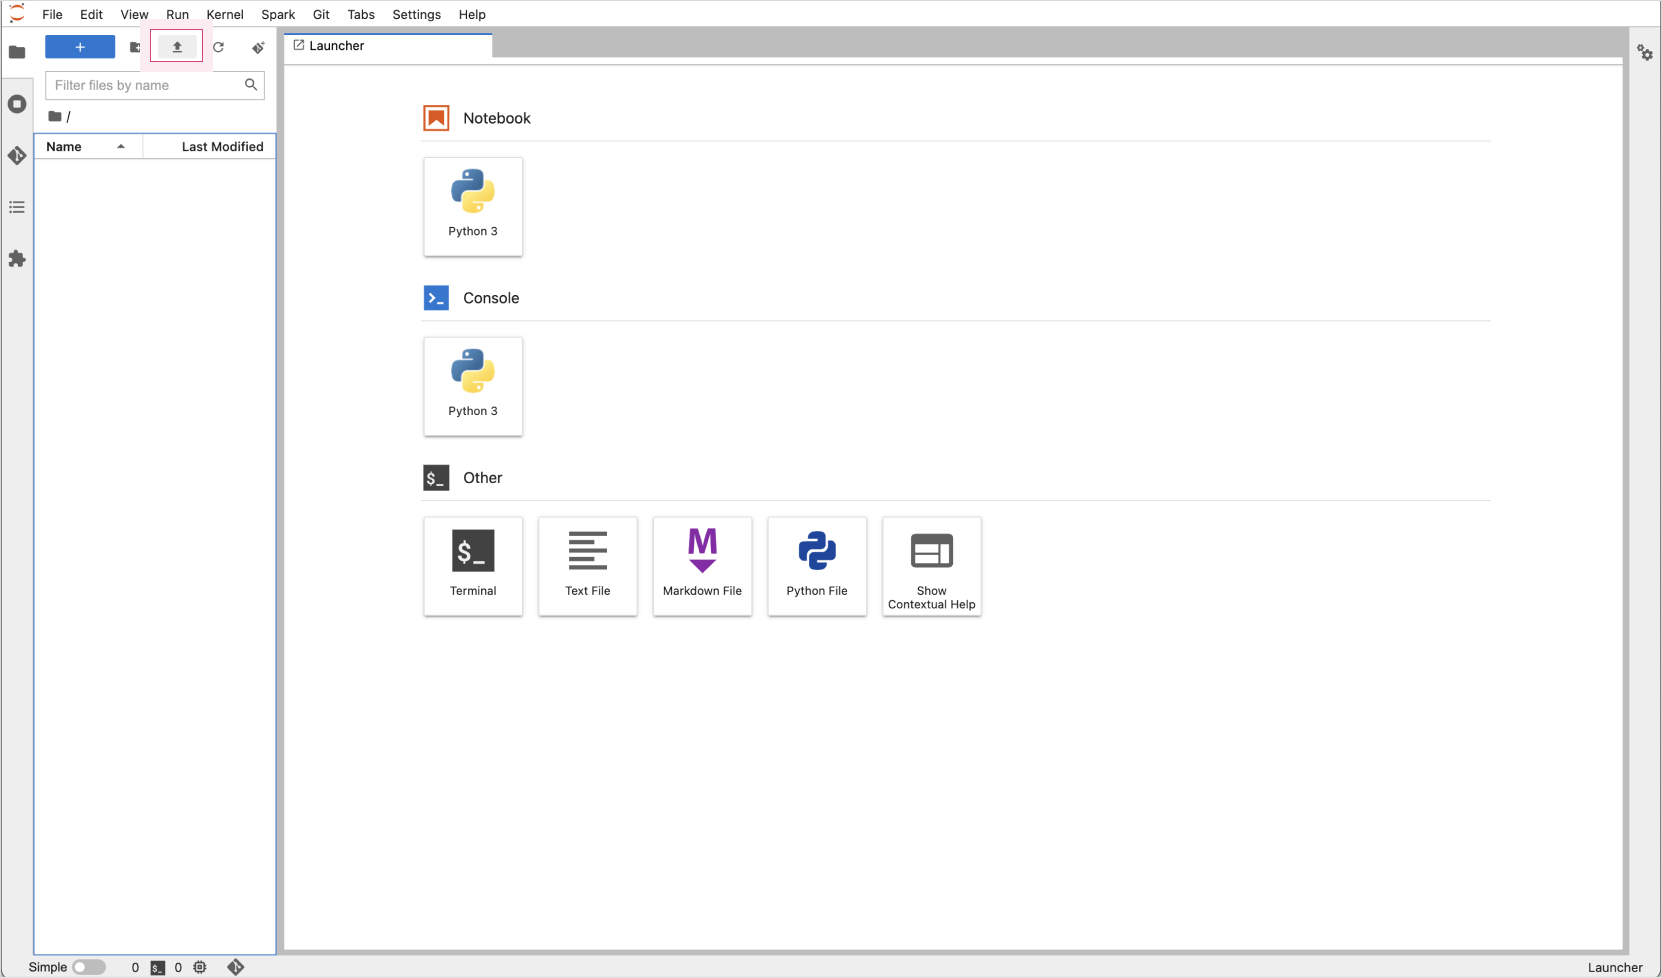 Upload a file in the Jupyter Notebook console
 -
After the upload is complete, review the exercise in the right pane.
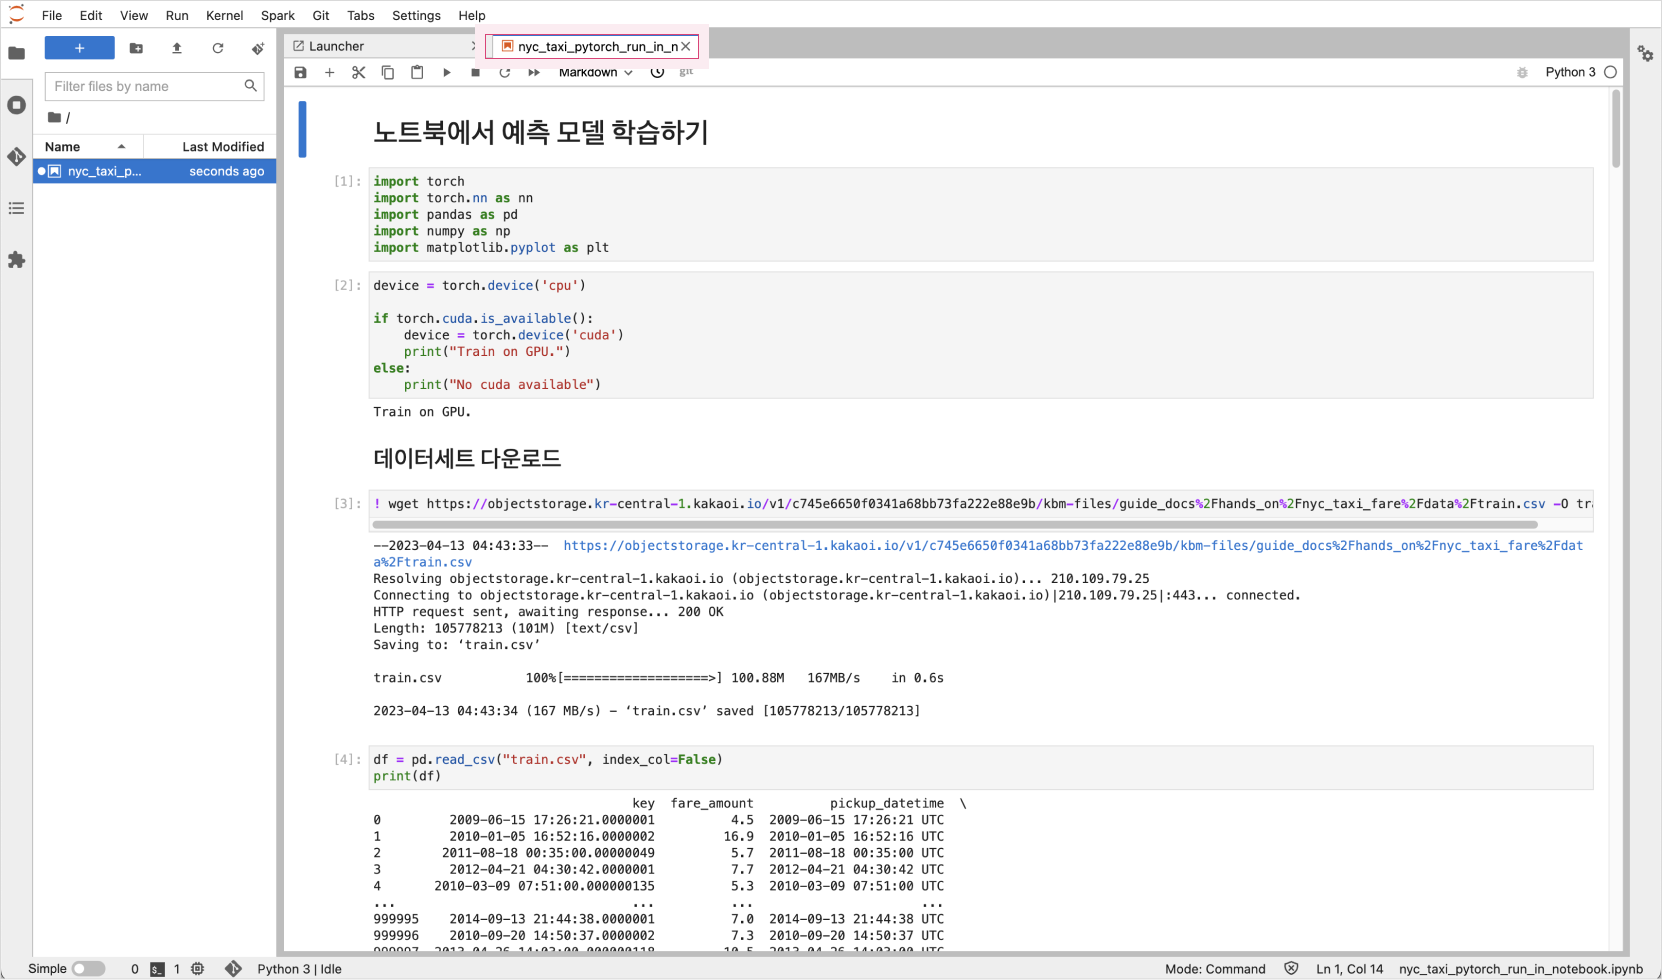 Uploaded sample file
 -
Follow the sample instructions to train the model.
Step 4. Create a pipeline and train a predictive model in a notebook (exercise 2)
-
Download the following sample files.
Upload a file in the Jupyter Notebook console -
After the upload is complete, review the exercise in the right pane.
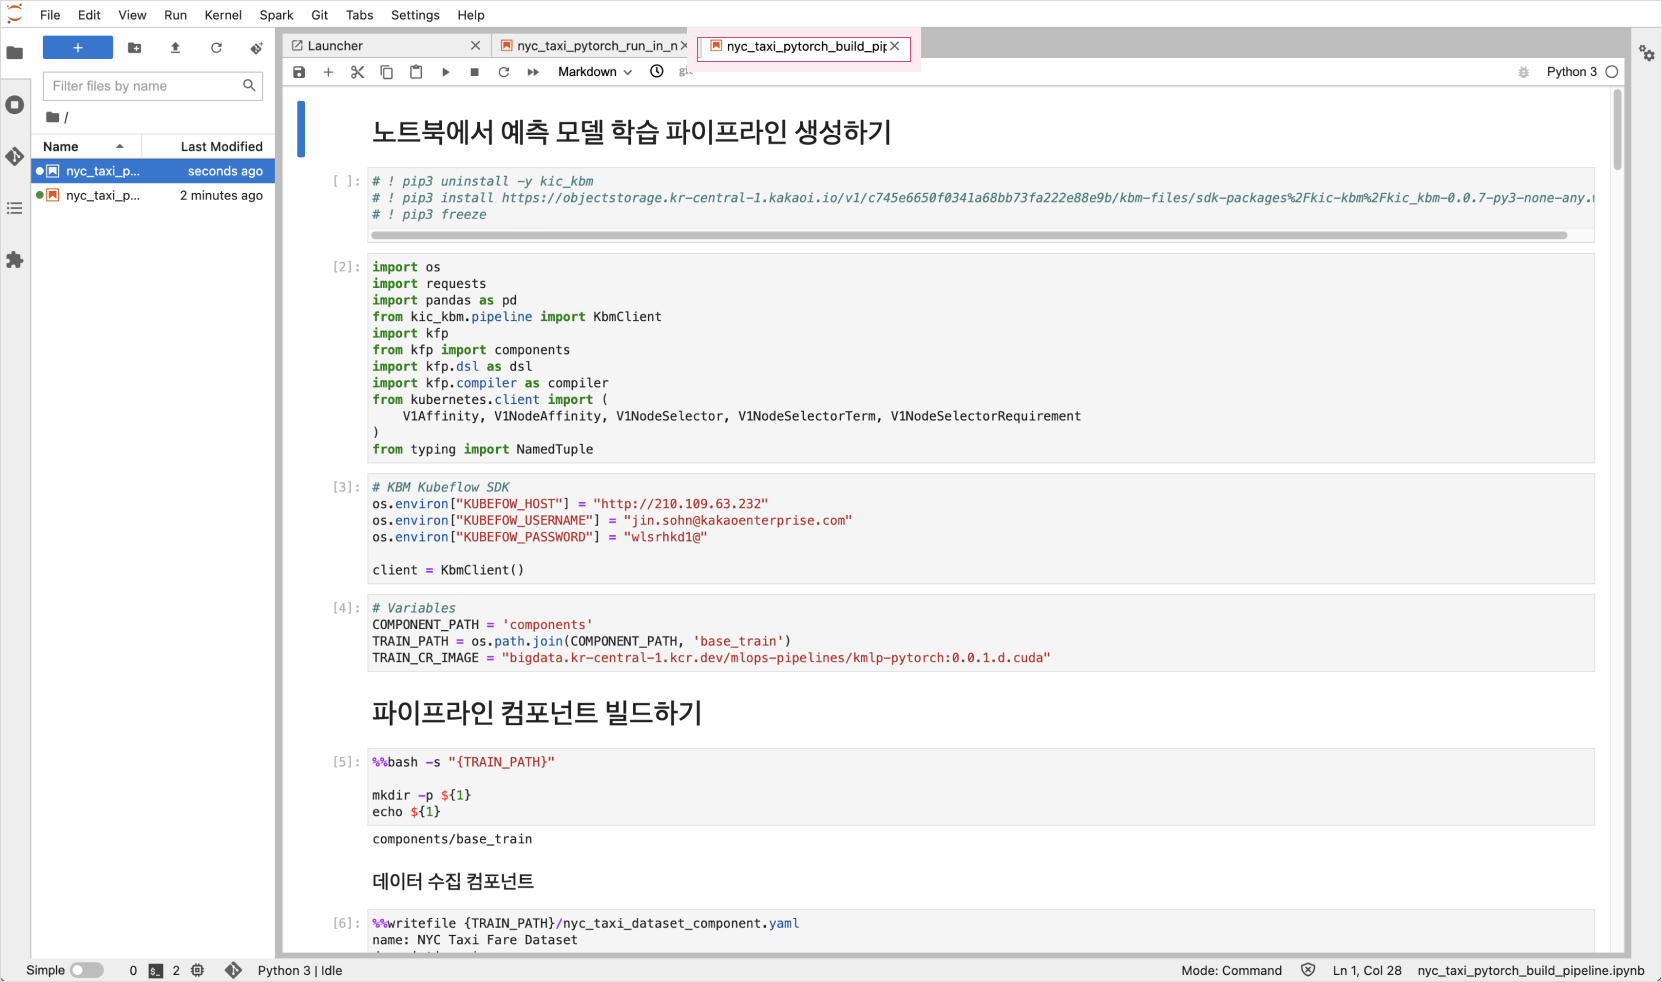 Uploaded sample file for exercise 2
 -
Follow the sample instructions to train the model.
infoWe recommend deleting completed or unused runs as described below to conserve resources.
-
After completing the exercise, delete the completed run. Move the run to Archived, and then click Delete.
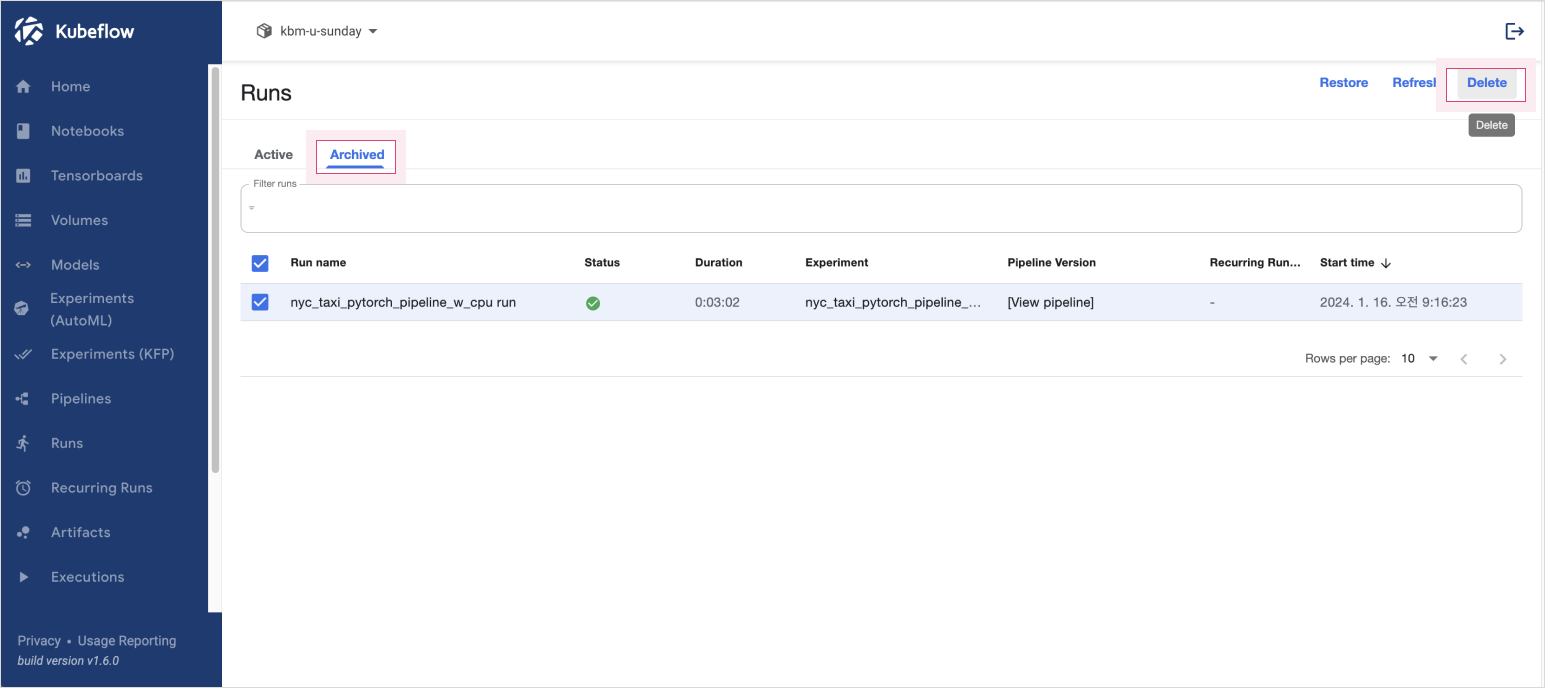 Delete a run
 -
After deleting the run, verify that its pods were also deleted.
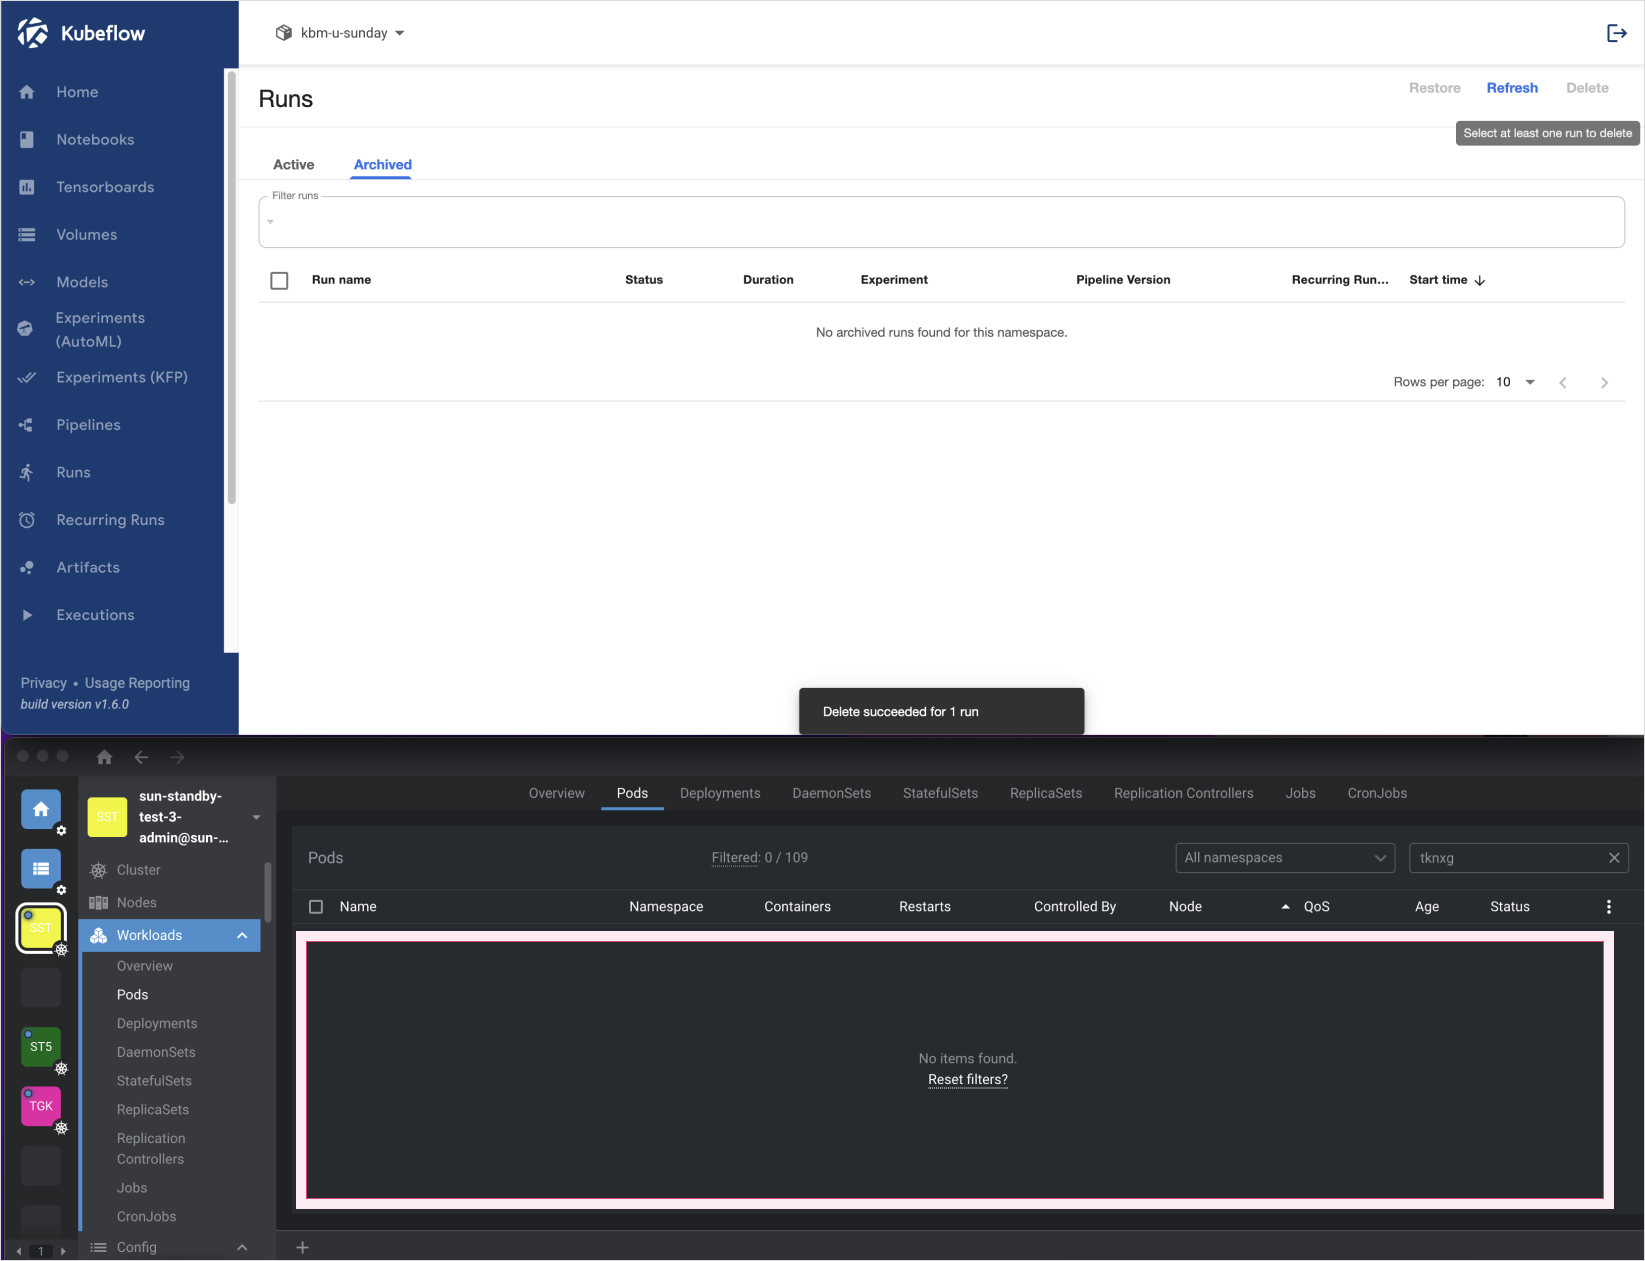 Verify run deletion