Manage instance
Here is how to manage instances in the Bare Metal Server service.
View instance list
You can view a list of running instances along with basic instance information.
-
Go to the KakaoCloud console > Beyond compute service > Bare metal server menu.
-
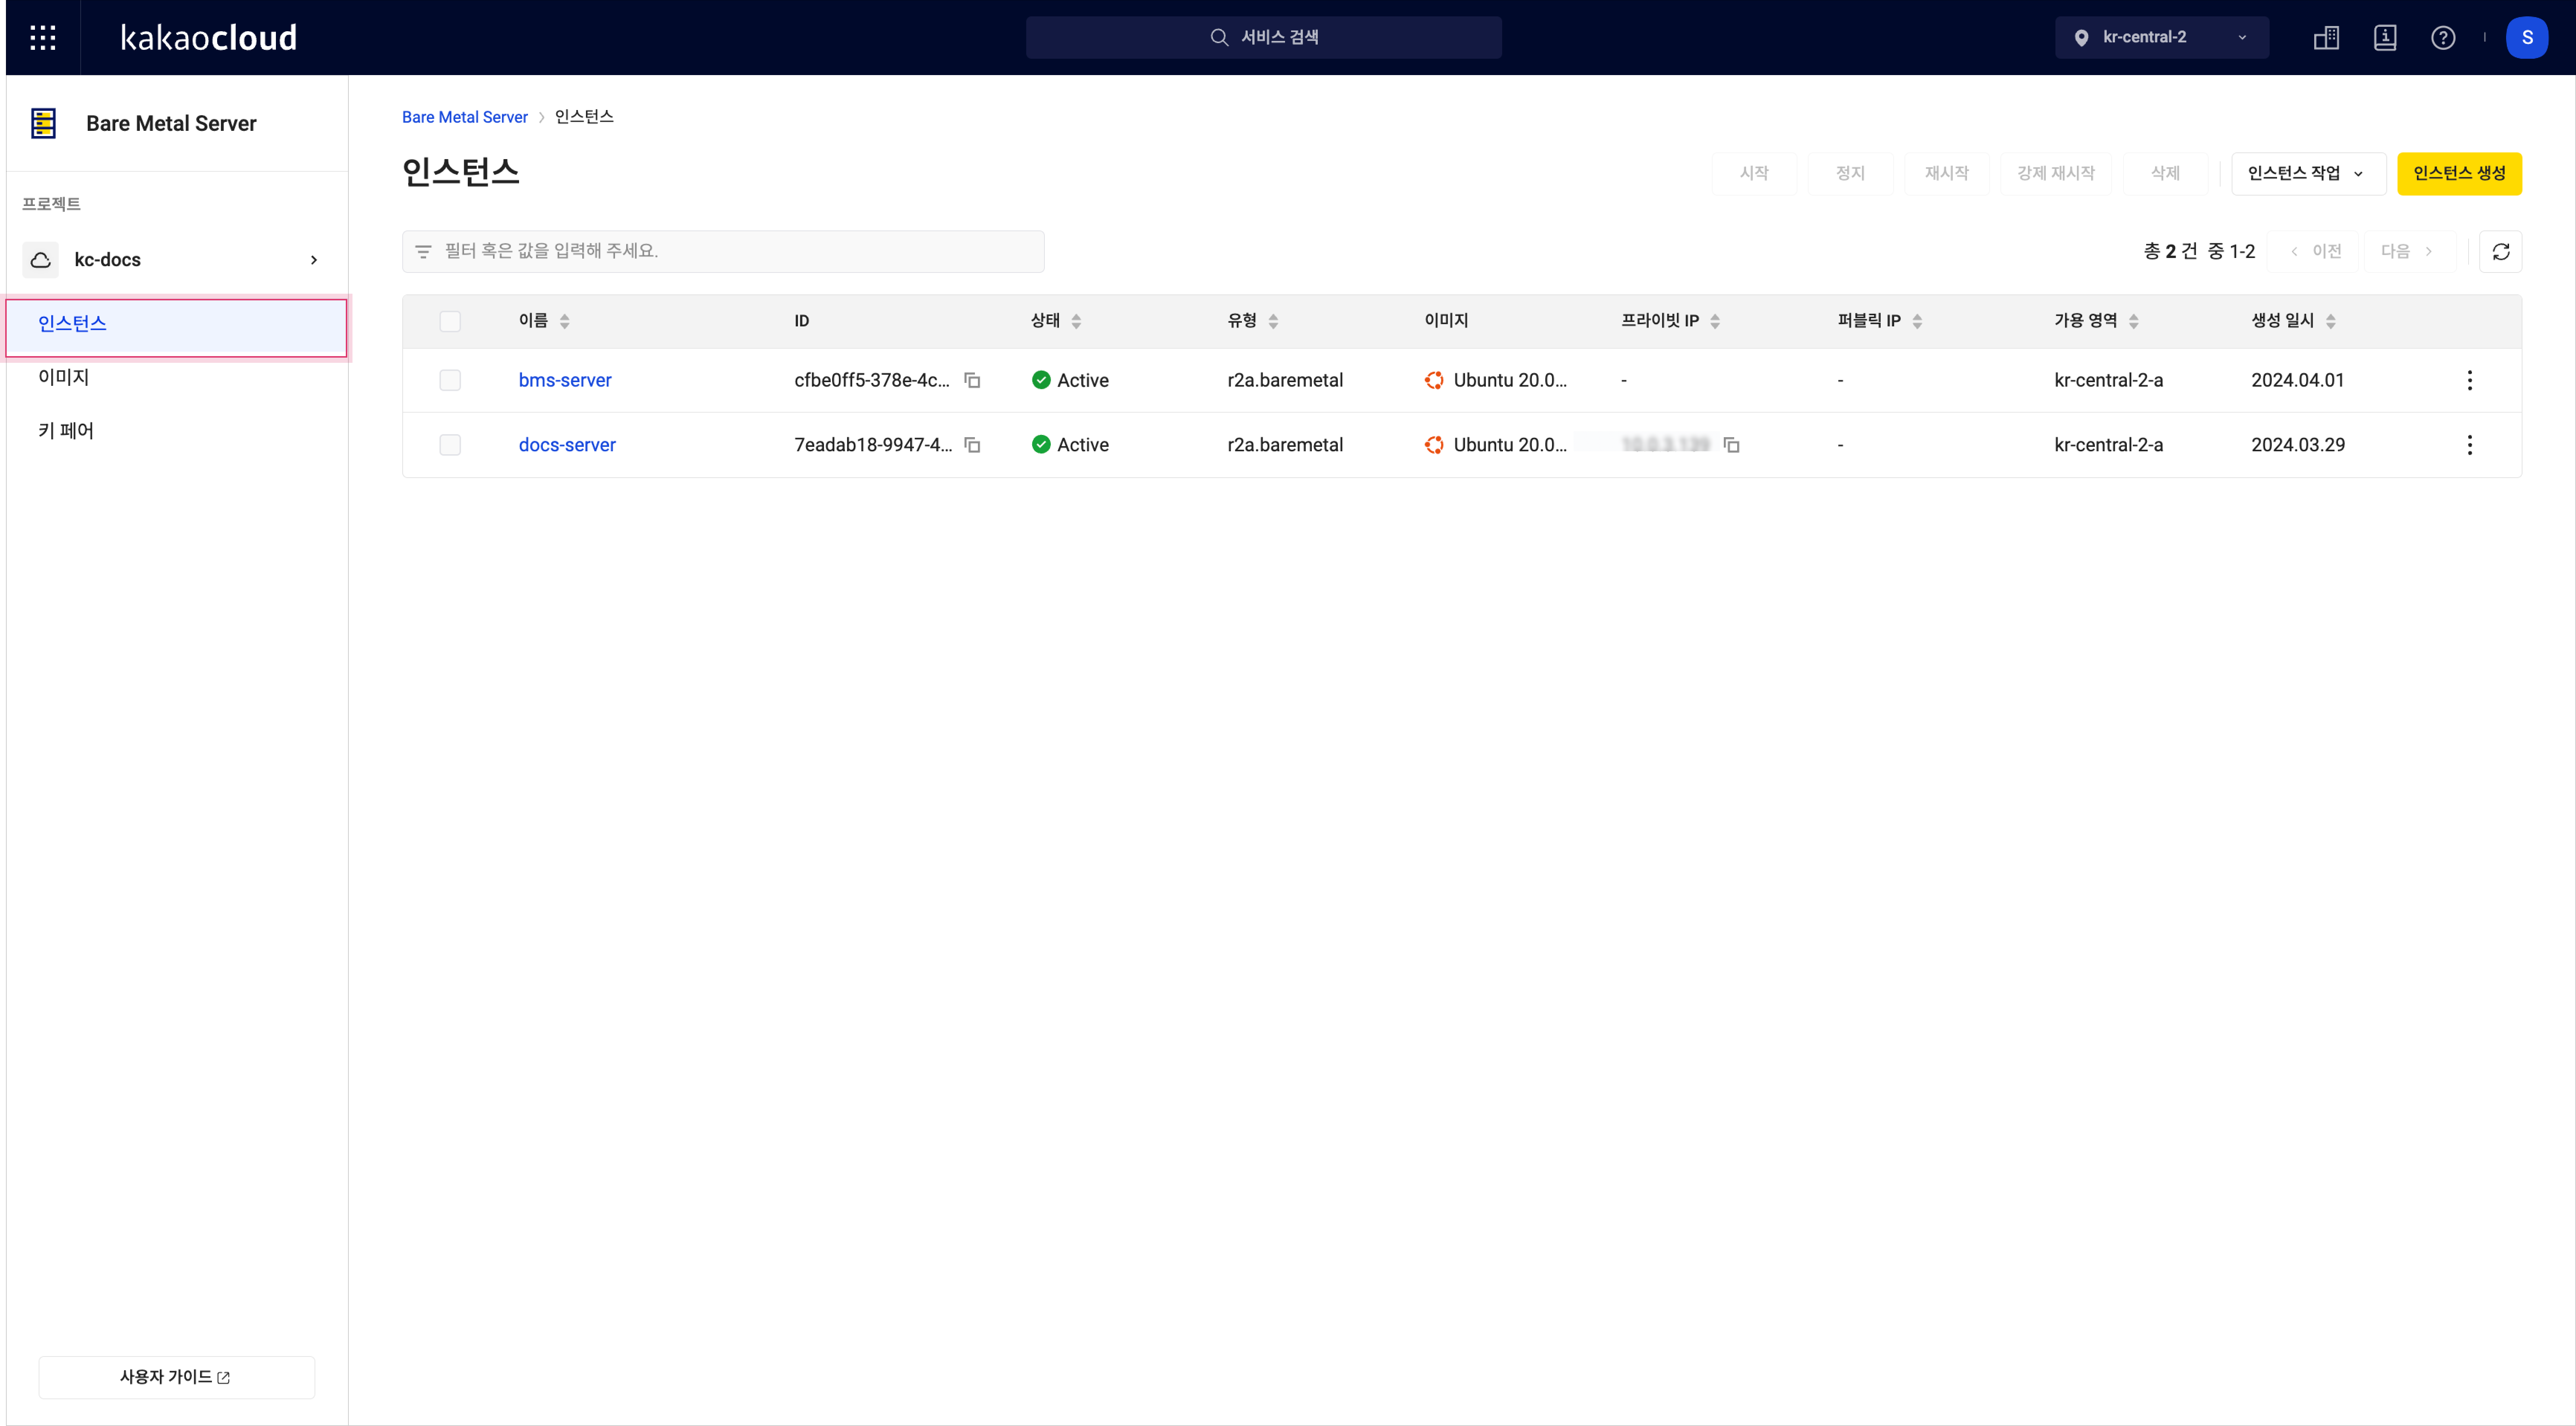
In the Instance menu, check the list of currently created instances.
 Instance menu
Field Description Name Name assigned by the user ID Unique ID (UUID) of the instance Status Current status of the instance
- For details, see Instance lifecycleType Server type of the instance Image Installed image on the instance Primary private IP Private IP address assigned to the instance’s primary network interface Primary public IP Public IP address attached to the instance’s primary network interface Availability zone Availability zone where the instance is located Created Creation timestamp of the instance More Execute additional actions per item
- See More features for details
More features
You can select the [More] icon on an instance to access various management actions.
-
Go to the KakaoCloud console > Beyond compute service > Bare metal server menu.
-
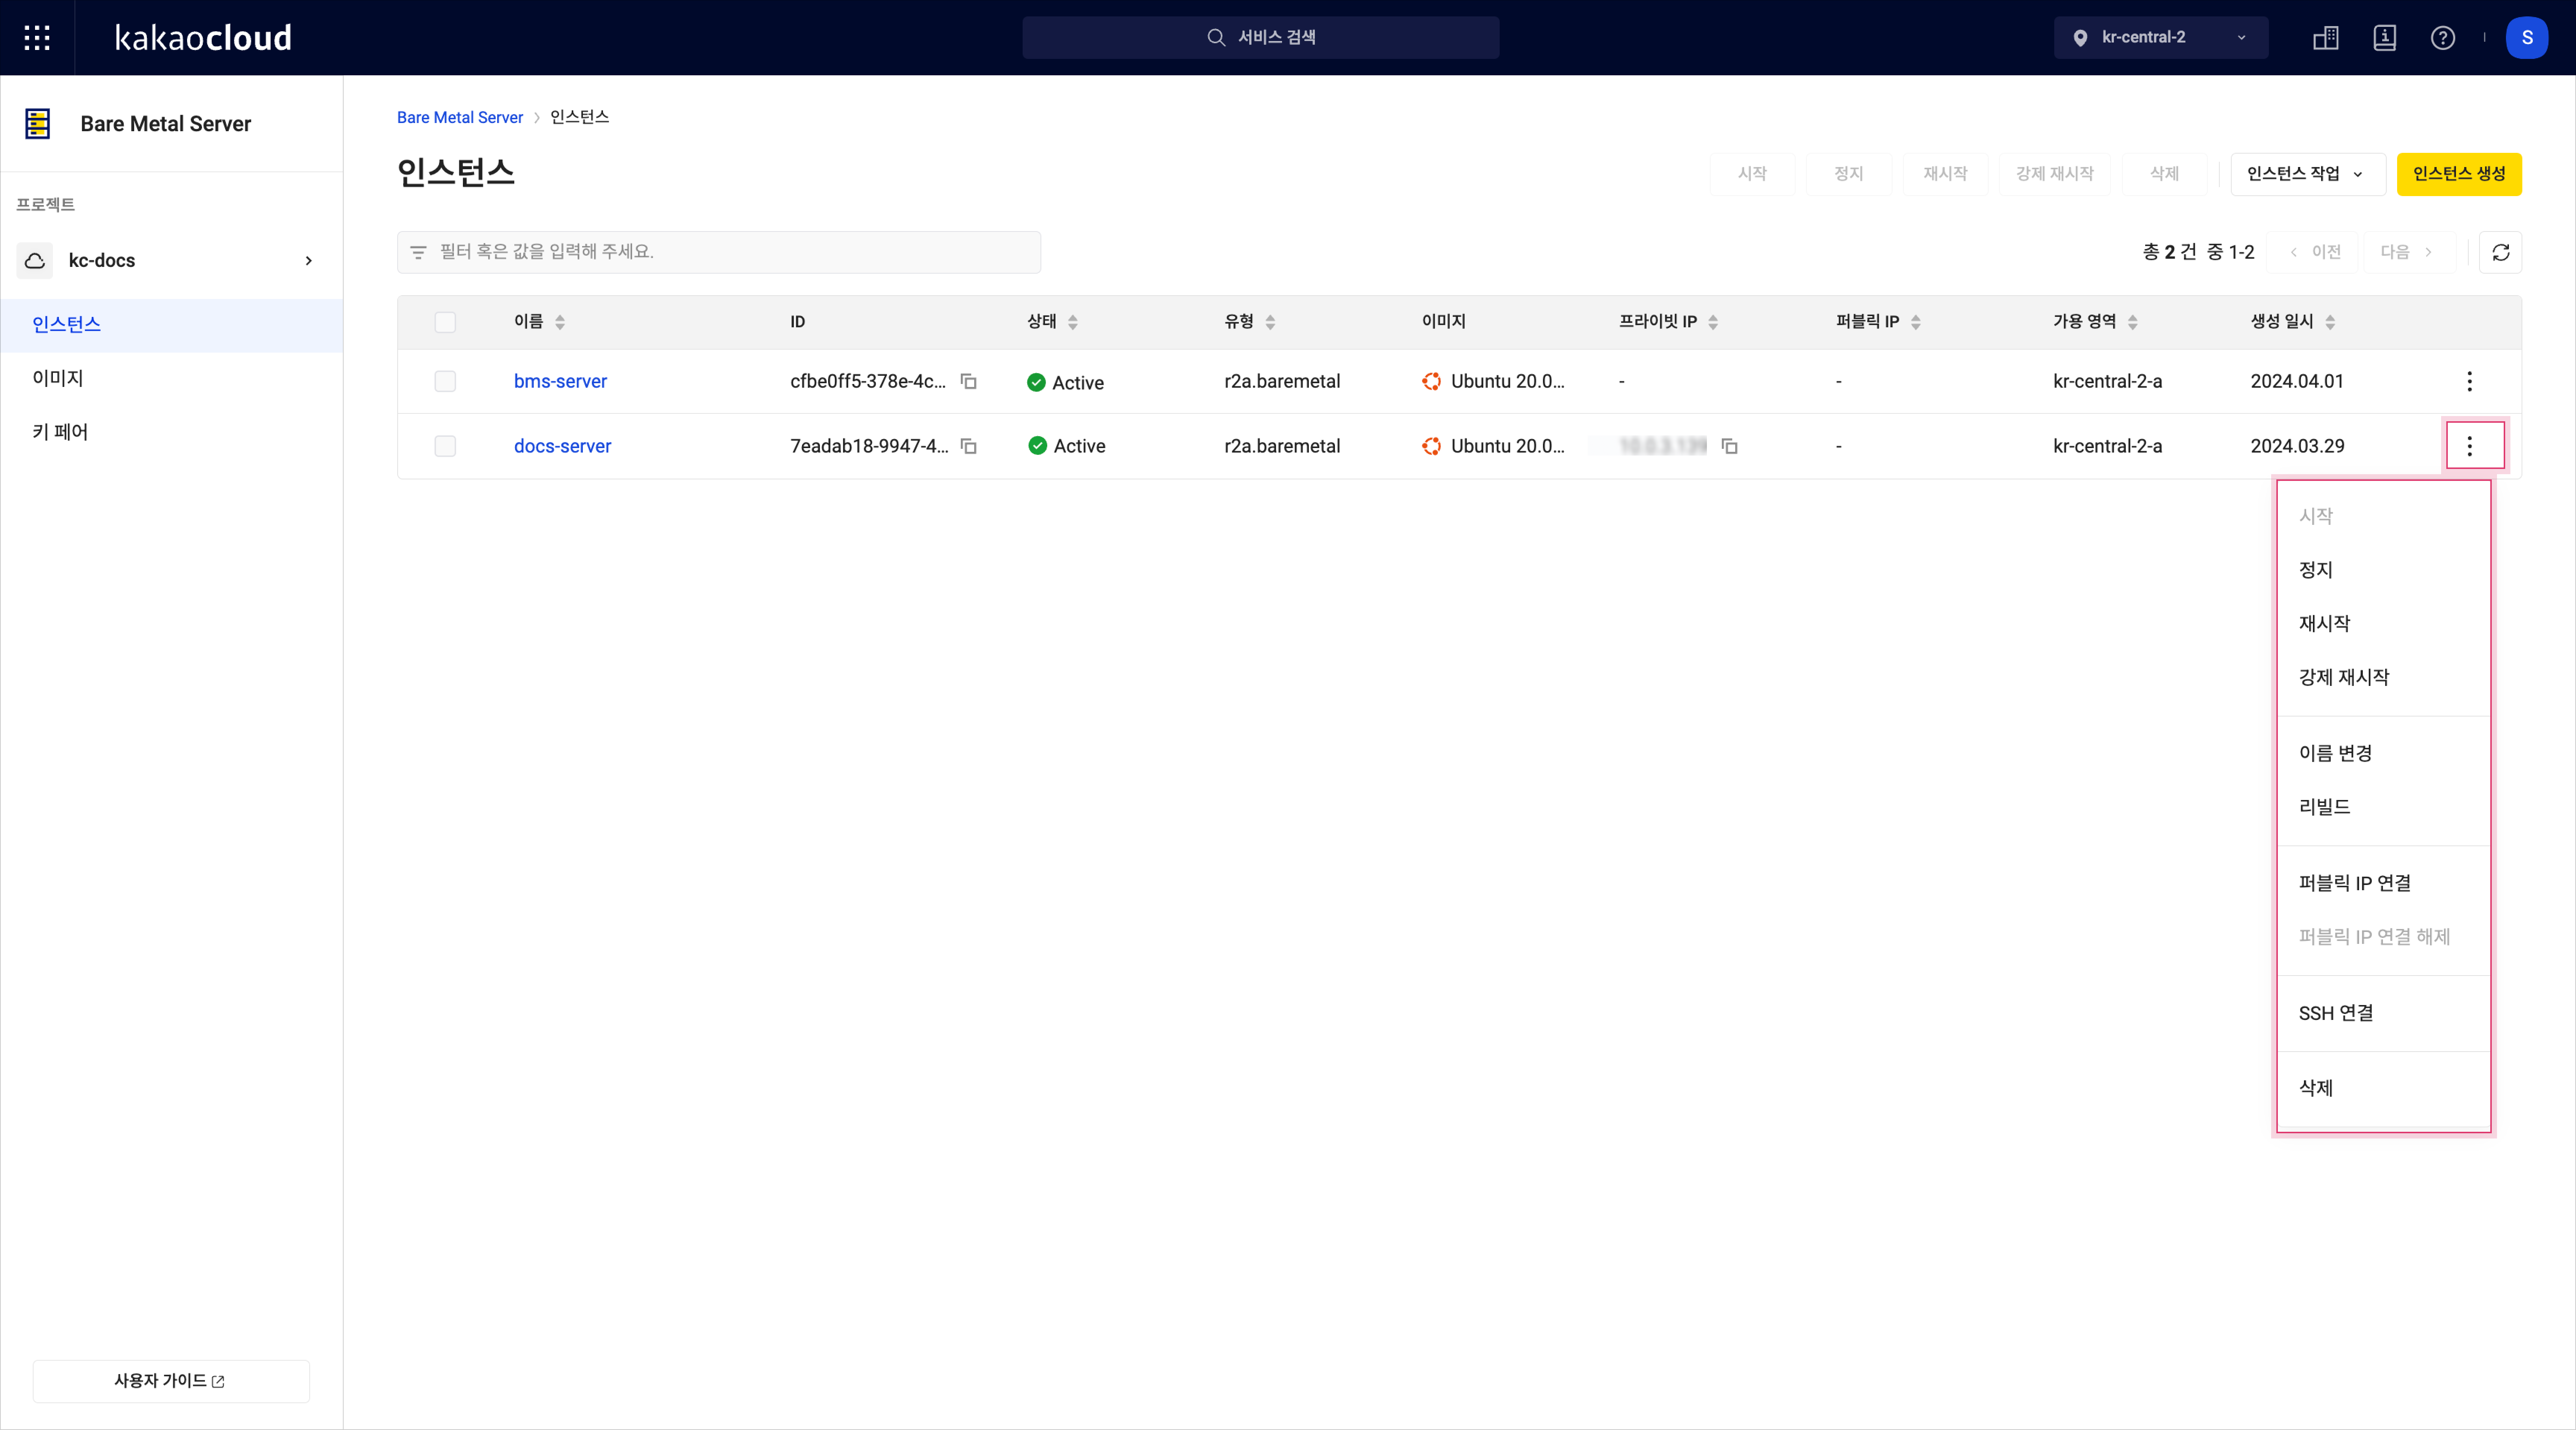
In the Instance menu, select the [More] icon on the instance you want to manage.
 More features
Action Description Start Start an instance that is currently in the StoppedstateStop Temporarily stop the instance
- Billing continuesRestart Reboot the instance by stopping its running processes
- May fail if processes don’t terminate properlyForce restart Forcefully power off and reboot the instance Delete Terminate and release the instance Rename Edit instance name and description Rebuild Rebuild the instance with a new OS and key pair Associate public IP Attach a public IP to the network interface of the instance
- Project Admin onlyDisassociate public IP Detach the public IP from the instance's network interface
- Project Admin onlySSH connect Connect to the instance via SSH
- Only for Linux-based instances
- See Connect to Linux instance with SSH for details
When changing the instance state via command line, note the following:
- If you shut down the instance from the OS, it will automatically reboot.
- To stop the server completely, use the console.
View instance details
You can check detailed instance information, network connections, and monitoring data.
- Go to the KakaoCloud console > Beyond compute service > Bare metal server menu.
- In the Instance menu, select the instance you want to view.
- Review the details on the instance detail page.
- Details tab
- Network tab
- Monitoring tab
| Field | Description |
|---|---|
| Instance name | Name assigned by the user |
| Instance ID | Unique ID (UUID) of the instance |
| Instance status | Current status of the instance |
| Availability zone | Availability zone of the instance |
| Hostname | Automatically generated hostname based on private IP - Formatted as host-{PRIVATE_IP} |
| Instance type | Instance type selected at creation |
| Image | Name of the image used |
| vCPU | Number of CPUs according to instance type |
| Key pair | Key pair associated with the instance |
| Memory | Memory size according to instance type |
| Creator | User who created the instance |
| Volume | Disk capacity assigned to the instance |
| Creation time | Time and date the instance was created (elapsed time since creation) |
All bare metal instances are provided within a VPC environment. The VPC offers network and security features and allows you to create logically separated service environments depending on your network requirements.
| Field | Description |
|---|---|
| Network bonding mode | Indicates whether bonding is enabled |
| Bonding type | Type of network bonding configured |
| Interface name | Name assigned to the network interface |
| Interface ID | Unique UUID of the network interface |
| Connection status | Status of the network interface - In Use: Connected to a resource - Available: Not connected to a resource |
| Private IP | Private IP assigned to the interface |
| Public IP | Public IP associated with the interface |
| Availability zone | Availability zone where the interface was created |
| Subnet name | Name of the subnet where the interface was created |
| Subnet ID | UUID of the subnet |
| More | - Detach: Disconnect selected interface from instance |
You can check detailed monitoring information after installing the monitoring agent. Follow the steps below to install the agent.
-
Go to the KakaoCloud console > Beyond compute service > Bare metal server.
-
In the Instance menu, select the instance for which to install the monitoring agent.
-
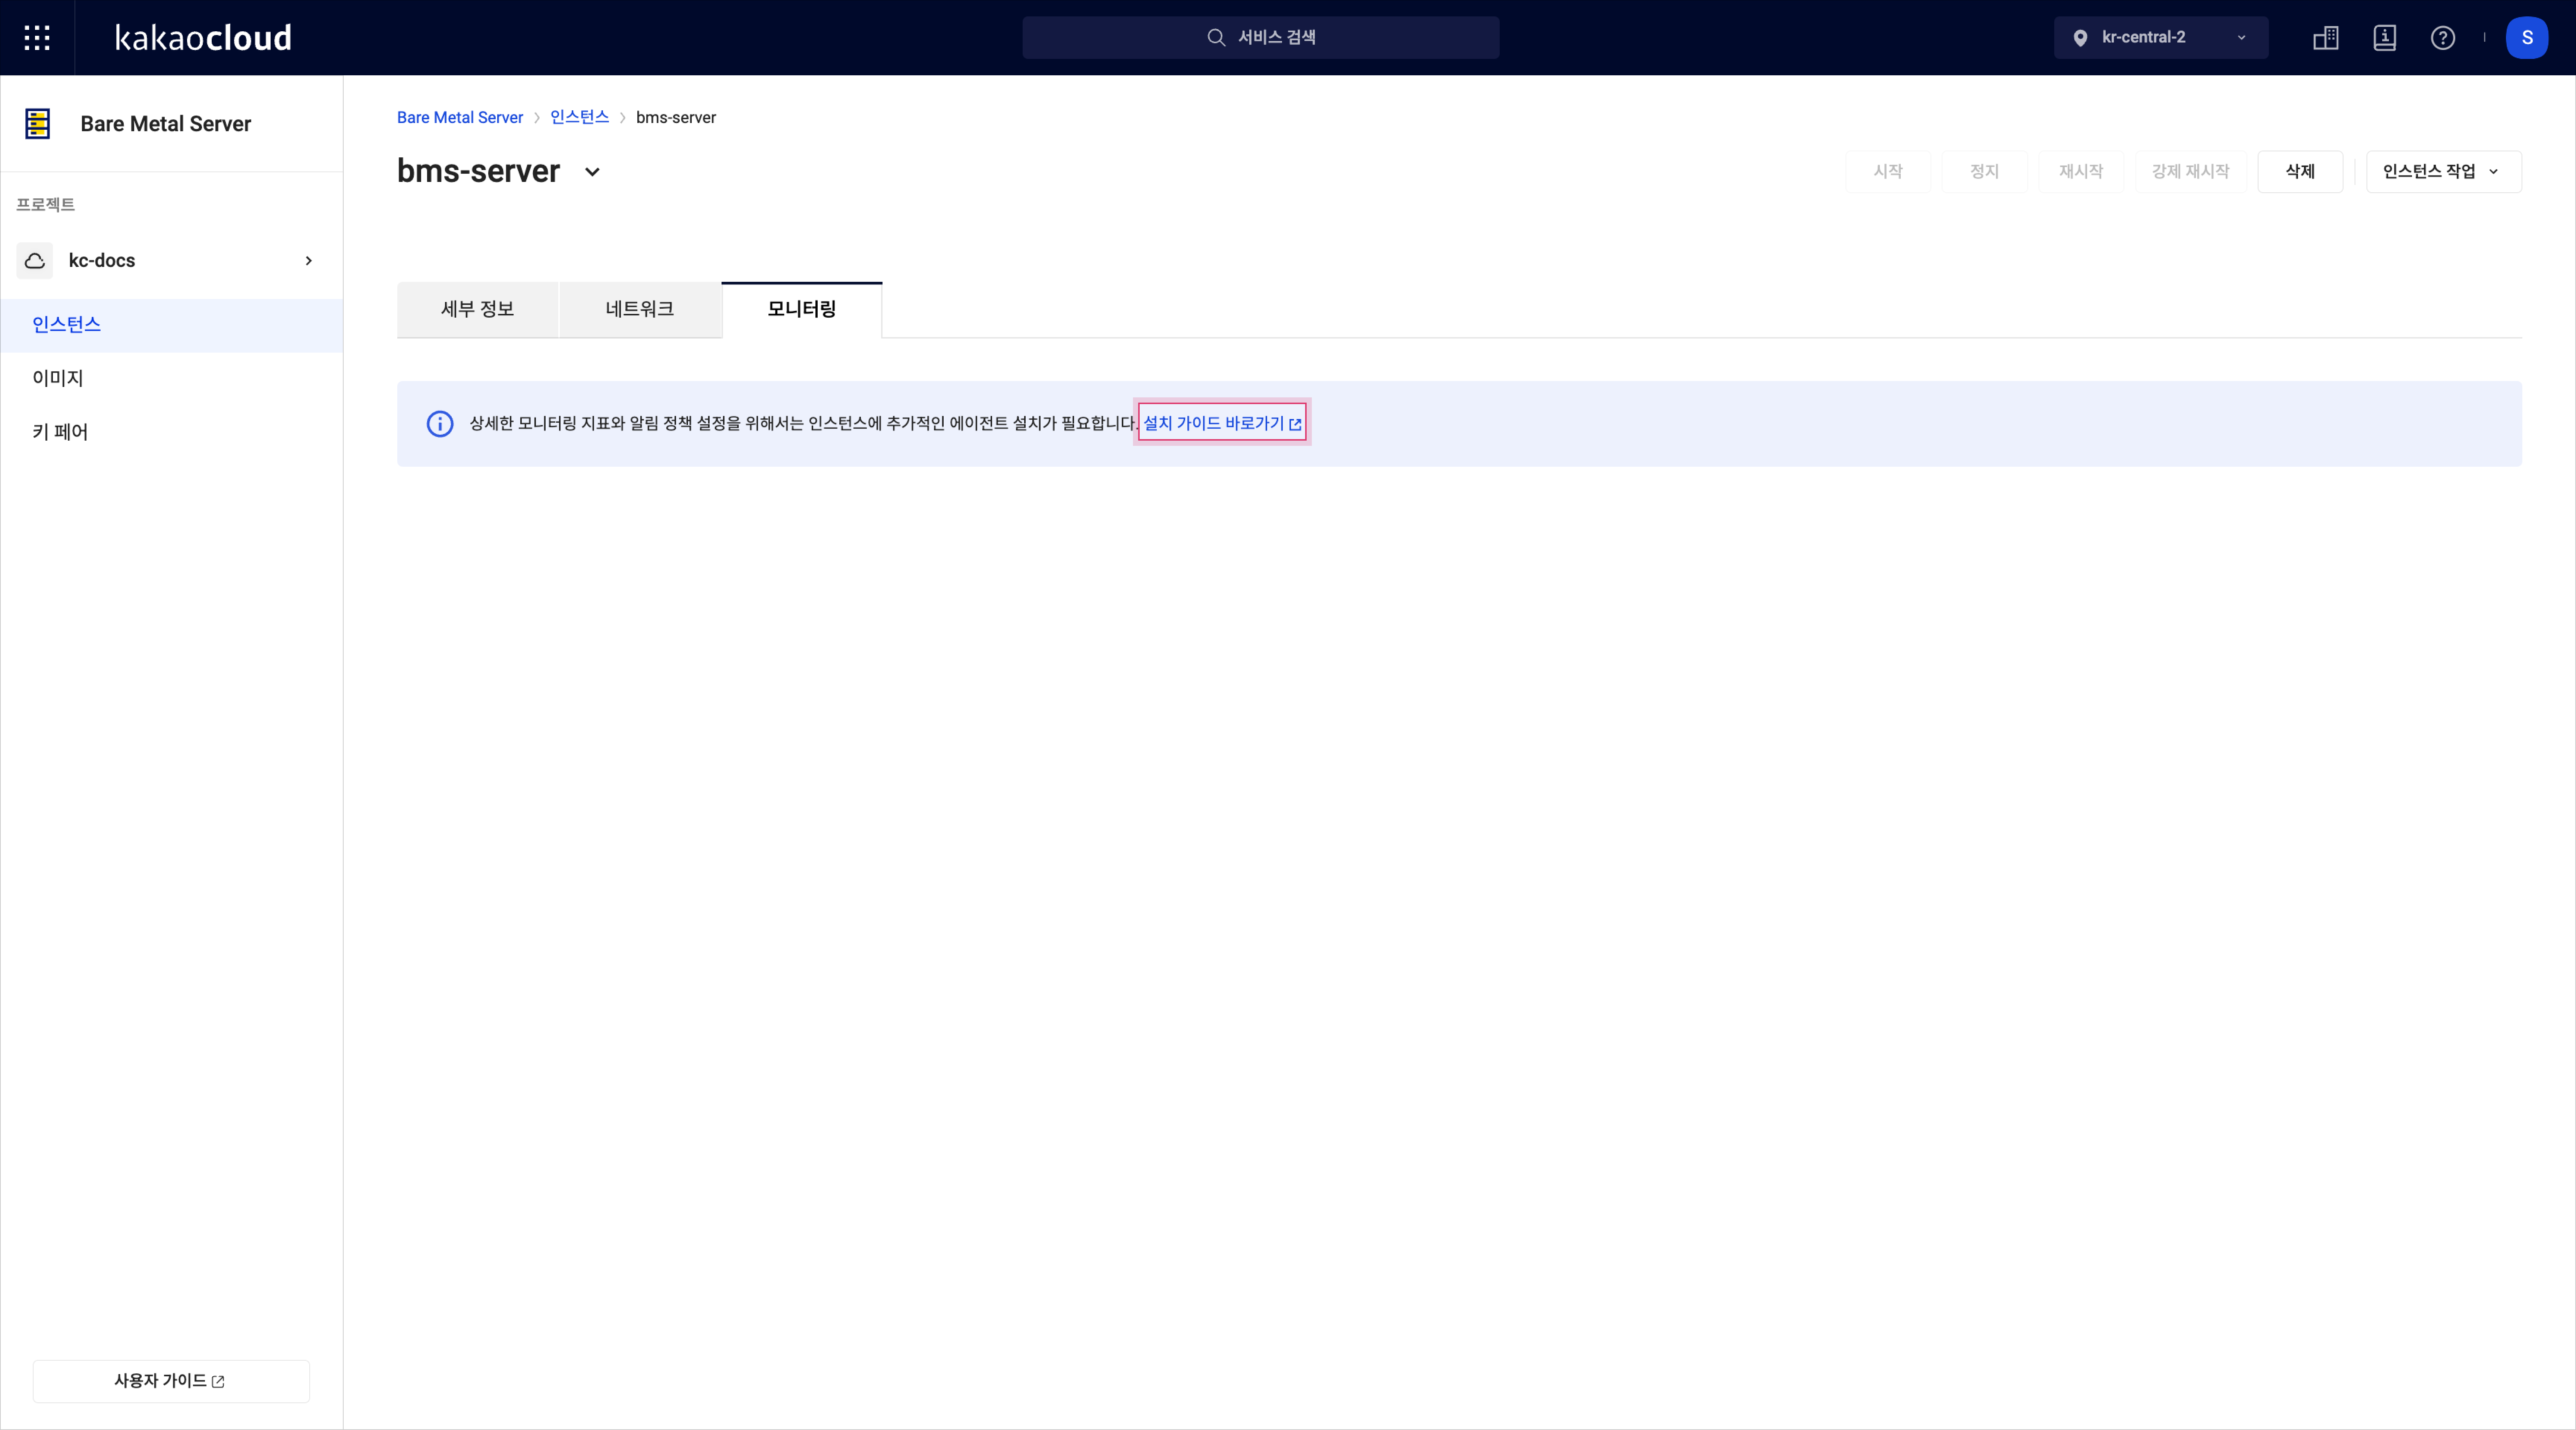
On the Monitoring tab of the instance details page, select [Go to installation guide].
 Install monitoring agent
 -
After installation, configure each metric in the Management > Monitoring > Explorer tab. See Use explorer for more.
-
To view logs, use the Log explorer in Management > Monitoring > Explorer.
-
While a default monitoring dashboard is provided, you can customize it as needed. For more information, refer to Use dashboard.
Hard reboot instance
You can forcefully reboot an instance.
This operation is equivalent to a system reboot. It typically takes 10–15 minutes, and existing configurations such as public/private IP addresses, public DNS, and data volumes remain unchanged.
Note that forcibly rebooting an instance does not reset its billing period.
-
Go to the KakaoCloud console > Beyond compute service > Bare metal server menu.
-
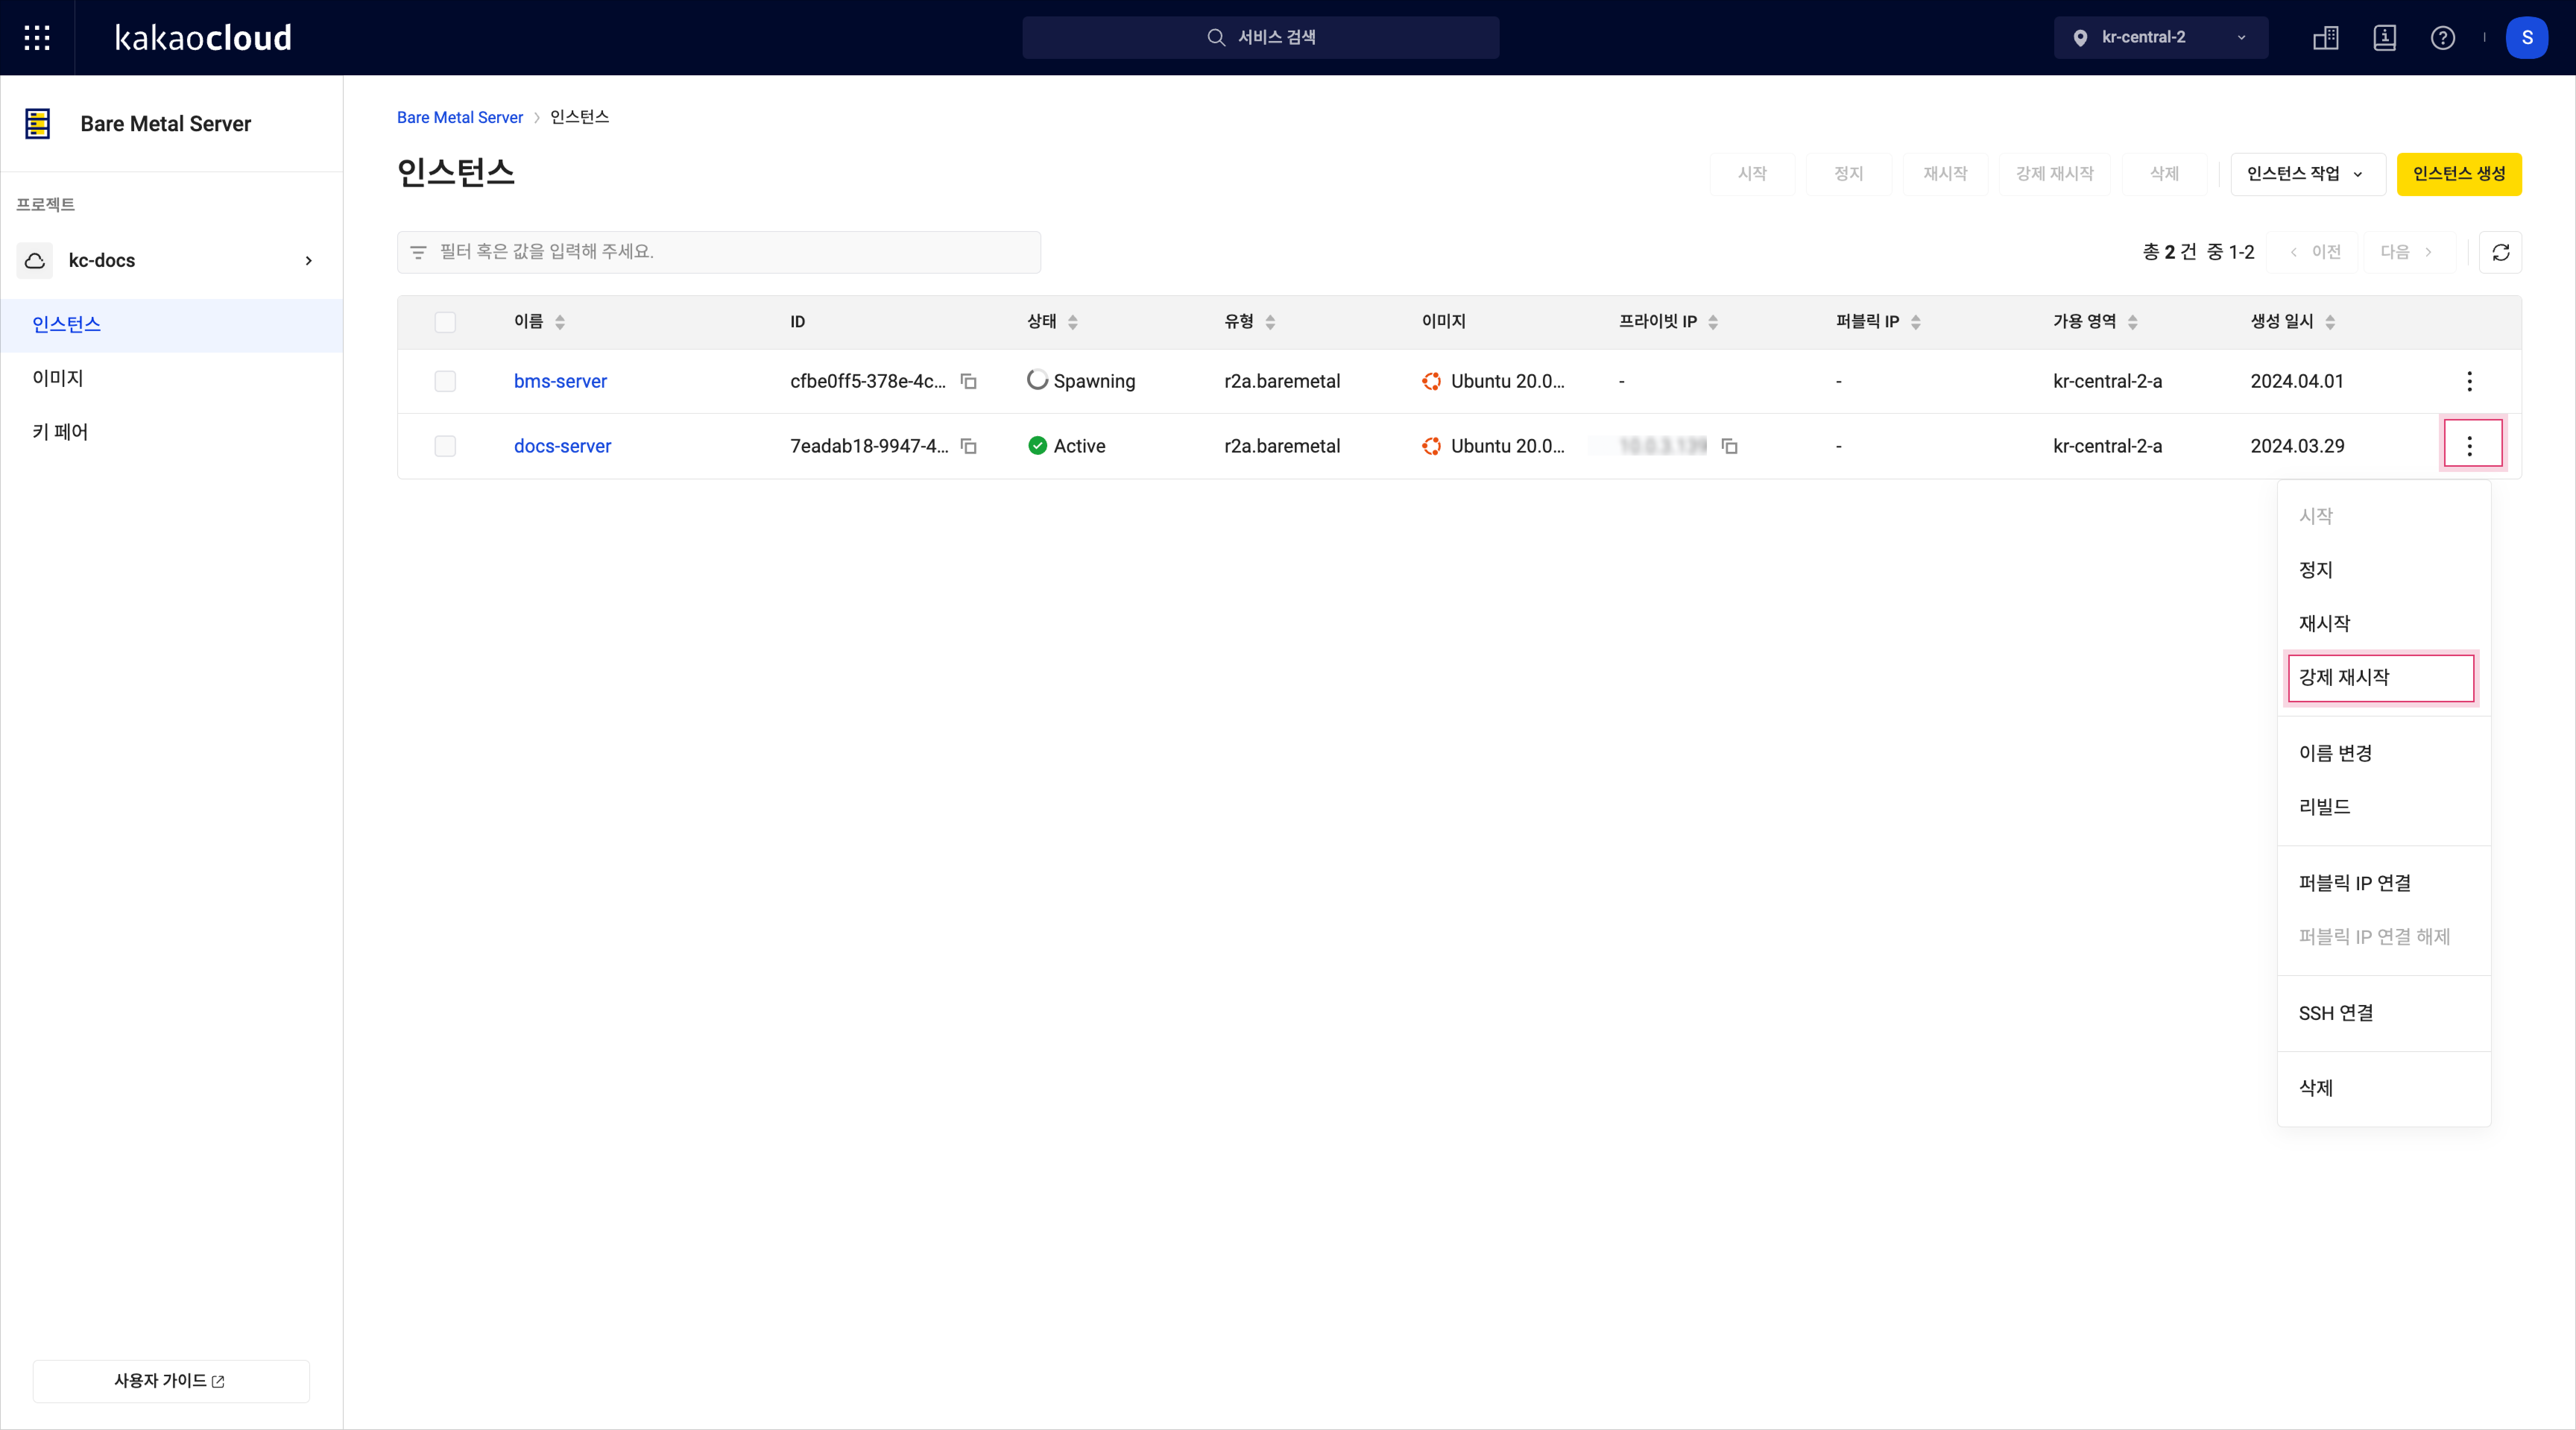
In the Instance menu, select [More] > Hard reboot on the instance you want to restart.

-
In the Hard reboot instance pop-up, review the instance details and select [OK].
Delete instance
You can delete instances that are no longer in use.
Deleted instance resources are permanently released and cannot be recovered.
- Go to the KakaoCloud console > Beyond compute service > Bare metal server menu.
- In the Instance menu, select [More] > Delete instance on the instance you want to remove.
- In the pop-up, enter the instance name and select [Delete].
Set time reference
Accurate and consistent time settings are important for multi-server operations and processes.
Images provided by KakaoCloud come preconfigured with time synchronization services such as Network Time Protocol (NTP), Chrony, and systemd-timesyncd. These services ensure all servers work from the same time reference. However, they require internet access.
For local network environments, KakaoCloud offers its own NTP service. On Linux systems, you can use Chrony to sync time with KakaoCloud’s NTP server.
- KakaoCloud's time synchronization service is available via IPv4 address
169.254.169.123.
- RHEL-based
- Debian-based
-
Install the Chrony package.
sudo yum install chrony -
Open
/etc/chrony.confand add the following line:server 169.254.169.123 prefer iburst minpoll 4 maxpoll 4 -
Restart the Chrony daemon:
sudo service chronyd restart -
Enable Chrony to start on boot:
sudo chkconfig chronyd on -
Confirm that time is synced to
169.254.169.123:chronyc sources -
Check Chrony tracking status:
chronyc tracking
-
Install the Chrony package:
sudo apt install chrony -
Open
/etc/chrony/chrony.confand add:server 169.254.169.123 prefer iburst minpoll 4 maxpoll 4 -
Restart the Chrony daemon:
sudo /etc/init.d/chrony restart -
Confirm the time source is set correctly:
chronyc sourcesOutputMS Name/IP address Stratum Poll Reach LastRx Last sample
===============================================================================
^* 169.254.169.123 2 4 37 4 +41us[ +189us] +/- 39ms
^- pugot.canonical.com 2 6 17 18 -8895us[-8864us] +/- 162ms
^- prod-ntp-3.ntp1.ps5.cano> 2 6 17 18 -3232us[-3203us] +/- 125ms
^- prod-ntp-5.ntp1.ps5.cano> 2 6 17 19 -1723us[-1707us] +/- 123ms
^- alphyn.canonical.com 2 6 17 18 -2344us[-2321us] +/- 140ms
^- 121.174.142.82 3 6 17 19 -9870us[-9853us] +/- 28ms
^- ntp-seoul.gombadi.com 2 6 17 20 -8532us[-8519us] +/- 52ms
^- send.mx.cdnetworks.com 2 6 17 18 -8997us[-8971us] +/- 29ms
^- 193.123.243.2 2 6 17 19 -9014us[-8994us] +/- 4132us -
Check synchronization status:
chronyc trackingOutputReference ID : A9FEA97B (169.254.169.123)
Stratum : 3
Ref time (UTC) : Wed Jun 28 08:25:52 2023
System time : 0.000156159 seconds slow of NTP time
Last offset : -0.000184961 seconds
RMS offset : 0.000184961 seconds
Frequency : 5.999 ppm fast
Residual freq : -0.600 ppm
Skew : 35.807 ppm
Root delay : 0.076914668 seconds
Root dispersion : 0.000669460 seconds
Update interval : 16.2 seconds
Leap status : Normal