Use instance type
Use gpu instance
To use a GPU-type instance, you must install the appropriate driver.
You can create an instance by using a GPU-dedicated OS image with the driver installed, or create an instance with a default image and then separately download and install a public driver. The following describes how to install the GPU driver and use the GPU by operating system.
- Linux
The following describes how to install the GPU driver on the Linux operating system.
This guide is based on the Ubuntu 20.04 image and NVIDIA A100 currently provided by KakaoCloud.
Step 1. Install NVIDIA driver
Install the NVIDIA driver. The recommended driver and CUDA versions are as follows.
| GPU type | NVIDIA version | CUDA version |
|---|---|---|
| NVIDIA A100 | 450.80.02 or later | CUDA Toolkit 11.1 or later |
- For more information about downloading the NVIDIA driver, see NVIDIA official site Driver Downloads.
- For more information about installing and configuring the NVIDIA driver, see NVIDIA official site > NVIDIA Driver Installation Quickstart Guide.
-
Run the command to check whether the instance where you want to install the NVIDIA driver has NVIDIA hardware.
Command to search for NVIDIA hardwarelspci | grep -i NVIDIA -
Check the driver versions available for installation.
- If the installed driver is not the latest version, run the
apt update -ycommand to update it. - If the message
Command ‘ubuntu-drivers’ not foundappears, enter thesudo apt install ubuntu-drivers-commoncommand to install ubuntu-drivers-common.Command to check installable driver versionsubuntu-drivers devicesExample of checking driver versionsubuntu-drivers devices
**==** /sys/devices/pci0000:00/0000:00:04.0 **==**
modalias : pci:v000010DEd000020B0sv000010DEsd0000134Fbc03sc02i00
vendor : NVIDIA Corporation
driver : nvidia-driver-515-server - distro non-free
driver : nvidia-driver-470 - distro non-free
driver : nvidia-driver-470-server - distro non-free
driver : nvidia-driver-510-server - distro non-free
driver : nvidia-driver-510 - distro non-free
driver : nvidia-driver-450-server - distro non-free
driver : nvidia-driver-515 - distro non-free recommended
driver : xserver-xorg-video-nouveau - distro free builtin
- If the installed driver is not the latest version, run the
-
Select an available driver and proceed with the installation.
Install driversudo apt install nvidia-driver-470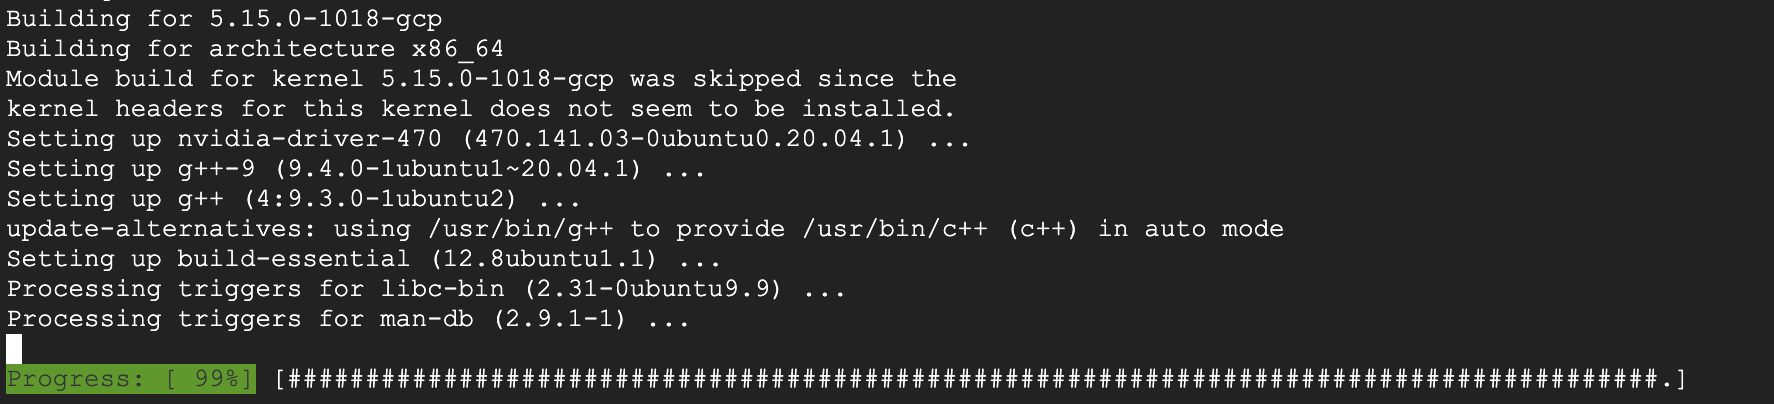
-
Reboot the instance.
Reboot commandsudo reboot -
Check the installed driver information.
Command to check installed driver informationnvidia-smiExample of checking installed driver informationnvidia-smi
+-----------------------------------------------------------------------------+
| NVIDIA-SMI 470.141.03 Driver Version: 470.141.03 CUDA Version: 11.4 |
|-------------------------------+----------------------+----------------------+
| GPU Name Persistence-M| Bus-Id Disp.A | Volatile Uncorr. ECC |
| Fan Temp Perf Pwr:Usage/Cap| Memory-Usage | GPU-Util Compute M. |
| | | MIG M. |
|===============================+======================+======================|
| 0 NVIDIA A100 80G... Off | 00000000:00:05.0 Off | 0 |
| N/A 33C P0 41W / 300W | 35MiB / 80994MiB | 0% Default |
| | | Disabled |
+-------------------------------+----------------------+----------------------+
| 1 NVIDIA A100 80G... Off | 00000000:00:06.0 Off | 0 |
| N/A 34C P0 43W / 300W | 35MiB / 80994MiB | 0% Default |
| | | Disabled |
+-------------------------------+----------------------+----------------------+
Step 2. Install NVIDIA CUDA Toolkit
Install the NVIDIA CUDA Toolkit.
-
If you are reinstalling the CUDA Toolkit, prepare the following installation environment. For a new installation, start from step 2.
a. Delete the existing CUDA-related settings.
Command to delete CUDA settingssudo rm -rf /usr/local/cuda*b. If the following existing settings are present in
~/.bashrcor/etc/profile, delete them.Delete existing settingsexport PATH=$PATH:/usr/local/cuda-11.4/bin
export LD_LIBRARY_PATH=$LD_LIBRARY_PATH:/usr/local/cuda-11.4/lib64
export CUDADIR=/usr/local/cuda-11.4c. After deleting all existing settings, run the
nvcc -Vcommand and check that the command does not run.Result of running nvcc -V commandnvcc -V
Command 'nvcc' not found, but can be installed with: sudo apt install nvidia-cuda-toolkit -
Select the CUDA Toolkit version to install from NVIDIA official site > CUDA Toolkit Archive. When selecting a version, you can check the Base Installer commands at the bottom.
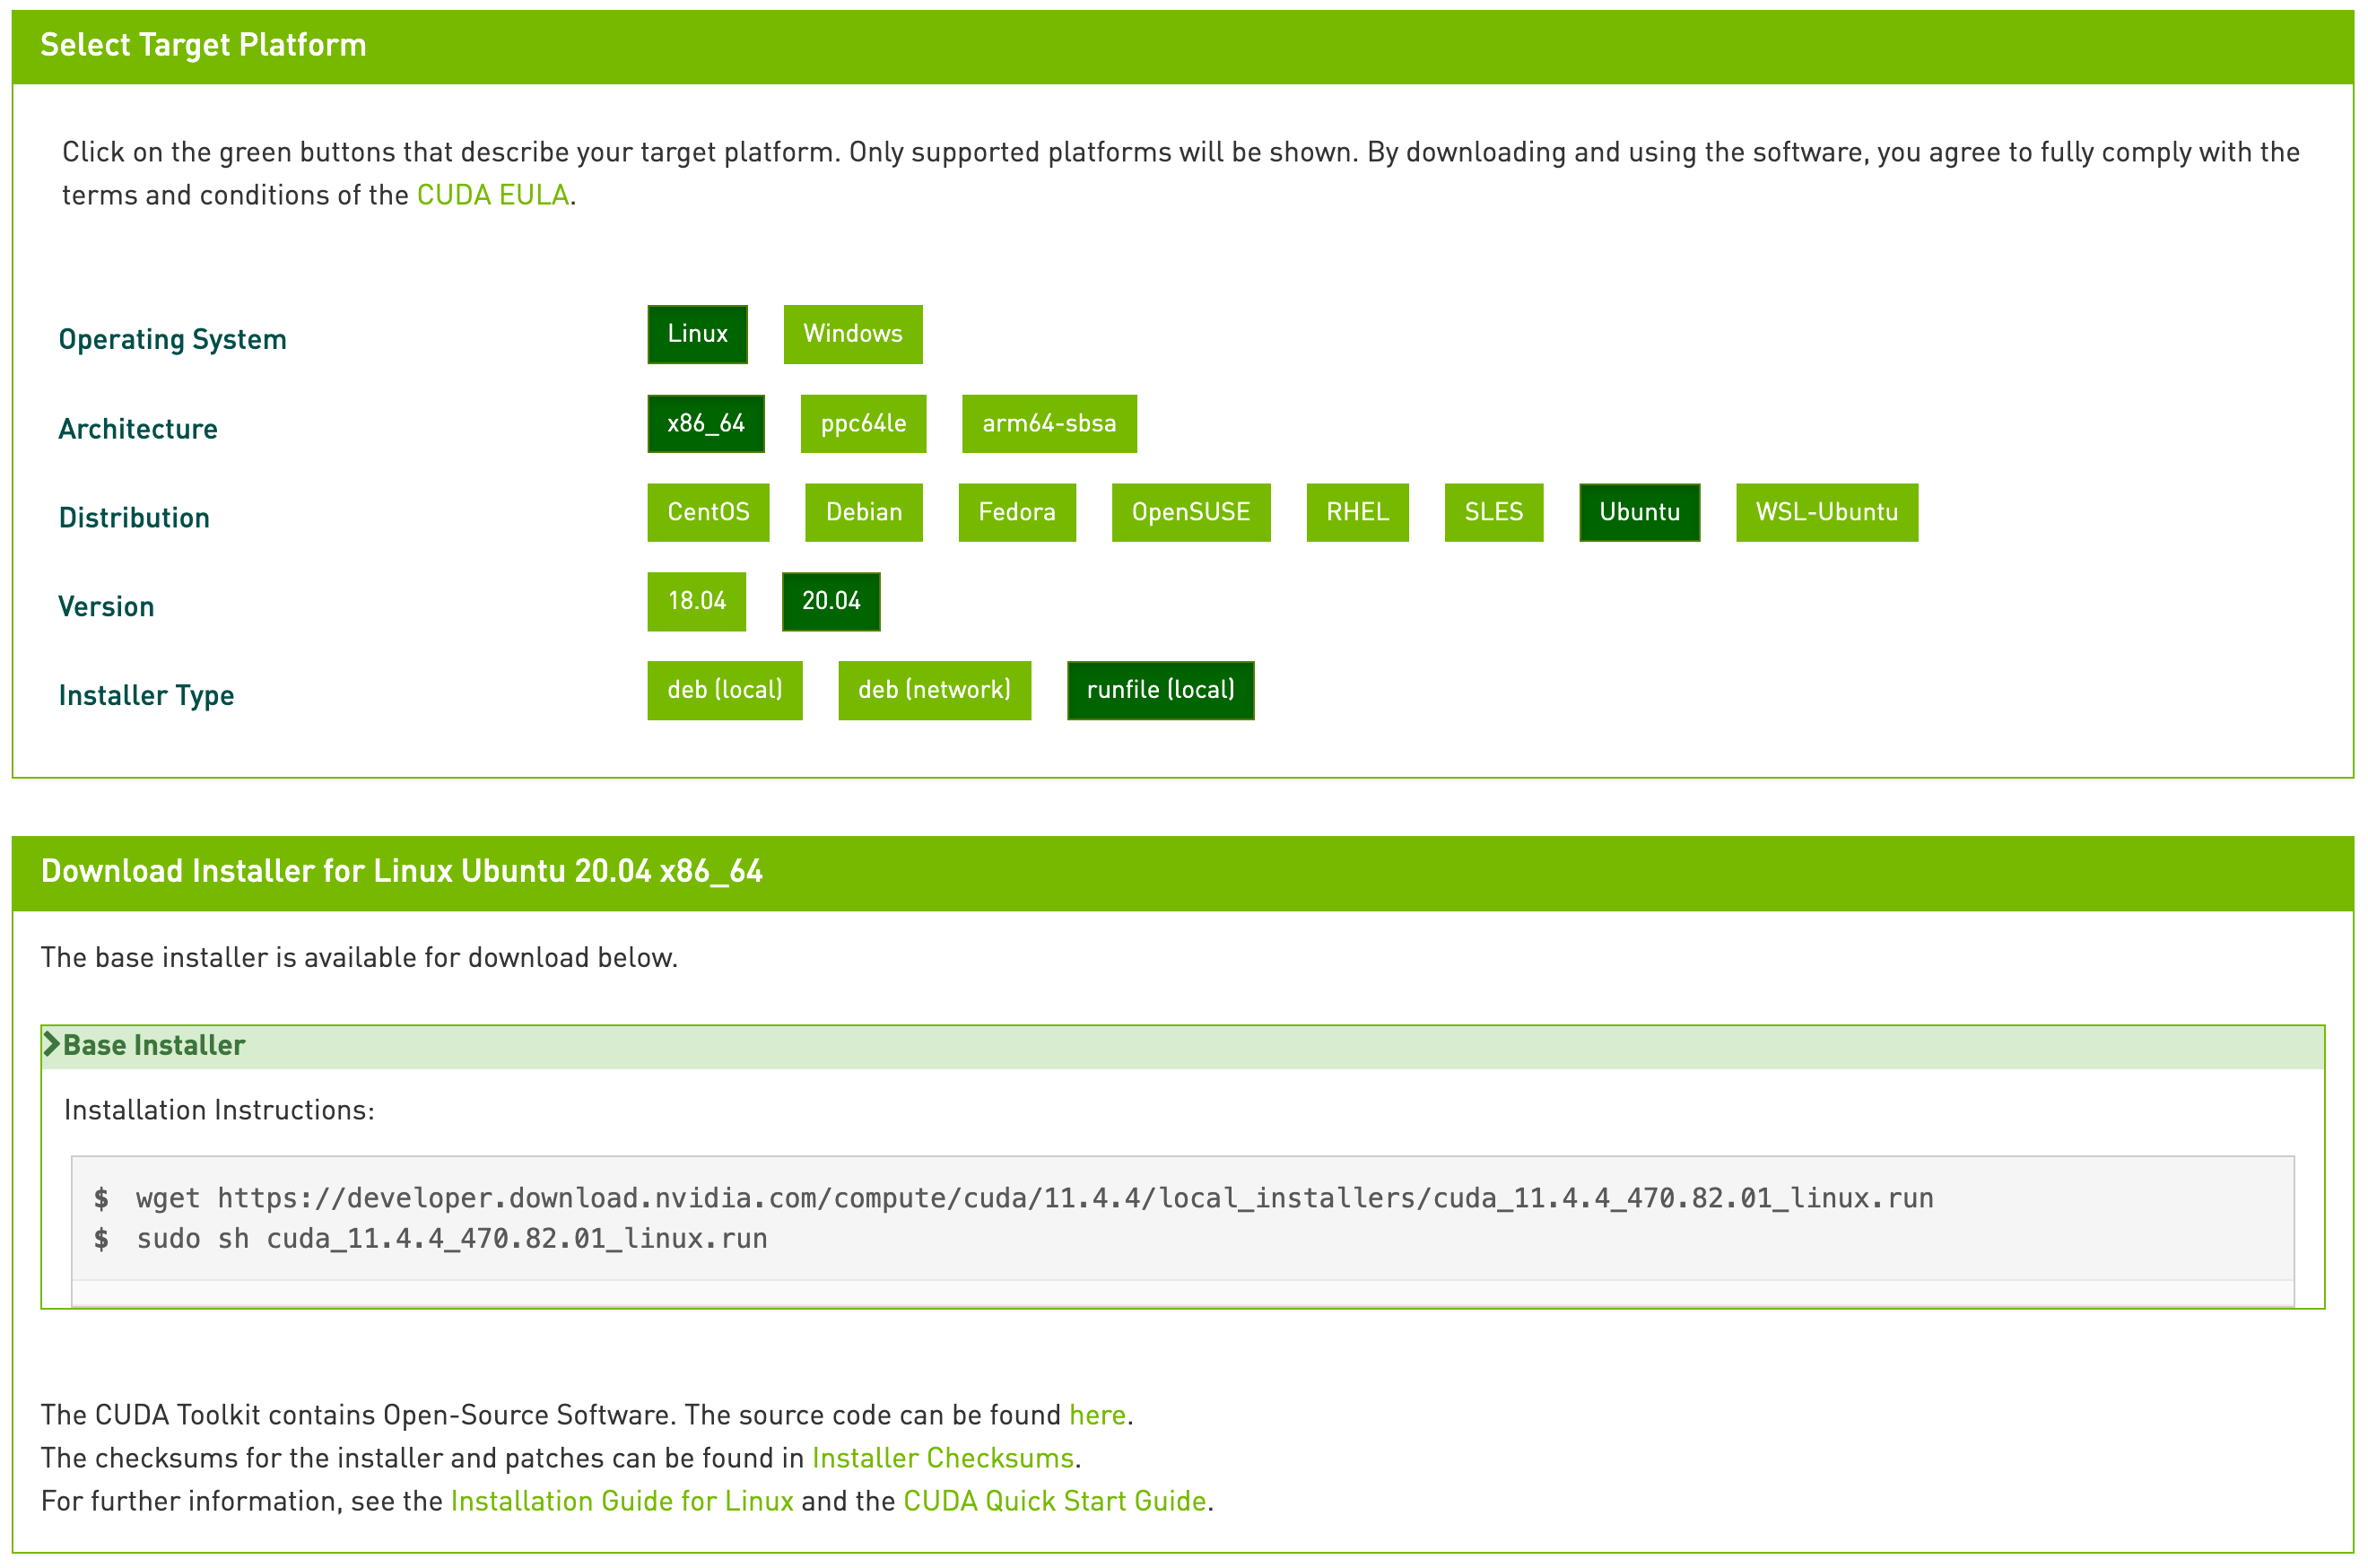 Select CUDA Toolkit version and check Base Installer commands
 -
Run the first line of the Base Installer commands to download the CUDA Toolkit installation file.
Example command to download CUDA Toolkit installation filewget https://developer.download.nvidia.com/compute/cuda/11.4.0/local_installers/cuda_11.4.0_470.42.01_linux.run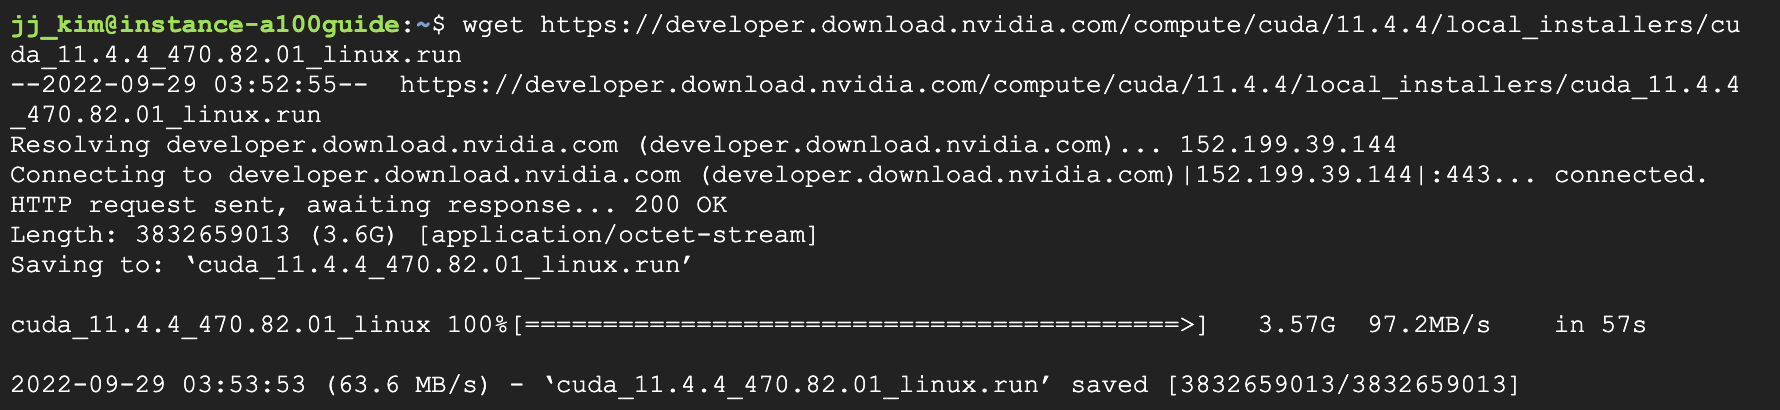 Result of running the Base Installer command to download the Toolkit installation file
 -
Run the second line of the Base Installer commands to execute the CUDA Toolkit installation file.
- Executing the CUDA Toolkit installation file takes more than 1 minute.
Command to run CUDA Toolkit installation filesudo sh cuda_11.4.0_470.42.01_linux.run -
Press the arrow keys to select Continue, then press Enter.
 Select Continue
 -
Enter
accept, then press Enter.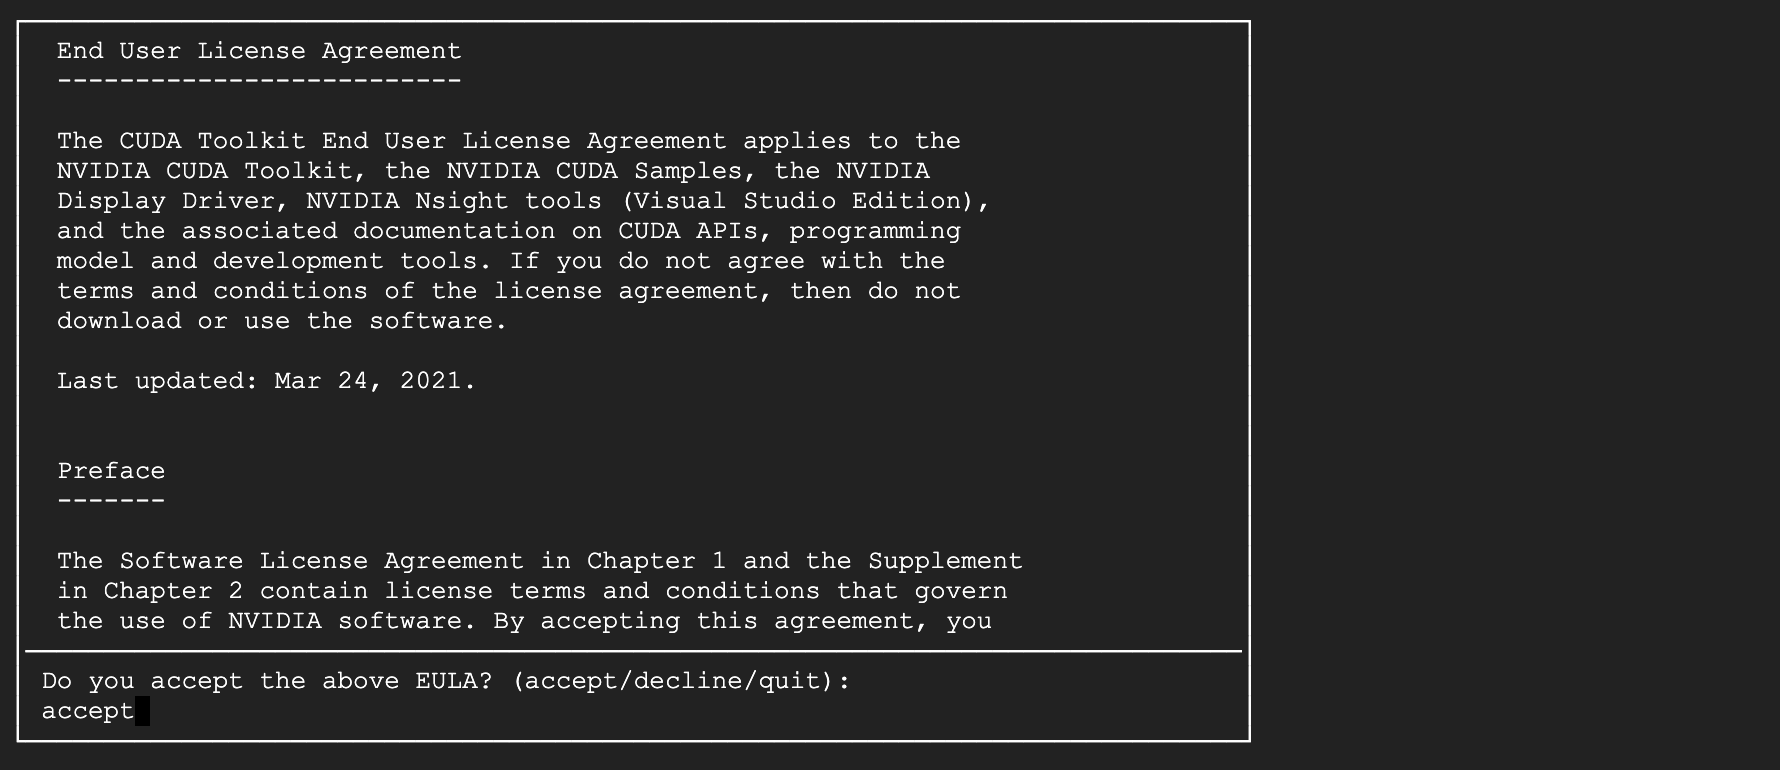 Enter accept
 -
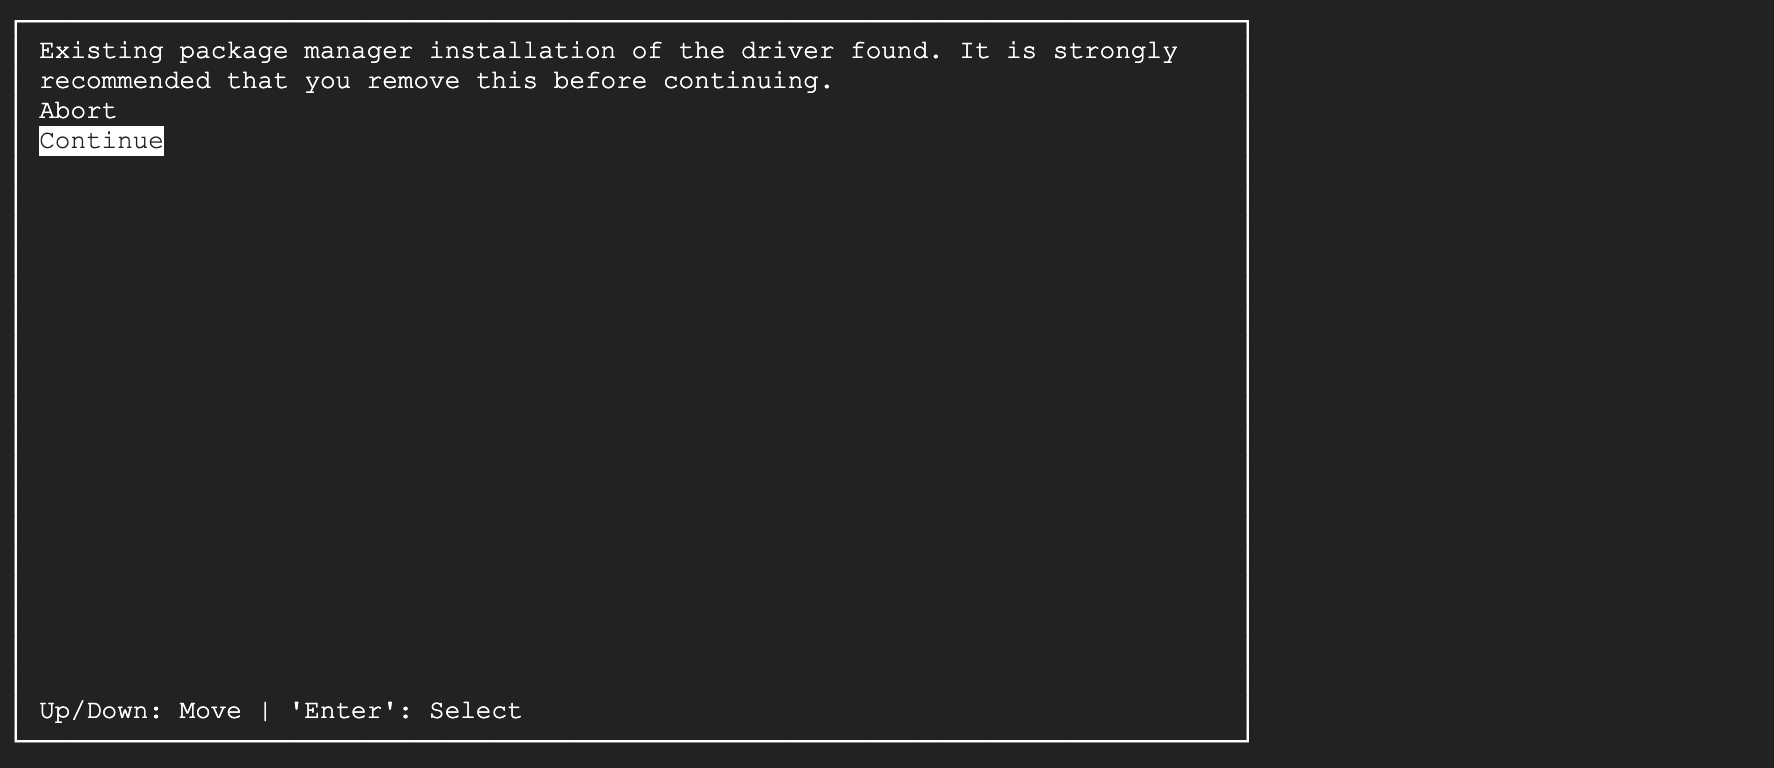
Press Space to clear the Driver checkbox, select Install, then press Enter.
- If existing settings are present, the message
Existing installation of CUDA Toolkit 11.x foundappears. In that case, select Upgrade all and press Enter.
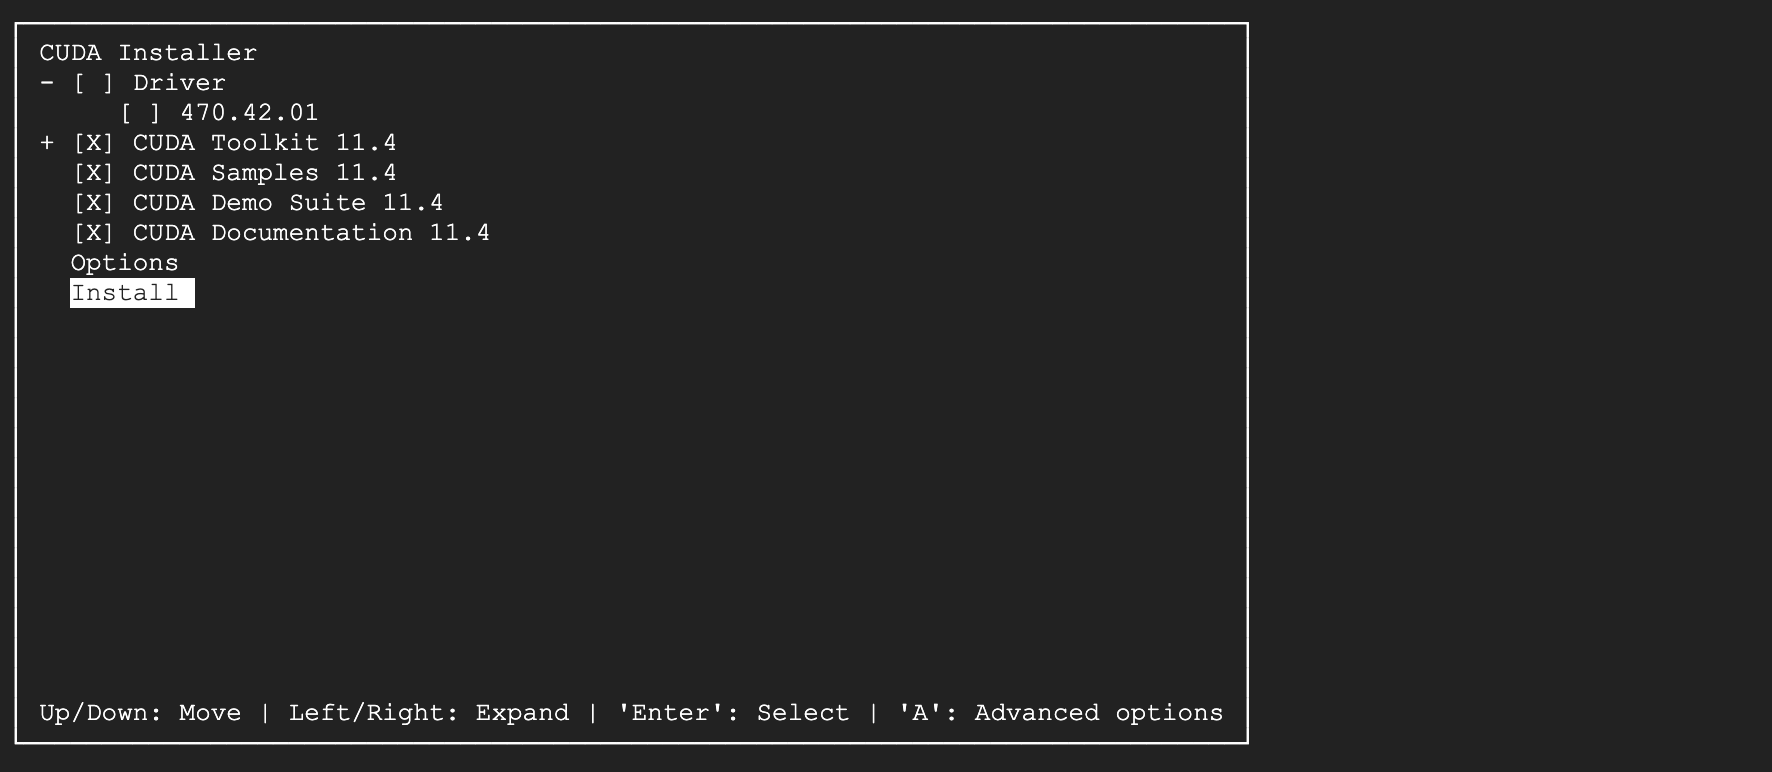 Select Install
 - If existing settings are present, the message
-
If the CUDA Toolkit is installed successfully, you can see the following screen.
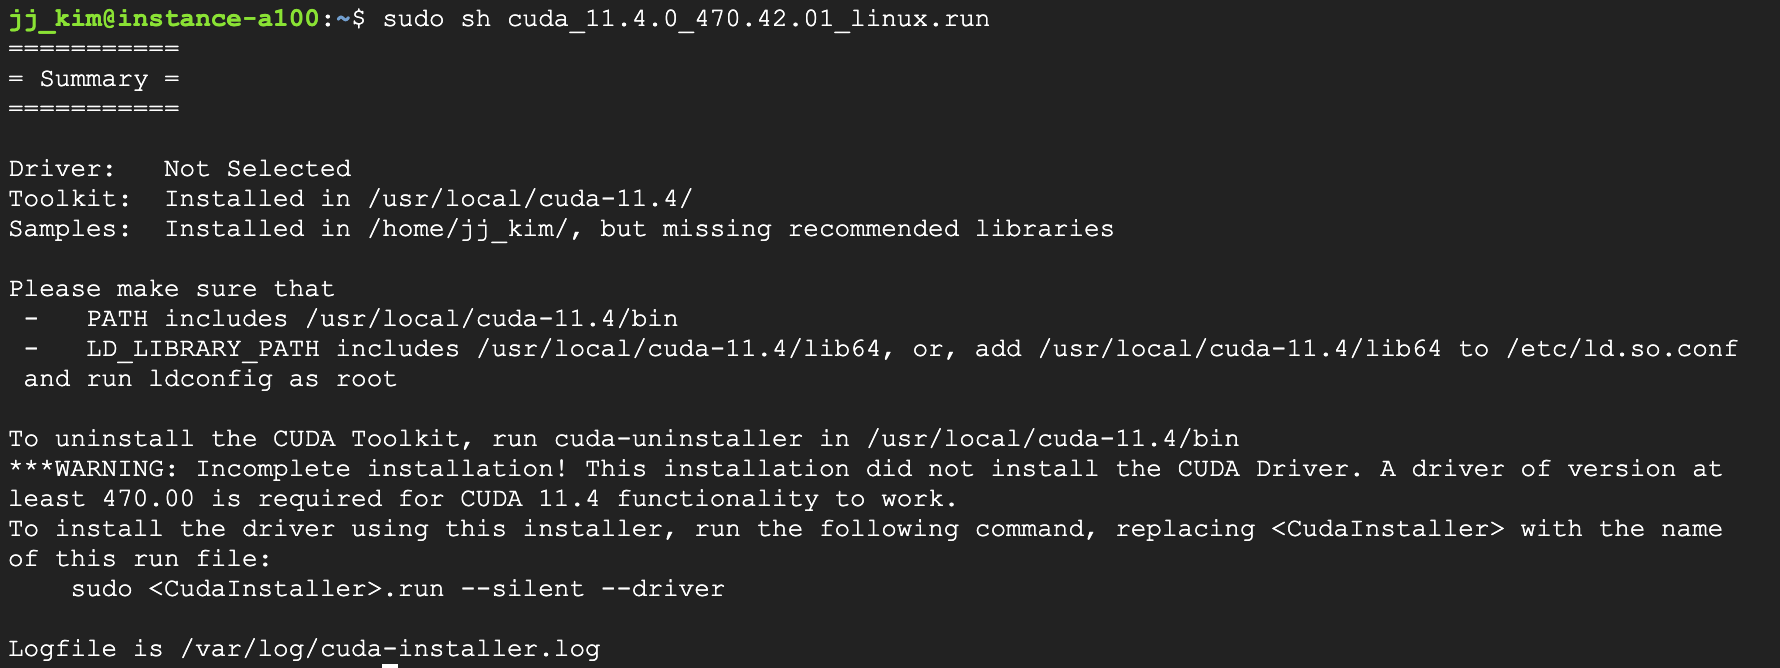 CUDA Toolkit installation complete
 -
Run the following commands to add environment variables related to the CUDA Toolkit.
Command to add CUDA Toolkit environment variablessudo sh -c "echo 'export PATH=$PATH:/usr/local/cuda-11.4/bin' >> /etc/profile"
sudo sh -c "echo 'export LD_LIBRARY_PATH=$LD_LIBRARY_PATH:/usr/local/cuda-11.4/lib64' >> /etc/profile"
sudo sh -c "echo 'export CUDADIR=/usr/local/cuda-11.4' >> /etc/profile"
source /etc/profile -
Run the
nvcc -Vcommand to check the installed CUDA Toolkit. Result of checking CUDA Toolkit installation