Create and manage ALB
Application Load Balancer (ALB) handles traffic at the application layer, which is Layer 7 of the OSI model. ALB listeners can use HTTP or HTTPS protocols and are associated with a default target group.
You can also add ALB rules to configure routing based on custom rules.
Create load balancer
To create a load balancer:
-
Go to the KakaoCloud console > Beyond Networking Service > Load Balancing > Load balancer menu.
-
Select the [Create load balancer] button at the top right.
-
In the Create load balancer screen, under Select type, choose Application Load Balancer.
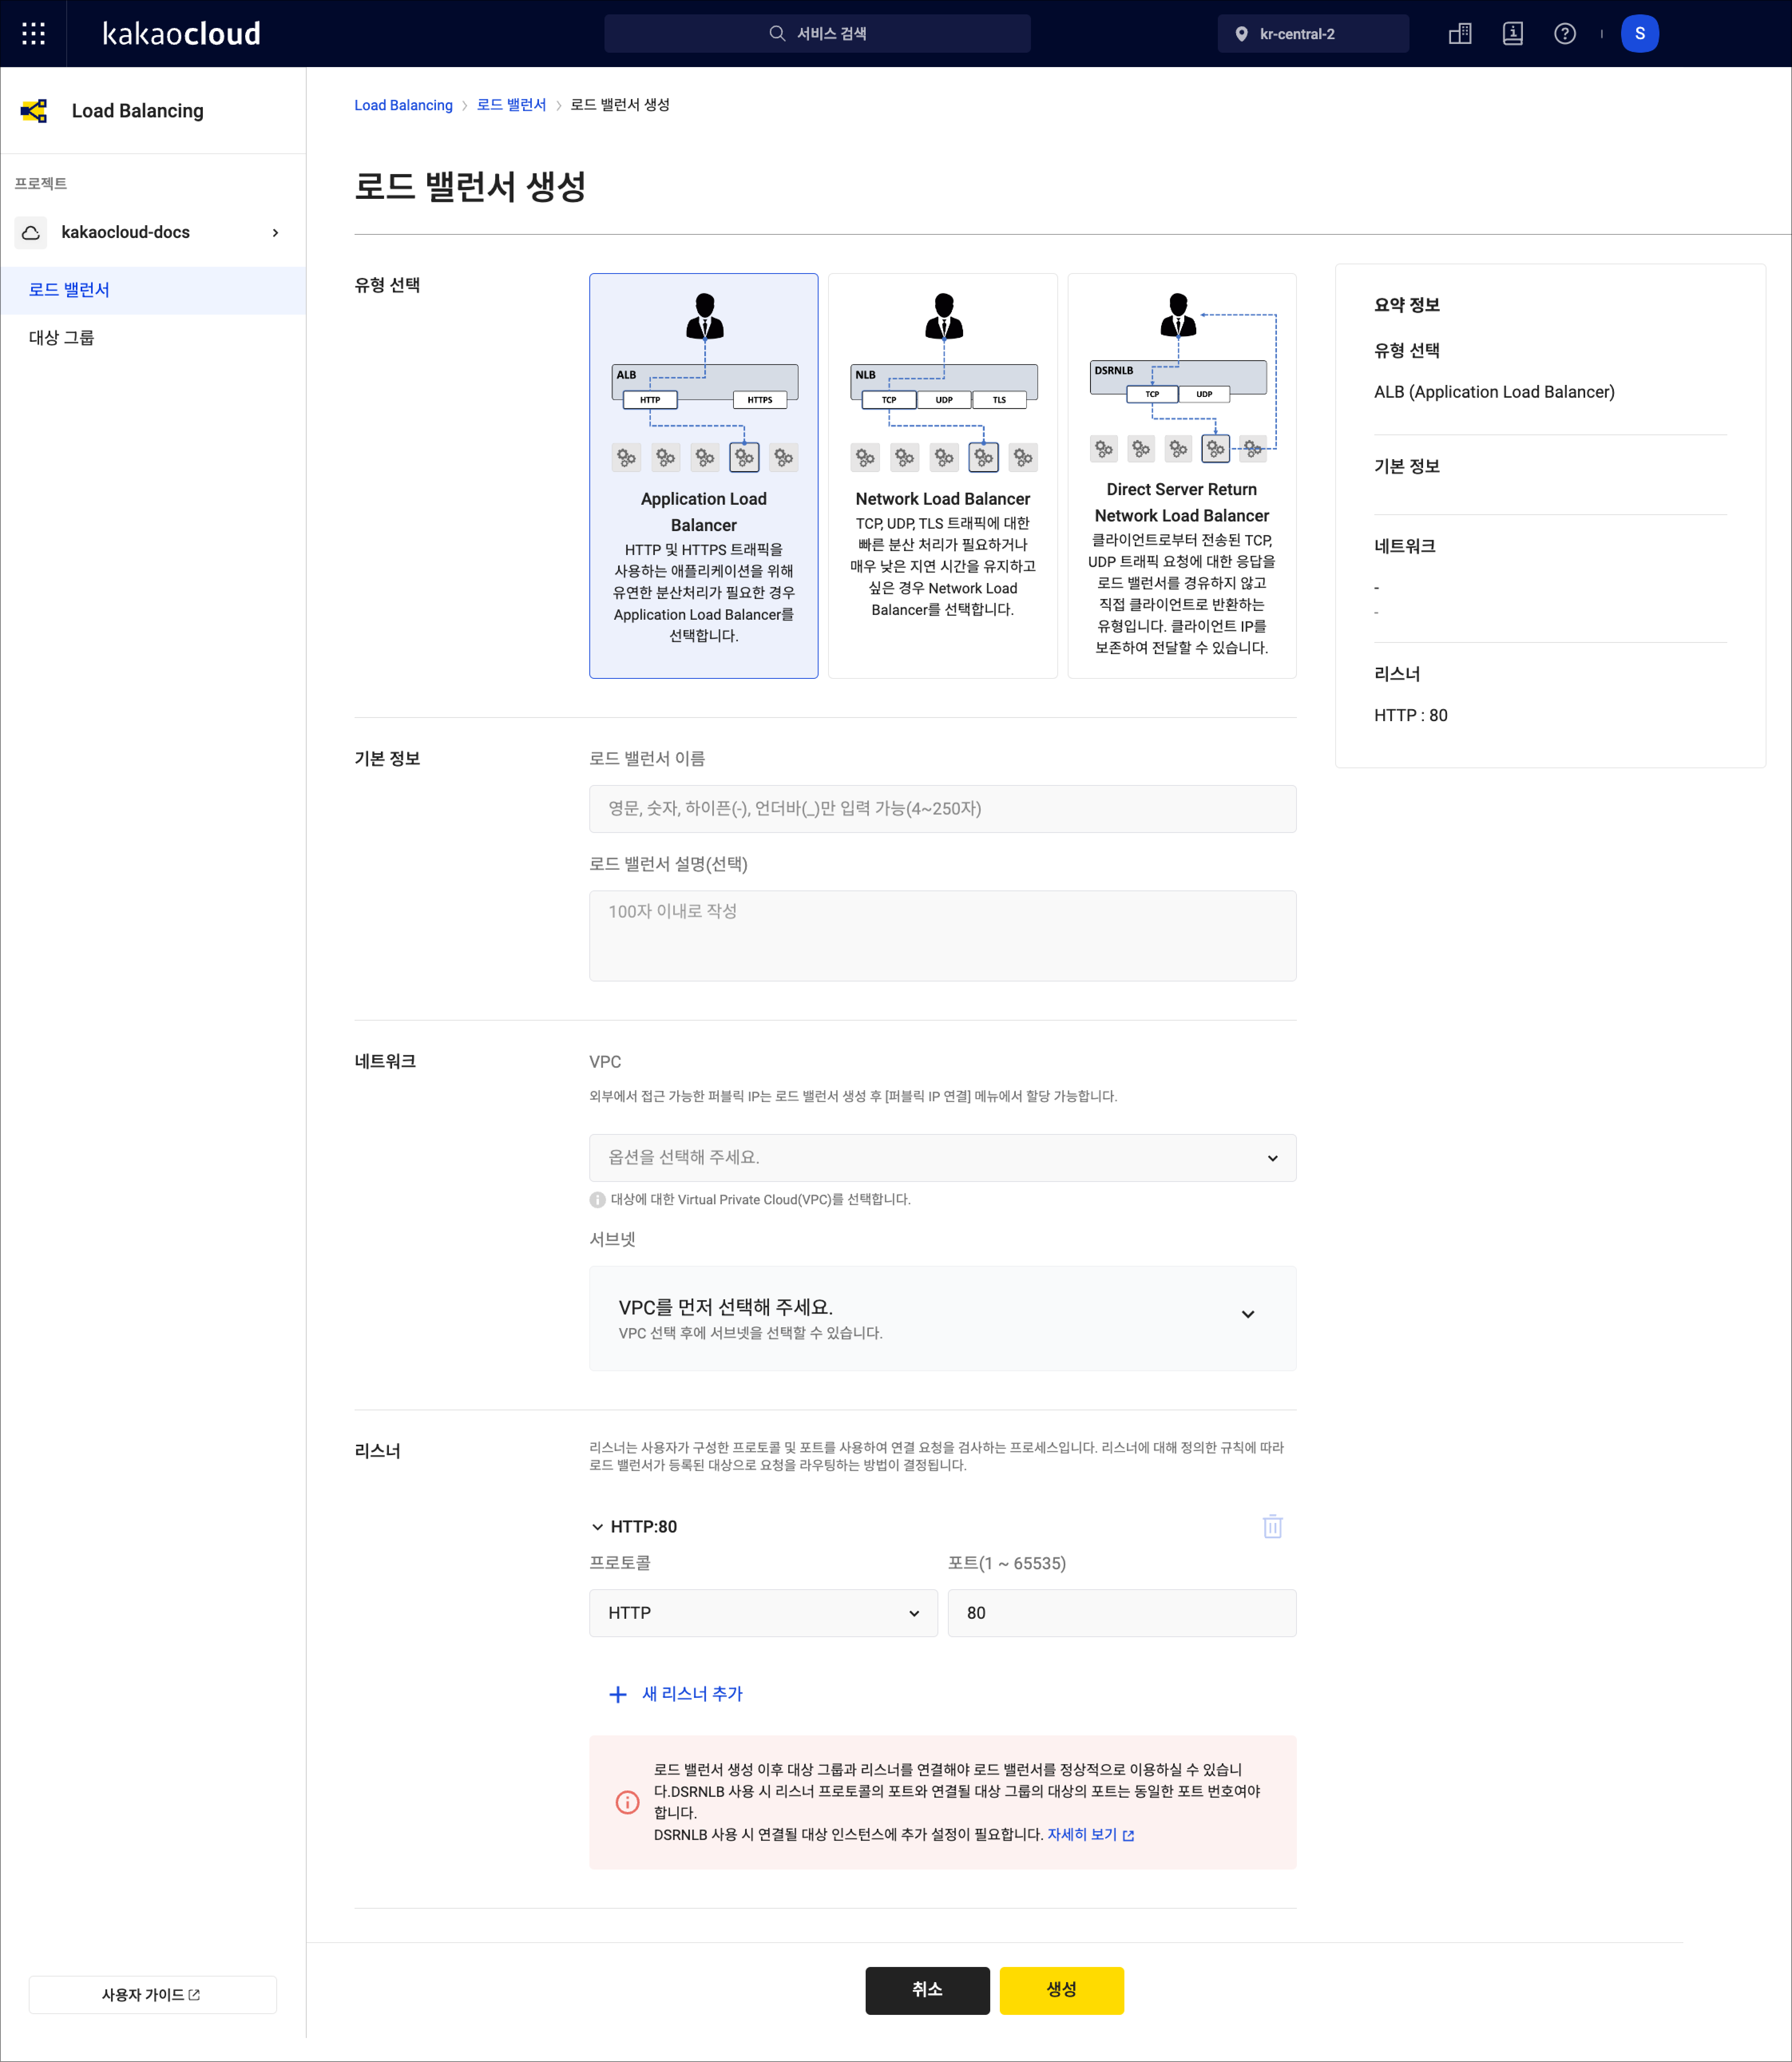
Create load balancer
Section Field Description Basic info Load balancer name Enter a name for the load balancer Load balancer description (optional) 0–100 characters Network VPC Select from available VPCs in the project Subnet Shows subnets for the selected VPC Listener Protocol HTTP,HTTPSPort Enter a value from 1 to 65535 Minimum TLS version Shown only when HTTPSis selected; choose one ofTLSv1.2,TLSv1.1, orTLSv1.3Default SSL certificate Shown only when HTTPSis selected; displays certificates registered to the listener -
Enter the settings and select [Create]. If more listeners are needed, select [Add new listener] to add another listener.
After the load balancer is created, you can modify its settings or add listeners.
View load balancer list
-
Go to the KakaoCloud console > Beyond Networking Service > Load Balancing > Load balancer menu.
-
View the list of load balancers. Use filters to easily search for a specific load balancer.
Field Description Name Name entered during creation ID Unique ID assigned at creation Provisioning status Indicates whether creation, modification, or deletion is in progress Operating status Indicates whether the load balancer is operational Type Application, Network, Direct Server Return Private IP Automatically assigned private IP address Public IP Public IP assigned by the user VPC VPC the load balancer belongs to Availability zone Availability zone selected during creation Created at Date the load balancer was created [More options] icon Provides options such as rename, associate/disassociate public IP, configure access log, delete, etc.
View load balancer details
-
Go to the KakaoCloud console > Beyond Networking Service > Load Balancing > Load balancer menu.
-
Select the load balancer you want to inspect.
-
In the details screen, check each tab for detailed info, listener settings, and monitoring.
Tab Description Details View detailed information of the load balancer Listener View the list and details of added listeners Monitoring View monitoring results for up to 7 days
- Inbound traffic (bytes/sec)
- Outbound traffic (bytes/sec)
- Connections per second (CPS)
- Concurrent sessions
Rename load balancer
- Go to the KakaoCloud console > Beyond Networking Service > Load Balancing > Load balancer menu.
- From the list, select the [More options] icon of the load balancer to rename.
- Select Rename load balancer.
- In the popup, change the name or description and select [Apply].
Associate public IP
- Go to the KakaoCloud console > Beyond Networking Service > Load Balancing > Load balancer menu.
- From the list, select the [More options] icon of the target load balancer.
- Select Associate public IP.
- In the popup, configure allocation options and select [Apply].
- Create and assign a new public IP: Allocates and connects a new public IP
- Select from existing public IPs: Uses an existing public IP
Disassociate public IP
- Go to the KakaoCloud console > Beyond Networking Service > Load Balancing > Load balancer menu.
- From the list, select the [More options] icon of the target load balancer.
- Select Disassociate public IP.
- In the popup, choose whether to delete the public IP and select [Disassociate].
Configure access log
Access logs are optional and disabled by default. Here is how to enable or disable them.
Enable access log
-
Go to the KakaoCloud console > Beyond Networking Service > Load Balancing > Load balancer menu.
-
Select the [More options] icon of the target load balancer.
-
Select Configure access log.
-
In the popup, toggle from [Disabled] to [Enabled].
-
Select the bucket to store access logs. You can enable encryption for security. See Create and manage bucket.
-
Select an Access Key ID that does not have an expiration. Refer to Credentials for creating access keys.
info- Keep your secret access key safe when generating access keys.
- Enabling access logs may incur storage charges. Set log retention with Object Storage Lifecycle policies. See Configure lifecycle.
-
Enter the corresponding secret access key and select [Apply].
Disable access log
- Go to the KakaoCloud console > Beyond Networking Service > Load Balancing > Load balancer menu.
- Select the [More options] icon of the target load balancer.
- Select Configure access log.
- In the popup, toggle from [Enabled] to [Disabled].
Delete load balancer
- Go to the KakaoCloud console > Beyond Networking Service > Load Balancing > Load balancer menu.
- Select the [More options] icon of the load balancer to delete.
- Select Delete load balancer.
- In the popup, enter the confirmation text and select [Delete].