Create and manage DSRNLB
Direct Server Return Network Load Balancer (DSRNLB) processes traffic at the transport layer, which corresponds to layer 4 of the OSI model. Packets received from the client are delivered to a target within the target group, and the response is sent directly back to the client without passing through the load balancer. This behavior is referred to as Direct Server Return (DSR).
The DSRNLB listener supports TCP and UDP protocols and is linked to a single default target group. All traffic received through the listener is routed to the default target group.
This guide explains how to create a DSRNLB and manage it, including listing, monitoring, modifying, and configuring security group settings.
Create load balancer
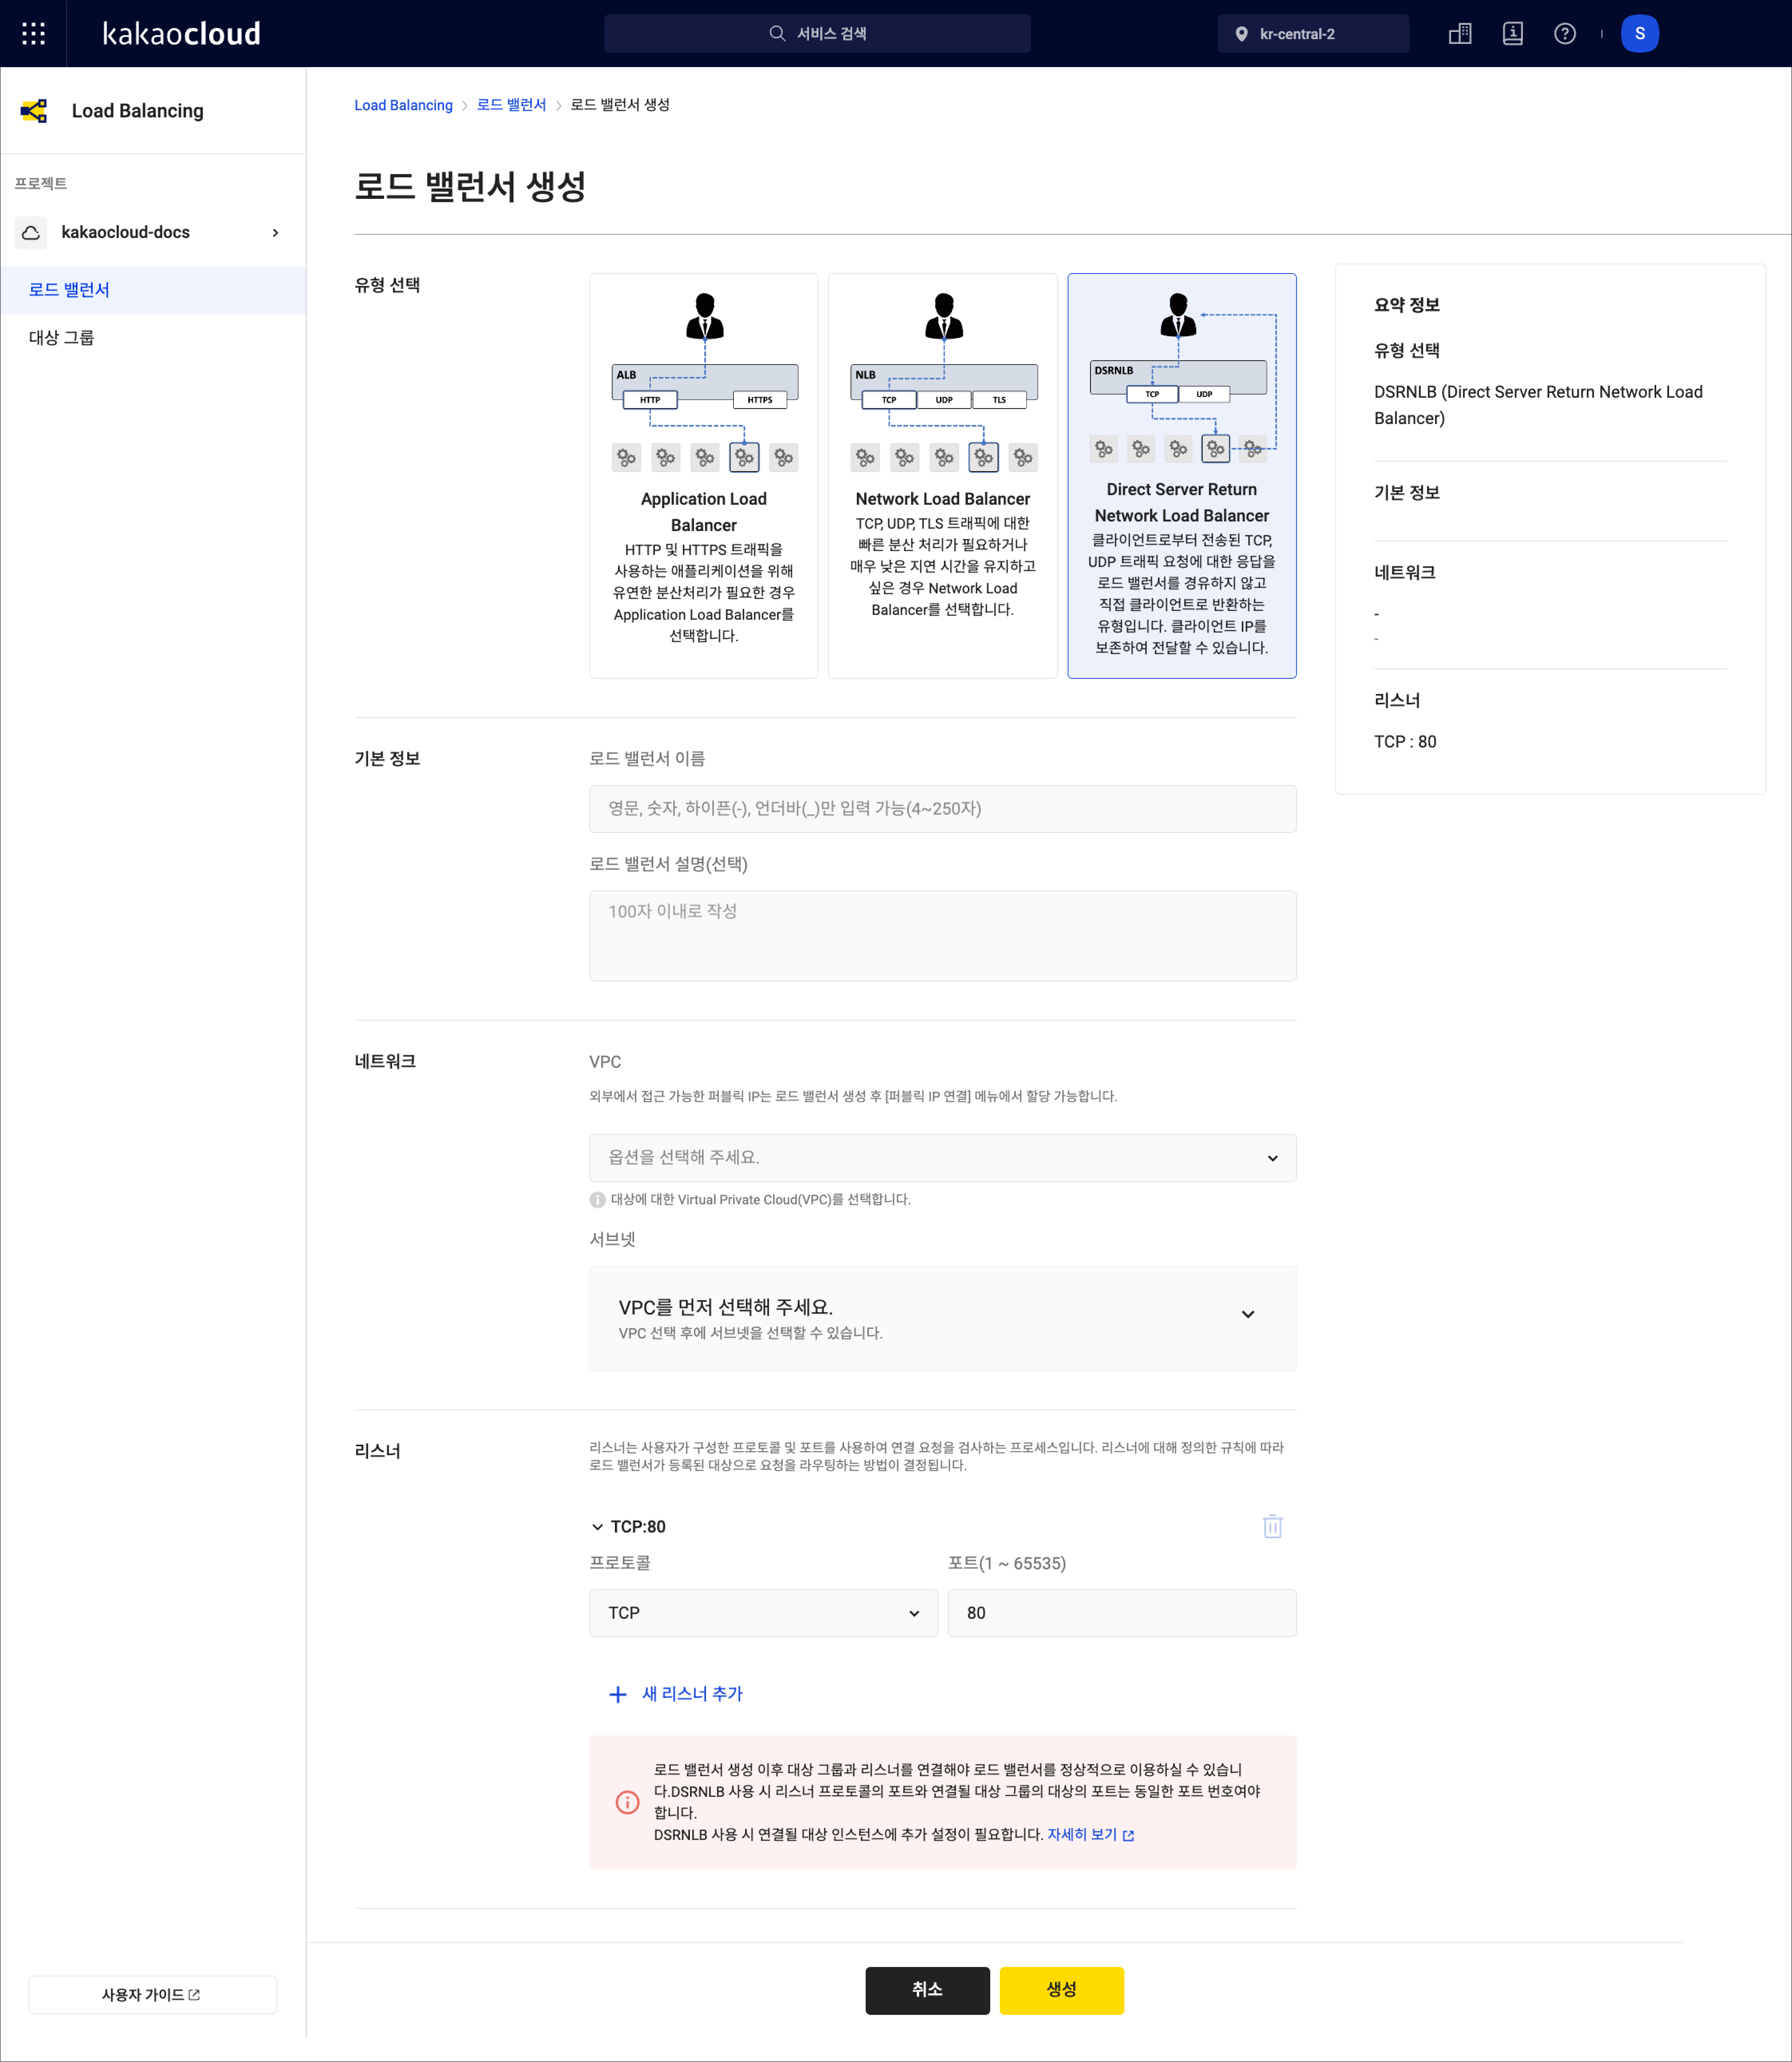
Follow the steps below to create a DSRNLB.
-
Go to the KakaoCloud console > Beyond Networking Service > Load Balancing > Load balancer menu.
-
Select the Create load balancer button in the top right corner.
-
In the Create load balancer screen, under Select type, choose Direct Server Return Network Load Balancer.
-
Enter the required configuration and select the Create button. To add more listeners, select Add new listener.
 Create load balancer
Section Field Description Basic info Load balancer name Name of the load balancer Description (optional) 0–100 characters Network VPC Select from available VPCs in the project Subnet List of subnets in the selected VPC Listener Protocol TCP,UDPPort Enter a value between 1 and 65535
DSRNLB requires that the port of the listener and the port of the targets in the connected target group be identical. Additional configuration is also required on the target instance. A target group connected to one listener cannot be reused by another listener within the same DSRNLB.
For further configuration of the target instance, refer to Create and manage target group.
View load balancer list
-
Go to the KakaoCloud console > Beyond Networking Service > Load Balancing > Load balancer menu.
-
View the list of load balancers. Use filters to narrow your search if needed.
Item Description Load balancer name Displays the user-defined name and assigned ID Provisioning status Indicates whether the load balancer is active, being modified, or being deleted Operational status Indicates whether the load balancer is currently available Type Application, Network, or Direct Server Return Private IP Automatically assigned private IP address Public IP User-assigned public IP address VPC VPC containing the load balancer Availability zone Zone selected during creation Created at Load balancer creation date [More] icon Allows name change, public IP association/disassociation, access log settings, and deletion
The private IP of the DSRNLB is required when configuring target instances. Make sure to check this information in advance.
View load balancer details
-
Go to the KakaoCloud console > Beyond Networking Service > Load Balancing > Load balancer menu.
-
Select the load balancer you want to inspect.
-
On the detail screen, check tabs for general info, listeners, and monitoring data.
Tab Description Details View general details of the load balancer Listener View the list and configuration details of attached listeners Monitoring View metrics for up to 7 days
- Inbound traffic (bytes/sec): Data received via listener
- Outbound traffic (bytes/sec): Data sent via listener
- CPS (Connections Per Second): Number of connections handled per second
- Concurrent sessions: Number of simultaneous active sessions
Rename load balancer
-
Go to the KakaoCloud console > Beyond Networking Service > Load Balancing > Load balancer menu.
-
Select the [More] icon next to the load balancer you want to rename.
-
Select Rename load balancer from the menu.
-
In the Rename load balancer popup, update the name or description and select Apply.
Associate public IP
-
Go to the KakaoCloud console > Beyond Networking Service > Load Balancing > Load balancer menu.
-
Select the [More] icon next to the load balancer to associate with a public IP.
-
Select Associate public IP from the menu.
-
In the Associate public IP popup, configure the allocation option and select Apply.
- Create and automatically assign a new public IP: Allocates and links a new public IP
- Select from existing public IP list: Links an existing public IP
Disassociate public IP
-
Go to the KakaoCloud console > Beyond Networking Service > Load Balancing > Load balancer menu.
-
Select the [More] icon next to the load balancer to disassociate a public IP.
-
Select Disassociate public IP from the menu.
-
In the Disassociate public IP popup, choose whether to delete the public IP, then select Disassociate.
Configure access log
Access logging is an optional feature and is disabled by default. You can enable or disable access logging using the steps below.
Enable access log
To enable access logging:
-
Go to the KakaoCloud console > Beyond Networking Service > Load Balancing > Load balancer menu.
-
Select the [More] icon next to the load balancer.
-
Select Configure access log from the menu.
-
In the popup, select [Disabled] to enable logging.
-
Select a bucket for storing access logs. You can enable encryption for the bucket. For enhanced security, it is recommended to choose
Enable. For details on bucket creation, see Create and manage bucket. -
Select an access key ID. It must be set with
No expiration. To create one, refer to Credentials.info- Save your secret access key securely when generating an access key.
- Charges may apply based on the volume of logs stored. You can configure Lifecycle settings on the bucket to limit retention. See Configure lifecycle.
-
Enter the matching secret access key and select Apply.
Disable access log
To disable access logging:
-
Go to the KakaoCloud console > Beyond Networking Service > Load Balancing > Load balancer menu.
-
Select the [More] icon next to the load balancer.
-
Select Configure access log from the menu.
-
In the popup, select [Enabled] to turn off access logging.
Delete load balancer
-
Go to the KakaoCloud console > Beyond Networking Service > Load Balancing > Load balancer menu.
-
Select the [More] icon next to the load balancer you want to delete.
-
Select Delete load balancer from the menu.
-
In the Delete load balancer popup, enter the confirmation phrase and select Delete.