Add and Manage Listeners
You can add listeners to a Network Load Balancer (NLB), view the list of listeners, modify their information, and manage them. Below are the steps to do so.
Add Listener
Add TCP/UDP listener
-
Go to the KakaoCloud console > Beyond Networking Service > Load Balancing > Load Balancer menu.
-
Select the load balancer to which you want to add a listener from the Load Balancer list.
-
Select the Listener tab in the detailed view, then select the [Add Listener] button.
-
In the Add Listener popup, select either the
TCPorUDPprotocol and modify the port if necessary. -
After selecting the Default forwarding target, select the [Add] button to configure the target group.
Add TLS listener
-
Go to the KakaoCloud console > Beyond Networking Service > Load Balancing > Load Balancer menu.
-
Select the load balancer to which you want to add a listener from the Load Balancer list.
-
Select the Listener tab in the detailed view, then select the [Add Listener] button.
-
In the Add Listener popup, select the
TLSprotocol and modify the port if necessary. -
Select the Default forwarding target and Minimum TLS version.
-
Select the Default SSL certificate. If an existing certificate is registered, select it; if not, select the dropdown button and select the [Add New Certificate] button to navigate to the Certificate Manager to register a new certificate.
Supported Cipher Suites by minimum TLS version security policy
| Minimum TLS Version Security Policy | TLSv1.0 | TLSv1.1 | TLSv1.2 |
|---|---|---|---|
| TLS Protocol | |||
| TLSv1.0 | v | ||
| TLSv1.1 | v | v | |
| TLSv1.2 | v | v | v |
| Cipher Suite | |||
| ECDHE-RSA-AES128-GCM-SHA256 | v | ||
| ECDHE_RSA_AES128_CBC_SHA(ECDHE-RSA-AES128-SHA) | v | v | v |
| ECDHE-RSA-AES128-SHA256 | v | ||
| ECDHE-RSA-AES256-GCM-SHA384 | v | ||
| ECDHE_RSA_AES256_CBC_SHA(ECDHE-RSA-AES256-SHA) | v | v | v |
| ECDHE-RSA-AES256-SHA384 | v | ||
| AES128-GCM-SHA256 | v | ||
| AES128-SHA | v | v | v |
| AES128-SHA256 | v | ||
| AES256-GCM-SHA384 | v | ||
| AES256-SHA | v | v | v |
| AES256-SHA256 | v | ||
| CAMELLIA128-SHA | v | v | v |
| CAMELLIA256-SHA | v | v | v |
| DHE-RSA-AES128-GCM-SHA256 | v | ||
| DHE-RSA-AES128-SHA | v | v | v |
| DHE-RSA-AES128-SHA256 | v | ||
| DHE-RSA-AES256-GCM-SHA384 | v | ||
| DHE-RSA-AES256-SHA | v | v | v |
| DHE-RSA-AES256-SHA256 | v | ||
| DHE-RSA-CAMELLIA128-SHA | v | v | v |
| DHE-RSA-CAMELLIA256-SHA | v | v | v |
| ECDHE_ECDSA_AES128_SHA | v | v | v |
- After completing the listener addition, you can connect a target group in Listener settings. If the default forwarding target is set to 'Not configured', an error will occur when accessing the service from outside. Please connect a target group for smooth service operation.
- For HTTPS listeners, you can select either
HTTP/1.1orHTTP/2as the target group protocol version.
View listeners
In the load balancer detailed view, you can modify or delete existing listeners, or add new listeners.
View listener list
-
Go to the KakaoCloud console > Beyond Networking Service > Load Balancing > Load Balancer menu.
-
Select the load balancer whose listener list you want to view from the Load Balancer list.
-
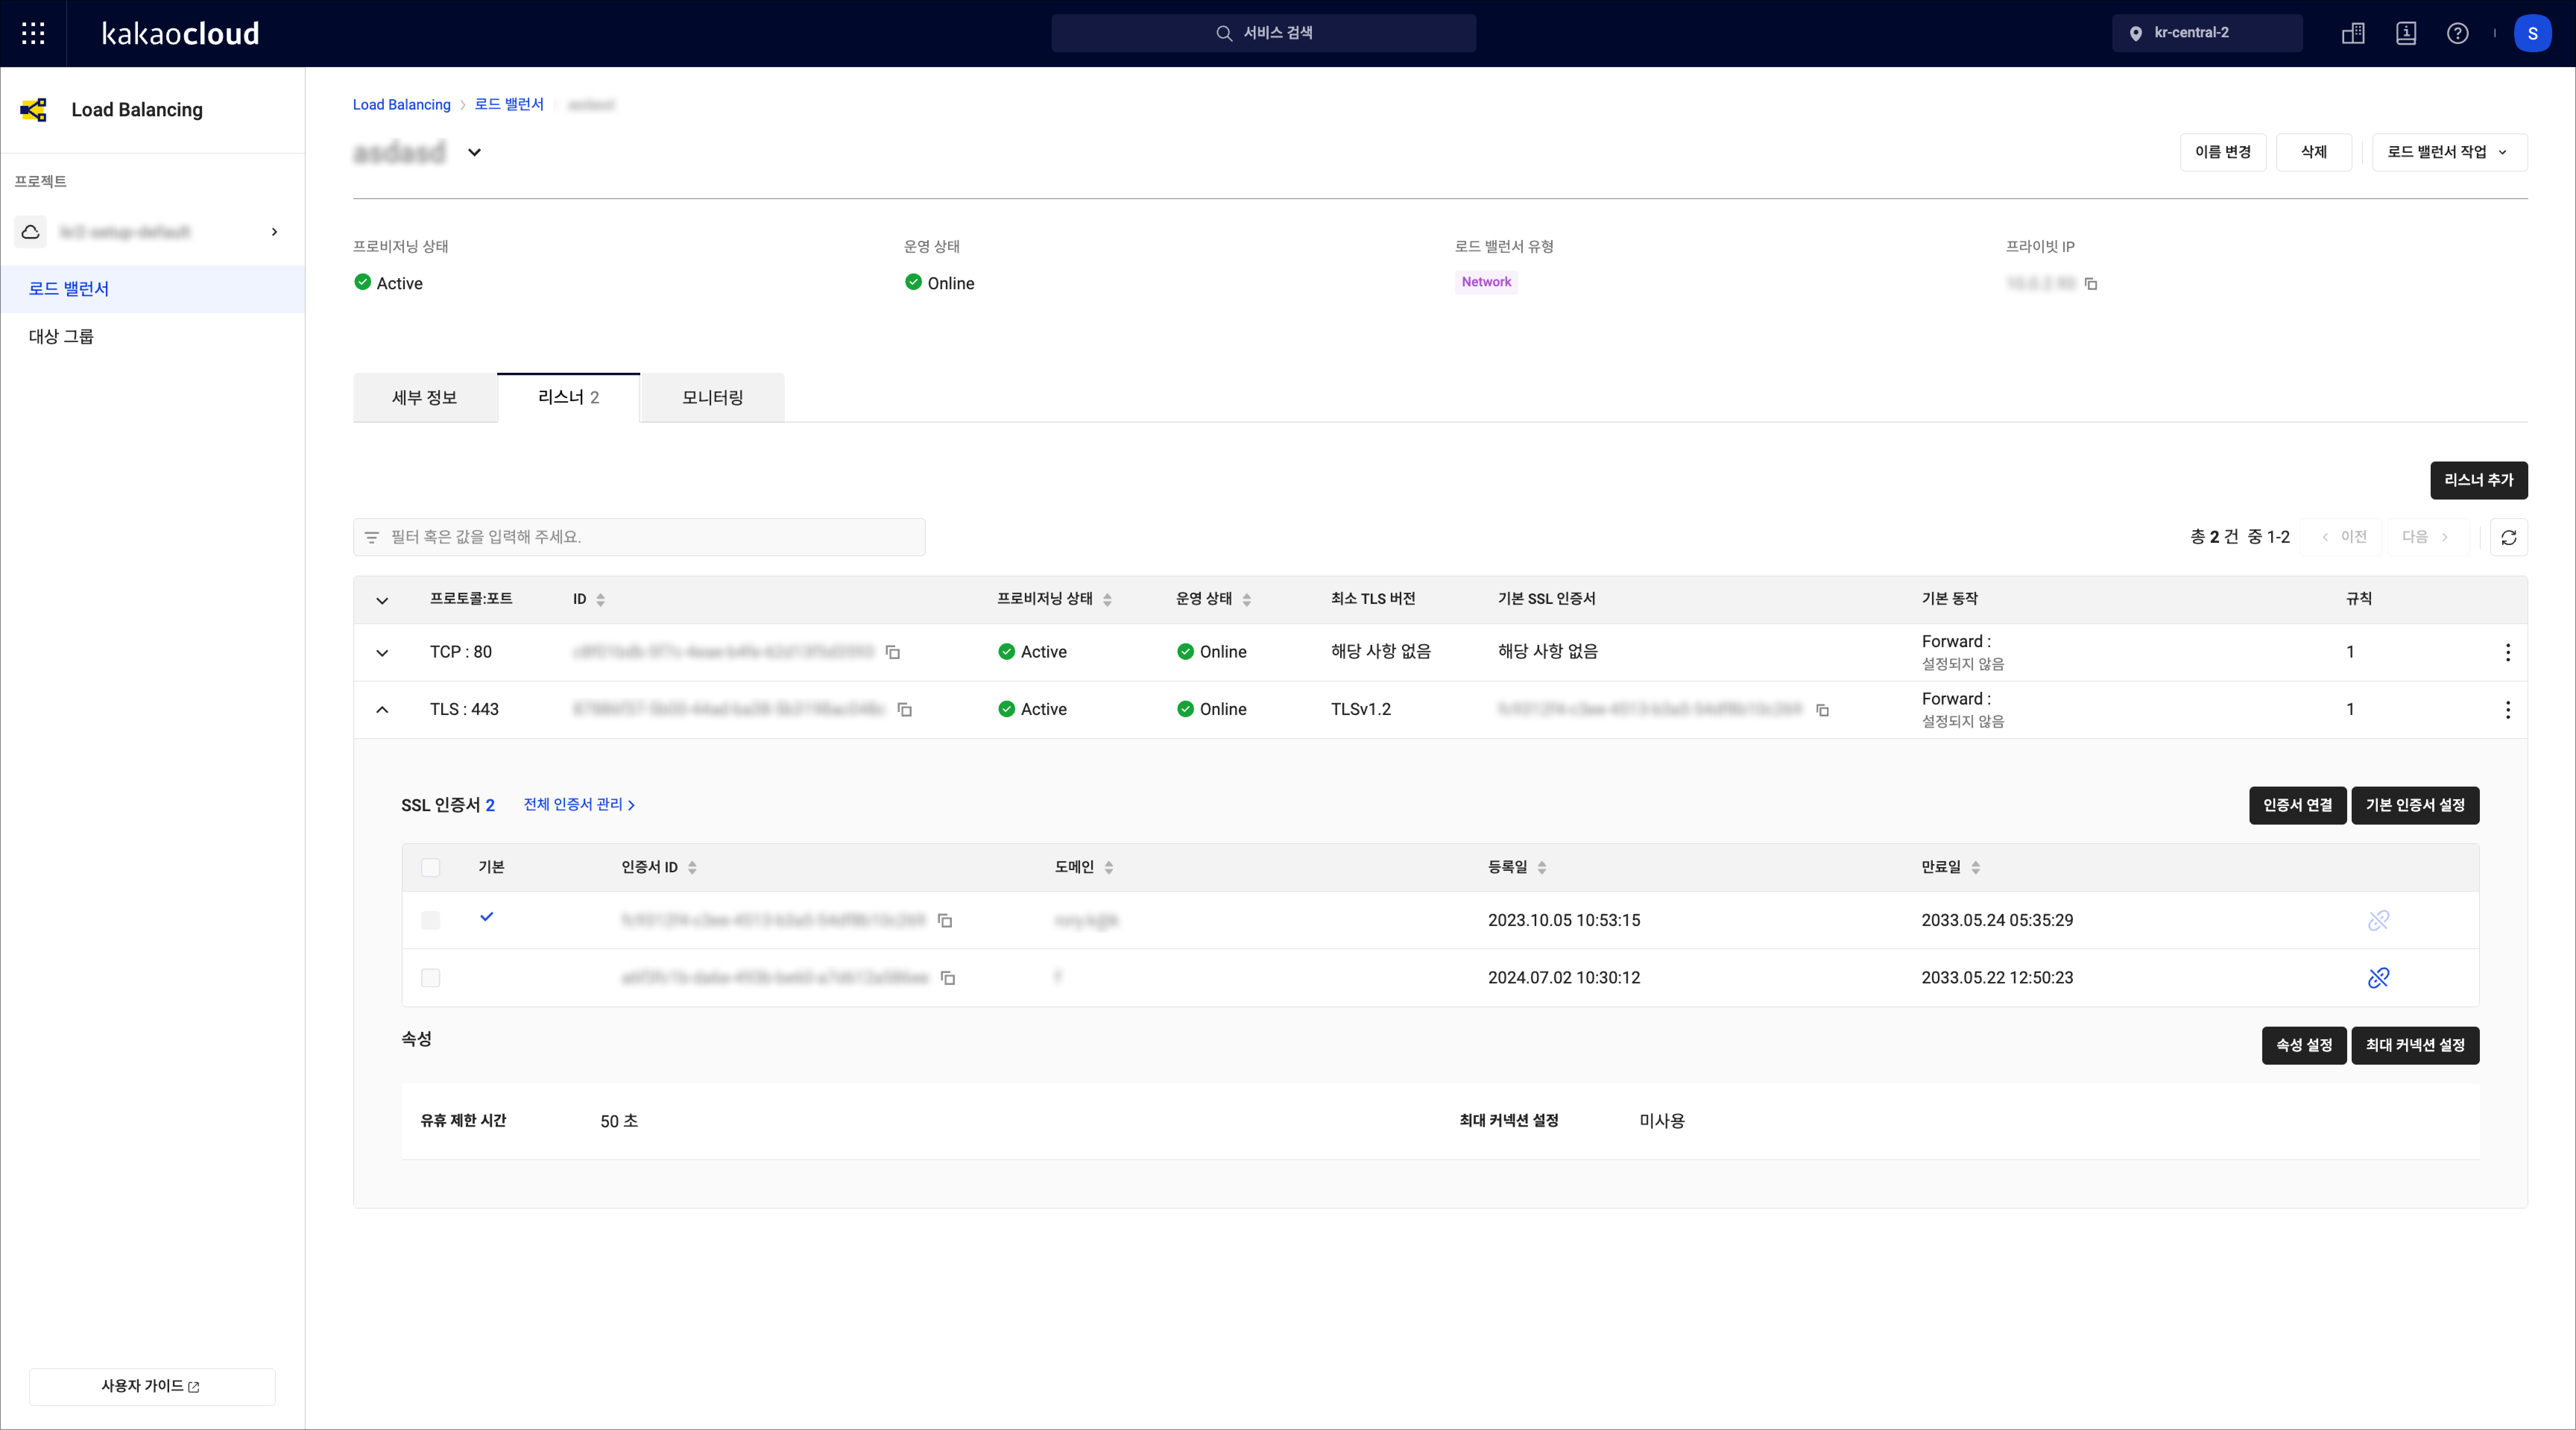
Select the Listener tab in the detailed view to see the list of listeners connected to the load balancer.
Field Description Protocol:Port Protocol and port of the listener ID ID assigned during creation Provisioning Status Information on whether the listener has been created successfully or is being modified/deleted Operational Status Information on whether the listener is in an available state Minimum TLS Version Security policy used for TLS communication between the client and the load balancer Default SSL Certificate Certificate used for TLS communication between the client and the load balancer Default Action Default action for handling traffic received by the listener, typically Forward
- Displays the target group name if a target group is connected[More] Icon Provides options for listener settings and deletion
View listener details
-
Go to the KakaoCloud console > Beyond Networking Service > Load Balancing > Load Balancer menu.
-
Select the load balancer whose listener details you want to view from the Load Balancer list.
-
In the load balancer detailed view, select the Listener tab, then select the listener for which you want to view details.
 Listener Details
Field Item Description Attributes Idle Timeout Connection idle timeout setting Maximum Connections Displays the maximum value if set SSL Certificate (TLS listeners only) Default Whether it is the default certificate Certificate ID ID assigned when the certificate was added Domain Certificate domain Registration Date Date the certificate was registered Expiration Date Expiration date of the certificate Disconnect Icon Displays a popup for disconnecting the certificate when clicked
Manage listeners
Modify target group
-
Go to the KakaoCloud console > Beyond Networking Service > Load Balancing > Load Balancer menu.
-
Select the load balancer containing the listener you want to modify from the Load Balancer list.
-
Select the Listener tab, then select the [More] icon for the listener whose default forwarding target you want to change.
-
From the [More] menu, select Listener Settings.
-
In the Listener Settings popup, select the new target group from the Default forwarding target list, then select [Save].
Set maximum connections
-
Go to the KakaoCloud console > Beyond Networking Service > Load Balancing > Load Balancer menu.
-
Select the load balancer containing the listener you want to modify from the Load Balancer list.
-
Select the Listener tab, then select the listener for which you want to change the maximum connection setting.
-
In the listener detailed view, select the [Set Maximum Connections] button at the top of the properties section.
-
In the Set Maximum Connections popup, adjust the settings.
- To set a limit: Enable the Maximum Connections option and enter the maximum value (from 1 to 2,147,483,647).
- To remove the limit: Disable the Maximum Connections option.
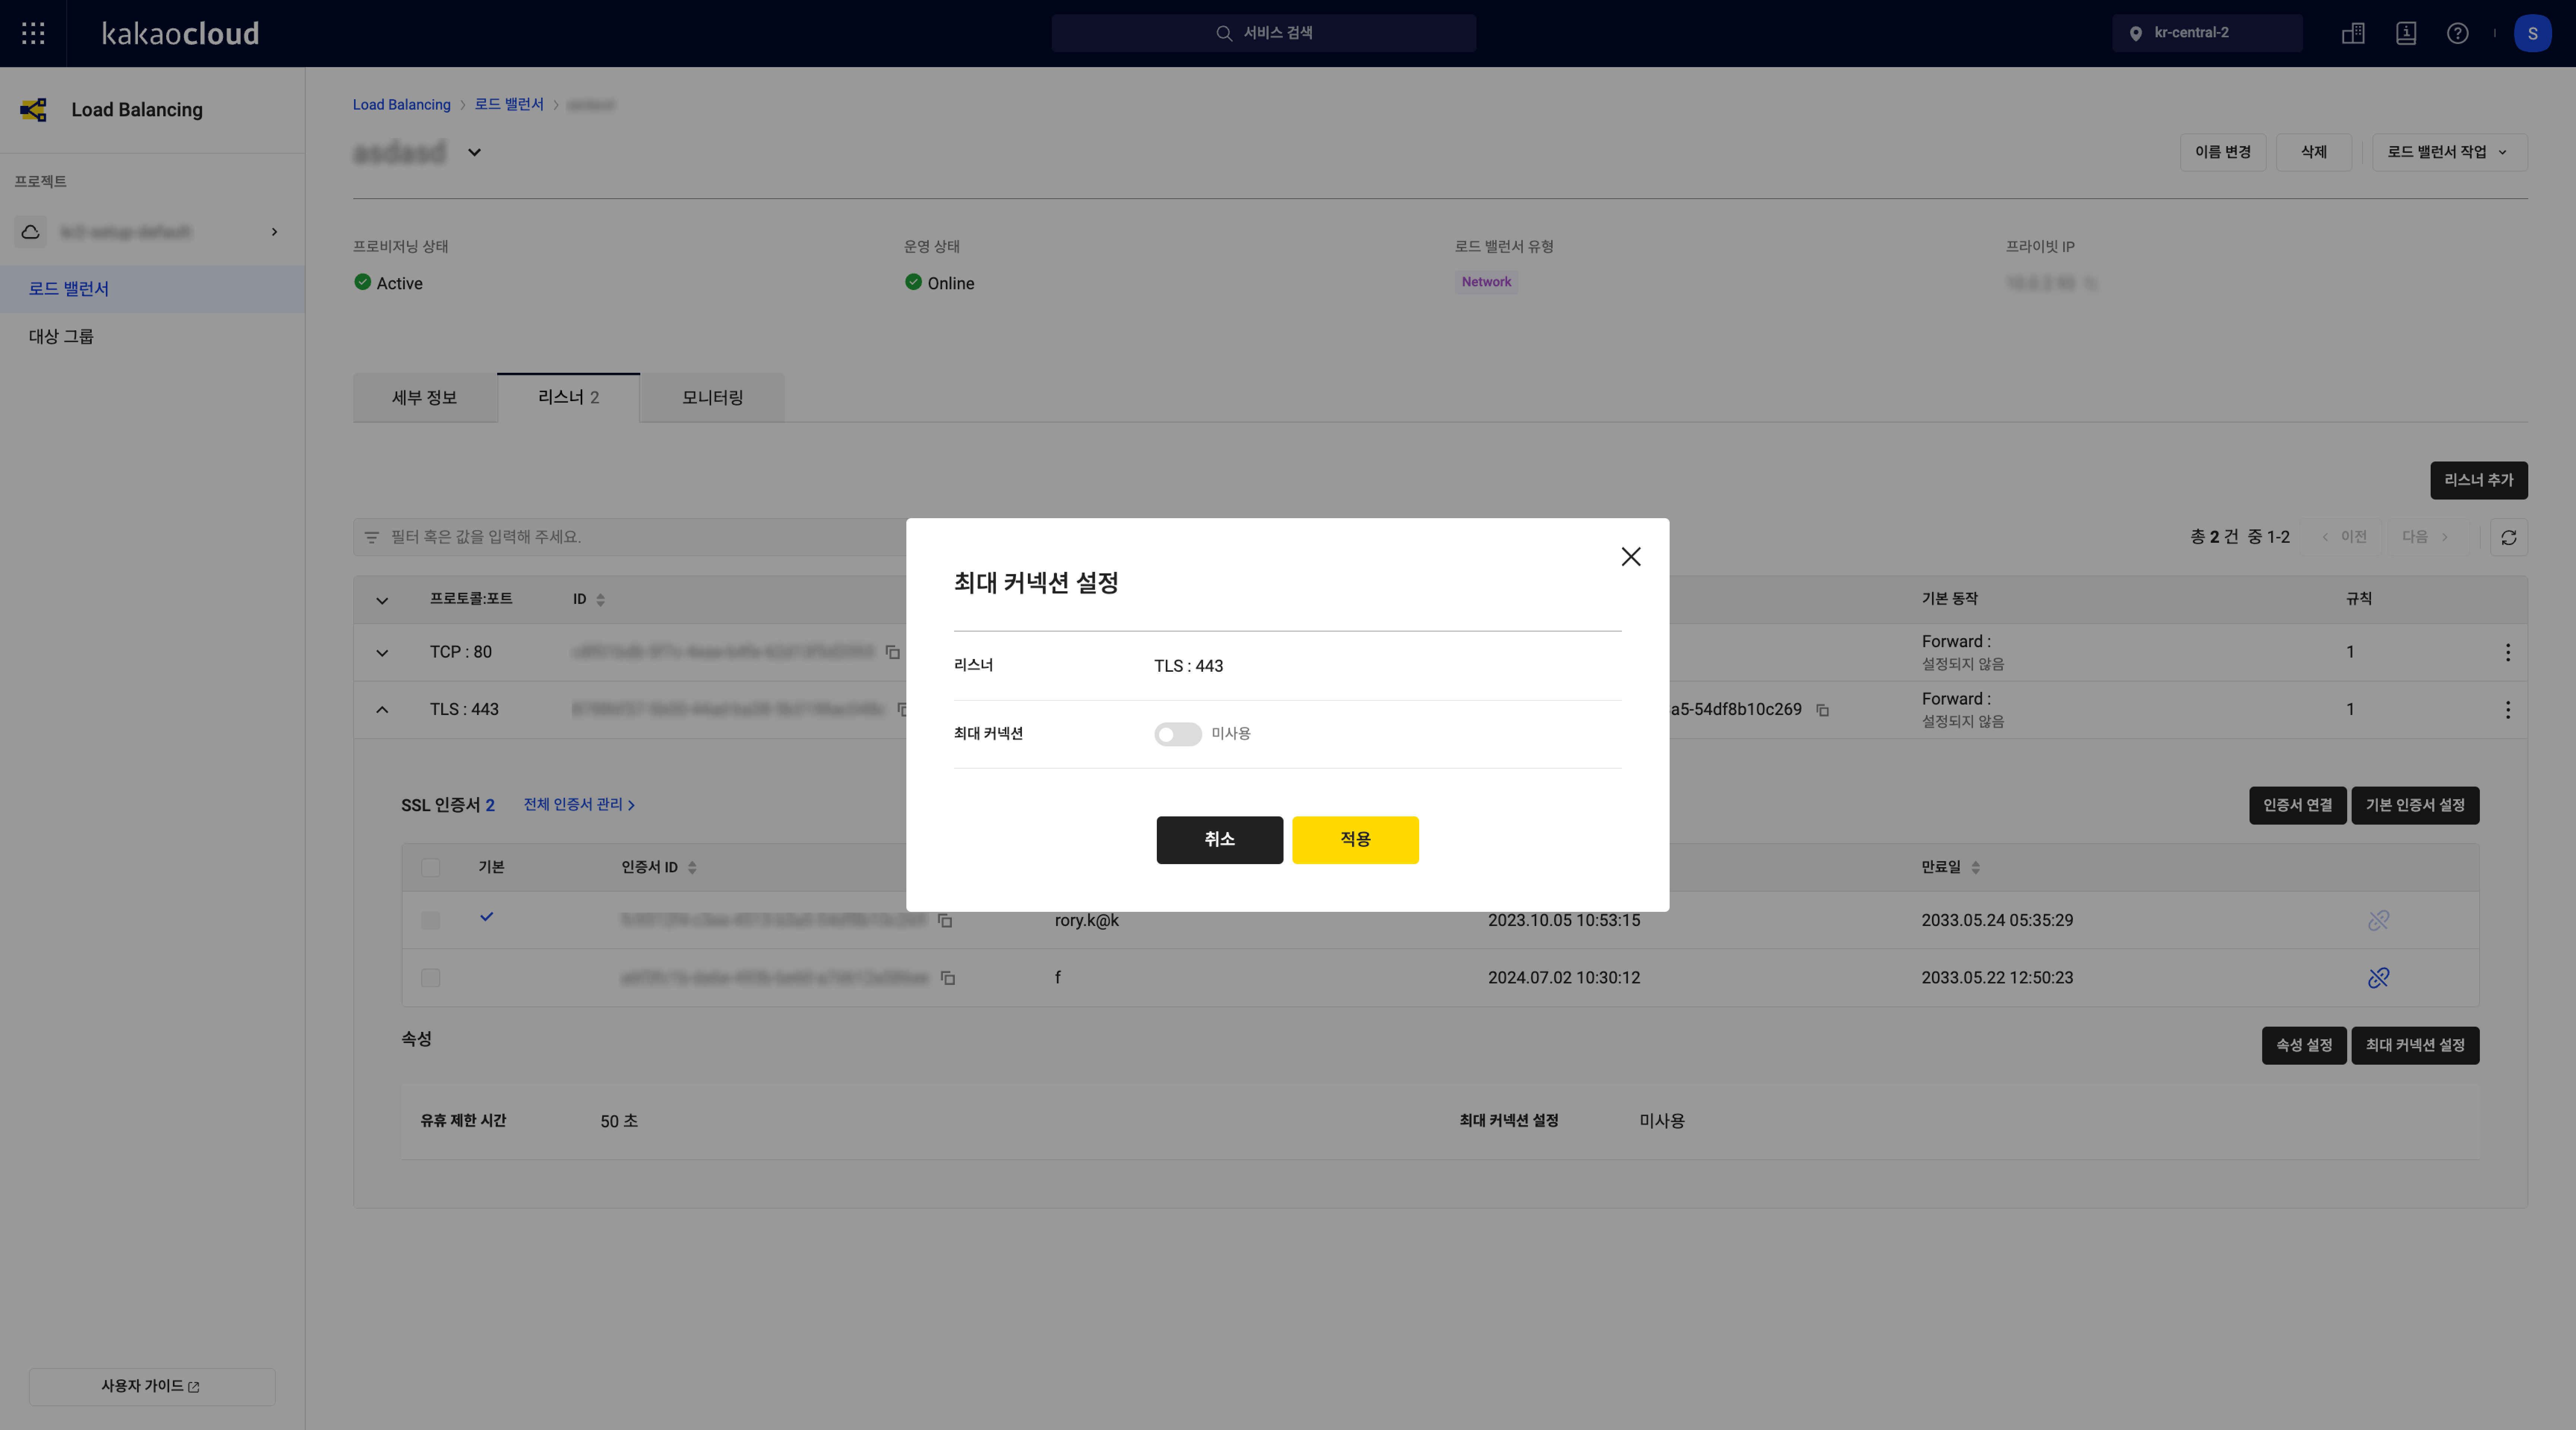 Set Maximum Connections for Listener
 -
Select [Apply].
Set idle timeout
-
Go to the KakaoCloud console > Beyond Networking Service > Load Balancing > Load Balancer menu.
-
Select the load balancer containing the listener you want to modify from the Load Balancer list.
-
Select the Listener tab, then select the listener for which you want to modify the idle timeout.
-
In the listener detailed view, select the [Set Properties] button at the top of the properties section.
-
In the Listener Properties popup, modify the Idle Timeout setting (1 to 4000 seconds, default is 50 seconds).
-
Select [Save].
Set minimum TLS version (TLS listeners only)
-
Go to the KakaoCloud console > Beyond Networking Service > Load Balancing > Load Balancer menu.
-
Select the load balancer containing the listener you want to modify from the Load Balancer list.
-
Select the Listener tab, then select the [More] icon for the listener whose minimum TLS version you want to change.
-
From the [More] menu, select Listener Settings.
-
From the Minimum TLS Version list, select the desired version, then select [Save].
Change Default Certificate from All Certificates (TLS listeners only)
-
Go to the KakaoCloud console > Beyond Networking Service > Load Balancing > Load Balancer menu.
-
Select the load balancer containing the listener you want to modify from the Load Balancer list.
-
In the load balancer detailed view, select the Listener tab, then select the [More] icon for the listener whose certificate you want to change.
-
From the [More] menu, select Listener Settings.
-
In the Listener Settings modal, select the certificate from the Default SSL Certificate list, then select [OK].
You cannot change the default certificate if no certificate is connected or if all connected certificates have been deleted. Please add a new certificate in the Certificate Manager and retry the action.
Connect Additional Certificates (TLS listeners only)
You can connect up to 5 additional certificates excluding the default certificate.
-
Go to the KakaoCloud console > Beyond Networking Service > Load Balancing > Load Balancer menu.
-
Select the load balancer containing the listener you want to modify from the Load Balancer list.
-
In the detailed view, select the Listener tab, then select the listener to which you want to add certificates.
-
Select the [Connect Certificate] button in the listener detailed view.
Option Description Select existing certificate Select the dropdown button and select an existing certificate Add new certificate 1. Select the dropdown button and select [Add New Certificate].
2. In the Add Certificate popup, enter the required information and select [Add].
3. From the SSL certificate list, select the added certificate.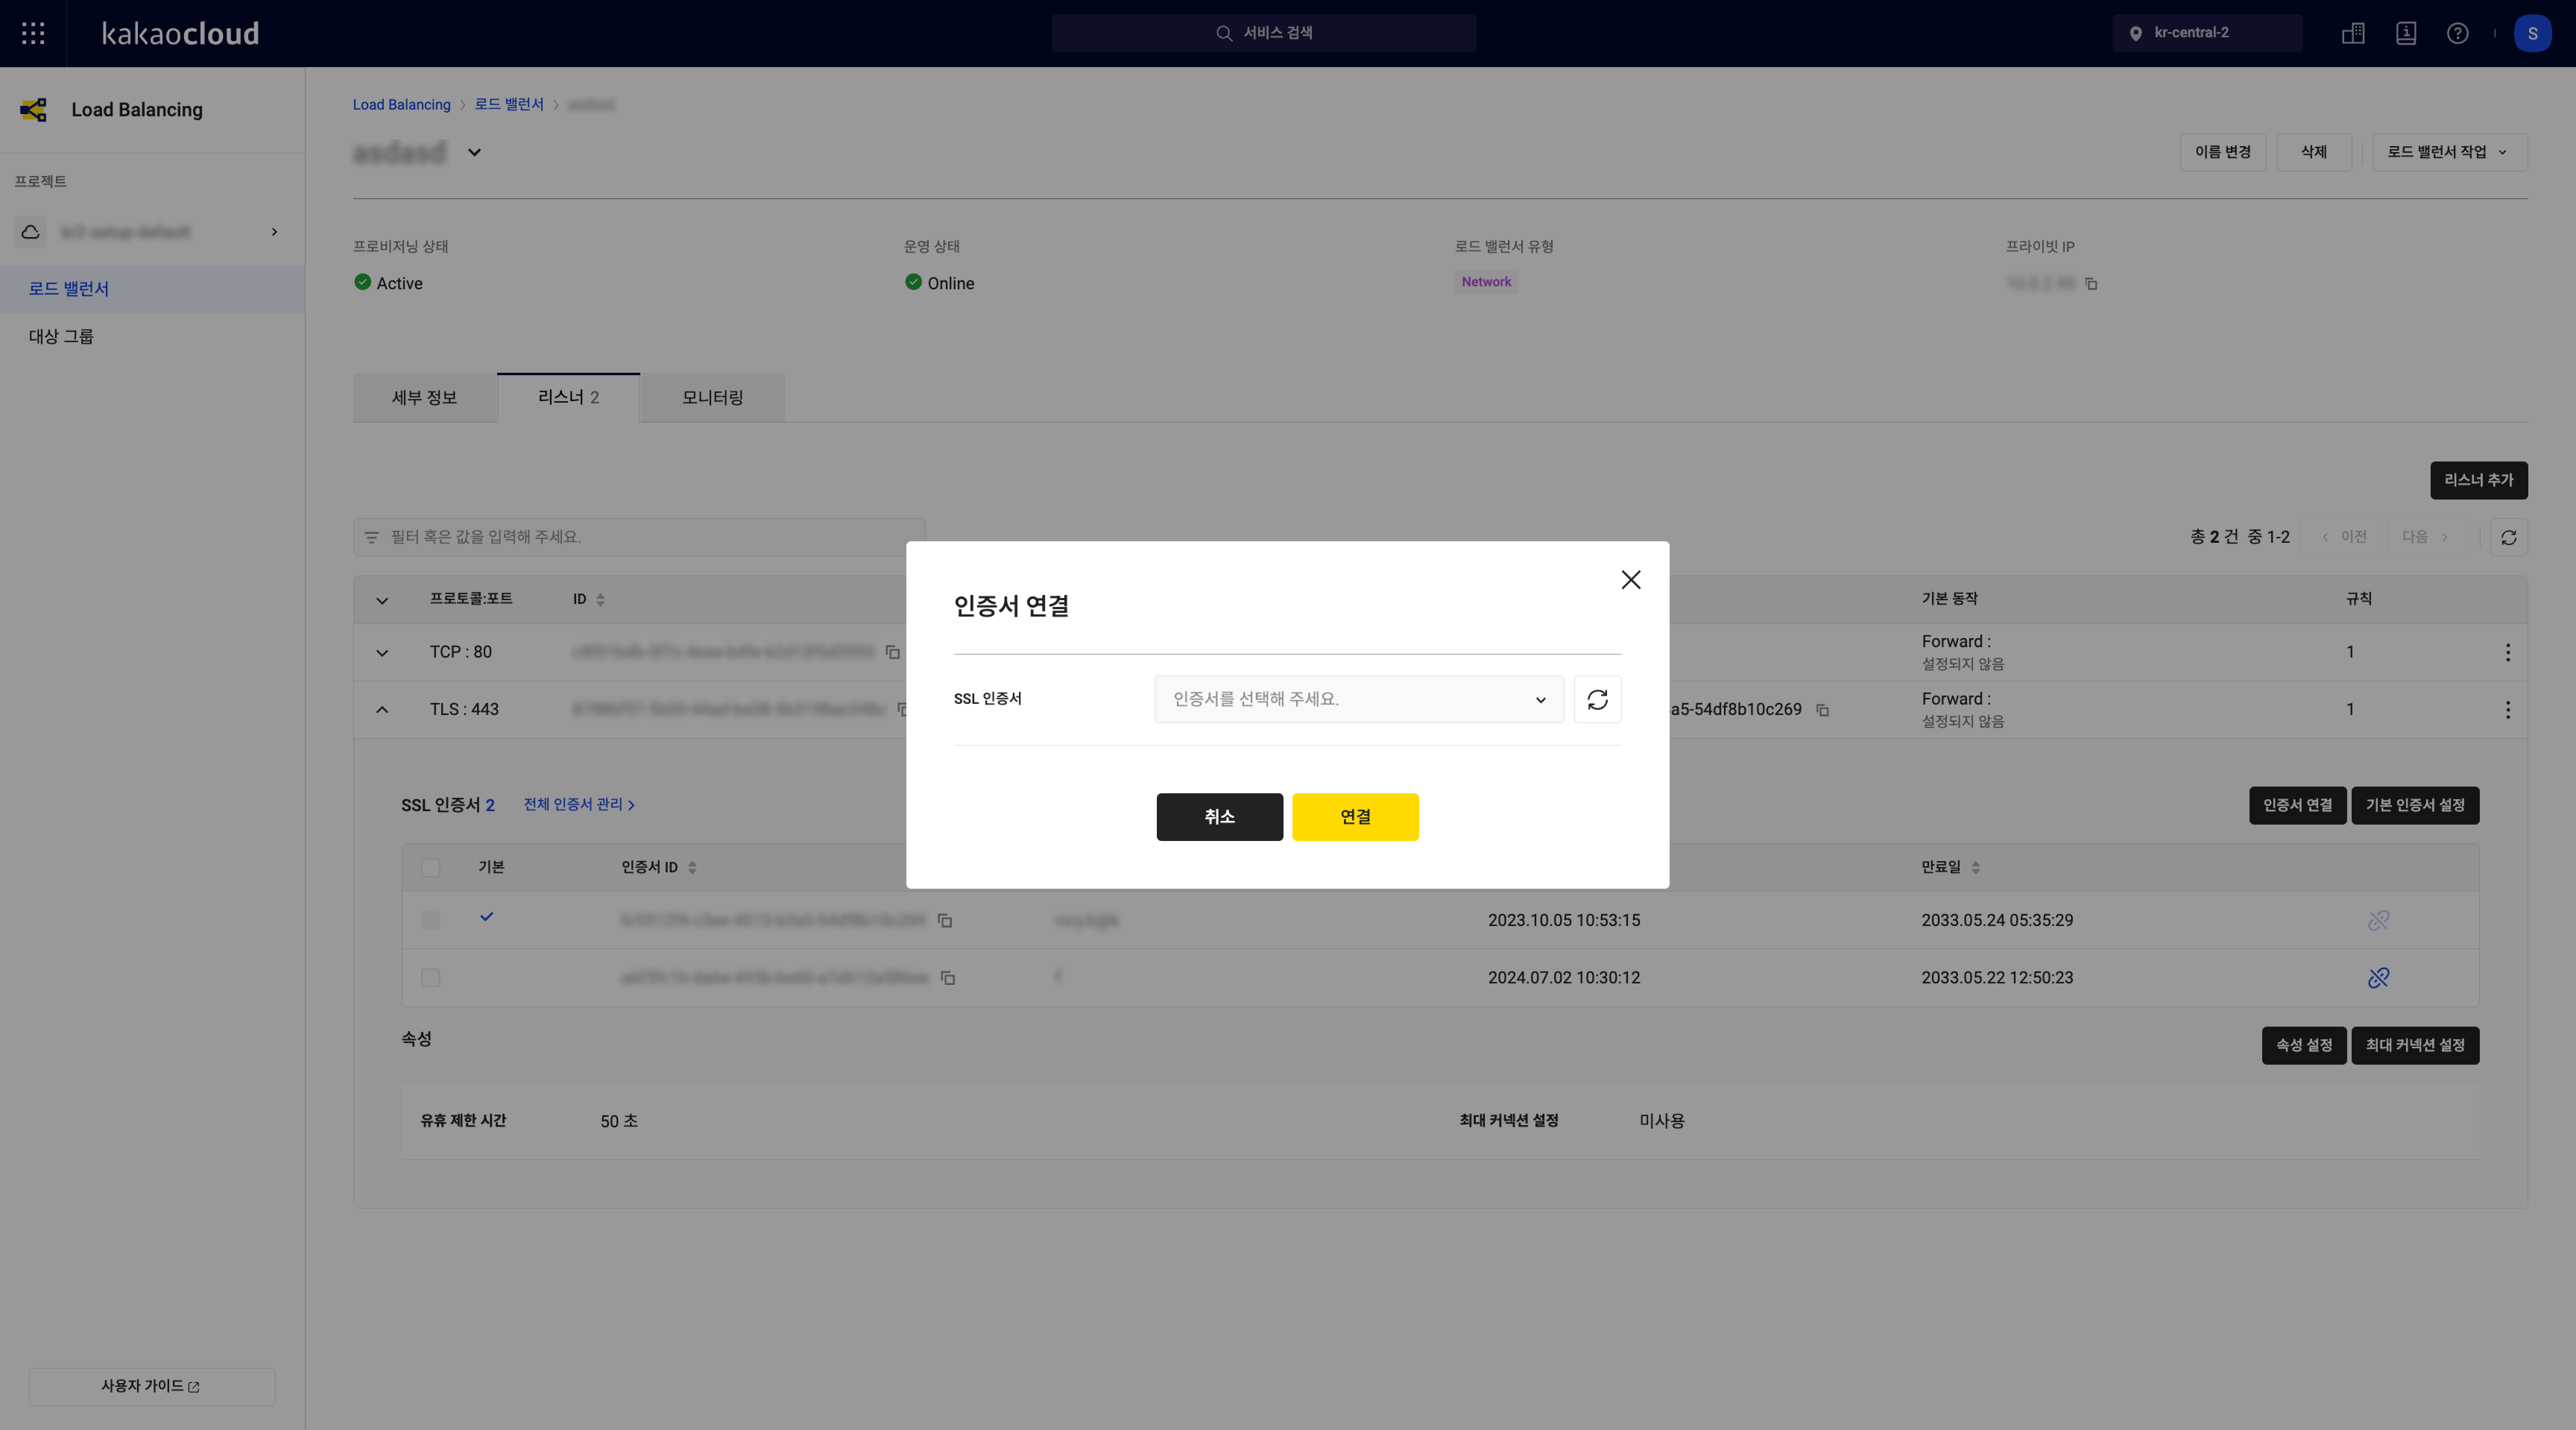 Connect Certificate to Listener
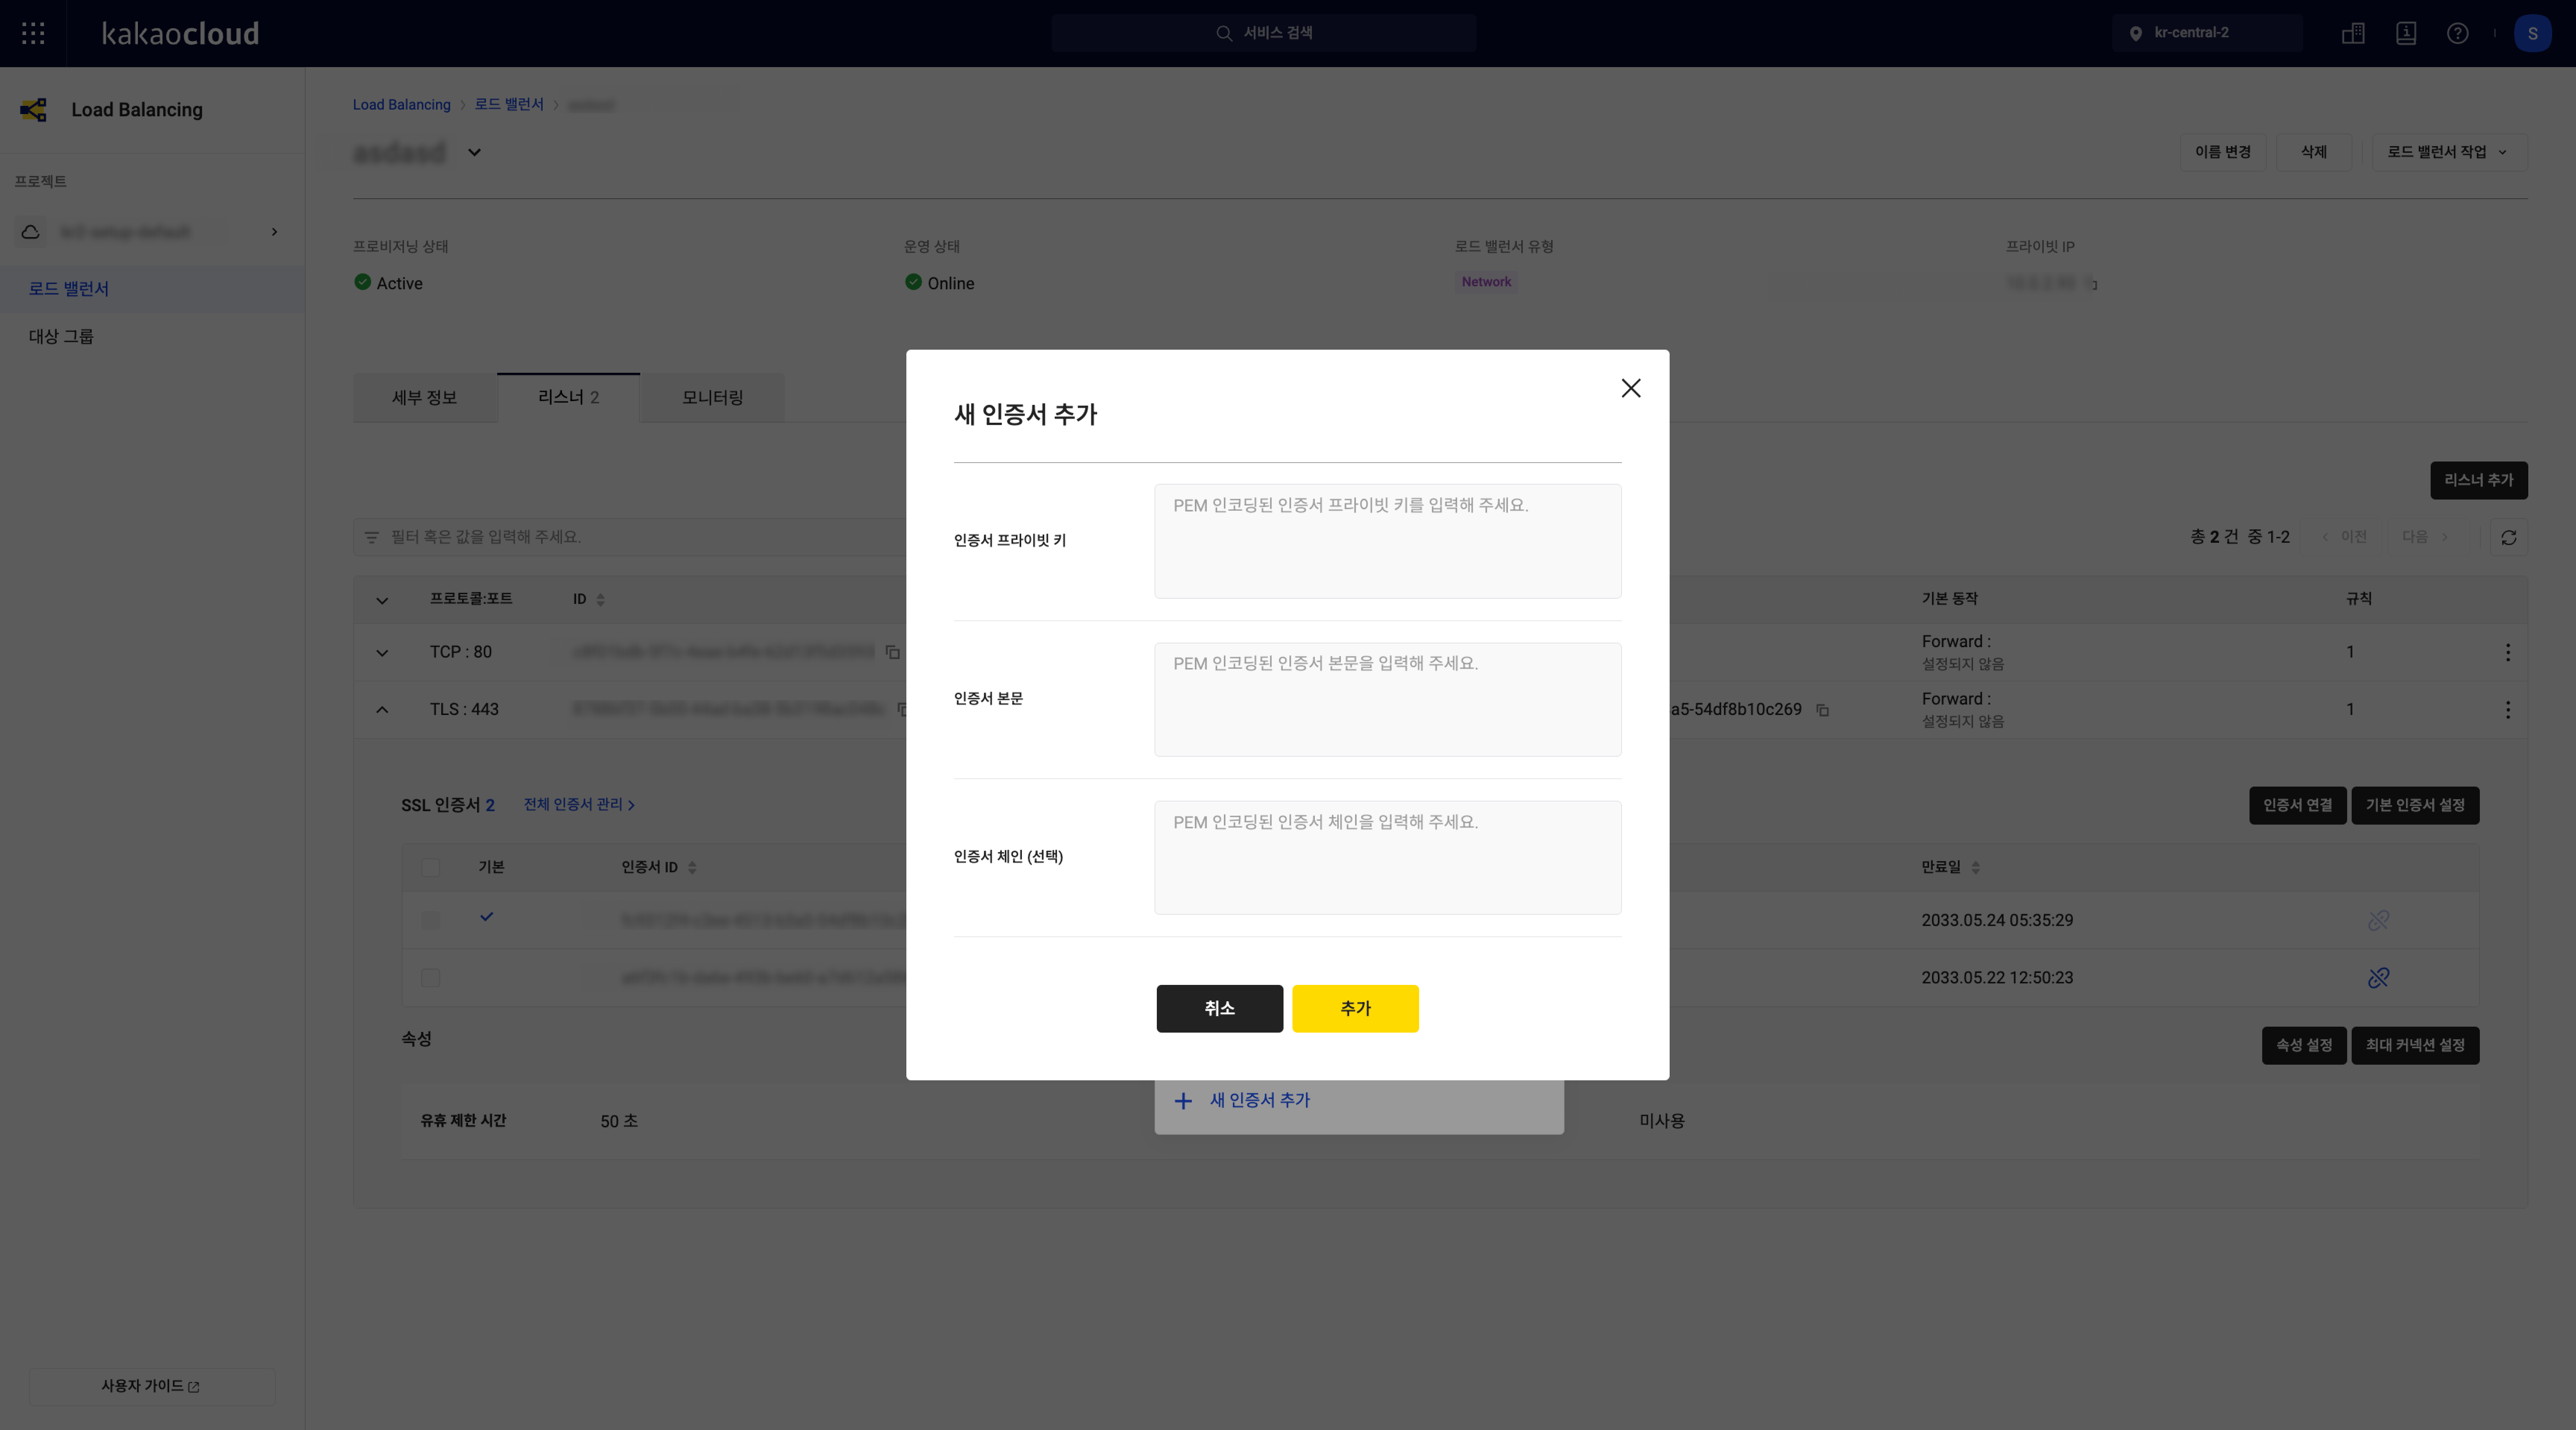 Add New Certificate
 -
In the Connect Certificate popup, select the SSL certificate you want to connect.
-
Select [Connect].
Disconnect Certificate (TLS listeners only)
You can disconnect certificates other than the default certificate.
-
Go to the KakaoCloud console > Beyond Networking Service > Load Balancing > Load Balancer menu.
-
Select the load balancer containing the listener you want to modify from the Load Balancer list.
-
In the detailed view, select the Listener tab, then select the [Expand] button next to the listener in the list at the bottom.
-
If two or more certificates are connected in the [SSL Certificates] list, the [Disconnect] button will appear in the top right corner. You can disconnect certificates other than the default one.
-
Check the checkboxes of the certificates you want to disconnect, then select [Disconnect].
-
In the Disconnect Certificate modal, select [Disconnect].
If any certificates have been deleted, check all certificates (except the default certificate) to disconnect them simultaneously.
Delete listener
-
Go to the KakaoCloud console > Beyond Networking Service > Load Balancing > Load Balancer menu.
-
Select the load balancer containing the listener you want to delete from the Load Balancer list.
-
Select the Listener tab.
-
Select the [More] icon for the listener you want to delete.
-
From the [More] menu, select Delete Listener.
-
In the Delete Listener popup, enter the confirmation phrase and select [Delete].