Create and manage route table
Here's how to create and manage route tables in the VPC service.
- VPC role management follows IAM role-based access control (RBAC), and only Project Admin can create and manage route tables. Other project members can only view route tables.
- For your IAM permissions by role, please contact your Org Admin.
Create route table
You can create a new route table.
-
Go to the KakaoCloud console > Beyond Networking Service > VPC menu.
-
Select the Route Table menu, then select the [Create Route Table] button.
-
In the Create Route Table popup, enter the information and select [Create].
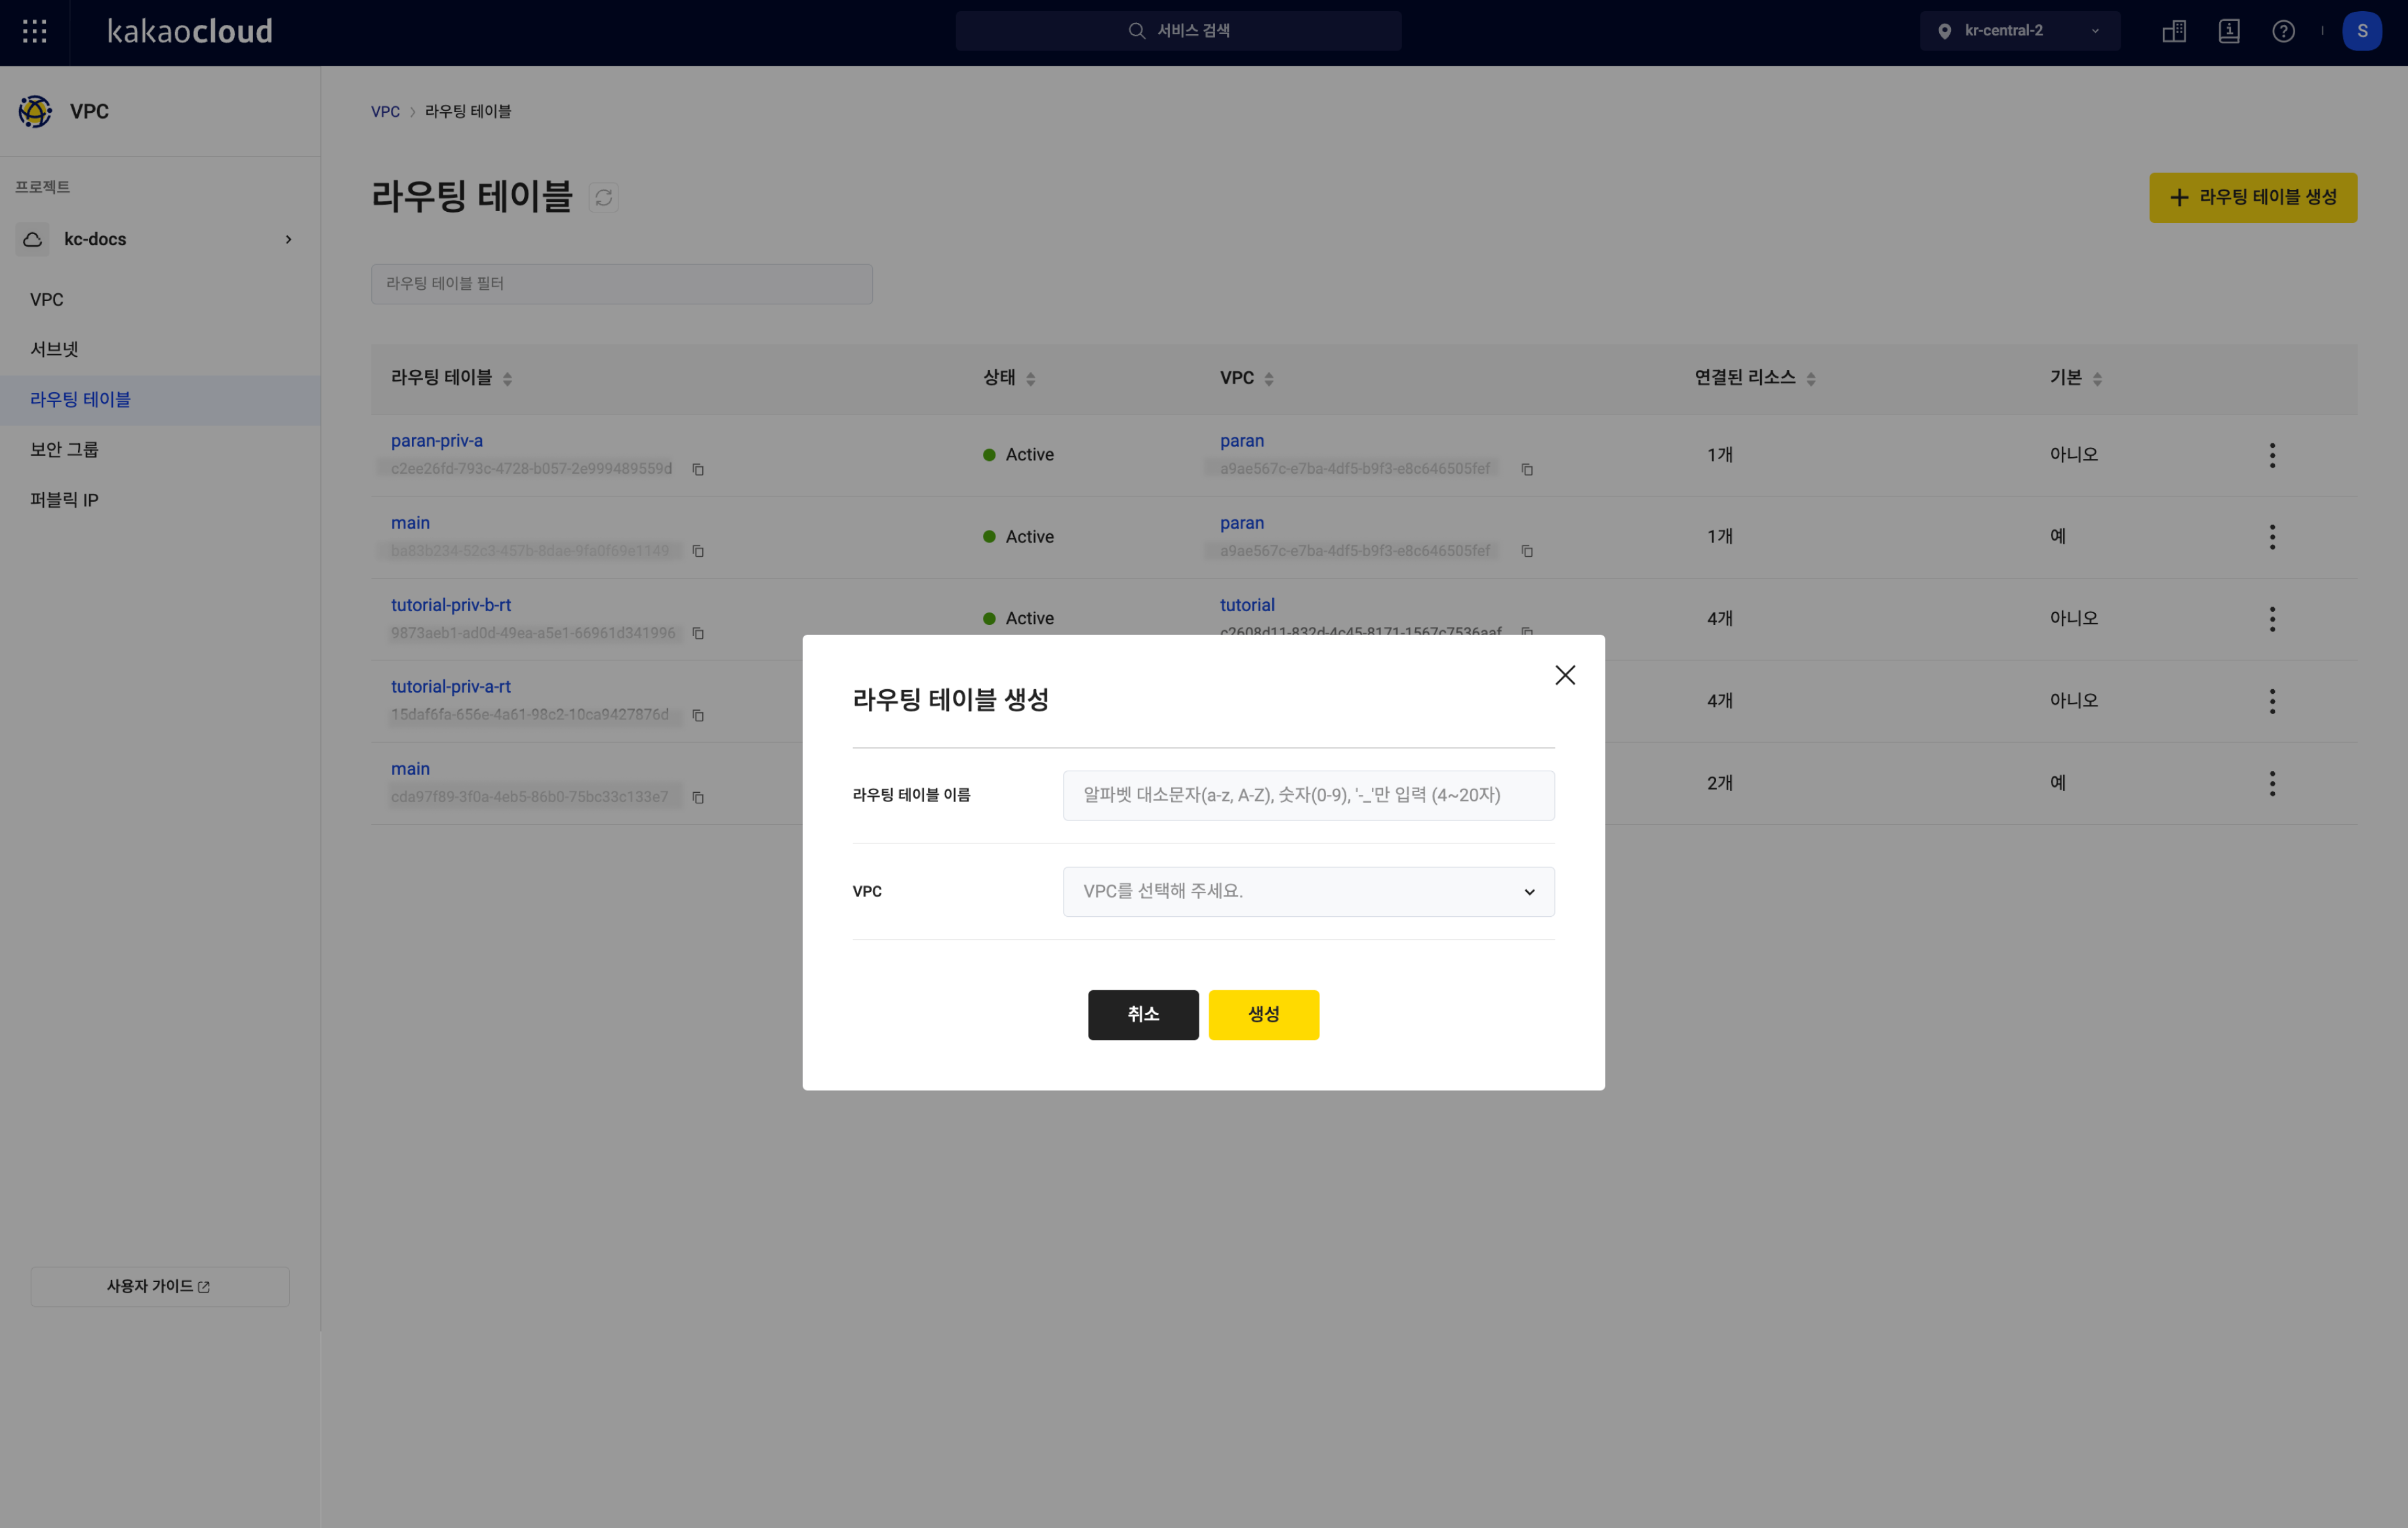
Item Description Route Table Name Enter the name for the new route table VPC Select the VPC where the route table will be located
Manage route tables
- When modifying or adding routes, instances with more than two network interfaces cannot be specified as the destination in the route table. Future support for destination configuration on a per-network interface basis will be available.
View route table list
You can view the list of currently created route tables and their details.
-
Go to the KakaoCloud console > Beyond Networking Service > VPC menu.
-
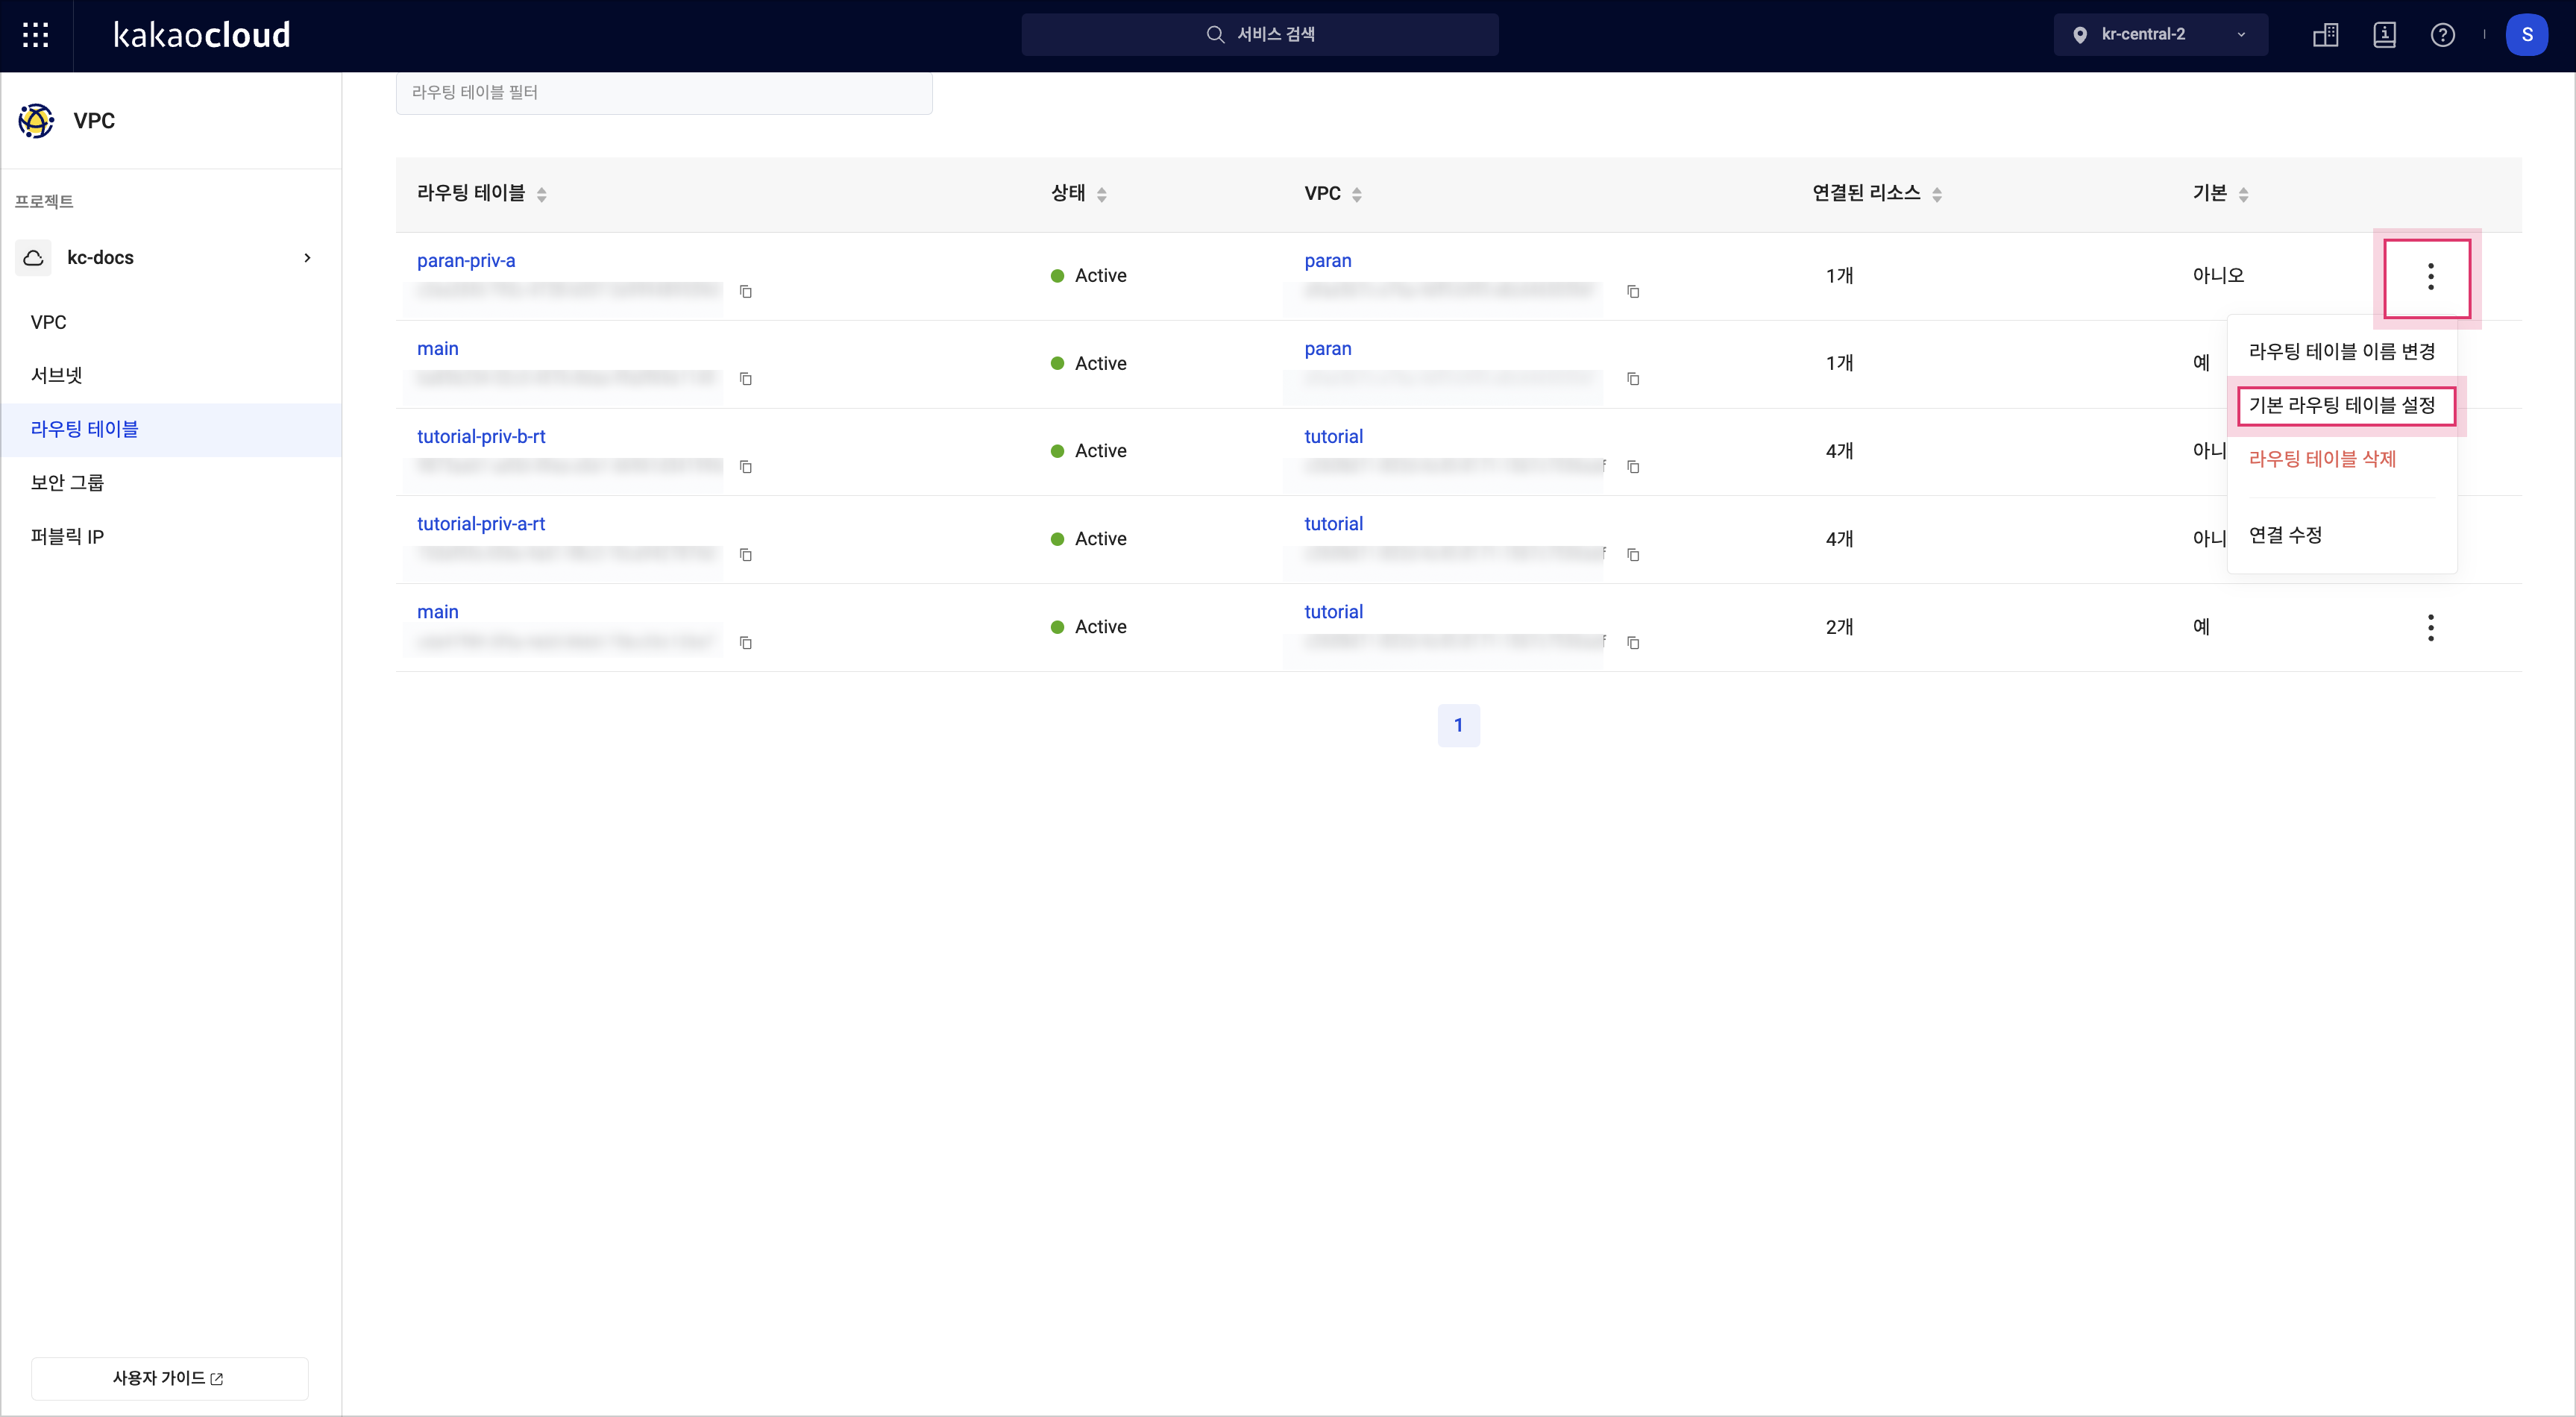
Select the Route Table menu, then view the list of currently created route tables.
Item Description Route Table The name and ID of the created route table Status The status of the route table VPC The name of the VPC where the route table is located Connected Subnets Information on subnets connected to the route table Default Whether it is the default route table
- Yes: The route table created automatically with the VPC (cannot be deleted)
- No: The route table created by the user (can be deleted)[More Options] Icon Rename Route Table: Rename the route table
Set as Default Route Table: Set this route table as the default
Delete Route Table: Delete Route Table reference
Edit Association: Modify the subnet association for this route table -
Select the route table whose details you want to view, and check the information on the route table detail page.
Rename route table
You can rename the route table.
- Go to the KakaoCloud console > Beyond Networking Service > VPC menu.
- Select the Route Table menu, then select the [More Options] icon for the route table you want to rename > Rename Route Table.
- In the Rename Route Table popup, enter the information and select [Apply].
Set default route table
You can set the route table as the default route table.
-
Go to the KakaoCloud console > Beyond Networking Service > VPC menu.
-
Select the Route Table menu, then select the [More Options] icon for the route table you want to set as the default > Set as Default Route Table.
-
In the Set Default Route Table popup, enter the information and select [Apply].
Manage connected subnets
The feature to manage connected subnets for route tables will be supported in a future release.
Modify association
You can modify the subnet associations to the route table.
-
Go to the KakaoCloud console > Beyond Networking Service > VPC menu.
-
Select the Route Table menu, then select the route table for managing the connected subnets.
-
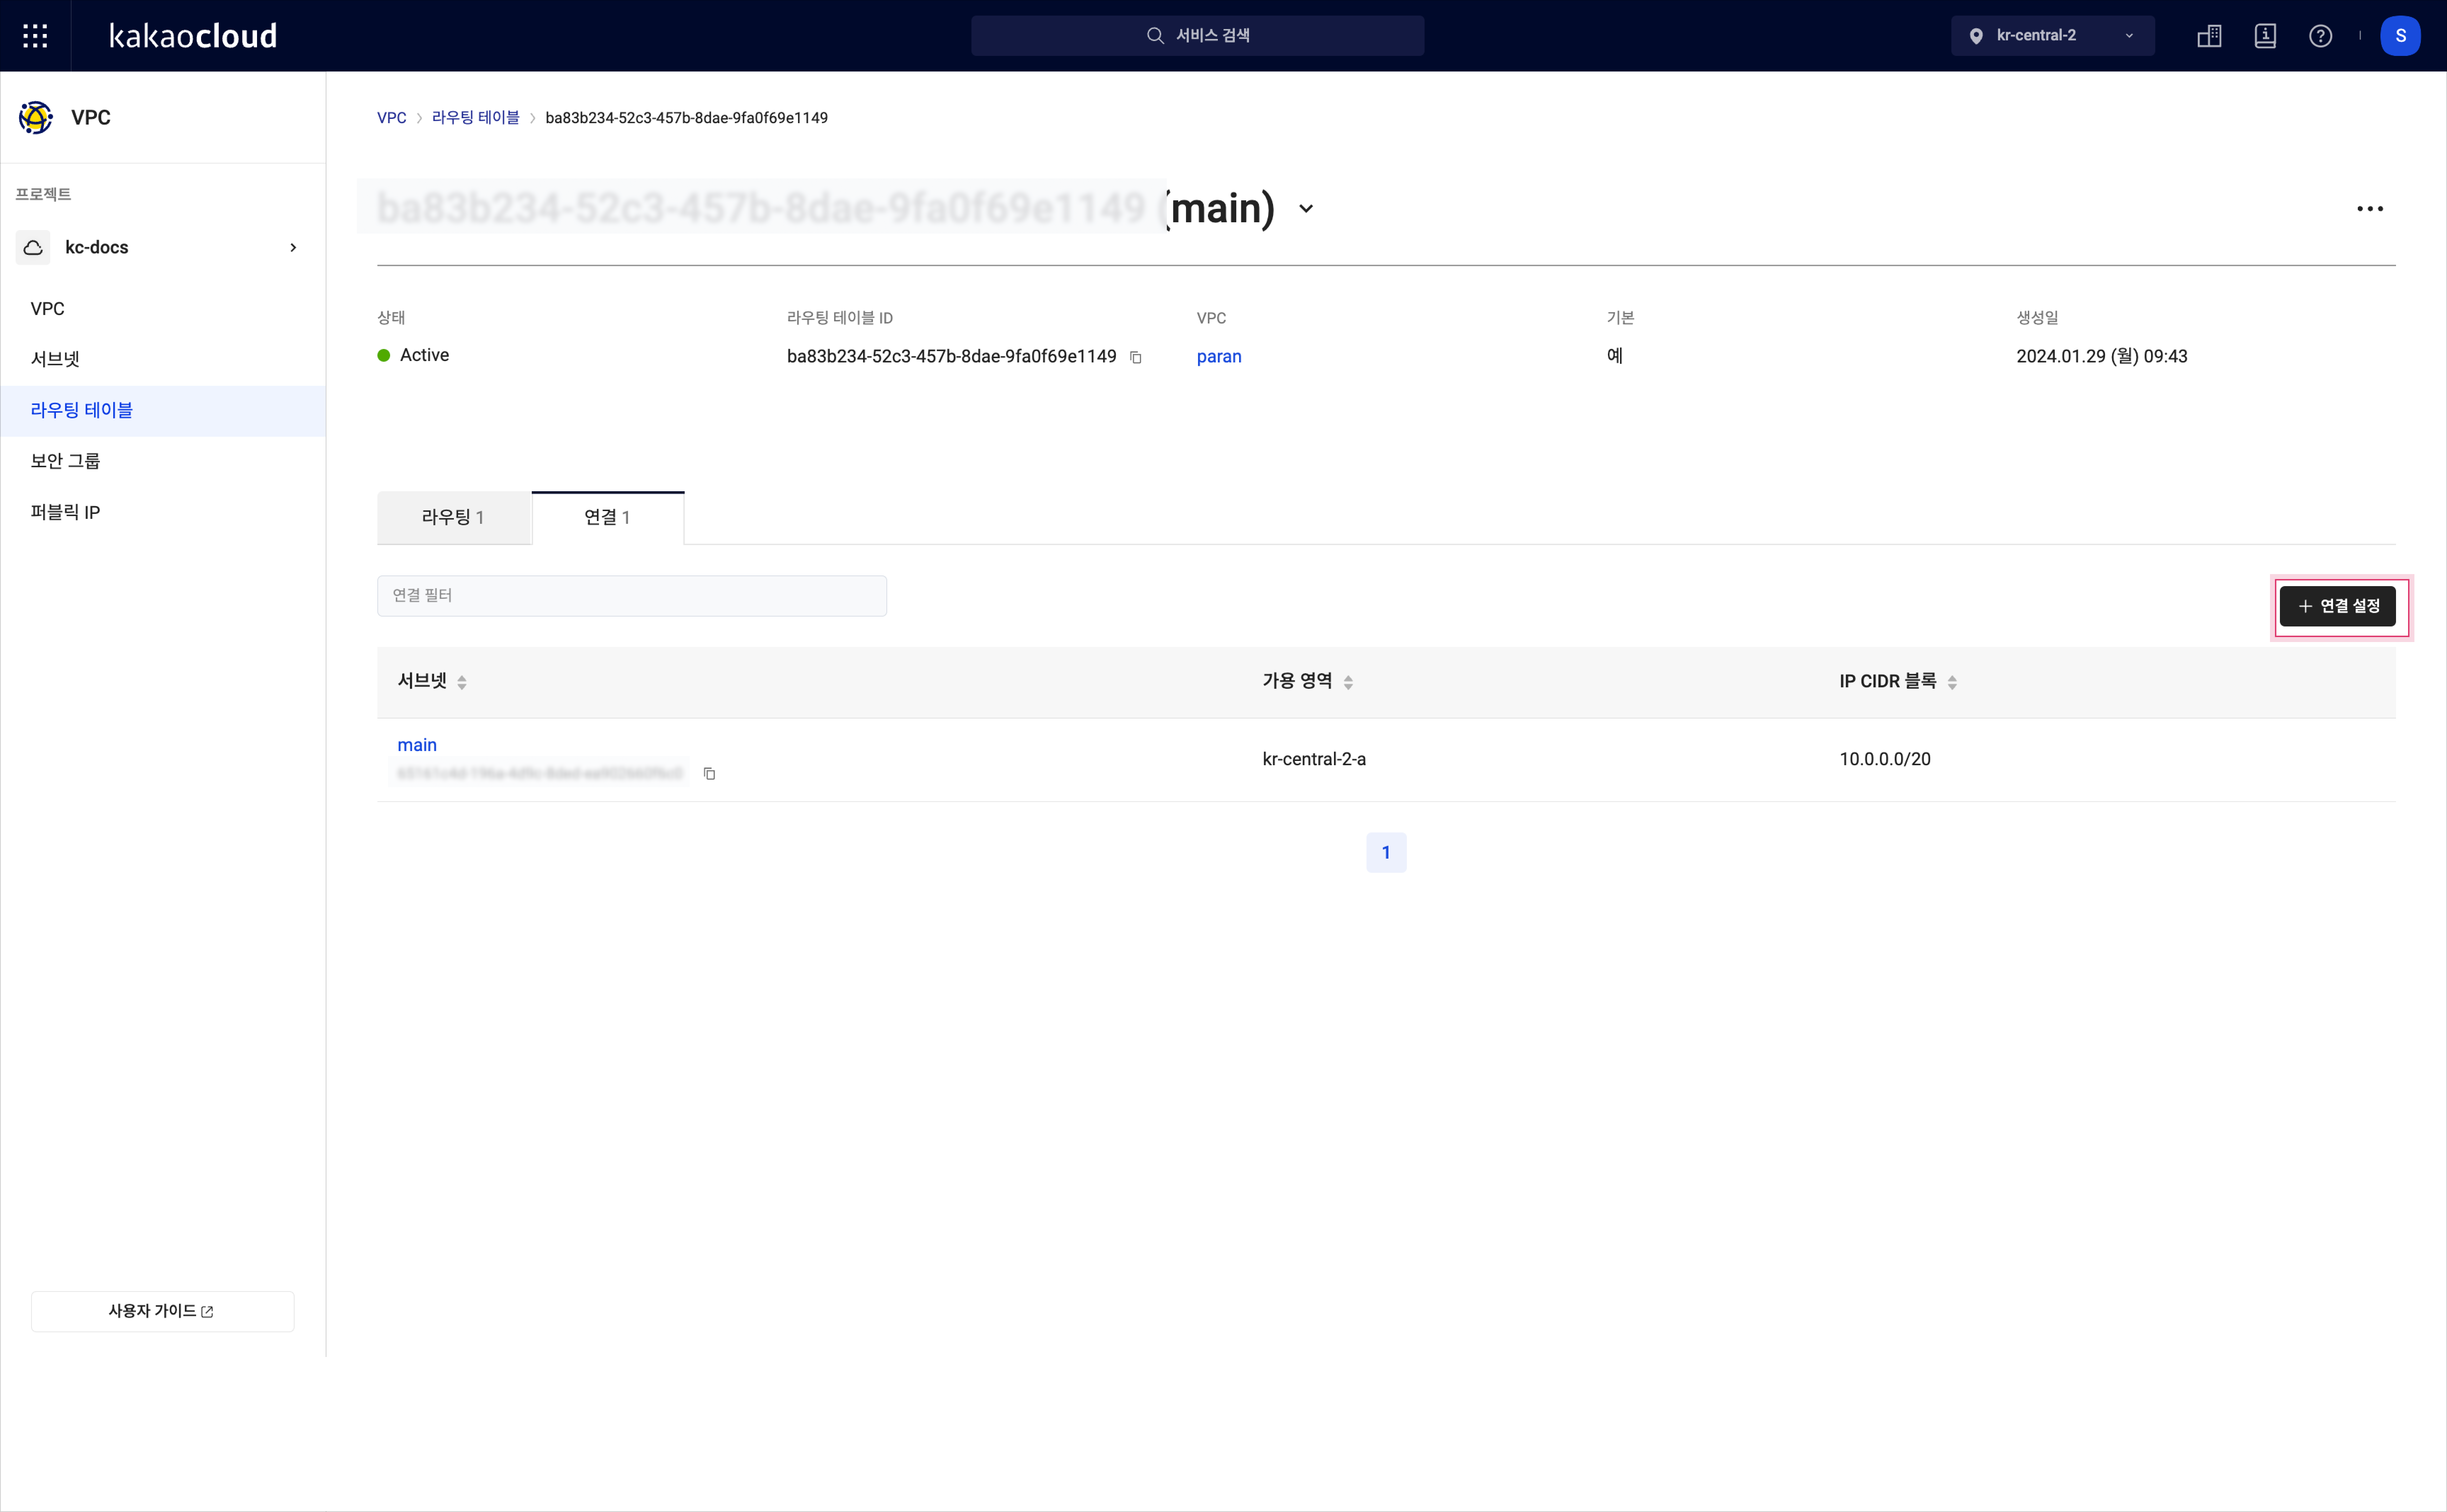
On the route table detail page, select the Association tab and then select the [Edit Association] button.
 Manage Connected Subnets
 -
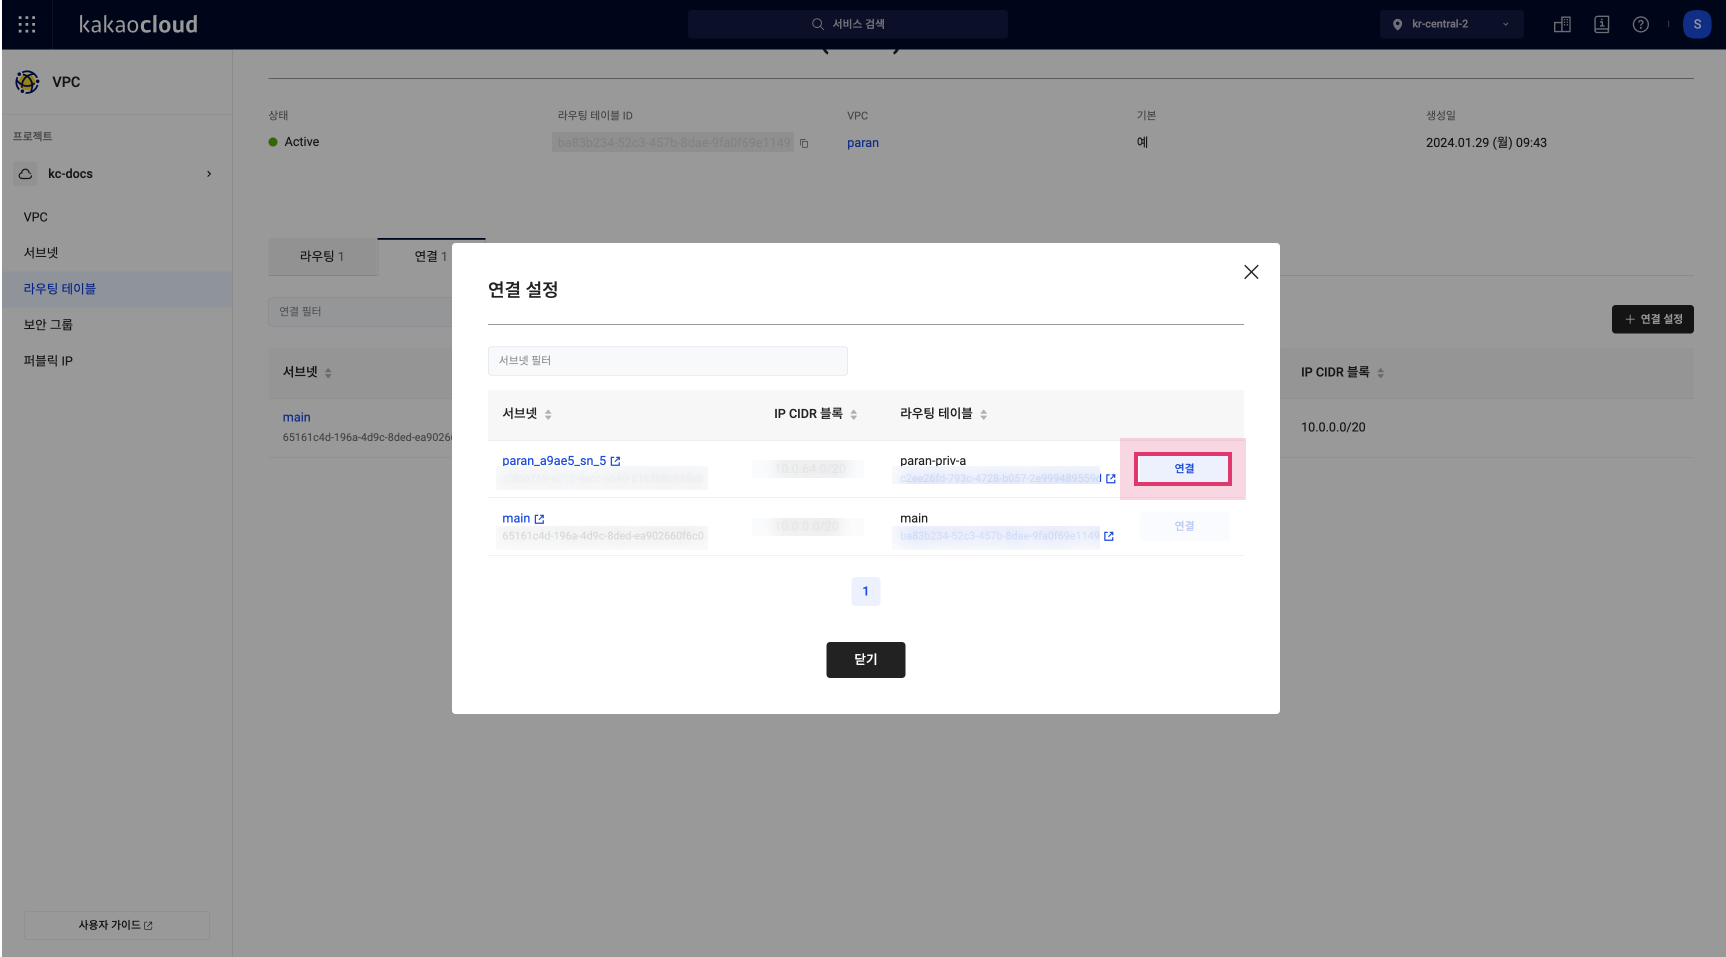
In the Edit Association popup, you can manage the connected subnets.
- If you need to associate a subnet, select [Connect] to associate it with the route table.
 Manage Connected Subnets Popup
Item Description Subnet The name of the subnet created in the VPC IP CIDR Block The IP CIDR block information for the subnet Route Table The route table connected to the subnet
- If you need to associate the subnet, select [Connect] to associate it with the selected route table.
- When associating, the subnet’s communication route changes based on the routing information, so verify the routing status in advance.
- [Connect] Button Active: The subnet is connected to another route table.
- [Connect] Button Inactive: The subnet is connected to this route table.
Delete route table
You can delete a route table that is no longer in use.
Before deleting a route table, ensure that all resources using the route table are deleted. The Default: Yes route table cannot be deleted and will be deleted when the VPC resource is deleted.
- Go to the KakaoCloud console > Beyond Networking Service > VPC menu.
- Select the [More Options] icon for the route table you want to delete > Delete Route Table.
- In the Delete Route Table popup, enter the name of the route table to delete and select [Delete].
Add new route
You can add a new route to the route table.
-
Go to the KakaoCloud console > Beyond Networking Service > VPC menu.
-
Select the Route Table menu, then select the route table where you want to add the route.
-
On the route table detail page, select the Routing tab, then select the [Add Route] button.
-
In the Add Route popup, enter the necessary information and select [Add].
- To use a NAT instance, set the route destination to Instance. For more details, refer to the Using NAT Instance.
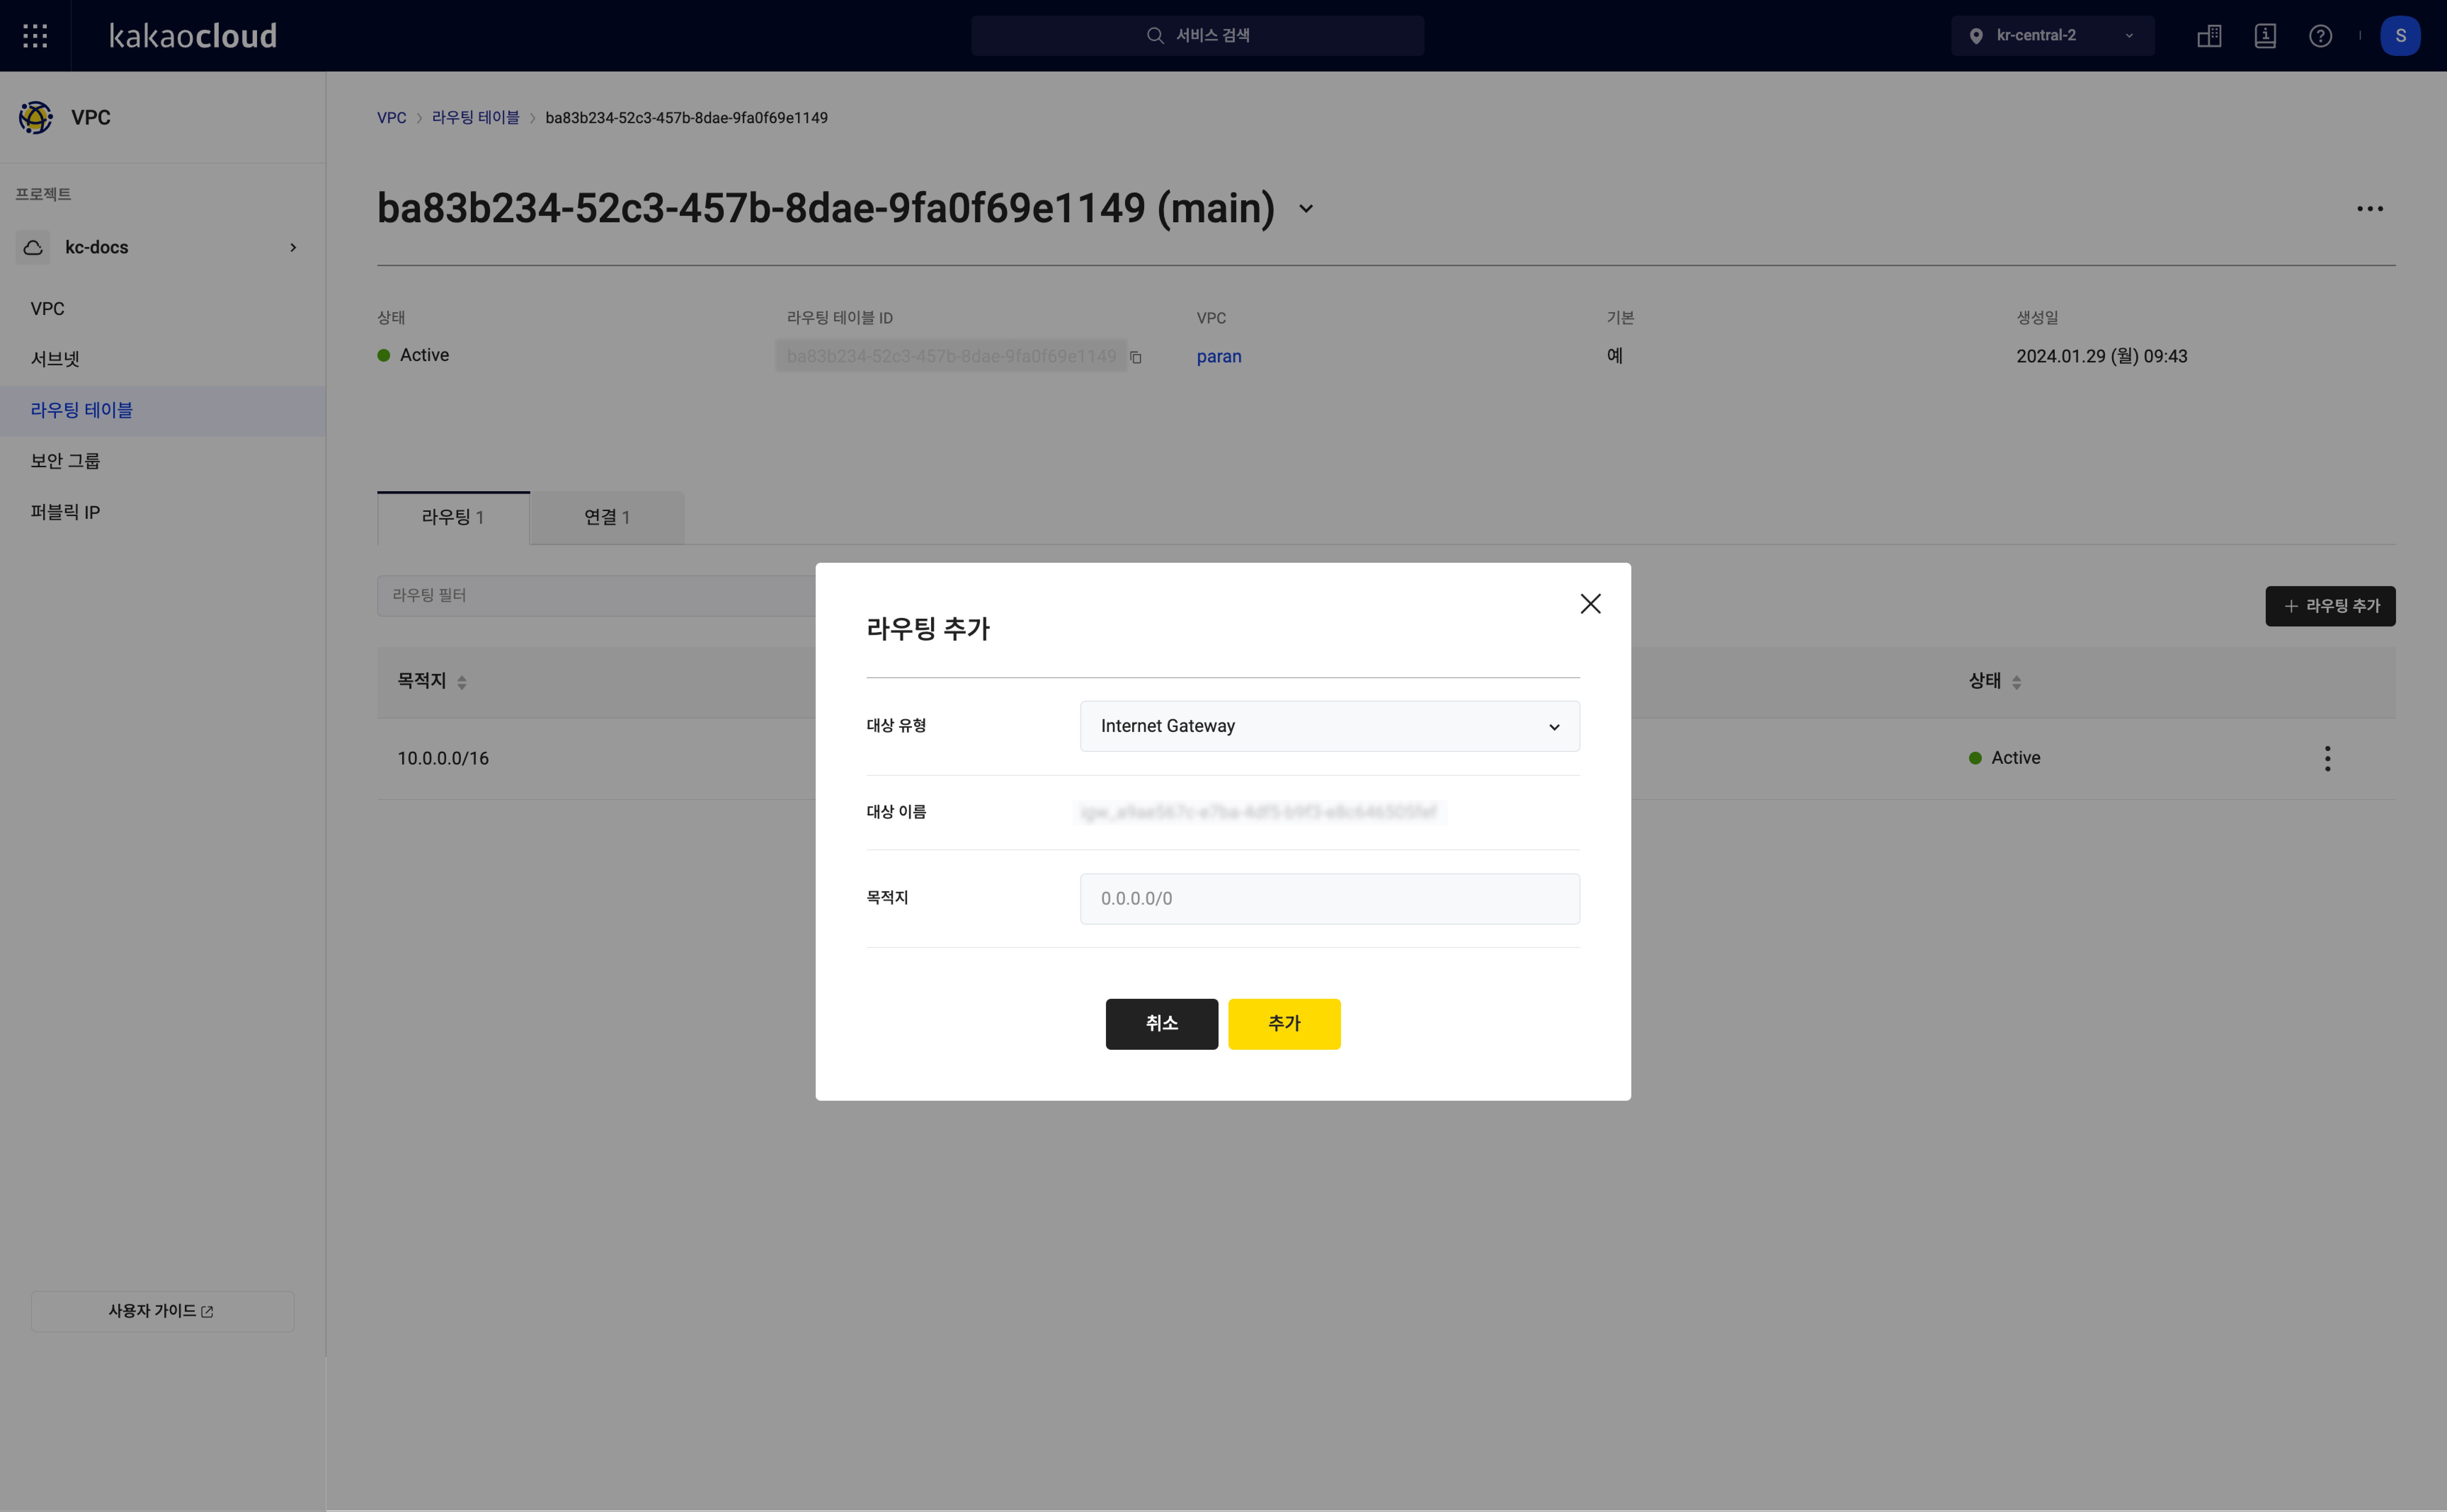 Add Route Popup
Item Description Destination Type The type of destination where the traffic will pass through to reach the destination IP
- Local: To communicate within the VPC network (Destination IP: VPC CIDR IP)
- Internet Gateway: To communicate with the internet (Destination IP: VPC CIDR IP or other IPs)
- Instance: To send traffic to a VM instance (Destination IP: VPC CIDR IP or other IPs)
- Transit Gateway: To send traffic to a Transit Gateway (Destination IP: VPC CIDR IP or other IPs)Destination Name The resource name for the selected destination type Destination IP Enter the destination IP in CIDR block format
Manage route
You can manage the routes within the route table.
When adding, modifying, or deleting routes, the communication paths for the connected subnets in the route table will change. Please verify the subnet connection status before managing the route table.
View routes
You can view the list of routes and their details in the route table.
-
Go to the KakaoCloud console > Beyond Networking Service > VPC menu.
-
Select the Route Table menu, then select the route table where you want to view the routes.
-
On the route table detail page, select the Routing tab to view the created routes.
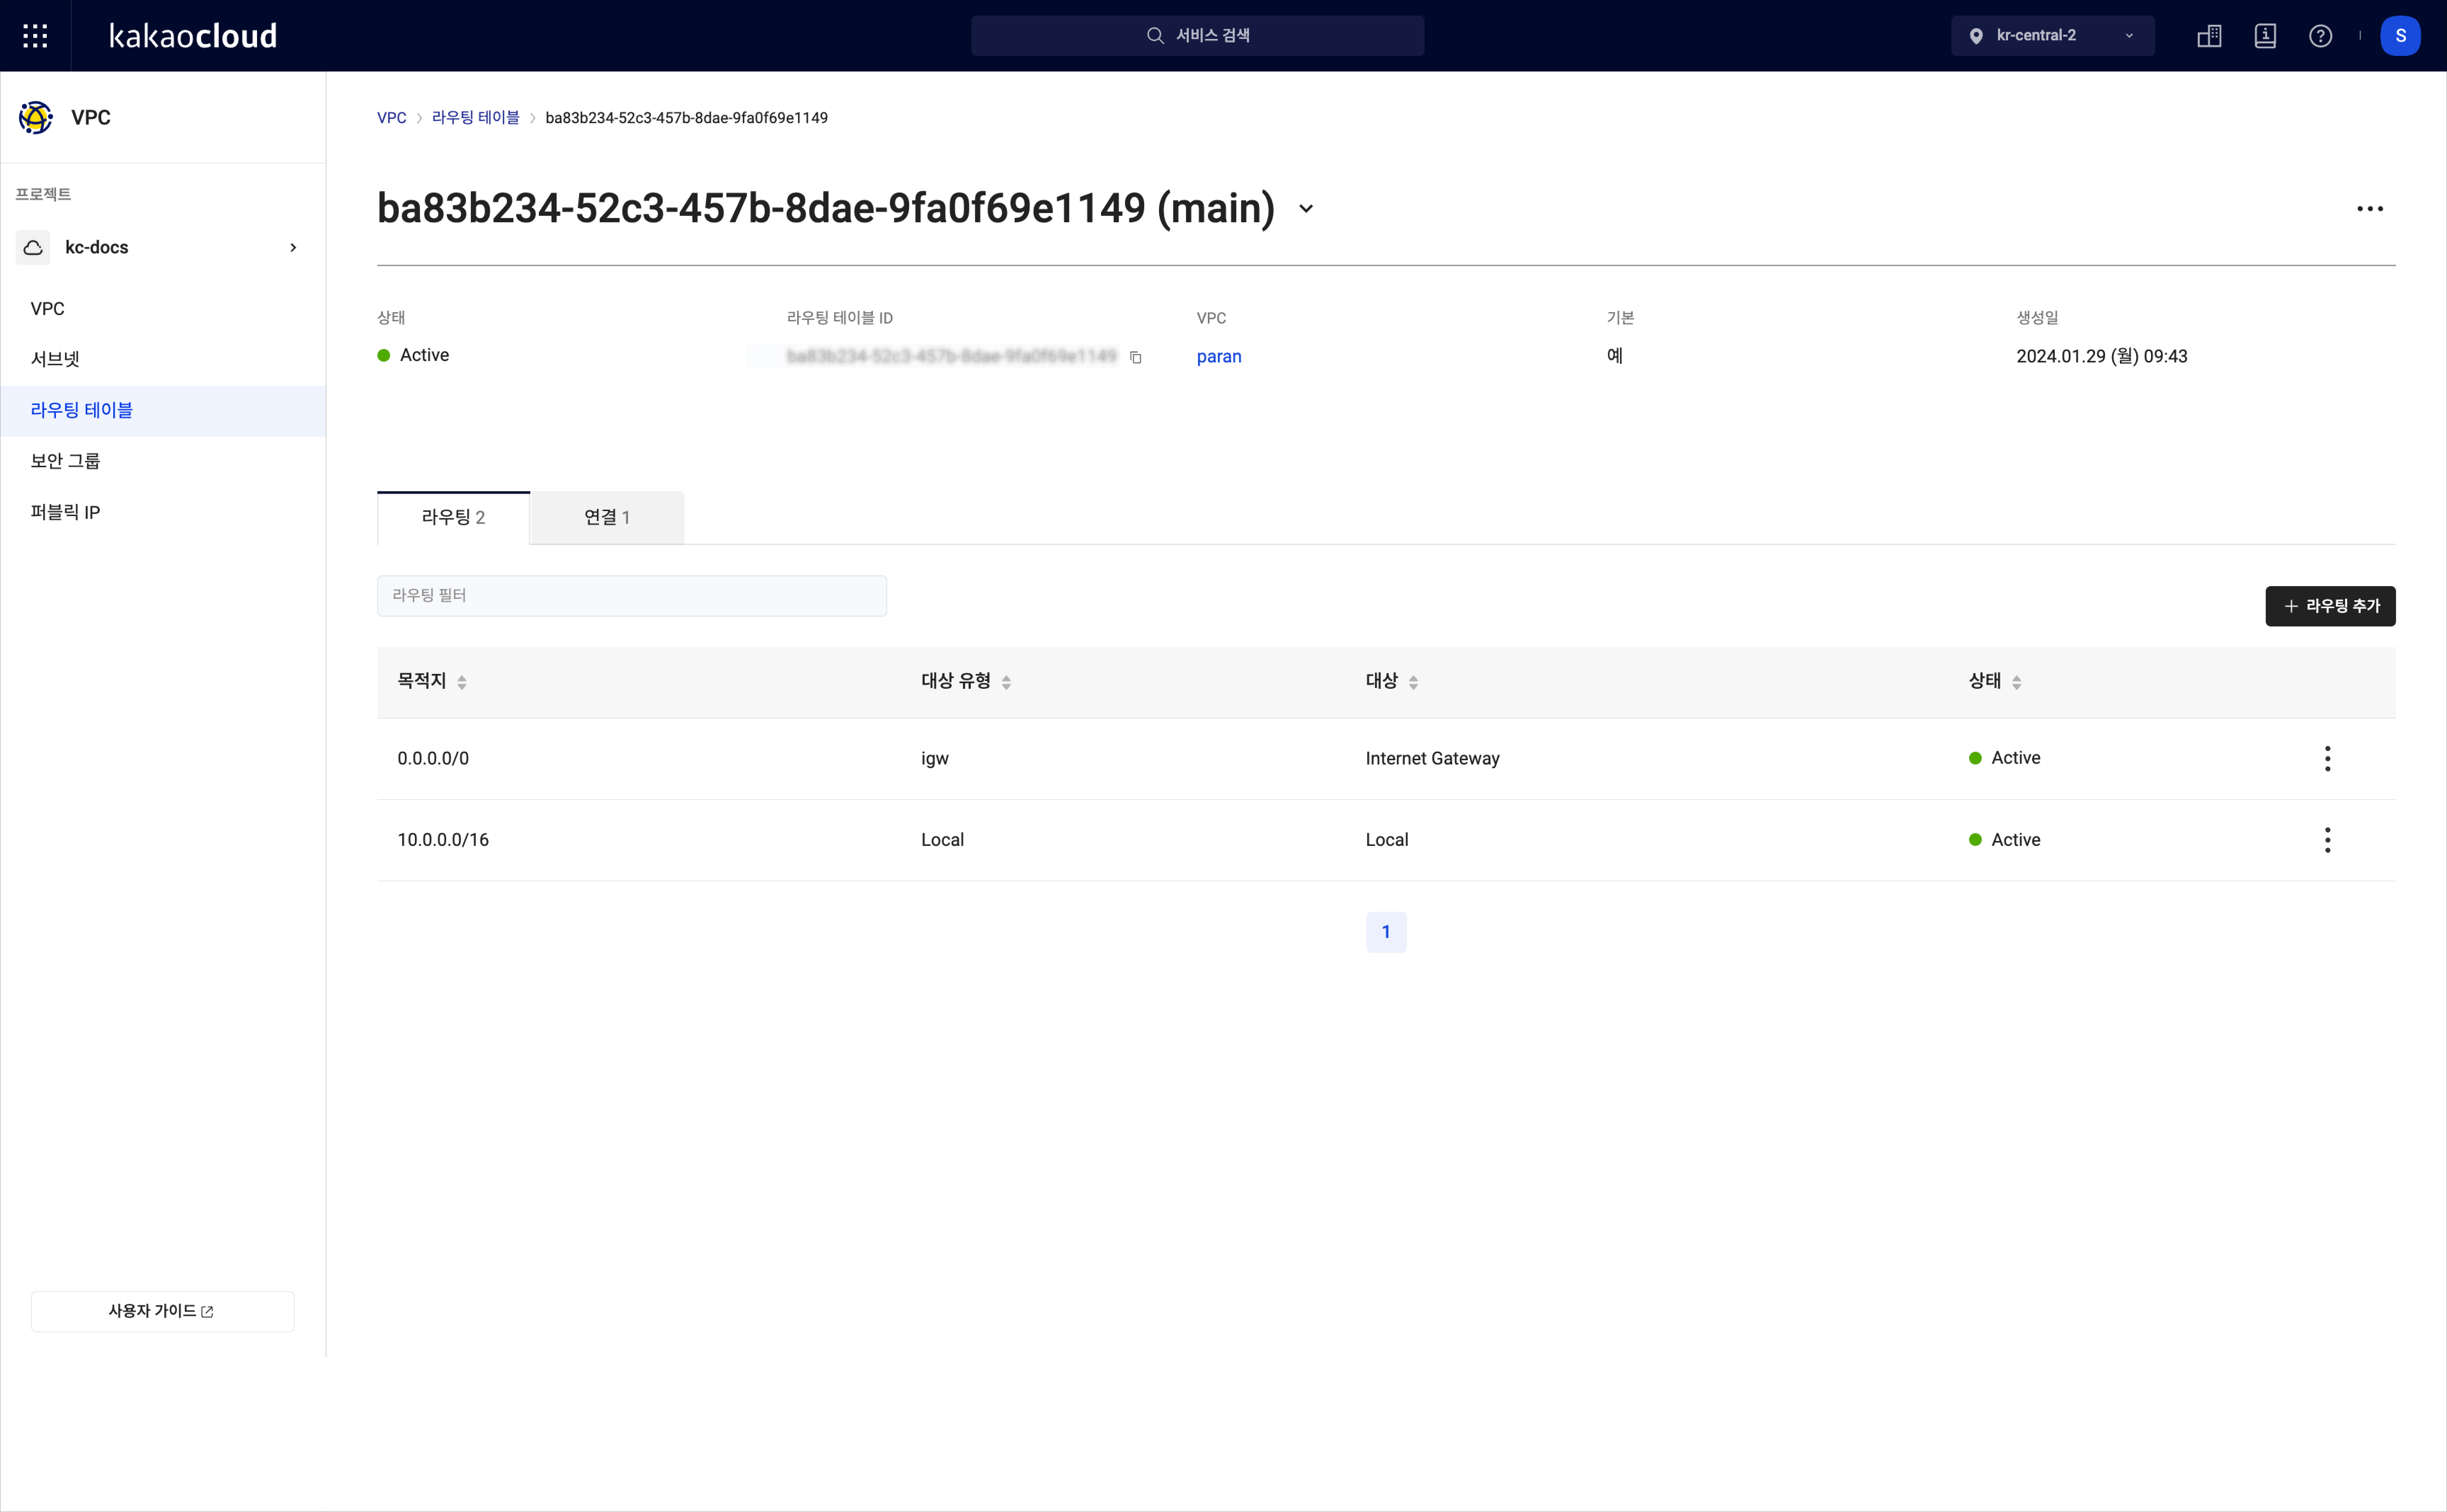 View Routes
Item Description Destination The destination IP for the route Destination Type The type of destination where traffic will pass through Destination The name of the destination where traffic will pass through Status The status of the route [More Options] Icon Modify Route: Change the route type
Delete Route: Delete the route
Change route type
You can change the destination type of a route.
-
Go to the KakaoCloud console > Beyond Networking Service > VPC menu.
-
Select the Route Table menu, then select the route table where you want to change the route.
-
On the route table detail page, select the Routing tab, then select the [More Options] icon for the route you want to change > Modify Route.
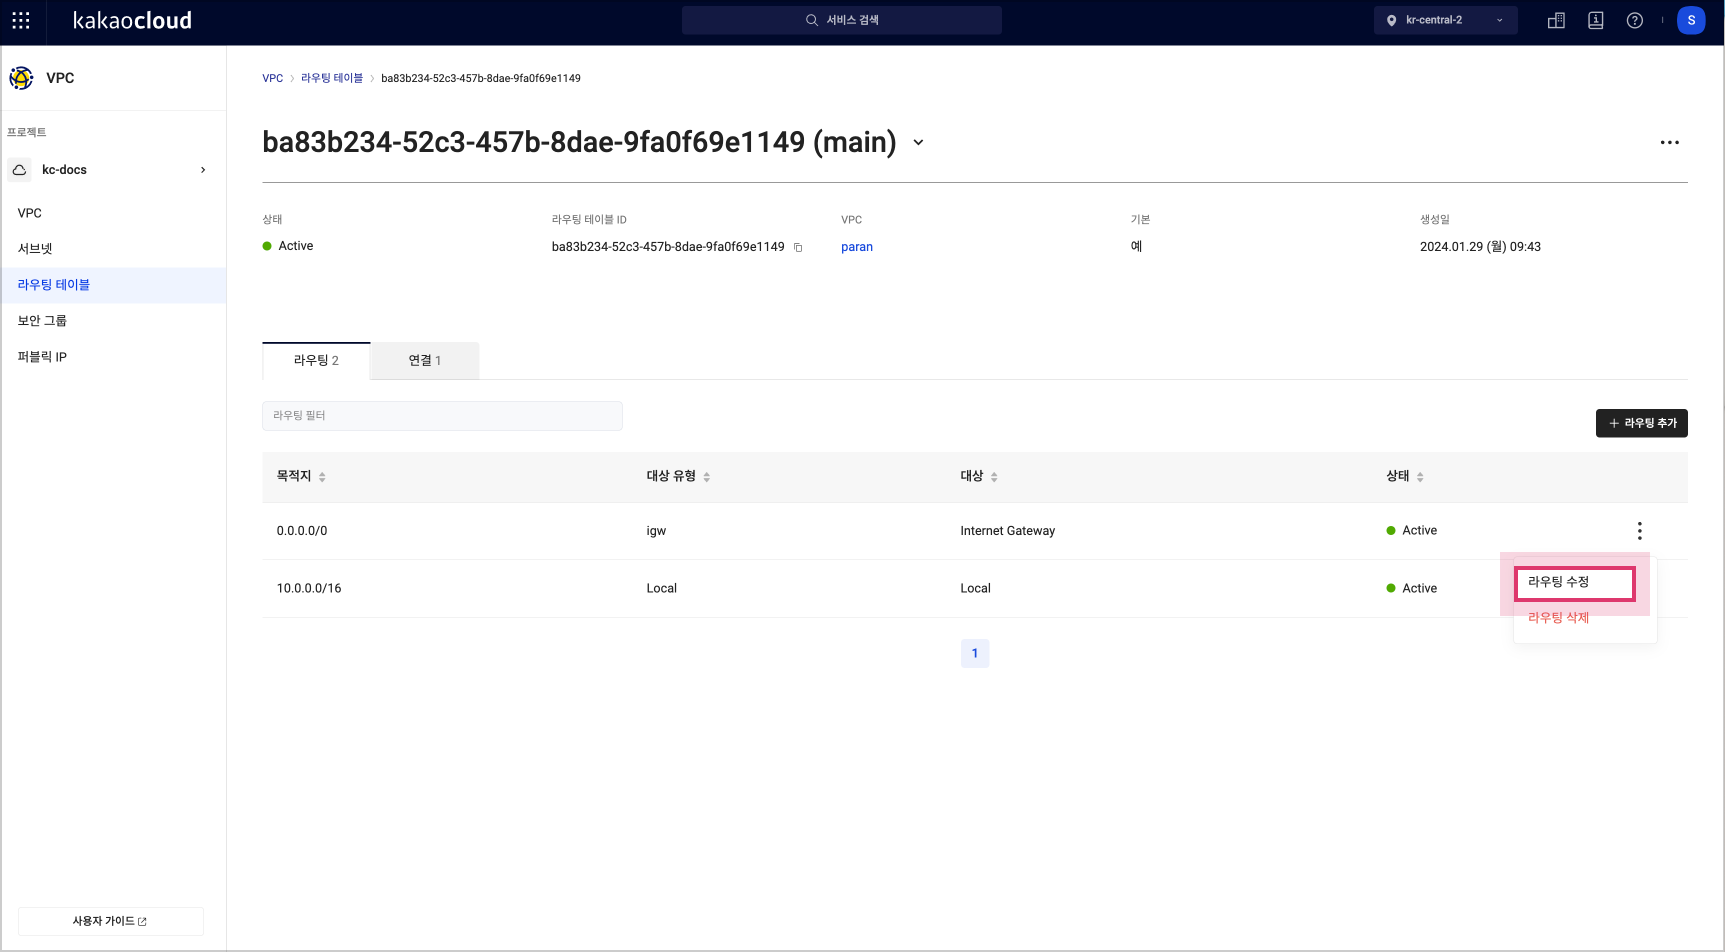 Modify Route
 -
In the Modify Route popup, edit the information and select [Apply].
Delete route
You can delete a route that is no longer in use.
- Go to the KakaoCloud console > Beyond Networking Service > VPC menu.
- Select the Route Table menu, then select the route table where you want to delete the route.
- On the route table detail page, select the Routing tab, then select the [More Options] icon for the route you want to delete > Delete Route.
- In the Delete Route popup, select [Delete].