create and manage subnets
You can create multiple subnets in a VPC based on your use case and purpose. Here's how to create and manage subnets in the VPC service.
- VPC role management follows IAM role-based access control (RBAC), and only Project Admins can create and manage subnets. Other project members can only view the VPC.
- For IAM permissions by role, please contact your Organization Admin.
Create subnet
You can create a new subnet.
- A default subnet is automatically created when a VPC is created.
-
Go to the KakaoCloud console > Beyond Networking Service > VPC menu.
-
Select on the Subnets menu, then select the [Create Subnet] button.
-
In the Create Subnet window, enter the required information and select [Create].
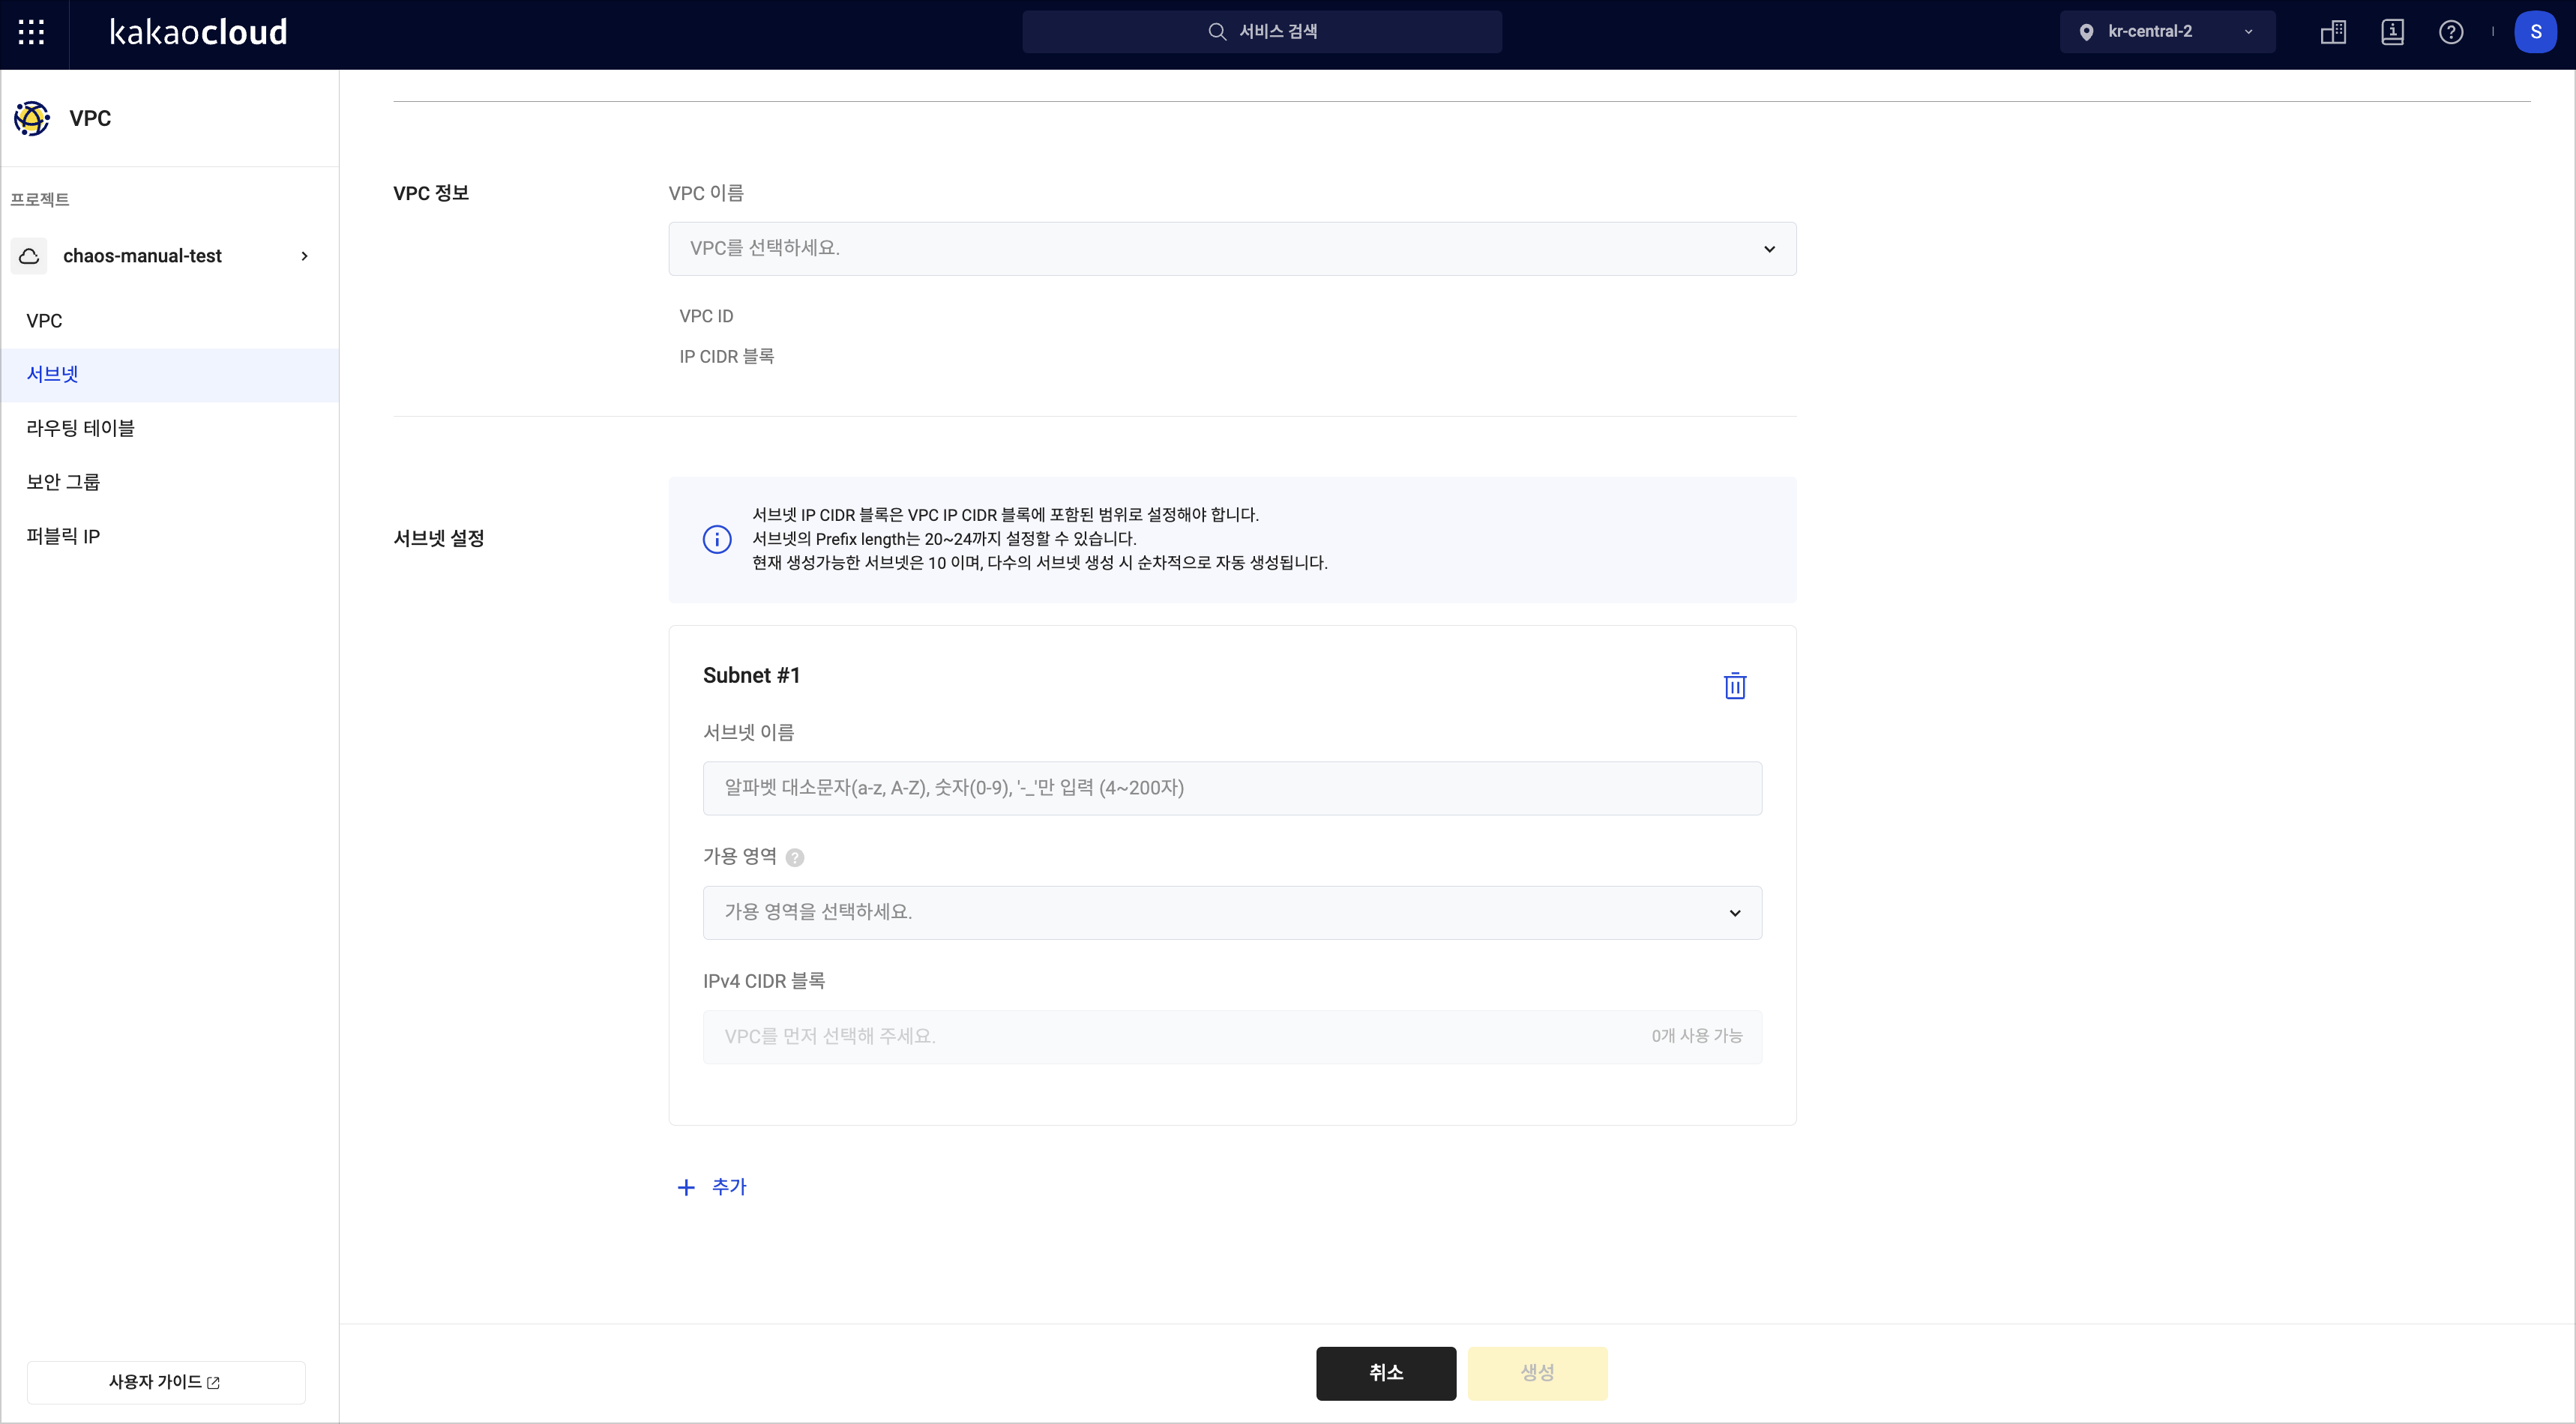 Create Subnet
Item Description VPC Information Select the VPC where the subnet will be created.
- VPC Name: Displays the name of the selected VPC
- VPC ID: Displays the ID of the selected VPC
- VPC CIDR Block: Displays the IP CIDR block of the selected VPCSubnet Settings - Subnet Name: Enter the subnet name
- Availability Zone: Select the availability zone
- IP CIDR Block: Enter the subnet's IP CIDR block
Ensure the IP range doesn’t overlap with existing subnets, and choose a prefix length between 20-26
Manage subnet
Increase subnet quota
The maximum number of subnets you can create is 30. If you need to increase the subnet quota, please contact Helpdesk.
-
Go to the KakaoCloud console and select on the [Helpdesk] icon in the top-right corner.
-
Select Q&A, then select the [Ask a Question] button in the top-right corner.
-
Select Technical Inquiry, then submit a request to increase the subnet quota by selecting VPC in the question type and clicking [Submit].
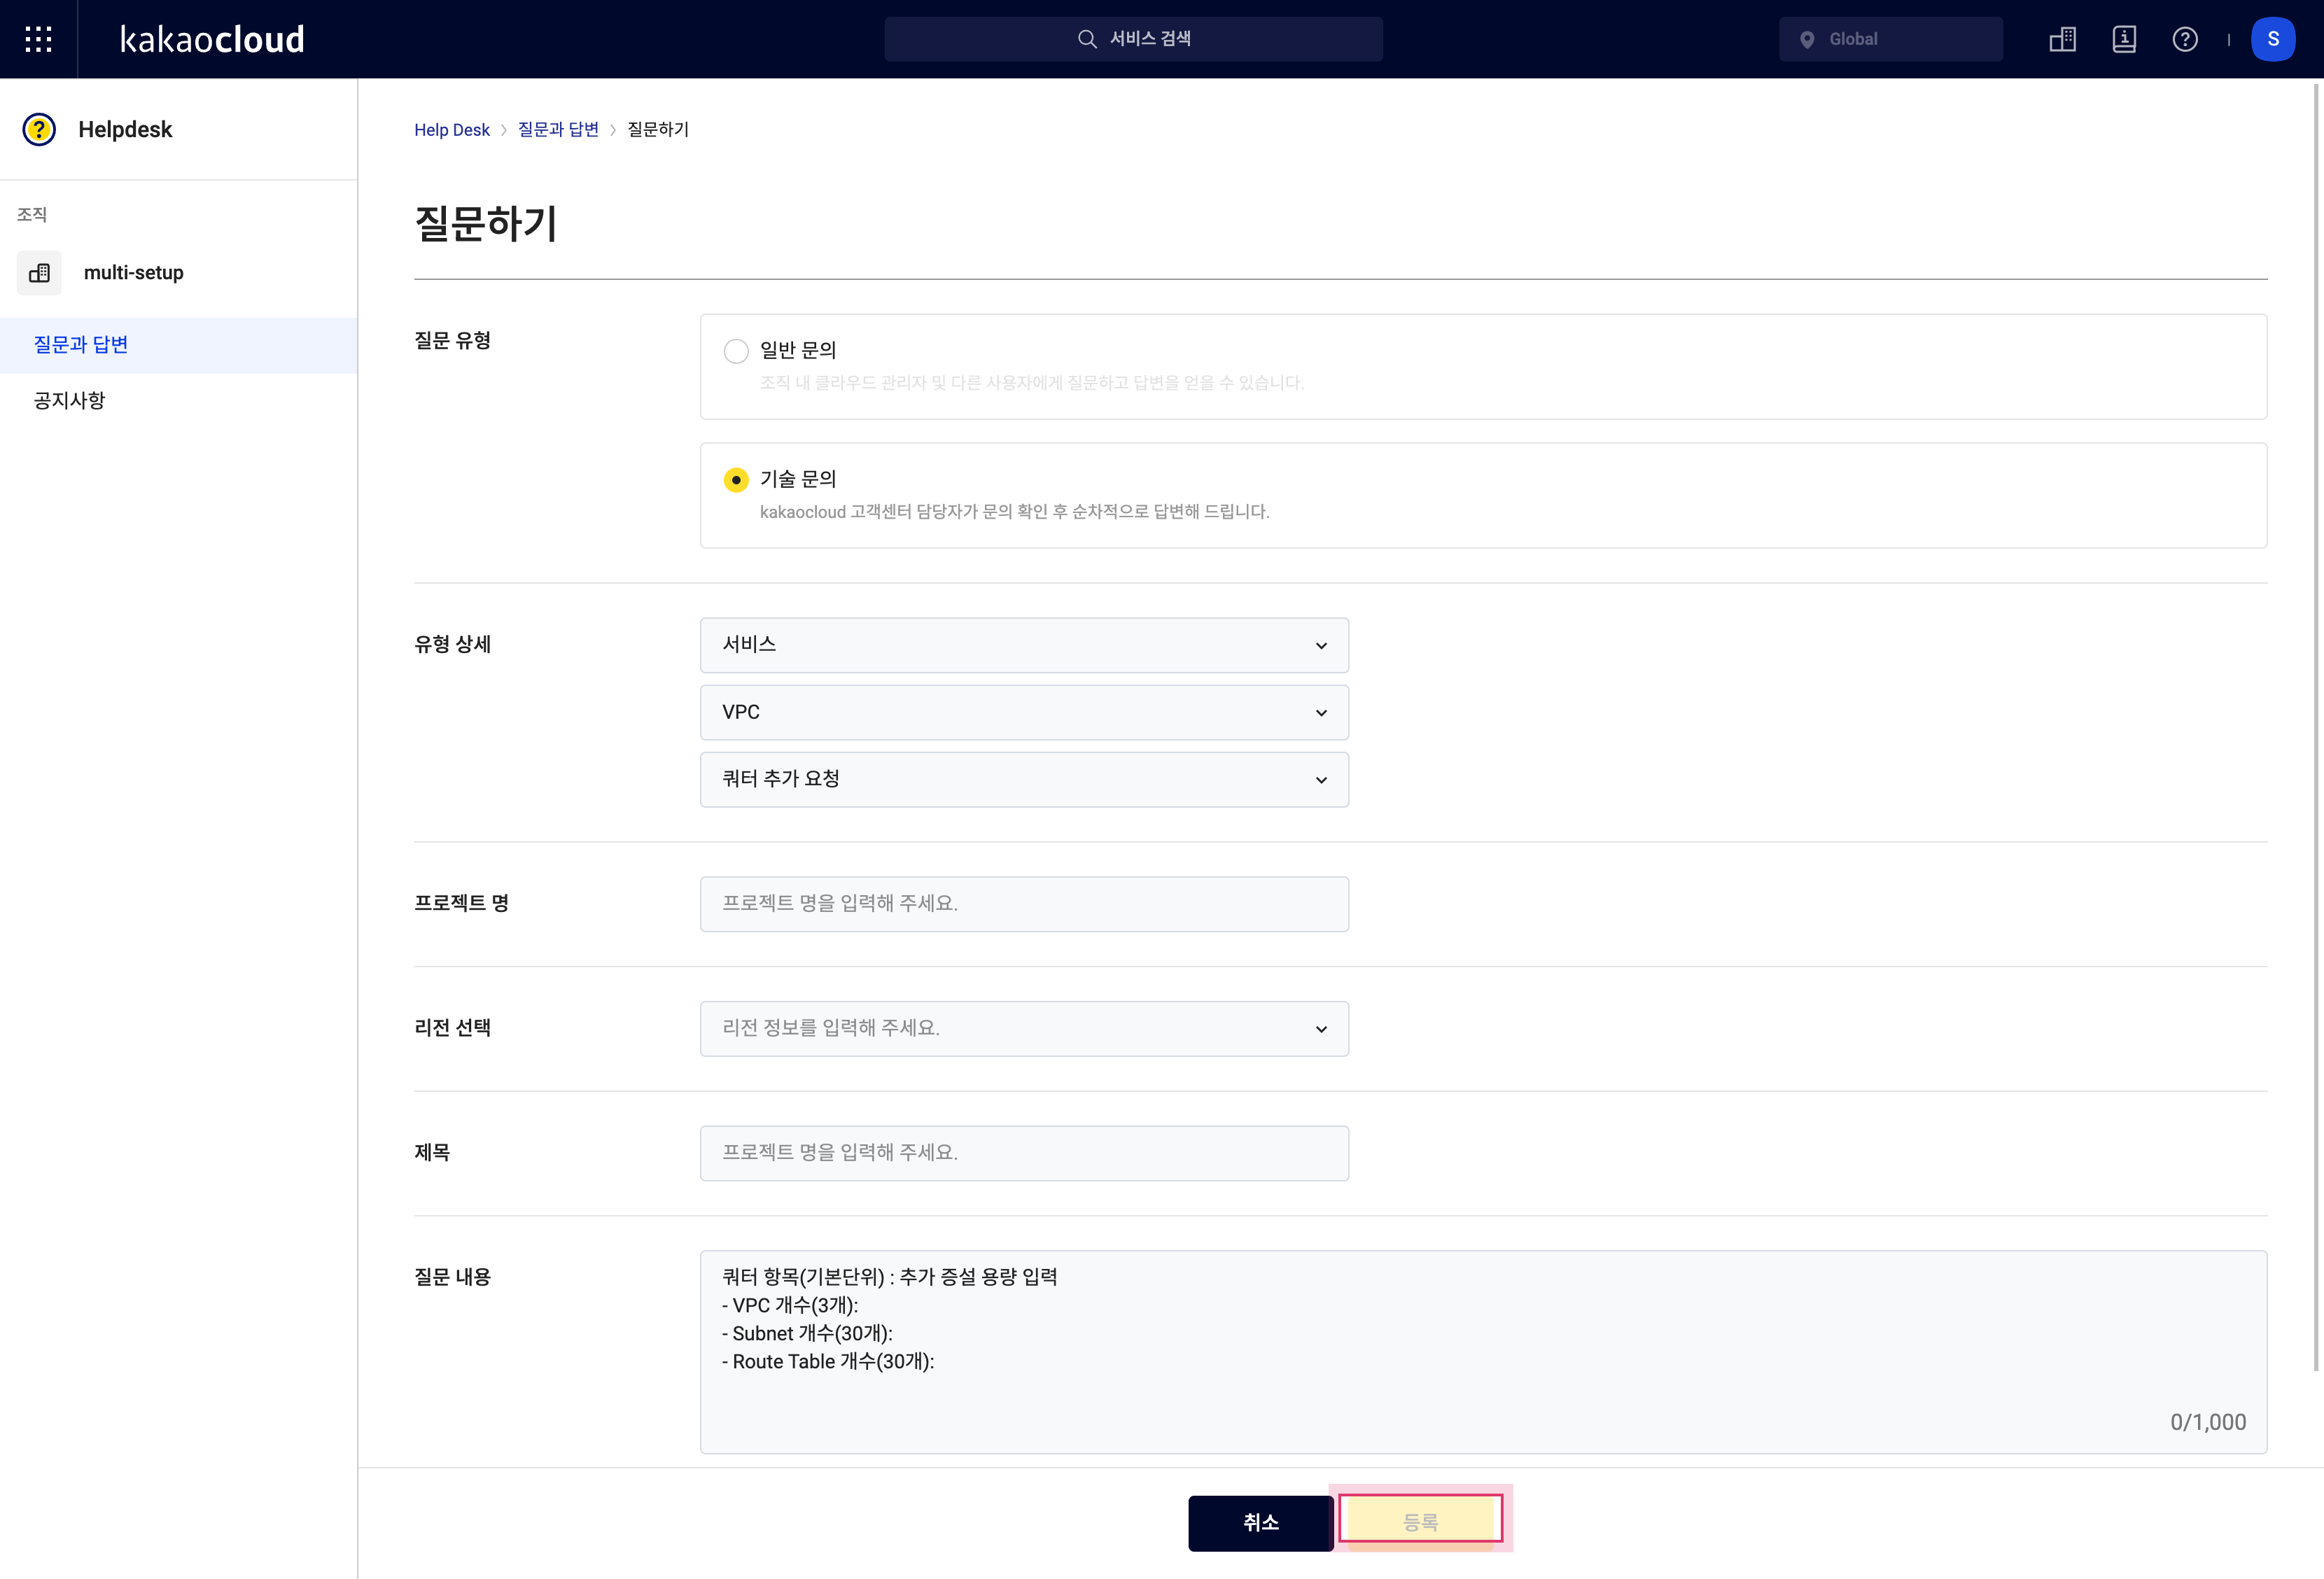 Request to Increase Subnet Quota
View subnet
You can view the list of subnets created and their detailed information.
-
Go to the KakaoCloud console > Beyond Networking Service > VPC menu.
-
Select on the Subnets menu, then check the list of created subnets.
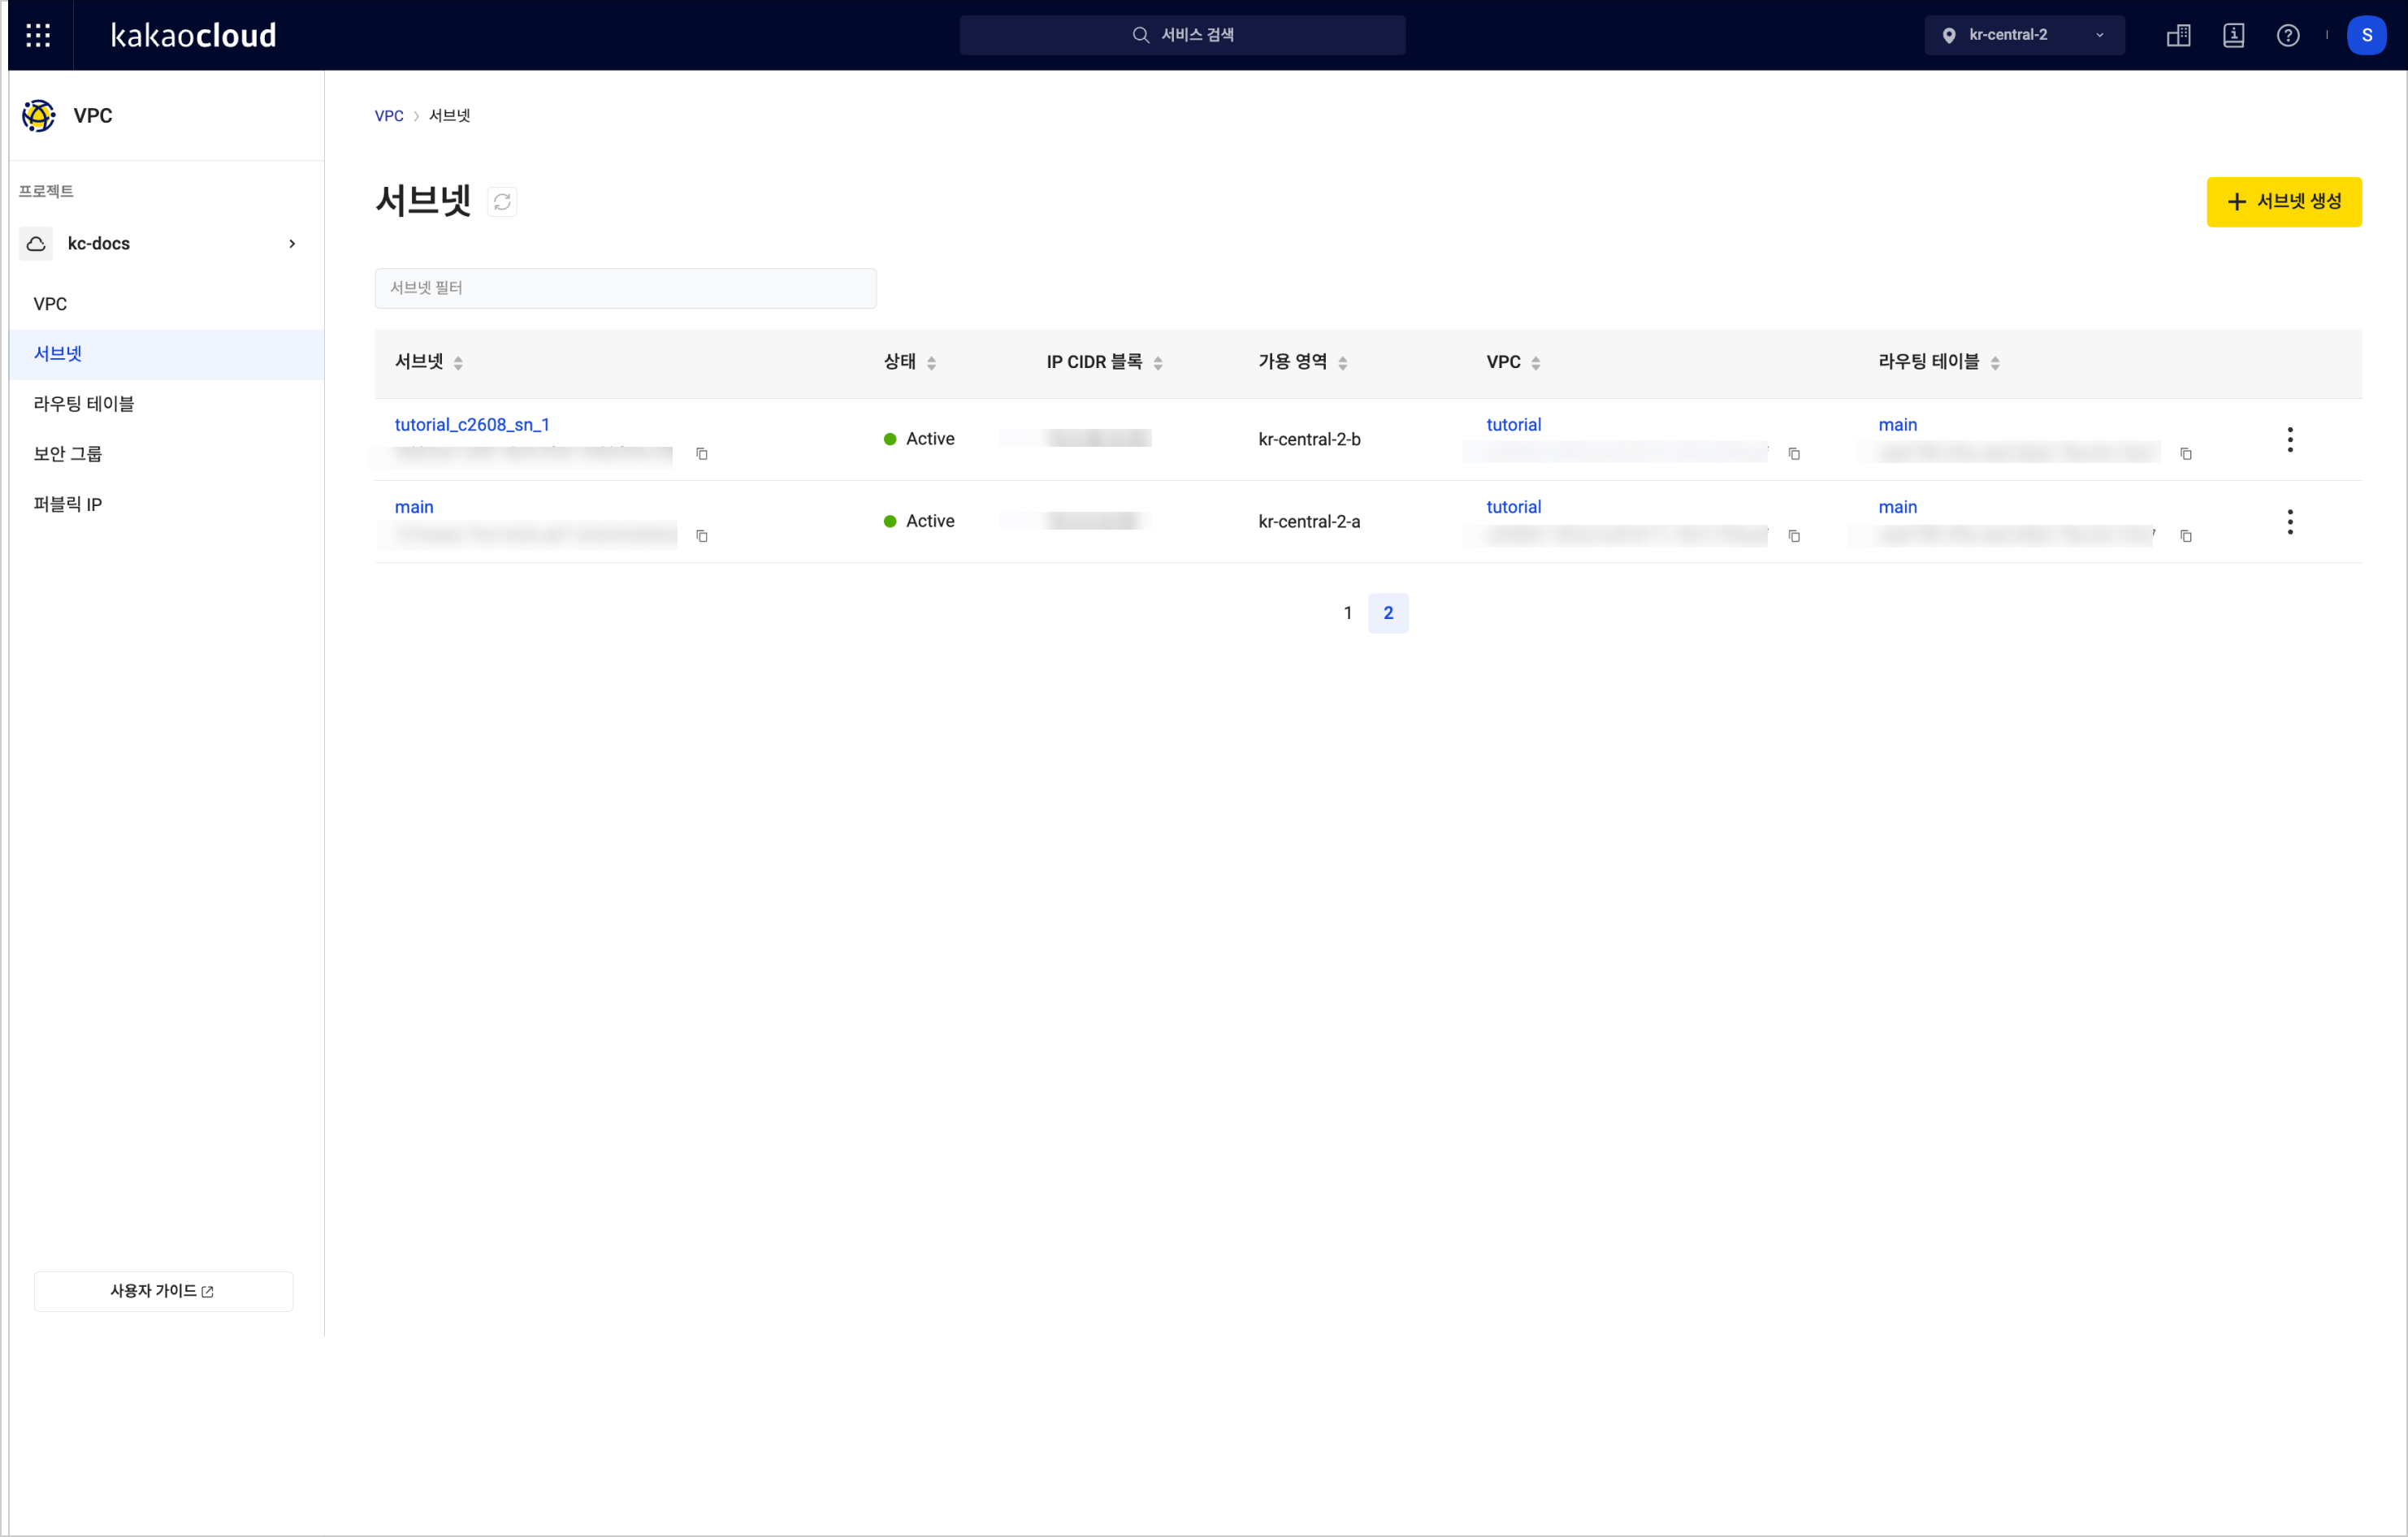 View Subnet List
Item Description Subnet Name and ID of the created subnet Status The status of the subnet IP CIDR Block The IP CIDR block of the subnet Availability Zone Availability zone information VPC The name of the VPC where the subnet is located Routing Table The routing table connected to the subnet [More Options] Icon Rename Subnet: Change the name of the subnet
Add Subnet Sharing: Share the subnet with another project
Delete Subnet: Delete the subnet -
To view detailed information, select on the subnet, and you’ll be taken to the subnet’s detail page.
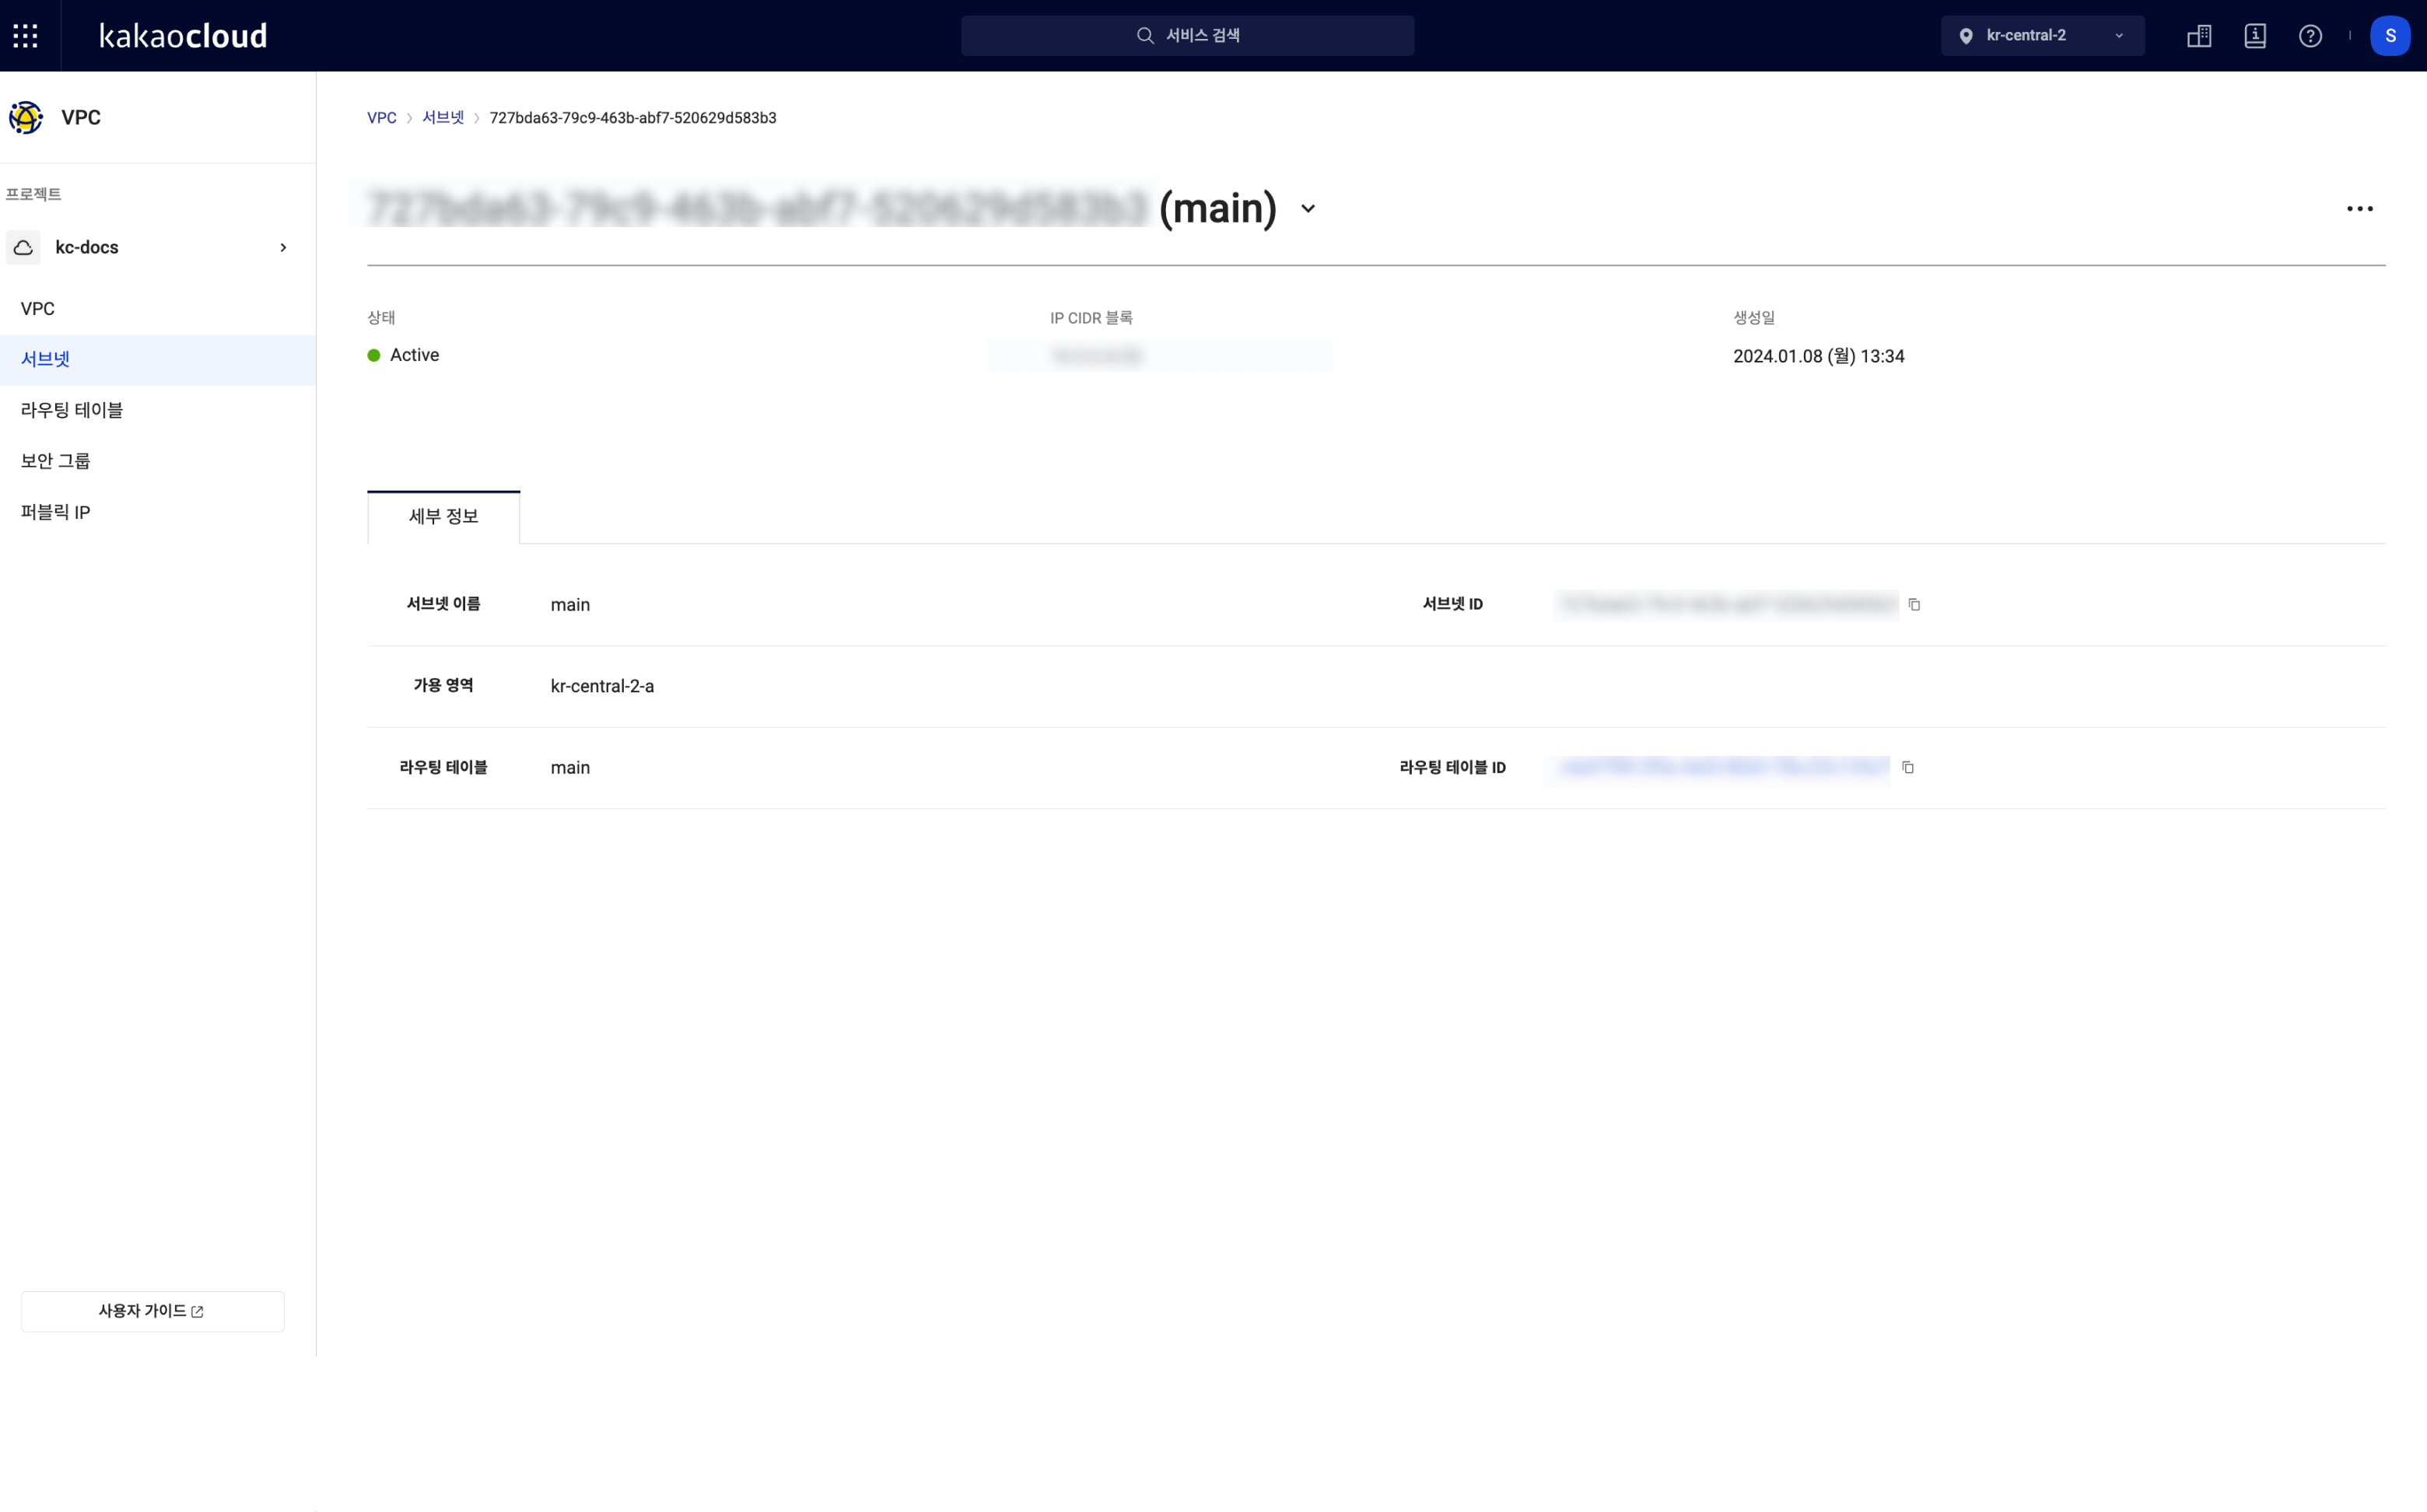 View Subnet Details
Tab Description Details Detailed information of the subnet
- Subnet Name: The name of the subnet
- Subnet ID: The ID of the subnet
- Availability Zone: The availability zone of the subnet
- Routing Table: The name of the routing table connected to the subnet
- Routing Table ID: The UUID of the routing table connected to the subnet
Rename subnet
You can rename a subnet.
- Go to the KakaoCloud console > Beyond Networking Service > VPC menu.
- Select on the Subnets menu, then select the [More Options] icon for the subnet whose name you want to change > Rename Subnet.
- In the Rename Subnet popup, enter the new name and select [Apply].
Share subnet
You can share a subnet with another project in the same domain. Follow the steps below to share a subnet.
When unsubscribing from a shared subnet, the project that received the subnet may lose connectivity to resources using that subnet.
- Go to the KakaoCloud console > Beyond Networking Service > VPC > Subnets menu.
- Select the [More Options] icon of the subnet to be shared, then select Add Subnet Sharing.
- In the Add Subnet Sharing popup, enter the project ID of the project to share the subnet with and select [Apply].
Unshare subnet
To unshare a subnet shared with another project, follow the steps below.
When unsubscribing from a shared subnet, the project that received the subnet may lose connectivity to resources using that subnet.
-
Go to the KakaoCloud console > Beyond Networking Service > VPC > Subnets menu.
-
Select the shared subnet and go to the Shared Projects tab.
-
In the shared project list, select the [More Options] icon next to the project to unshare, and select Unshare Subnet.
-
In the Unshare Subnet popup, select [Unshare].
- Participants can see and select the shared subnet when selecting a VPC as
Shared VPCduring instance creation. - Participants cannot view routing table information for shared subnets.
- Participants cannot perform actions like renaming the shared subnet.
- A subnet can be shared with projects that are not members, but only the project ID can be viewed.
Delete subnet
You can delete a subnet that is no longer in use.
You cannot delete a subnet if there are resources created in it. Please delete all resources using the subnet before deleting it.
- Go to the KakaoCloud console > Beyond Networking Service > VPC menu.
- Select on the Subnet Management tab, then select the [More Options] icon for the subnet you want to delete > Delete Subnet.
- In the Delete Subnet popup, enter the name of the subnet to delete and select [Delete].