Create and manage target groups
The following describes how to create a target group, view the list, change information, and manage target groups such as configuring listener associations.
Create target group
-
Go to KakaoCloud console > Networking > Load Balancing > Target group.
-
Click the [Create target group] button at the top right.
-
On the Step 1: Configure target group screen, enter the settings and click the [Next] button.
Category Item Description Load balancer Availability zone Select from the availability zones available in the project Load balancer Displays the list of all load balancers in the selected availability zone Listener Displays the list of all listeners of the selected load balancer and the Do not select a listeneroptionBasic information Target group name Name of the target group Protocol Target group protocols available according to the listener protocol
- HTTP listener:HTTP,PROXY
- HTTPS listener:HTTPSProtocol version Displayed when the connected load balancer is an Application Load Balancer (ALB), the selected listener is an HTTPS listener, and the target group protocol is set to HTTP
-HTTP/1.1: Sends requests to targets using HTTP/1.1
-HTTP/2: Sends requests to targets using HTTP/2Algorithm - Round robin: Distributes traffic sequentially to targets in the target group
-Least connections: Distributes traffic preferentially to the target with fewer connections
-Source IP: Sends traffic from clients using the same IP header to the same targetSticky session Can be enabled or disabled only when the listener x target group combination is one of the following cases
-HTTP x HTTP,TCP x TCP,UDP x UDP
- Otherwise: Fixed toDisabled(inactive)Type Sticky session types available when the listener x target group combination is one of the following cases
-HTTP x HTTP: HTTP cookie, App cookie
-TCP x TCP: Source IP
-UDP x UDP: Source IPSticky duration Enabled only when sticky session (HTTP cookie, App cookie) is in use
- Integer between 1 and 604800 (default: 3,600 seconds for HTTP cookie, otherwise 360 seconds)Cookie name Enabled only when sticky session (App cookie) is in use
- For app cookie, the custom cookie name used by the user's application must be entered (string)
- Allowed characters: uppercase/lowercase English letters, numbers, and some special characters (!#$%^&_*+~-)
- Allowed length: 1-255 charactersHealth check Health check Set whether to use it Health check protocol Health check protocol types available according to the target group protocol
- HTTP target group:HTTP,PING
- PROXY target group:PING,TCPHTTP method Set only when HTTPis selected as the health check typeHTTP version Set only when HTTPis selected as the health check type
- Select1or1.1HTTP status code Set only when HTTPis selected as the health check type
- Enter a single code, multiple codes separated by commas, or a code range specified with a hyphen (-)Check path Enter in URL format Check interval Integer between 1 and 3600 (default: 30 seconds). Must be set to a value greater than the timeout Timeout Integer between 1 and 900 (default: 4 seconds). Must be set to a value smaller than the check interval Threshold for state change (success) Integer from 1 to 10 (default: 5 times) Threshold for state change (failure) Integer from 1 to 10 (default: 2 times) infoWhen the algorithm is set to
Source IP, traffic sent from one source is delivered only to a specific target. Therefore, separate sticky session settings are not required and this feature is disabled. Since sticky session settings specify a retention duration, usingSource IPis recommended if you want to maintain stickiness continuously. -
On the Step 2: Add targets screen, you can add resources in the same availability zone and VPC as the load balancer selected in Step 1 as targets.
-
Select the instance to add as a target and enter the port number.
-
Click the [Add target] button.
-
You can add the same target again with a different port number or remove an added target.
-
After adding targets, click the [Next] button.
-
On the Step 3: Advanced settings screen, you can modify the detailed settings below. After modifying the values or leaving the default values as they are, click the [Next] button.
-
On the Step 4: Review screen, review the configured information and click the [Create] button.
info- After creating a target group, you must configure the security group settings of the targets. In Target group details > Targets tab, check the health check IP addresses and add those IP addresses to the inbound rules of the target's security group.
- Those IP addresses are used as service ports, so they must be opened through inbound rule settings even when health check is not used.
Manage target groups
You can modify or delete existing target groups or add new targets.
View target group list and basic information
- Go to KakaoCloud console > Networking > Load Balancing > Target group.
- Check the target group list and basic information.
Category Description Name Displays the target group name entered when created ID Displays the ID assigned when created Provisioning status Indicates whether the target group was created successfully or whether modification or deletion is in progress Operating status Indicates whether the created target group is available for use Protocol Protocol used to route traffic to targets Load balancer Displays the name of the load balancer connected to the target group Load balancer ID Displays the ID of the load balancer connected to the target group VPC Displays the name of the VPC that includes the load balancer Created at Displays the date when the target group was created
View target group details
-
Go to KakaoCloud console > Networking > Load Balancing > Target group.
-
Select the target group whose details you want to view.
-
Check detailed information in each tab of the details page.
- Details tab
- Connected load balancer tab
- Listener tab
- Health check tab
- Targets tab
- Monitoring tab
Item Description Name User-defined name used to identify the target group ID Unique identifier automatically assigned when the target group is created Provisioning status Progress status of resource creation/change operations Operating status Current operating status of the target group Protocol Communication protocol used by the target group (for example, HTTP, HTTPS, TCP) Algorithm Method of distributing traffic (for example, round robin) Created at Date and time when the target group was created Item Description Name Name of the load balancer connected to the target group ID Unique identifier of the load balancer Type Type of load balancer (for example, Application, Network) Provisioning status Progress status of load balancer resource creation/change Network information Information about the connected VPC, subnet, and availability zone Item Description Protocol:Port Communication protocol and port number of the listener ID Unique identifier of the listener Provisioning status Listener configuration application status Connection status Current activation status of the listener Item Description Health check protocol Method used to determine whether a target is healthy (for example, PING, HTTP) Health check interval Interval at which health checks are performed Timeout Maximum time to wait for a response Healthy threshold Number of consecutive successes required to determine a target is healthy Unhealthy threshold Number of consecutive failures required to determine a target is unhealthy Health check IP IP information to which health check requests are sent Item Description Healthy Number of healthy targets Warning Number of targets in warning state Error Number of targets in error state Inactive Number of inactive targets IP IP address of the registered target Port Target service port Weight Weight applied when distributing traffic Status Current health status of each target Item Description Query period Select the query range such as 1 hour, 3 hours, 12 hours, 1 day, or 7 days Auto refresh Whether data is automatically refreshed at regular intervals Metrics Monitoring metrics related to target groups such as traffic, number of connections, and error rate Graph Visually displays metrics for the selected period
Rename
- Go to KakaoCloud console > Networking > Load Balancing > Target group.
- Select [⋮] > Rename for the target group.
- Change the name in the pop-up window, and then click the [Change] button.
Configure listener association
- Go to KakaoCloud console > Networking > Load Balancing > Target group
- Select [⋮] > Configure listener association for the target group.
- Change the listener association settings in the pop-up window, and then click the [Apply] button.
- When configuring listener association: You can connect to two or more listeners by selecting listeners from the list to connect.
- When setting Do not associate listener: Disassociates from the listener.
Set algorithm
- Go to KakaoCloud console > Networking > Load Balancing > Target group.
- Select [⋮] > Set algorithm for the target group.
- Change the algorithm in the pop-up window, and then click the [Apply] button.
Configure targets
- Go to KakaoCloud console > Networking > Load Balancing > Target group.
- Select the target group for which you want to change target settings.
- Click the Targets tab, and then click the [Configure targets] button.
- In the pop-up window, check the registered targets and delete or add targets. If necessary, configure the health check port, and then click [Apply].
- To revert to the initial state while modifying targets, click the [Revert] button at the top of the added target list.
Set traffic weight
- Go to KakaoCloud console > Networking > Load Balancing > Target group.
- Select the target group for which you want to change the traffic weight settings.
- Click the Targets tab, and then click [⋮] > Set traffic weight.
- Change the weight in the pop-up window, and then click the [Set] button
Item Description Weight Traffic distribution value set for the target. The greater the value, the more traffic is delivered
- Enter as an integer between0and256Weight conversion (weight/256)*100 (rounded up to the first decimal place) Ratio Weight conversion / total sum of weight conversions IP Private IP address of the target to which traffic is delivered Instance Displays the name of the connected instance Instance ID Unique ID of the connected instance
Configure health check
-
Go to KakaoCloud console > Networking > Load Balancing > Target group.
-
Select the target group for which you want to change health check settings.
-
Click the Health check tab, and then click the [Configure health check] button.
-
In the pop-up window, change whether to use health check or modify the settings.
Category Description Target group Name of the current target group Protocol Types available according to the protocol of the target group
- HTTP target group:HTTP,PING
- HTTPS target group:HTTPS,PING
- TCP target group:PING,TCP
- UDP target group:TCP,HTTP
- PROXY target group:PING,TCPWhether to use health check Health check protocol: Health check type
-PING: Sends packets to the target and checks the response returned by the target (ICMP Ping)
-HTTP: Sends packets to the configured path and checks the response
-HTTPS: Checks responses in the same way as HTTP for targets using certificates
-TCP: Checks the status of the target using a TCP protocol portCheck interval: Target health check interval (unit: seconds, 1-3600 seconds)
- Timeout: Sets the maximum time to wait for a target with delayed response (unit: seconds, 1-900 seconds)
- If the specified time is exceeded, communication with the target is considered failed
- Must be set to a value smaller than the check interval
- Threshold for state change (success): If health checks succeed consecutively for the entered number of times, the target is determined to be healthy
- Threshold for state change (failure): If health checks fail consecutively for the entered number of times, the target is determined to be unhealthy and excluded from traffic distribution -
If the health check type is
HTTPorHTTPS, you can configure additional attributes.Category Description HTTP method Set only when HTTP is selected as the health check type HTTP version Set only when HTTP is selected as the health check type
- Select1or1.1HTTP status code Set the status code expected to be returned by the target to the load balancer
- If the target returns the HTTP status code configured by the user, the health check is considered successful
- Example of a single status code: 200, 201
- Example of multiple status codes: 201, 202, 401, 402
- Example of a range: 200-500Check path Enter the path for health checks based on the URL path -
Click the [Apply] button.
If the target in the target group uses the SELinux option provided by the latest CentOS distribution, PING type health checks do not work because SELinux denies shell_exec_t calls.
Configure sticky session
Sticky sessions can be configured only for some target groups depending on the listener and target group protocol.
Sticky session options by listener and target group protocol
| Target group\Listener | HTTP | HTTPS | TCP | UDP |
|---|---|---|---|---|
| HTTP | HTTP cookie, App cookie | X | X | X |
| HTTPS | X | X | X | X |
| TCP | X | X | Source IP | X |
| UDP | X | X | X | Source IP |
| PROXY | X | X | X | X |
- Go to KakaoCloud console > Networking > Load Balancing > Target group.
- Select the target group for which you want to change sticky session settings.
- Click the Attributes tab, and then click the [Configure sticky session] button.
- Change whether to use it or modify the settings in the pop-up window, and then click the [Apply] button.
Delete target group
- Go to KakaoCloud console > Networking > Load Balancing > Target group.
- Select [⋮] > Delete target group for the target group.
- Enter the delete confirmation text in the pop-up window, and then click the [Delete] button.
Manage targets
You can view, modify, and delete targets added to the target group.
Two health check IPs are created for each subnet containing targets. To perform health checks, communication through those IPs must be allowed.
Refer to the View health check IP and Allow health check IP communication guides and add inbound rules to the security group.
View health check IP
- Go to KakaoCloud console > Networking > Load Balancing > Target group.
- Select the target group for which you want to view the health check IP.
- Select the Targets tab, and then select [⋮] > View health check IP for the target.
Allow health check IP communication
There are two ways to configure security groups to allow communication from health check IPs.
For your convenience, choose one of the following two methods to allow communication.
First, add inbound rules that allow the IPs in the existing security group of the target instance
-
Go to KakaoCloud console > Networking > Load Balancing > Target group.
-
Select the target group for which you want to view the health check IP and allow communication.
-
Select the Targets tab.
-
Click Health check IP by subnet at the top of the tab details screen to check the list of health check IPs. Keep the health check IP view open or copy the list.
-
In the Target list at the bottom of the tab details screen, identify the instance for which communication from the health check IPs should be allowed, and select the security group name of that instance.
- If multiple security groups are connected, select any one of them and register it.
- If the same rule has already been added to one or more connected security groups, communication is already allowed.
-
In the Inbound rules tab of the Security group details screen, click the [Add inbound rule] button.
-
In the Manage security group rules pop-up window, click the [Add] button at the bottom of the inbound rules tab to add a new rule input field.
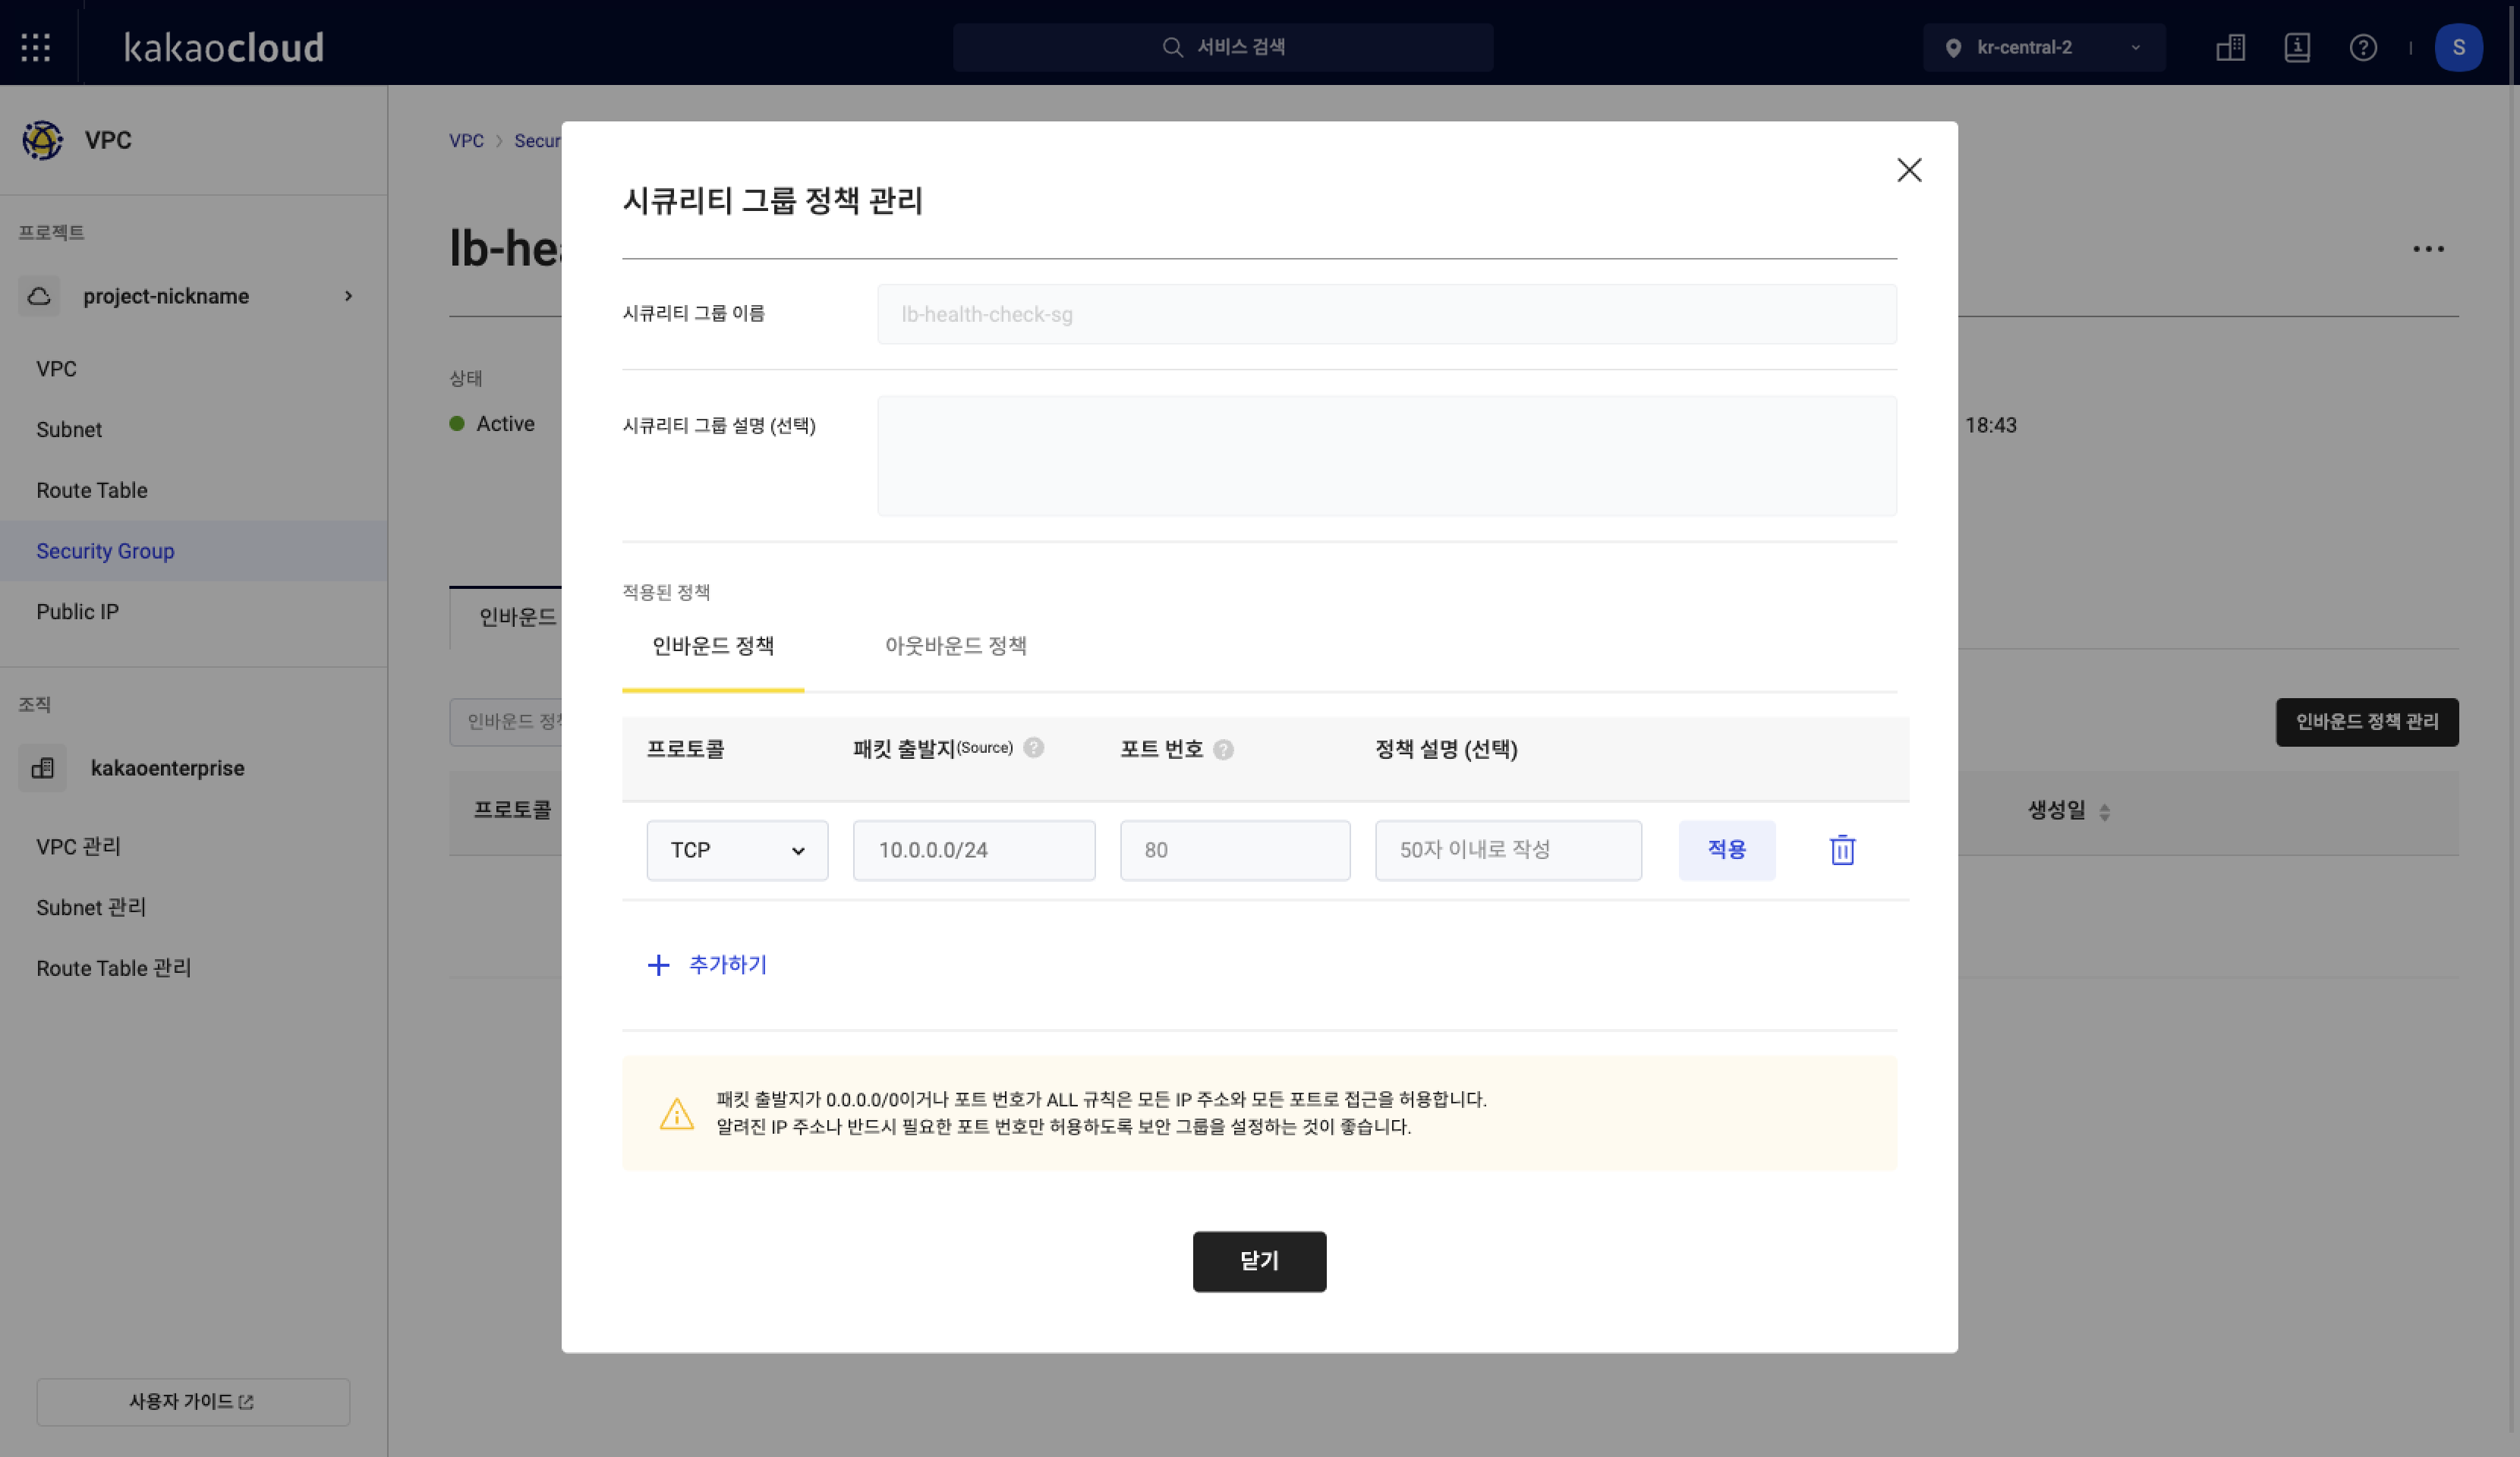 Manage security group rules
 -
Based on the detailed information in Process 5 of the Target group > Targets tab, enter the rule information and click the [Apply] button on the right.
Configure inbound rule
Category Description Protocol Protocol for communication (TCP, UDP, ICMP, ALL), selected according to the health check type of the target group
- If the health check type is PING:ICMP
- If the health check type is HTTP, HTTPS, TCP:TCPSource Source IP to allow access
- Enter the health check IP confirmed in target details
- Register each of the two health check IPs created in the subnet containing the targetPort Port for communication
- Enter the health check port of the targetRule description (optional) Description of the rule -
Click the [Close] button at the bottom of the Manage security group rules pop-up window to complete rule registration.
Second, create a new security group for health checks and connect it to the target instance
-
Go to KakaoCloud console > Networking > Load Balancing > Target group.
-
Select the target group for which you want to view the health check IP and allow communication.
-
Select the Targets tab.
-
Click Health check IP by subnet at the top of the tab details screen to check the list of health check IPs.
Keep the health check IP view open or copy the list. -
Refer to Create security group and go to the screen for creating a new security group.
-
In the pop-up window, enter the security group name and description, and then add inbound rules.
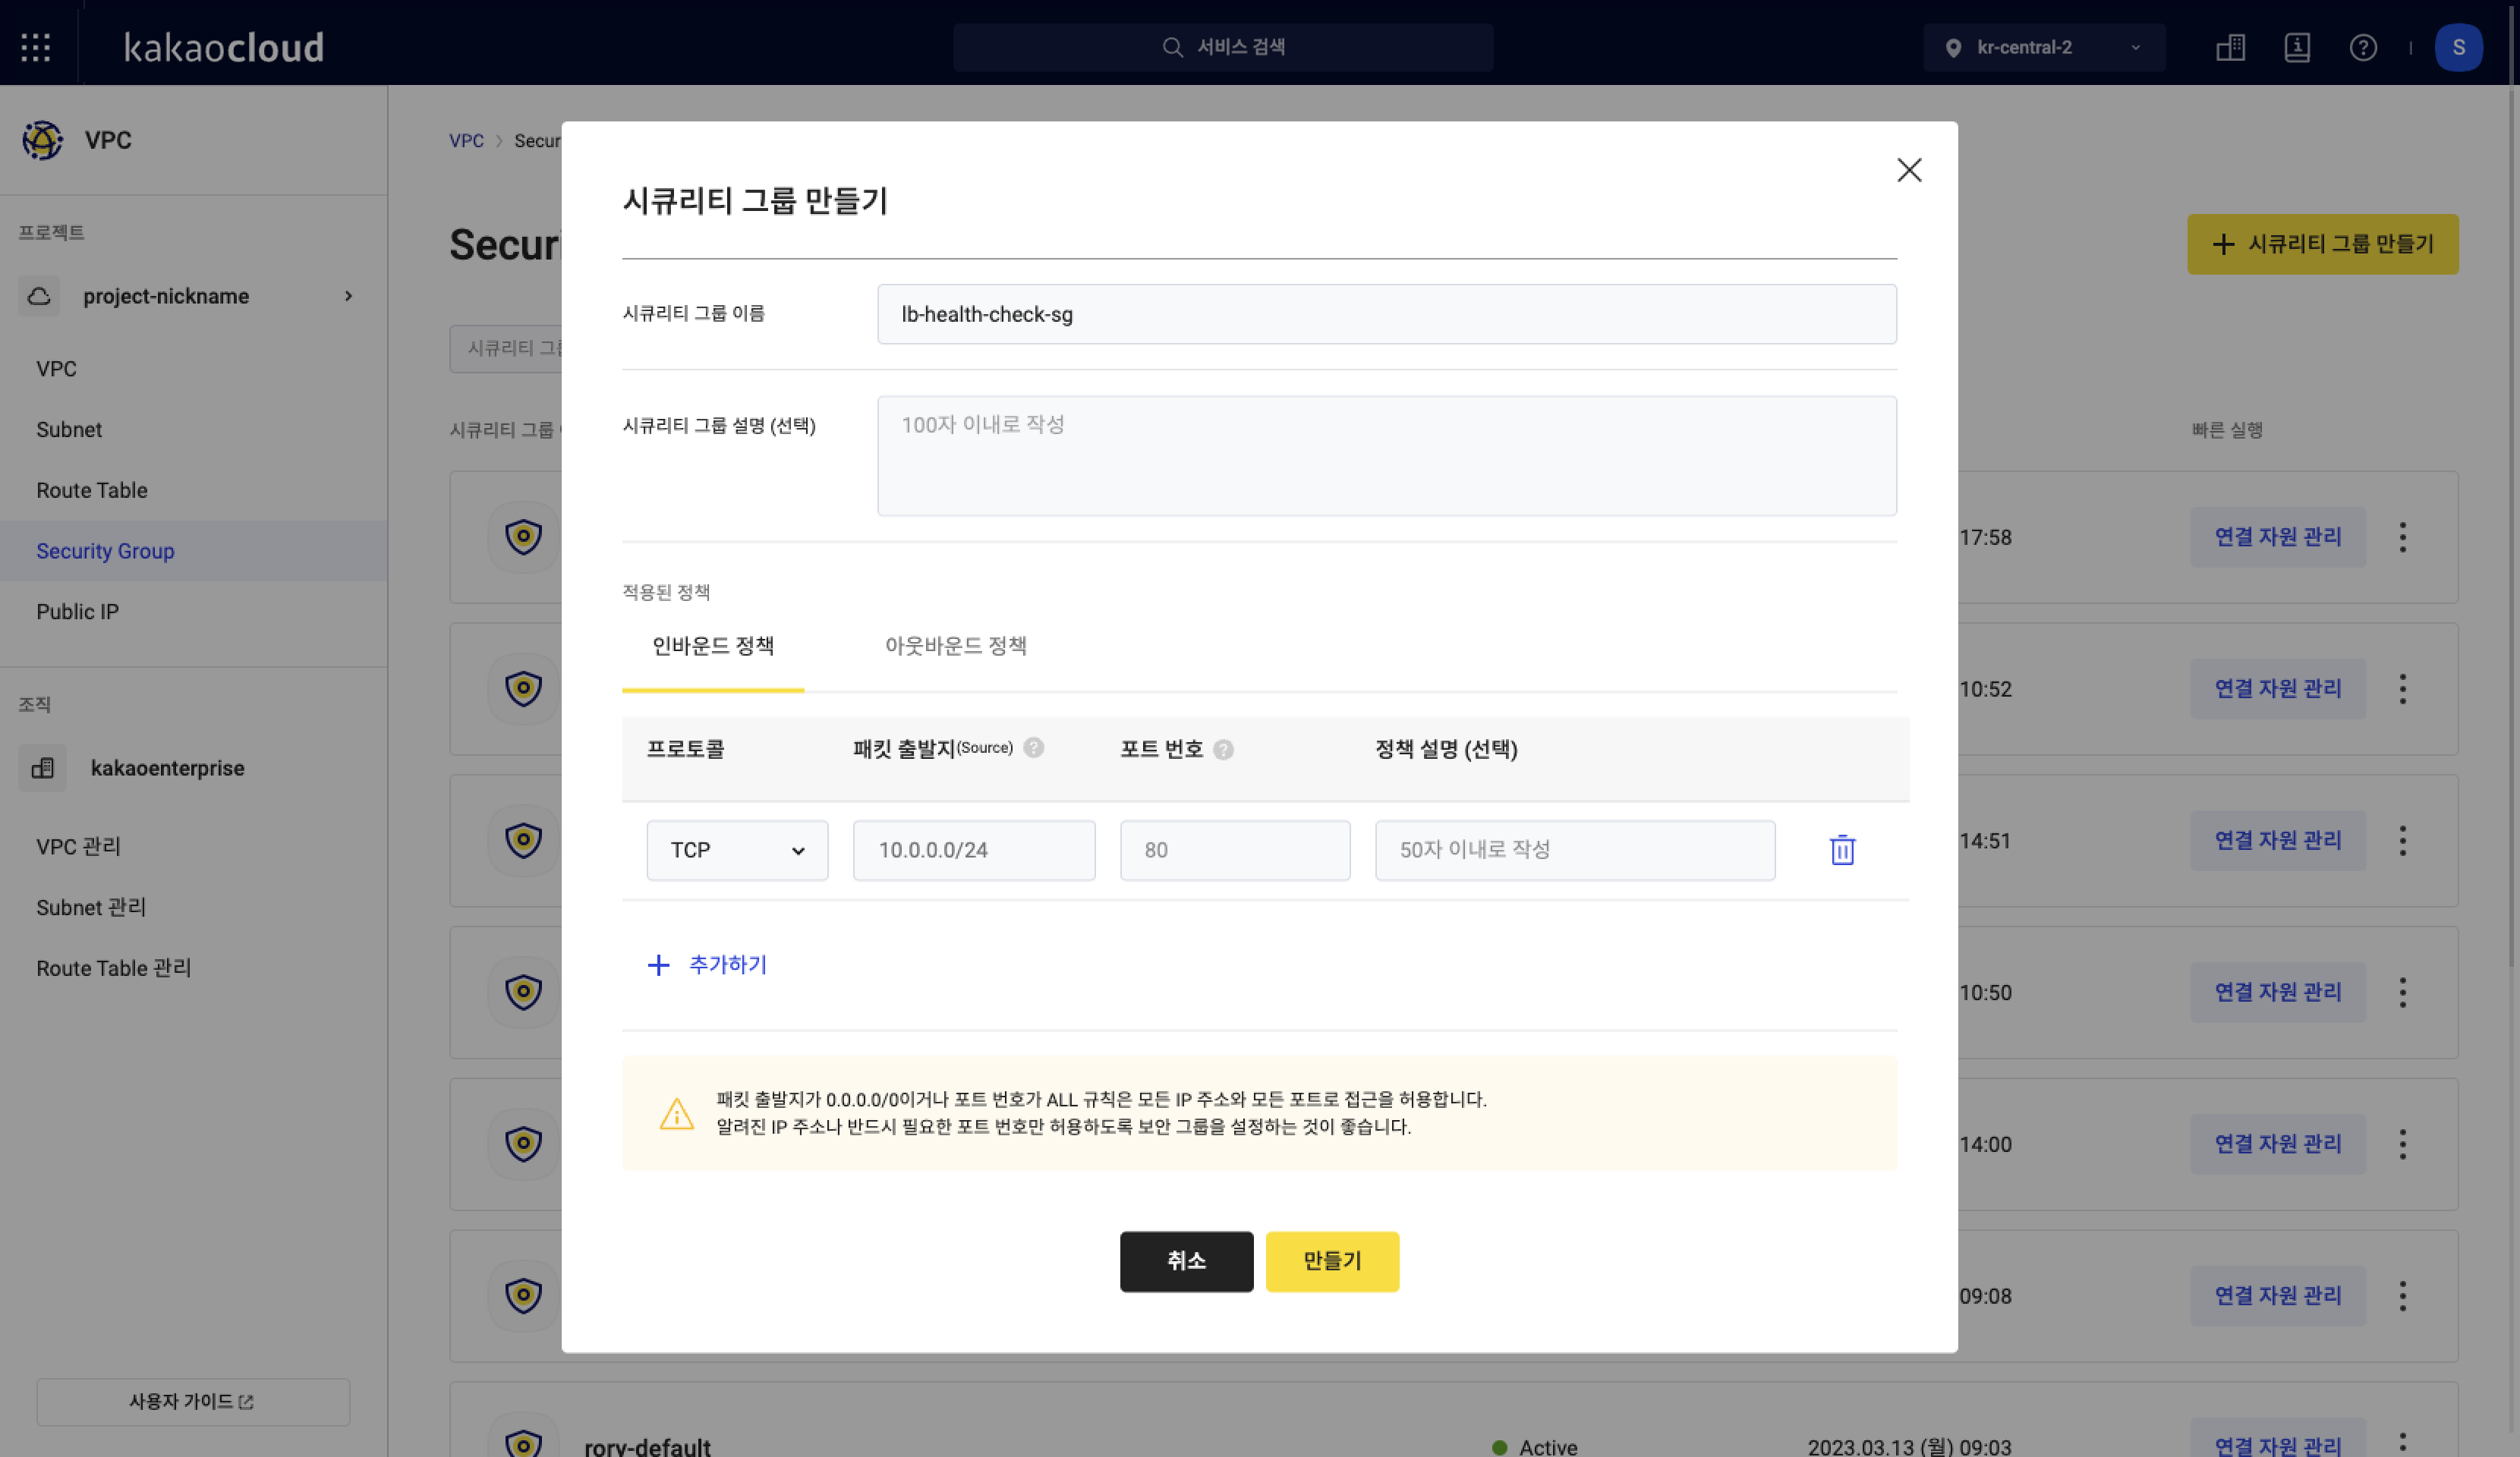 Create security group
 -
Based on the detailed information in Process 3 of the Target group > Targets tab, enter all rule information.
- You can register all health check IPs in one security group and connect that security group to all target instances.
Or you can create a security group for each subnet, register only the health check IPs created in that subnet, and connect it only to the target instances in the same subnet.
Configure inbound rule
Category Description Protocol Protocol for communication (TCP, UDP, ICMP, ALL), selected according to the health check type of the target group
- If the health check type is PING:ICMP
- If the health check type is HTTP, HTTPS, TCP:TCPSource Source IP to allow access
- Enter the health check IP confirmed in target details
- Register each of the two health check IPs created in the subnet containing the target
- If managing with one security group, register each of all health check IPsPort Port for communication
- Enter the health check port of the target
- Can be entered as a single port or a rangeRule description (optional) Description of the rule - You can register all health check IPs in one security group and connect that security group to all target instances.
-
Click the [Create] button to complete creating the security group.
-
In the Security group list, click the [Manage connected resources] button on the right of the created security group to connect the target instance and complete the configuration.
View target list and basic information
- Go to KakaoCloud console > Networking > Load Balancing > Target group.
- Select the target group for which you want to view targets.
- Select the Targets tab.
- Check the target list and basic information of the targets.
Category Description IP Target IP Port Target port Instance Name and ID of the target instance Subnet Name of the subnet that contains the target Security group Security group connected to the target instance Health check port Port on which the health check is performed Weight ratio Weight ratio converted from the entered weight according to the formula Provisioning status Indicates whether the target was added successfully or whether modification or deletion is in progress Operating status Indicates whether the added target is available for use
Modify targets
You cannot modify the port of an added target. If you want to change the port, delete the target and then perform Configure targets again.
Set health check port
- Go to KakaoCloud console > Networking > Load Balancing > Target group.
- Select the target group for which you want to change the health check port settings.
- Click the Targets tab, and then click [⋮] > Set health check port.
- Change the health check port value in the pop-up window to suit your environment, and then click the [Save] button.
Detach target
- Go to KakaoCloud console > Networking > Load Balancing > Target group.
- Select the target group from which you want to disassociate a target.
- Select the Targets tab, and then select [⋮] > Detach target for the target.
- Enter the information in the pop-up window, and then click the [Disassociate] button.
Disassociating a target does not delete the instance. To associate it again, add it in Configure targets.