Create and manage VPC
The VPC (Virtual Private Cloud) in KakaoCloud is a user-defined private network service. By using a VPC, users can combine multiple network components to quickly and easily build a network suited to their environment.
The following describes how to create and manage a VPC in the VPC service.
- VPC role management follows IAM role-based access control (RBAC), and only Project Admin can create and manage VPCs. Project members can only view VPCs.
- You can check your role in KakaoCloud console > Profile (top right) > Organization role or Project role.
Create VPC
You can create a new VPC.
You can create up to three VPCs per project.
-
Go to KakaoCloud console > Networking > VPC.
-
In the VPC menu, click the [Create VPC] button.
-
Enter the required information to create a VPC, and then click the [Create] button.
 Create VPC
Category Description ⓵ VPC information - Name: Enter the VPC name
- IP CIDR block: Enter the VPC IP CIDR block
ㄴ You can create it by entering a range from the private IP ranges (172.16.0.0 / 192.168.0.0 / 10.0.0.0)
ㄴ Prefix length: Select between 16–24⓶ Subnet settings Check subnet information
- Number of subnets per availability zone: One is set by default and can only be selected within the quota
ㄴ Public type: One is set by default and can only be selected within the quota
ㄴ Private type: Select from 0–10, within the quota
- Subnet CIDR block: Displayed according to the number of configured public and private subnets
ㄴ For the Private type, the prefix length can be selected between 20–26⓷ Topology You can preview the configuration graph that changes according to the VPC information, availability zone, and subnet settings
After creating a VPC, see the following tutorials for expanded network configuration.
- Build network using NAT instances in multi-availability zones: Private subnet and NAT instance configuration
- Connect multiple VPCs using Transit Gateway: Multi-VPC connectivity
View VPC list and basic information
View the list of currently created VPCs and their basic information.
-
Go to KakaoCloud console > Networking > VPC.
-
Click the VPC menu, and then check the list of currently created VPCs and their basic information.
Category Description Name Name of the VPC ID Unique ID of the VPC Status Status of the VPC
-Active: Activated
-Pending Create: Creating
-Pending Update: Updating
-Pending Delete: Deleting
-Error: Error occurredIP CIDR block IP CIDR block of the VPC Created at Date and time when the VPC was created infoAfter creating a VPC, even when the status becomes
Active, it may take up to about 20 minutes for internal VPC components such as the DNS resolver to complete configuration.
View VPC details
View detailed information about the VPC.
-
Go to KakaoCloud console > Networking > VPC.
-
Click the VPC menu, and then select the VPC whose details you want to view from the VPC list.
- Details tab
- Topology tab
- Subnet tab
Item Description Name User-defined name used to identify the VPC ID Unique ID automatically assigned when the VPC is created Status Current operational status of the VPC (for example, Active) IP CIDR block Private IP address range used within the VPC Internet gateway ID Unique identifier of the internet gateway connected to the VPC Route table Name of the route table connected to the VPC by default Route table ID Unique ID of the connected route table DNS resolver query logging bucket Object Storage bucket information where DNS query logs are stored DNS support Whether internal DNS functionality is enabled in the VPC Created at Date and time when the VPC was created Item Description Configuration graph Displays the relationships between the VPC, subnets, and route tables as a graph Routing configuration Displays routing settings for IGW and Transit Gateway Item Description Name Automatically created subnet name and ID ID Automatically created subnet ID Status Current status of the subnet IP CIDR block IP CIDR block of the subnet Availability zone Name of the availability zone where the subnet belongs Route table Name of the route table connected to the subnet Route table ID Unique ID of the route table connected to the subnet
Rename VPC
You can change the name of a VPC.
- Go to KakaoCloud console > Networking > VPC.
- Click the VPC menu, and then select [⋮] > Rename for the VPC whose name you want to change.
- Enter the information in the pop-up window, and then click the [Save] button.
Configure DNS resolver query logging
You can configure query logging for the DNS resolver in a VPC.
Enable DNS resolver query logging
To enable DNS resolver query logging for a specified VPC, you must first prepare an Object Storage bucket to store log files and an S3 access key required for the authentication process to store the files.
Refer to DNS resolver query logging and create each resource in advance.
The following describes how to enable DNS resolver query logging.
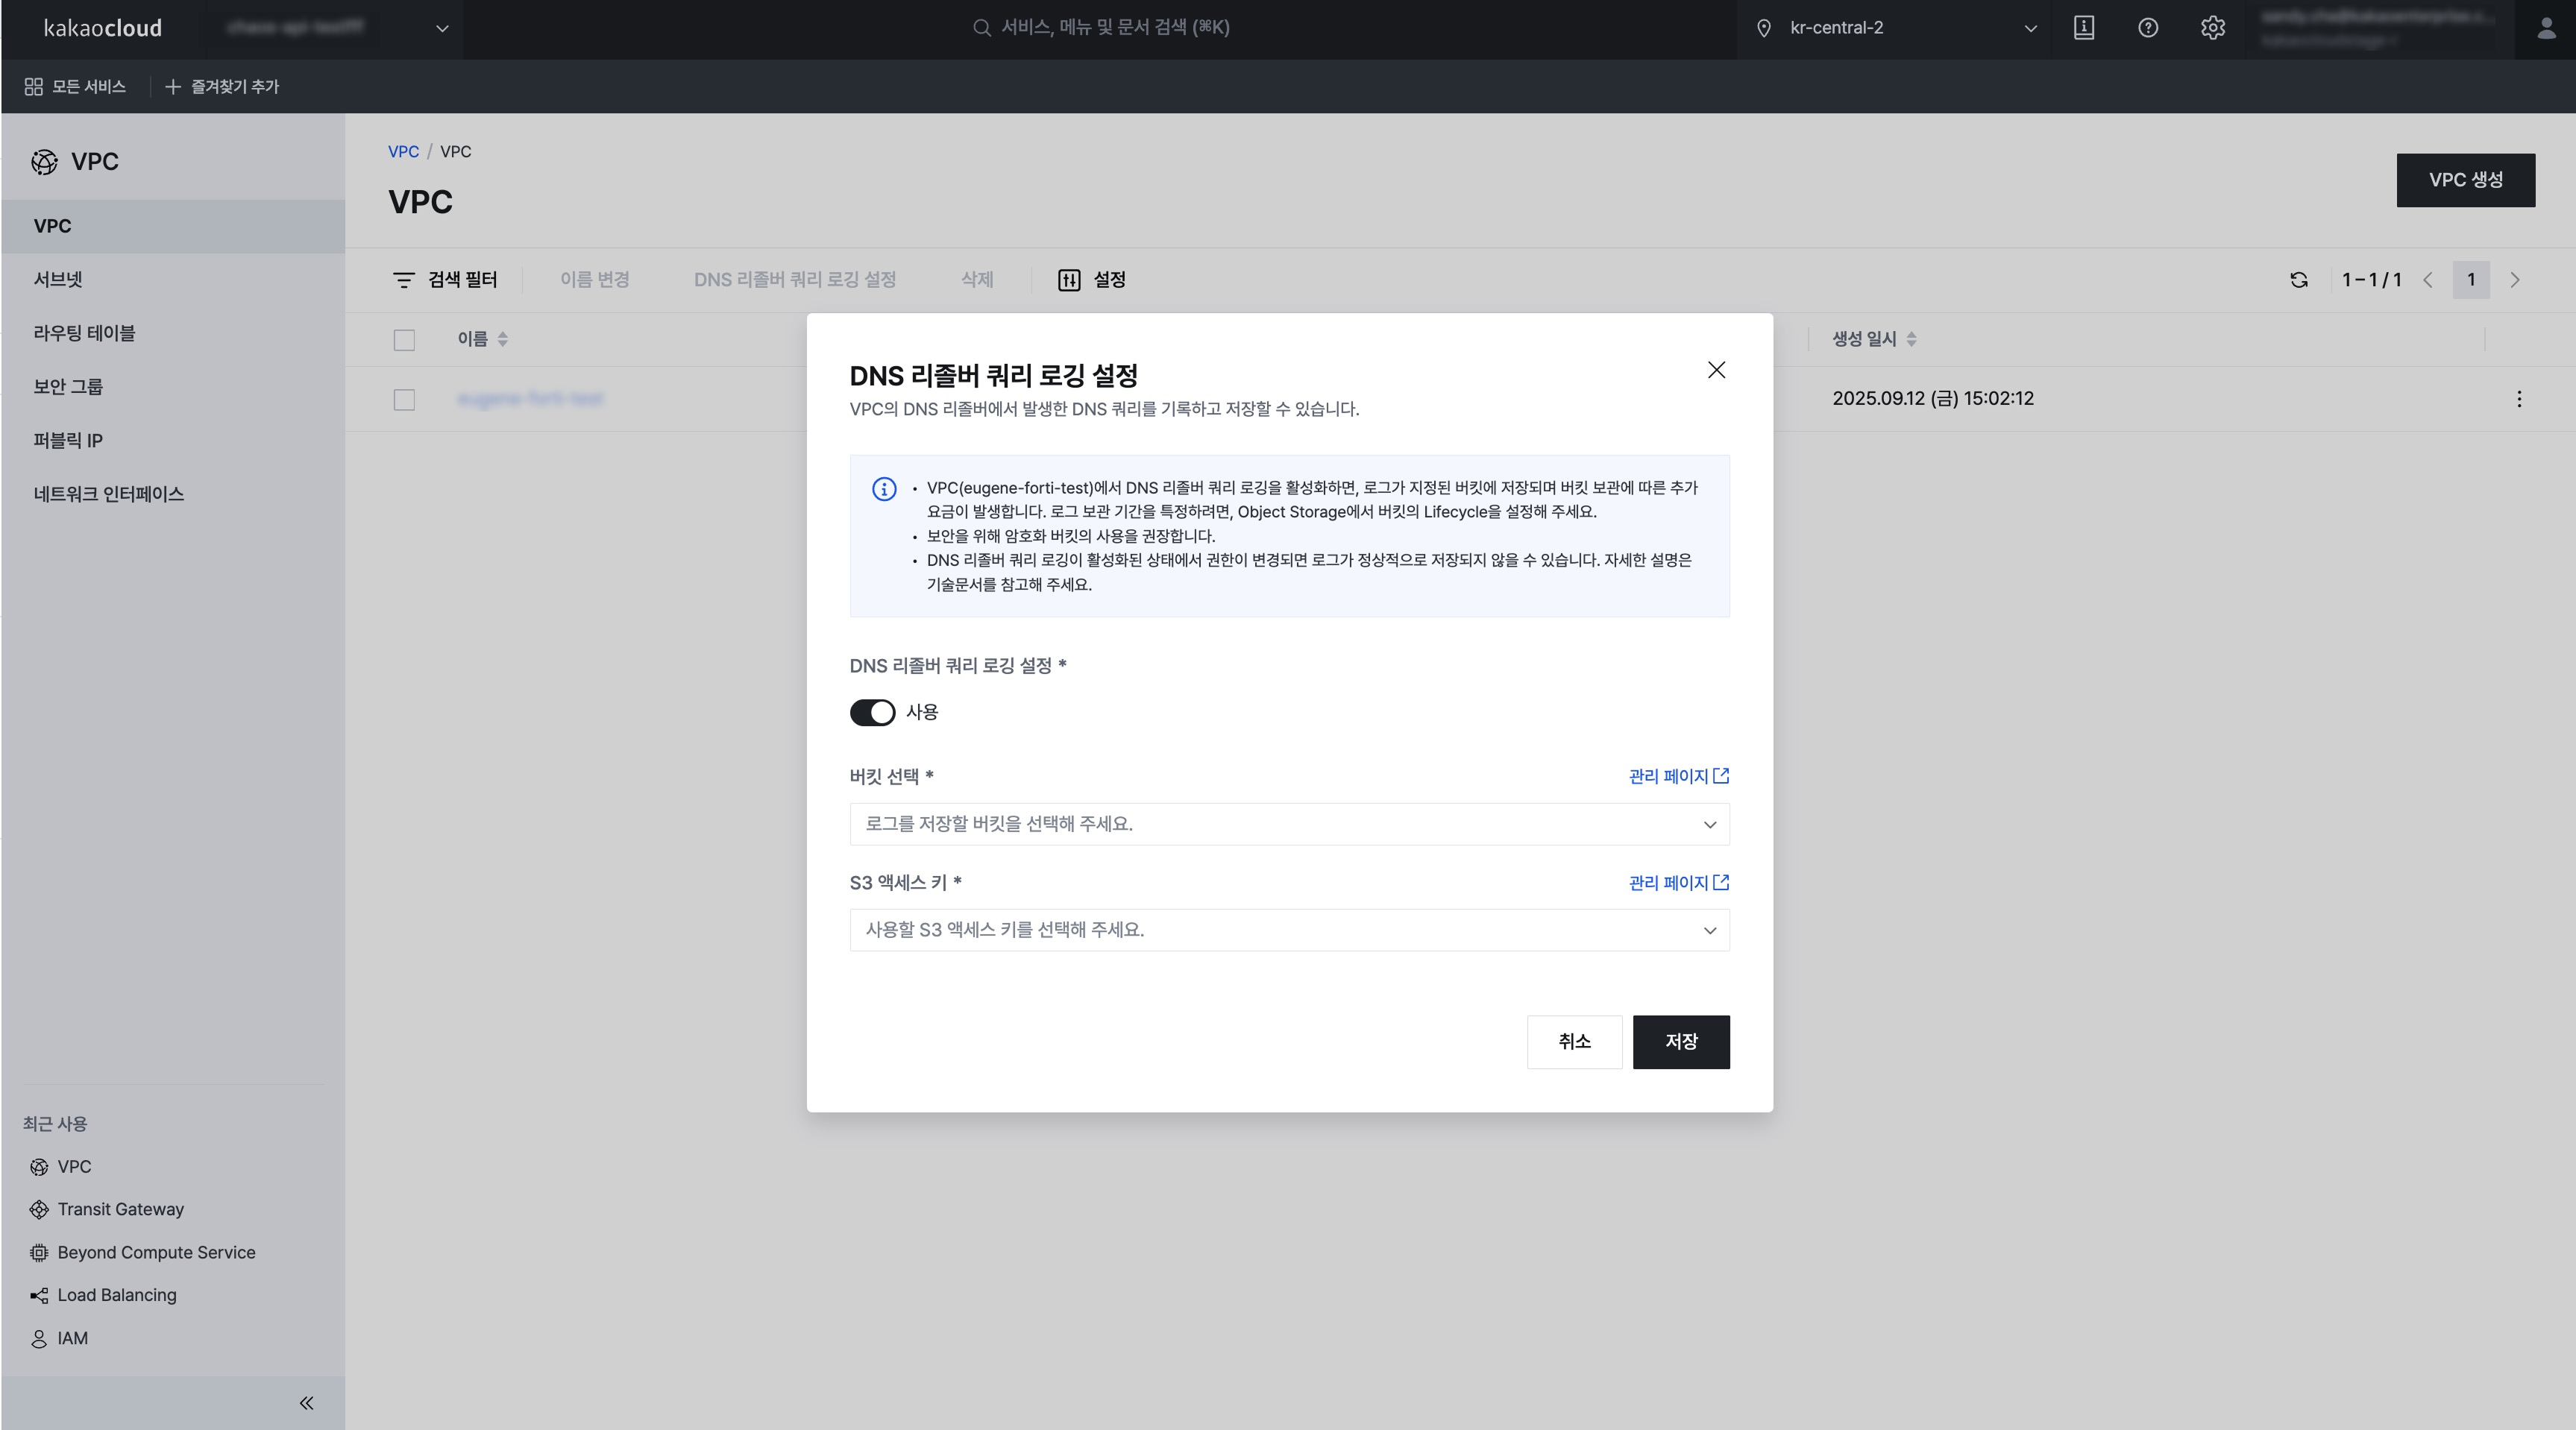 DNS resolver query logging configuration
- Go to KakaoCloud console > Networking > VPC.
- Click the VPC menu, and then select [⋮] > Configure DNS resolver query logging for the VPC where you want to enable DNS resolver query logging.
- Change the status from Disabled to Enabled.
- In Select bucket, choose the Object Storage bucket where the log files will be stored and select the S3 access key.
- You can enable encryption for the bucket. For security reasons, encrypting the bucket is recommended. For more information about creating an Object Storage bucket, see Object Storage > Create and manage buckets.
- Click the [Save] button.
- If the Object Storage bucket specified as the storage destination in DNS resolver query logging is deleted, query logs will not be stored normally. If the bucket is deleted, configure the settings again and specify another bucket.
- If the account permissions change while DNS resolver query logging is enabled, query logs may not be stored normally. Reconfigure the permissions for the account that set up DNS resolver query logging so that it can configure query logs.
- VPCs created before the DNS resolver query logging feature release, specifically before June 12, 2025, will be migrated in stages to support this feature. For related inquiries, contact the Helpdesk.
Disable DNS resolver query logging
The following describes how to disable DNS resolver query logging.
- Go to KakaoCloud console > Networking > VPC.
- Click the VPC menu, and then select [⋮] > Configure DNS resolver query logging for the target VPC.
- Change DNS resolver query logging configuration to [Disabled].
- Click the [Save] button.
Delete VPC
You can delete a VPC.
- Go to KakaoCloud console > Networking > VPC.
- Click the VPC menu, and then select [⋮] > Delete for the VPC you want to delete.
- Enter the required information, and then click the [Delete] button.