Create and manage route tables
The following describes how to create and manage route tables in the VPC service.
- VPC role management follows IAM role-based access control (RBAC), and only Project Admin can create and manage route tables. Project members can only view route tables.
- You can check your role in KakaoCloud console > Profile (top right) > Organization role or Project role.
Create route table
You can create a new route table.
-
Go to KakaoCloud console > Networking > VPC.
-
Click the Routing Table menu, and then click the [Create route table] button.
-
In the Create route table pop-up window, enter the information, and then click the [Create] button.

Category Description Route table name Enter the name of the route table to create VPC Select the VPC where the route table will be located
Manage route tables
You can view created route tables or perform tasks such as changing the name and changing the default route table.
View route table list and basic information
You can view the currently created route table list and basic information.
-
Go to KakaoCloud console > Networking > VPC.
-
Click the Routing Table menu, and then check the list of currently created route tables.
Category Description Name Name of the created route table ID ID of the created route table Status Status of the route table VPC Name of the VPC where the route table is located Number of connected resources Number of subnets connected to the route table Default Whether it is a default route table
- Yes: Route table automatically created with the VPC (cannot be deleted)
- No: Route table additionally created by the user (can be deleted) -
Click the route table for which you want to view detailed information, and then check the information on the detail page of that route table.
View route table details
You can view the currently created route table list and basic information.
-
Go to KakaoCloud console > Networking > VPC.
-
In the Routing Table menu, select the target route table.
-
Check detailed information for the route table on each tab.
- Details tab
- Routing tab
- Connections tab
Item Description Name User-defined name used to identify the resource ID Unique ID automatically assigned when the resource is created Status Current operating status of the resource (for example, Active) Default route table Whether the resource is the default route table VPC Name of the VPC to which the resource belongs VPC ID Unique ID of the connected VPC Created at Date and time when the resource was created Item Description Destination CIDR block of the target network to which traffic will be delivered Target type Type of the routing target (for example, Local, Gateway) Target information Information about the actual target resource to which traffic is delivered Status Current status of the routing entry Item Description Subnet Name of the connected subnet ID Unique ID of the connected subnet Availability zone Availability Zone where the subnet is located IP CIDR block IP address range assigned to the subnet
Rename route table
You can change the name of the route table.
- Go to KakaoCloud console > Networking > VPC.
- Click the Routing Table menu, and then select [⋮] > Rename for the route table whose name you want to change.
- Enter the information in the pop-up window, and then click the [Save] button.
Set default route table
You can set the route table as the default route table.
- Go to KakaoCloud console > Networking > VPC.
- Click the Routing Table menu, and then select [⋮] > Set default route table for the target route table.
- Enter the information in the pop-up window, and then click the [Save] button.
Manage connected subnets
Support for managing subnets connected to the route table will be added later.
Modify associations
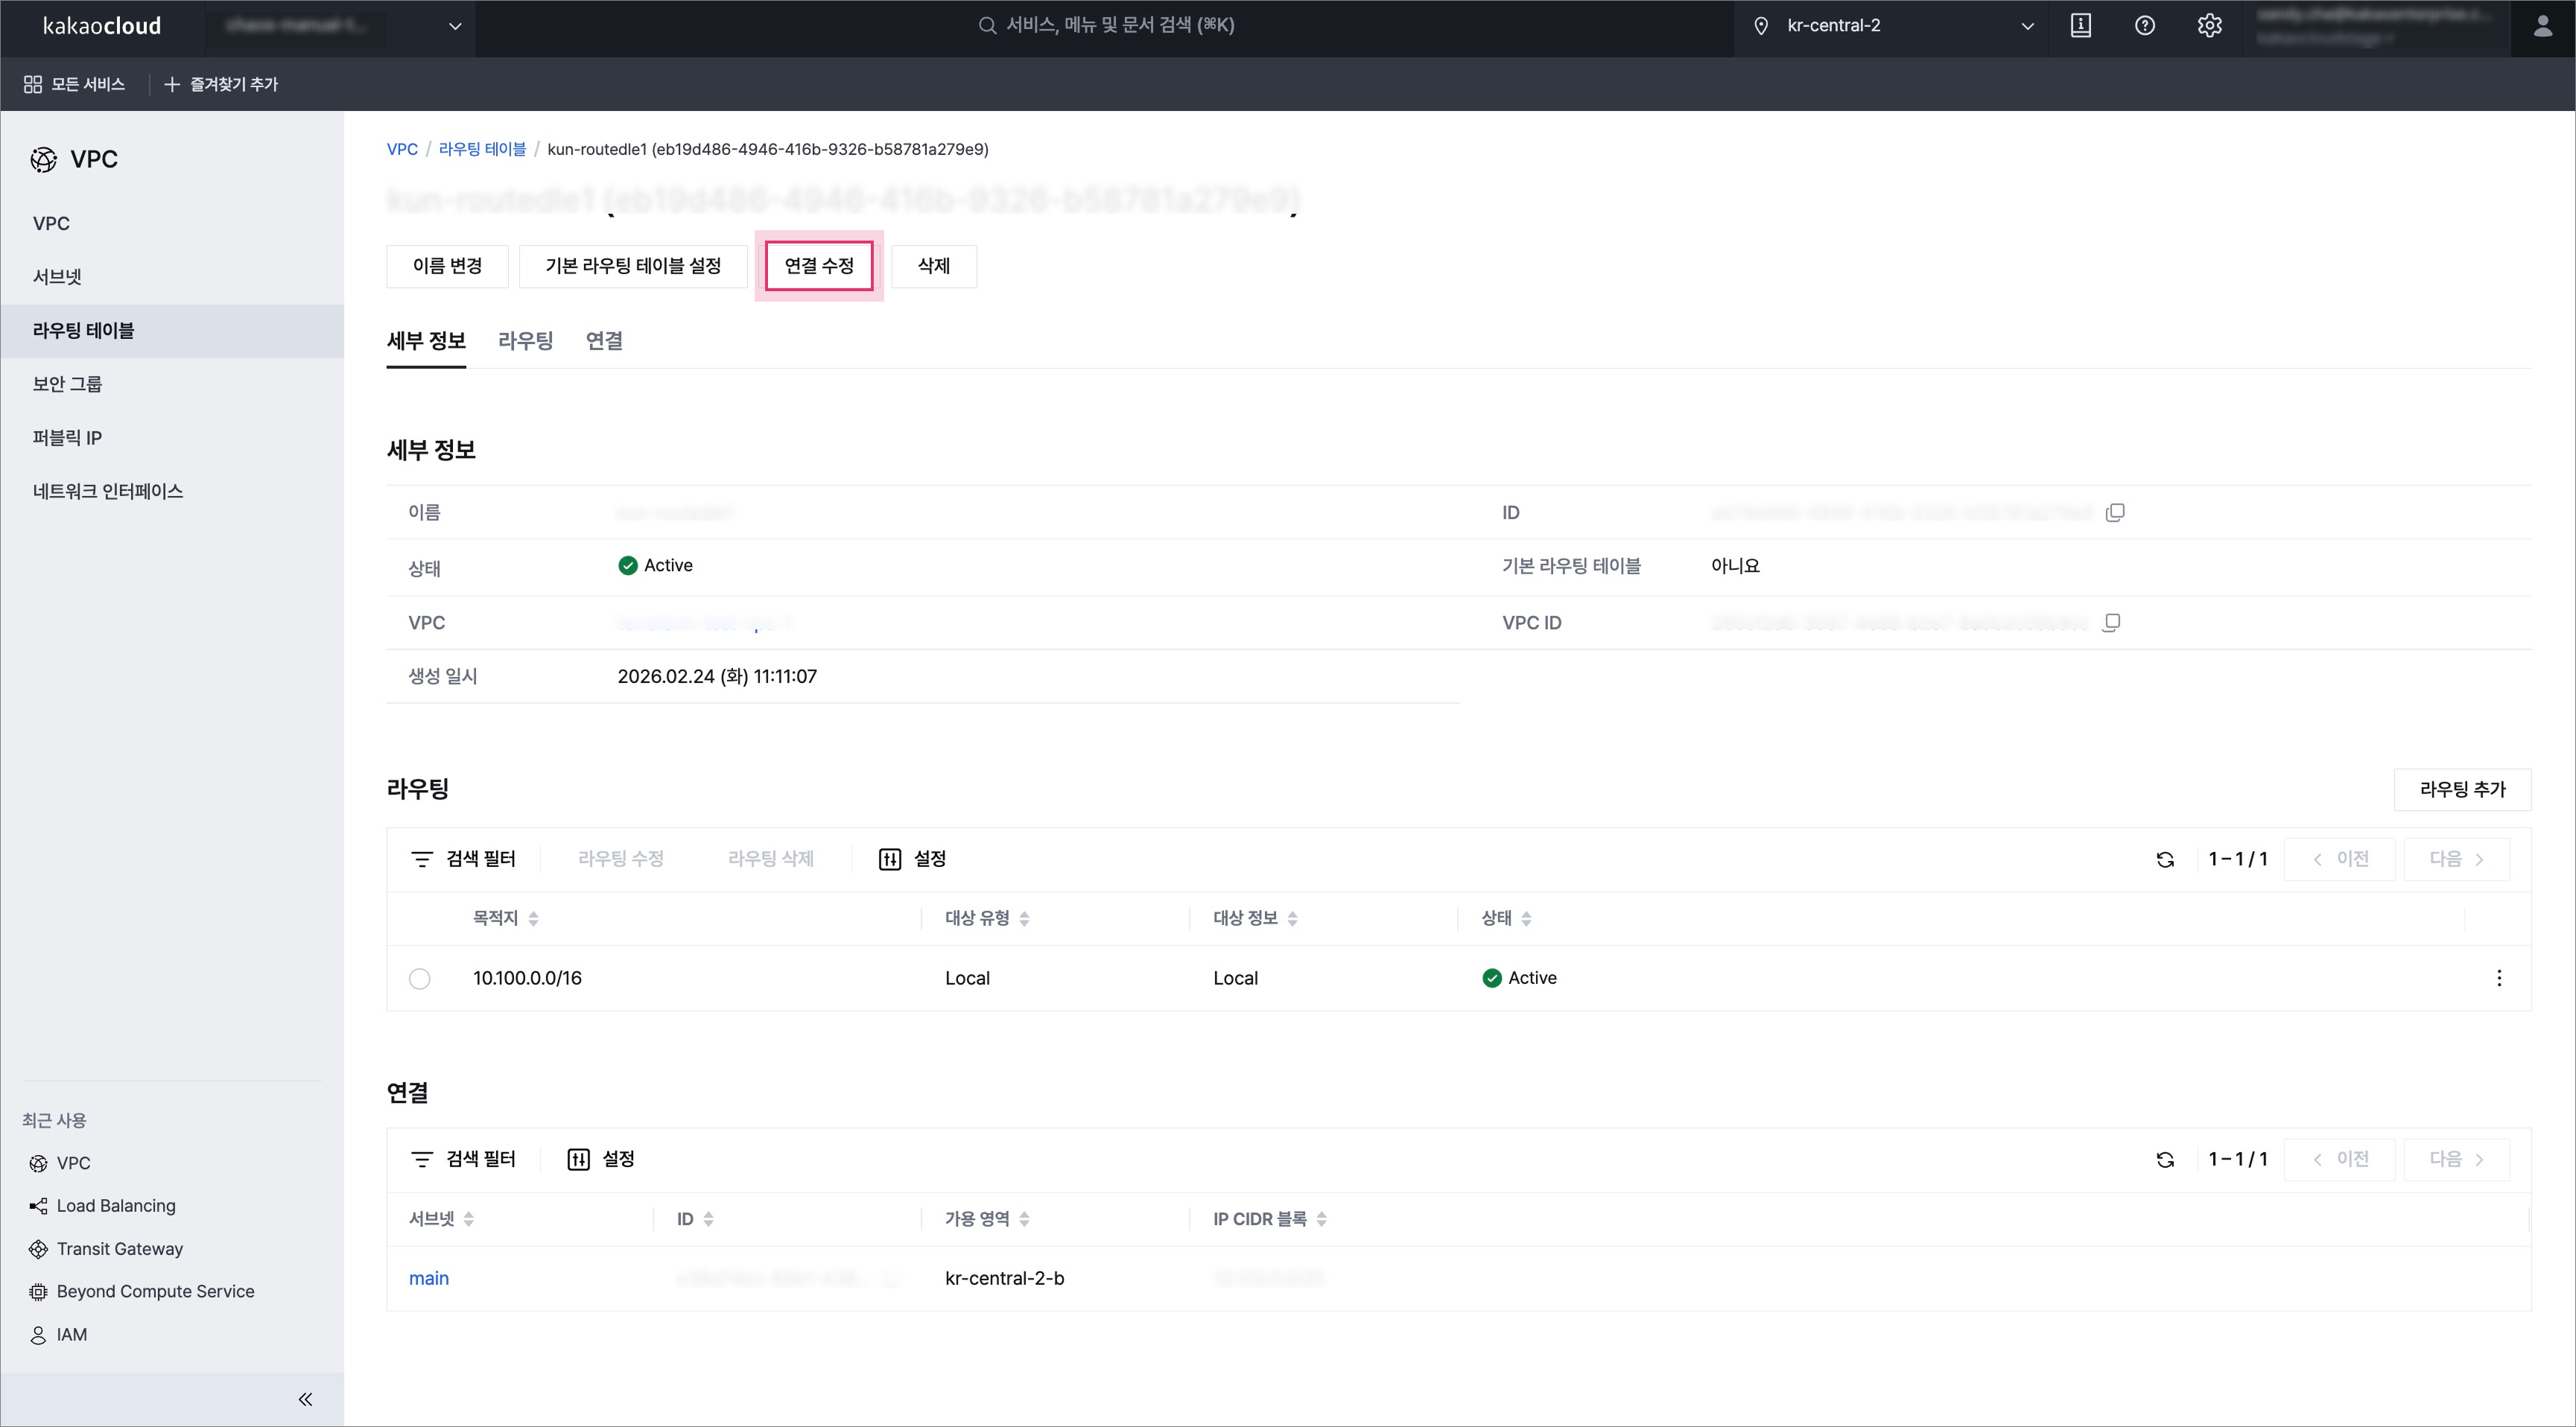
You can modify subnet associations connected to the route table.
-
Go to KakaoCloud console > Networking > VPC.
-
Click the Routing Table menu, and then select a route table.
-
Click the [Modify association] button located at the top.
 Manage connected subnets
 -
In the pop-up window, you can manage connected subnets.
- If a subnet association is needed, click the [Connect] button to connect the subnet to the route table.
Category Description Subnet Name of the subnet created in the VPC Subnet ID Unique ID of the subnet created in the VPC IP CIDR block IP CIDR block information of the subnet Route table Information about the route table connected to the subnet
- If a subnet association is needed, click the [Connect] button to connect the subnet to the route table
ㄴ When a subnet is connected, the subnet communication path changes according to the routing information, so you must check the routing status in advance
- [Connect] button enabled: Connected to another route table
- [Connect] button disabled: Connected to the selected route tableRoute table ID Unique ID of the route table
Delete route table
You can delete a route table.
Before deleting a route table, you must delete all resources that are using that route table. However, the default route table marked as Default: Yes cannot be deleted and is deleted together when the VPC resource is deleted.
- Go to KakaoCloud console > Networking > VPC.
- In the VPC menu, select [⋮] > Delete.
- Enter the delete confirmation text in the pop-up window, and then click the [Delete] button.
Add route
You can add a new route.
-
Go to KakaoCloud console > Networking > VPC.
-
Click the Routing Table menu, and then select the route table for which you want to view routes.
-
On the Routing tab, click the [Add route] button.
-
Enter the information in the pop-up window, and then click the [Add] button.
- To use a NAT instance, you must set the routing target to Instance. For more information, see Use NAT instances.
Category Description Target type Type of target through which traffic passes toward the destination IP
- Local: Target for communication within the VPC internal network (destination IP: VPC CIDR IP)
- Internet gateway: Target for communication with the internet (destination IP: IPs other than the VPC CIDR IP)
- Instance: Target for sending traffic to a VM instance (destination IP: IPs other than the VPC CIDR IP)
- Transit Gateway: Target for sending traffic to a Transit Gateway (destination IP: IPs other than the VPC CIDR IP)Target name Displays the resource name for the selected target type Destination Enter the route destination IP based on the IP CIDR block
- After selecting
Instanceas the type, you can add a route corresponding to the subnet CIDR of that VPC. - The link-local address range
169.254.0.0/16used for KakaoCloud services and destination CIDRs included in that range cannot be added as routes. - Instances with two or more connected network interfaces cannot be specified as a target of the route table. Support will be added later.
Manage routes
You can manage routes that belong to the route table.
When routes are added, changed, or deleted, the communication path of subnets connected to that route table changes. Check the status of connected subnets before managing routes.
View route list and basic information
You can view the currently created route list and detailed route information.
-
Go to KakaoCloud console > Networking > VPC.
-
Click the Routing Table menu, and then select the route table for which you want to view routes.
-
On the Routing tab, view the currently created routes and their basic information.
Category Description Destination Route destination IP Target type Type of target through which traffic passes toward the destination IP Target information Name of the target through which traffic passes toward the destination IP Status Route status
Change route type
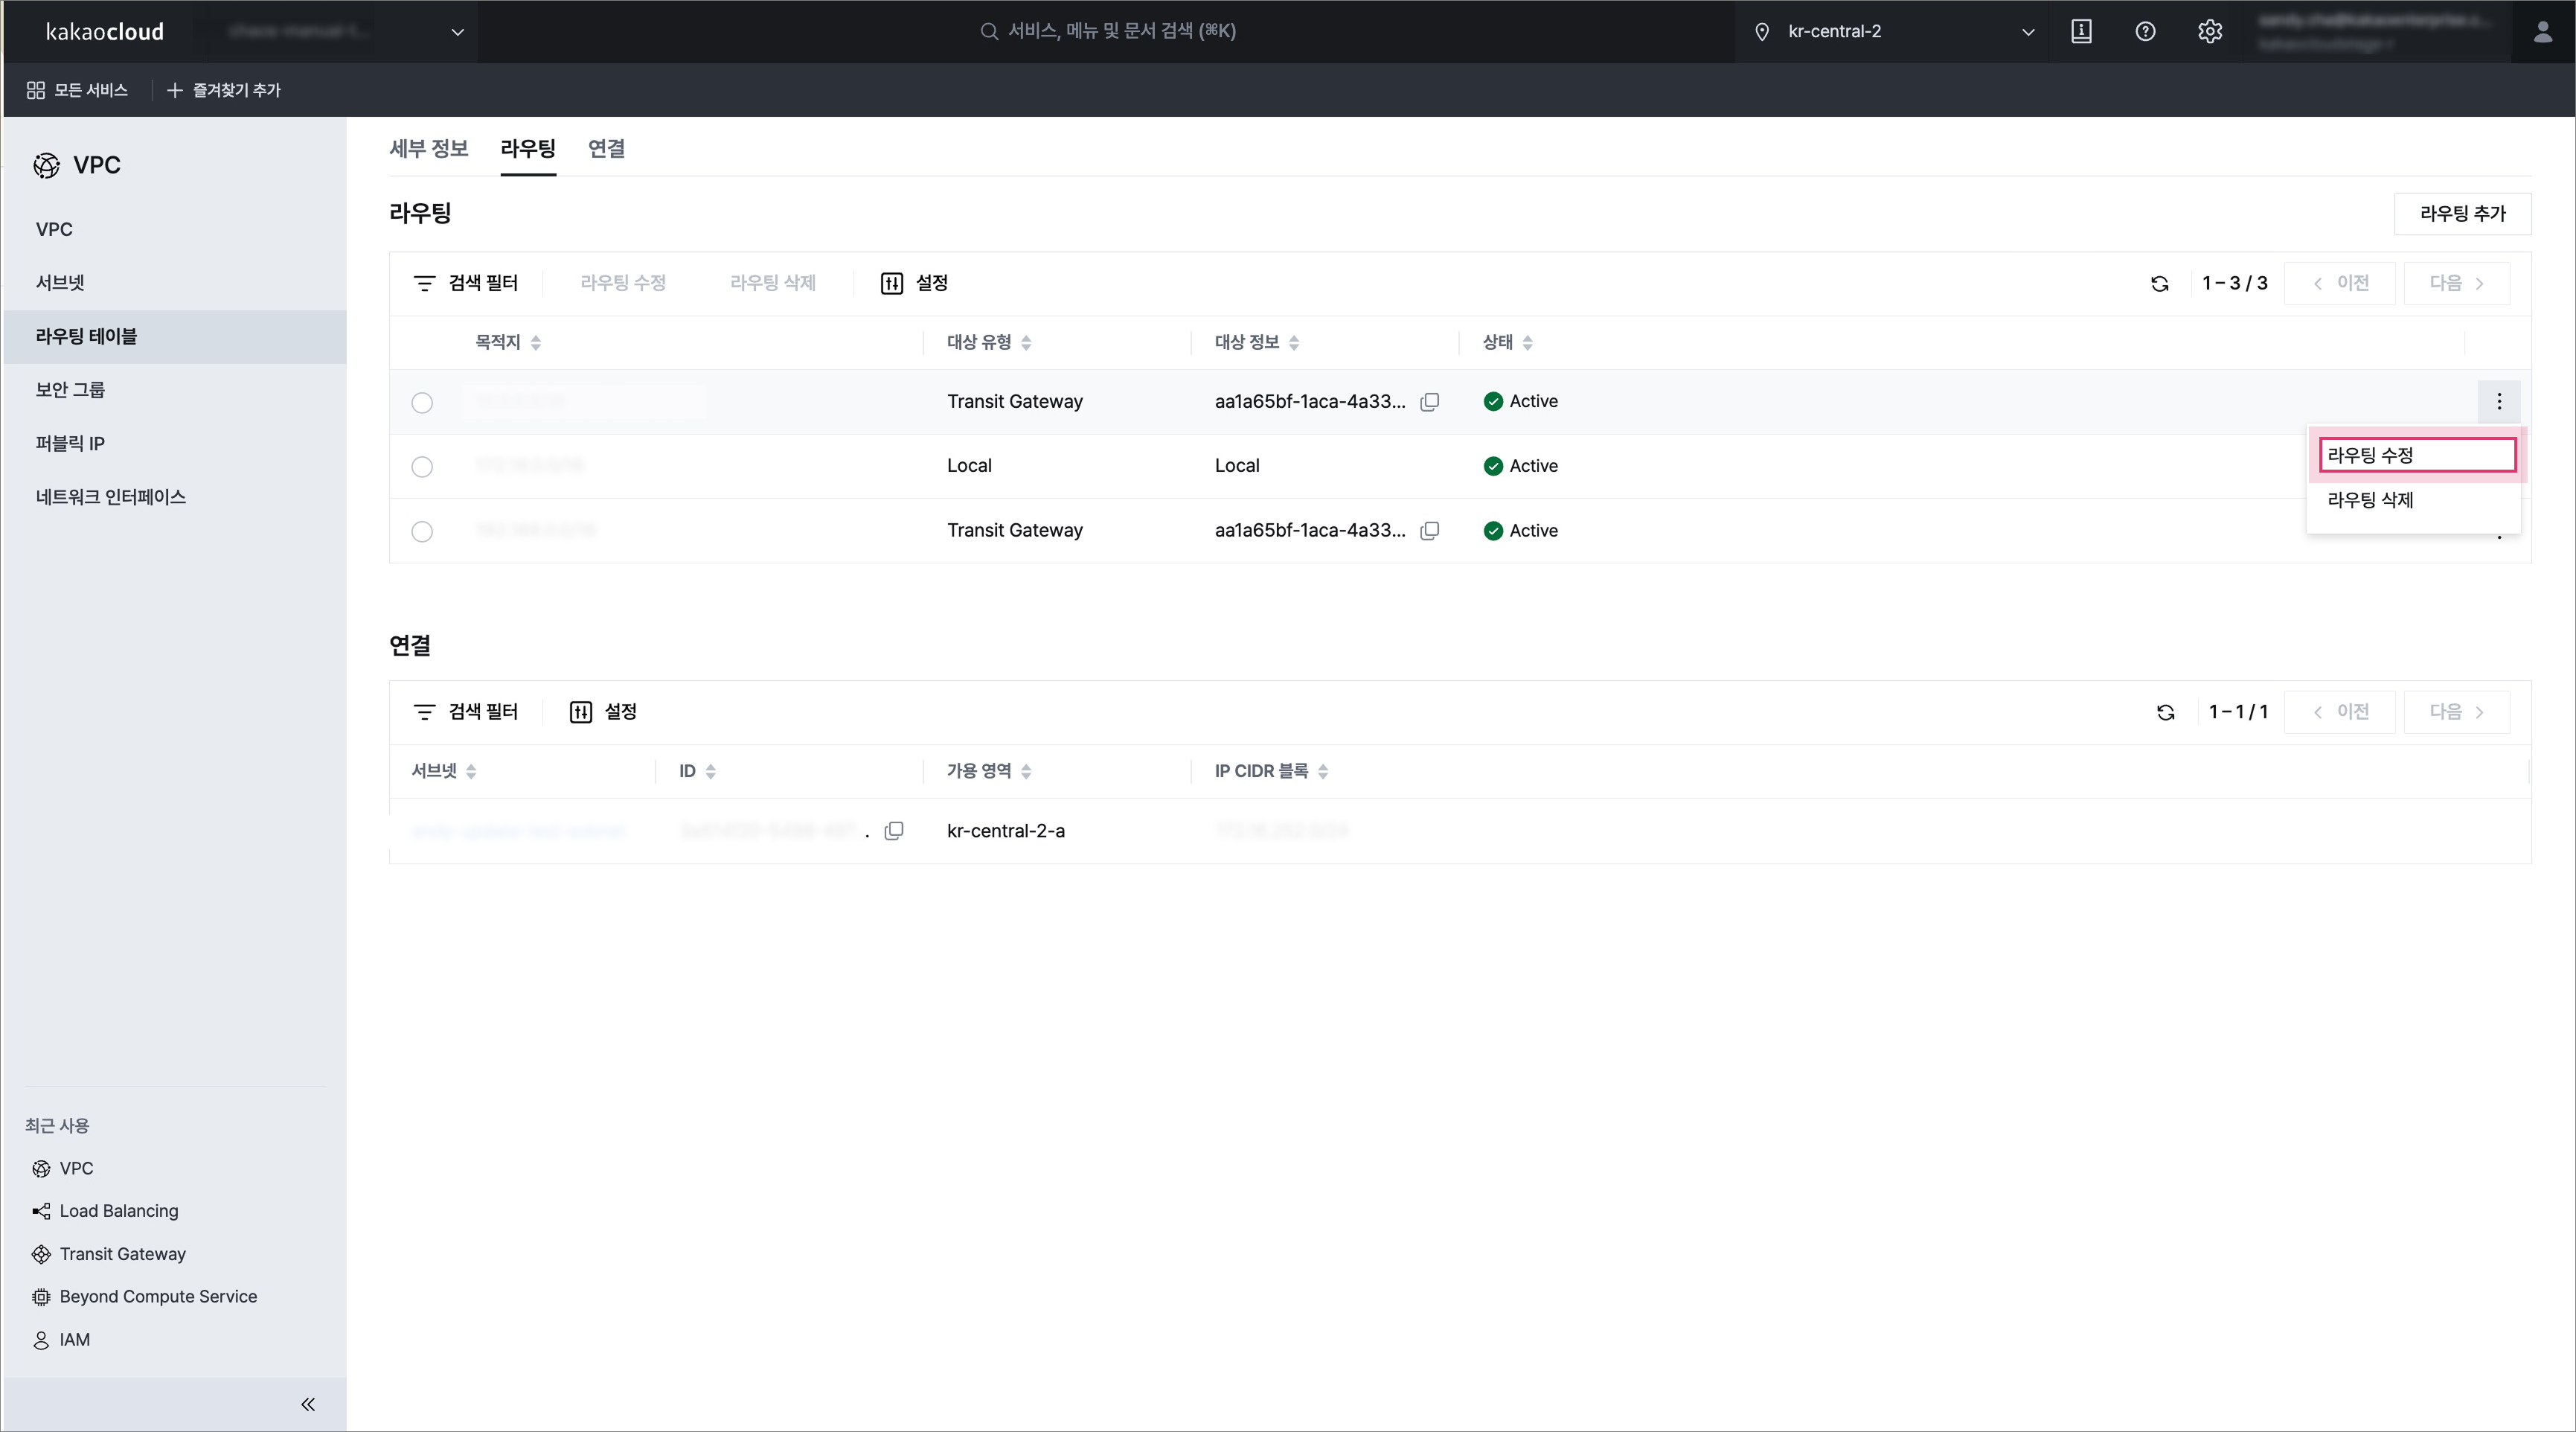
You can change the target type, destination, and other settings of a route.
-
Go to KakaoCloud console > Networking > VPC.
-
Click the Routing Table menu, and then select the target route table.
-
On the Routing tab, select [⋮] > Modify route for the route you want to change.
 Modify route
 -
Modify the information in the pop-up window, and then click the [Modify] button.
Delete route
You can delete a route.
- Go to KakaoCloud console > Networking > VPC.
- Click the Routing Table menu, and then select the target route table.
- On the Routing tab, select [⋮] > Delete route for the route you want to delete.
- Enter the delete confirmation text in the pop-up window, and then click the [Delete] button.