Step 5. Create VPC
Only Project Admin are allowed to perform this step according to KakaoCloud's IAM roles.
Create VPC
Virtual Private Cloud (VPC) is a dedicated virtual network for your organization. VPCs are logically isolated from other virtual networks and are used to run cloud resources like VM instances. To use various KakaoCloud services, you must first create and configure a VPC.
You can create up to three VPCs per project. Each VPC will be provisioned with a main routing table by default.
For details on subnet and routing table settings, refer to the VPC > How-to Guides.
-
Go to the KakaoCloud console > Beyond Networking Service > VPC.
-
Click the VPC menu and then click the [Create VPC] button.
-
Enter the required information and click [Create].
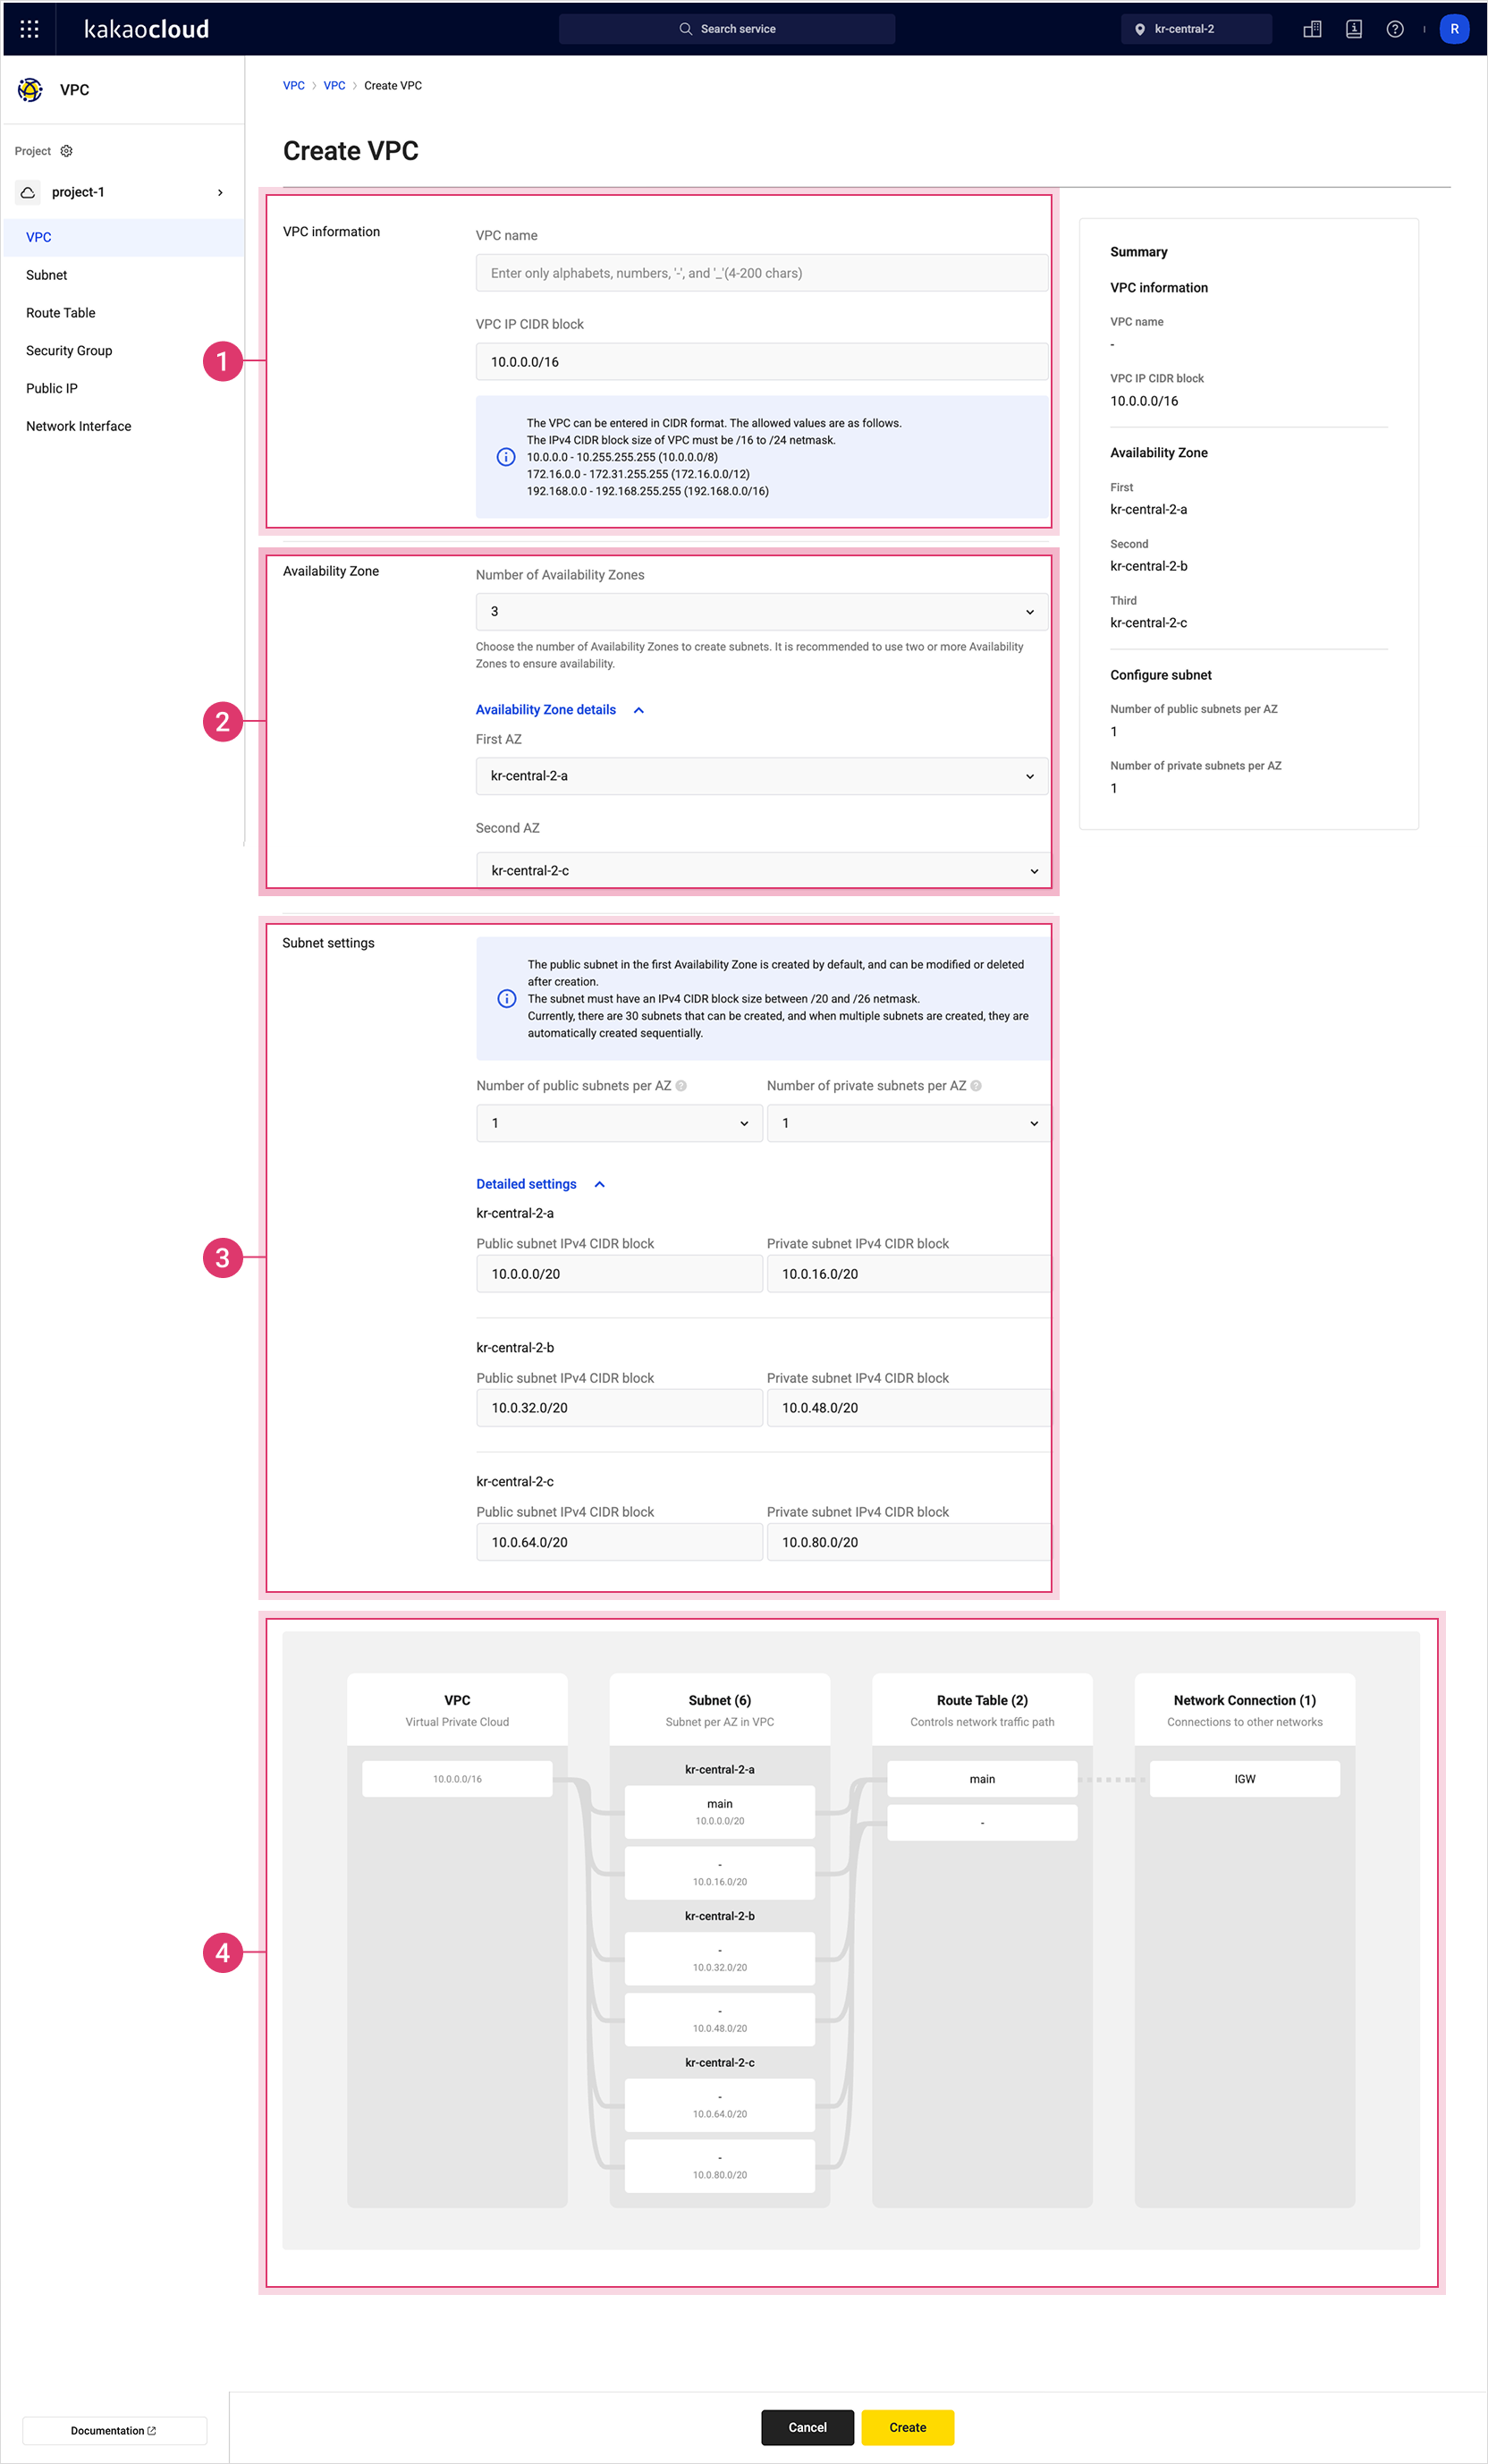
 Creating a VPC
Section Description ① VPC information - VPC name: Enter a name for the VPC
- VPC IP CIDR Block: Enter the CIDR block
ㆍAcceptable private IP ranges: 172.16.0.0 / 192.168.0.0 / 10.0.0.0
ㆍPrefix Length: choose between 16–24② Availability Zones - Number of Availability Zones: Up to 3 AZs supported
- Availability Zones details: Select specific AZs from the list③ Subnet settings - Review subnet info
- Number of public subnets per AZ: 1 by default (within quota)
- Public subnet IPv4 CIDR block: 0–10 (within quota)
- Detailed settings: Based on number of public/private subnets selected above
ㆍPublic subnet IPv4 CIDR block: Title reflects AZ
ㆍPrivate subnet IPv4 CIDR block: Prefix length 20–26④ Topology preview View a graphical preview of your settings for VPC, AZs, and subnets
Once your VPC is created, you're ready to start using KakaoCloud. For service-specific instructions, refer to the Service section.