Integrate Kubernetes Engine cluster with Rancher
Easily manage multi-cluster environments by integrating Rancher with KakaoCloud's Kubernetes Engine service.
- Estimated time: 30 minutes
- Recommended OS: Ubuntu
- Prerequisites
About this scenario
This tutorial provides guidance on integrating Kubernetes Engine with Rancher for efficient multi-cluster management. Rancher is a powerful open-source platform that enables unified management of Kubernetes clusters across diverse environments, including on-premises and cloud infrastructures. With Rancher, you can intuitively manage multi-cluster environments, efficiently deploy workloads across clusters, and monitor their performance.
This tutorial covers:
- Install and integrate Rancher with a Kubernetes Engine cluster
- Manage clusters via the Rancher web console
- Efficient operation of multi-cluster environments
- Ensure that you meet the prerequisites and the conditions listed in Before you start before proceeding.
- Note that Rancher usage and configuration are not officially supported by KakaoCloud. Refer to the official Rancher documentation for detailed information.
Before you start
To smoothly follow this tutorial, prepare the following:
1. Prepare kubernetes cluster
A Kubernetes Engine cluster with Calico CNI must be available for Rancher integration. Refer to the Kubernetes Engine cluster setup tutorial to configure the cluster, and complete the kubectl setup for managing Kubernetes Engine.
2. Set up VM for Rancher installation
A public-facing VM instance is required to install Rancher. This VM must be able to communicate with the worker nodes in the cluster. Configure communication by adjusting VM security group settings and Kubernetes Engine node pool security group settings.
3. Configure network and ports
Control network access between Rancher and Kubernetes Engine using security groups and open necessary ports for communication. Refer to the official Rancher port requirements and configure security group rules accordingly.
Getting started
Step 1. Install Rancher on VM instance
Install Rancher as a Docker container on a KakaoCloud VM instance and access the web console.
-
Connect to the VM instance and install Rancher using Docker.
sudo apt update -y
sudo apt install docker.io
sudo docker run -d --restart=unless-stopped -p 80:80 -p 443:443 --privileged rancher/rancherinfoFor various installation methods, refer to the official Rancher installation guide.
-
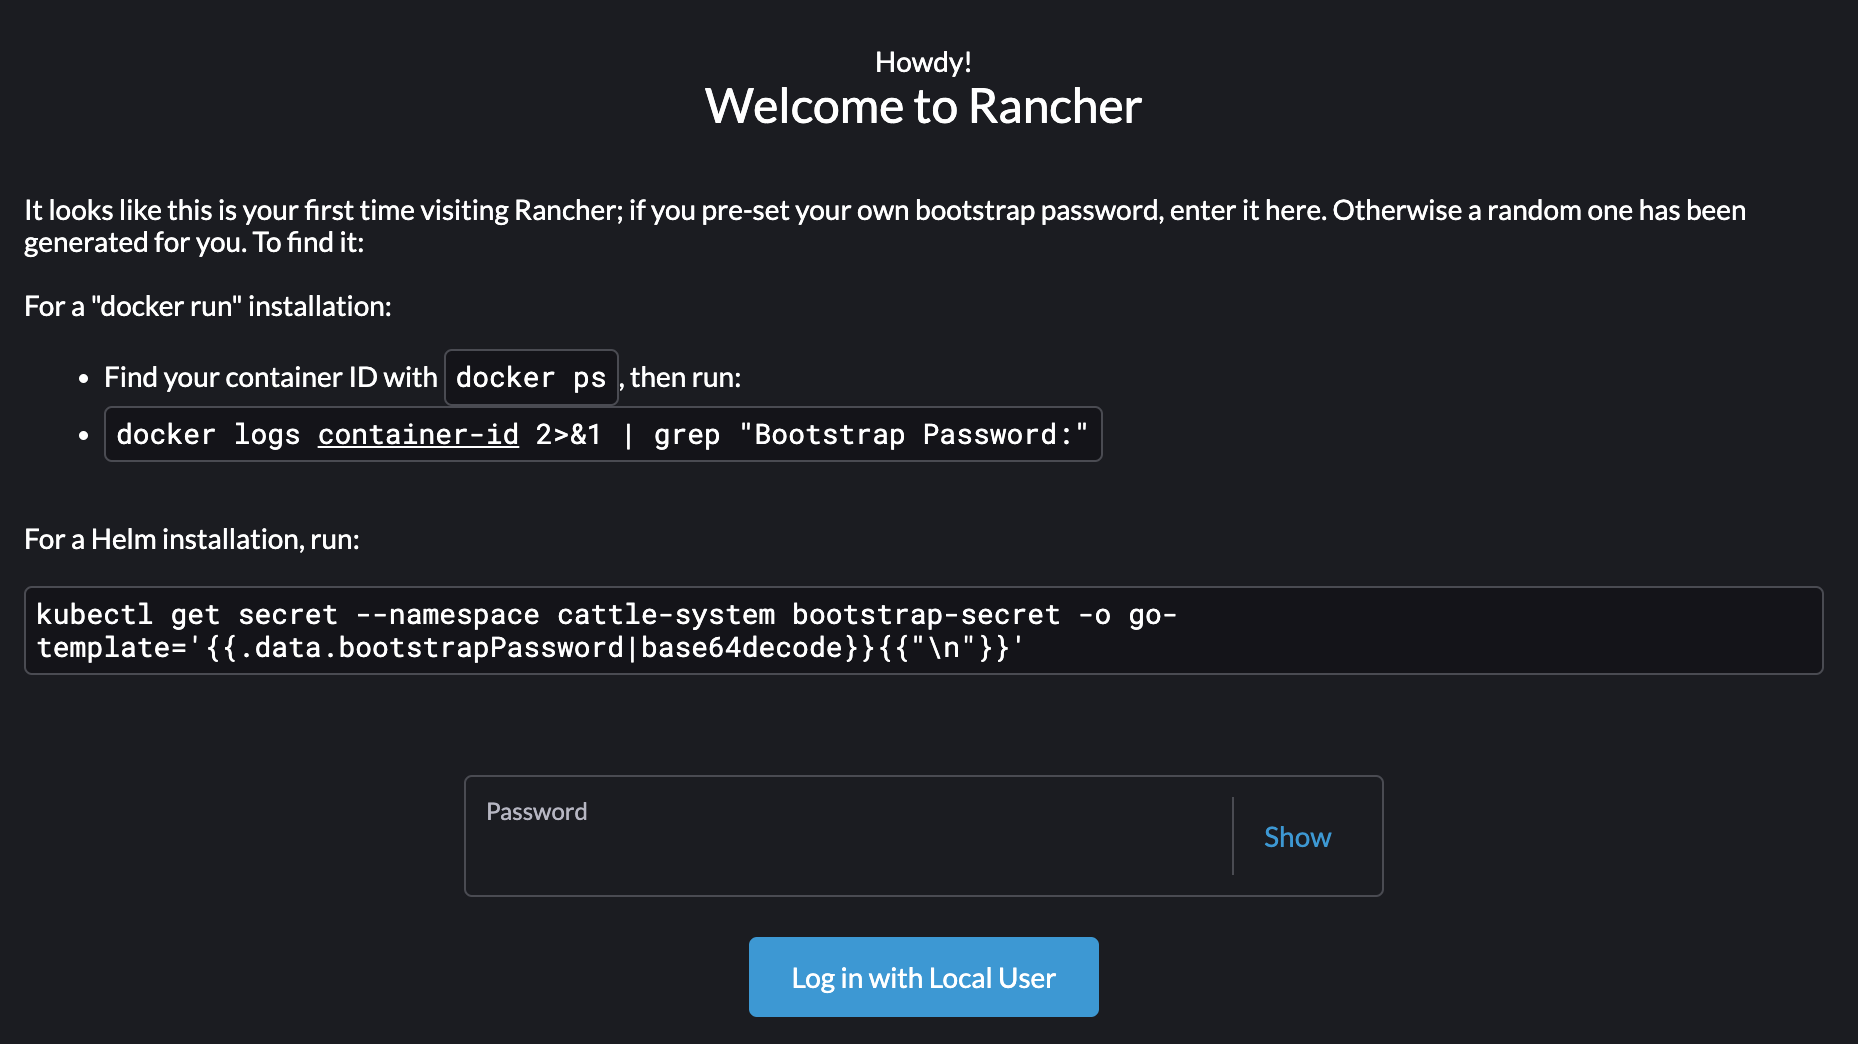
To check the Rancher web console login password, run the following Docker commands:
sudo docker ps # Check the Rancher container ID
sudo docker logs ${CONTAINER_ID} | grep "Bootstrap Password" -
Access Rancher web console.
http://${VM_PUBLIC_IP}환경변수 설명 VM_PUBLIC_IP🖌︎ Check public IP in Virtual Machine > Instances tab
Step 2. Download Rancher integration YAML file
After logging in to the Rancher web console and completing the setup, download the YAML file required for integration with Kubernetes Engine.
-
Log in using the password retrieved in Step 2.
-
Change the admin account password and log in.
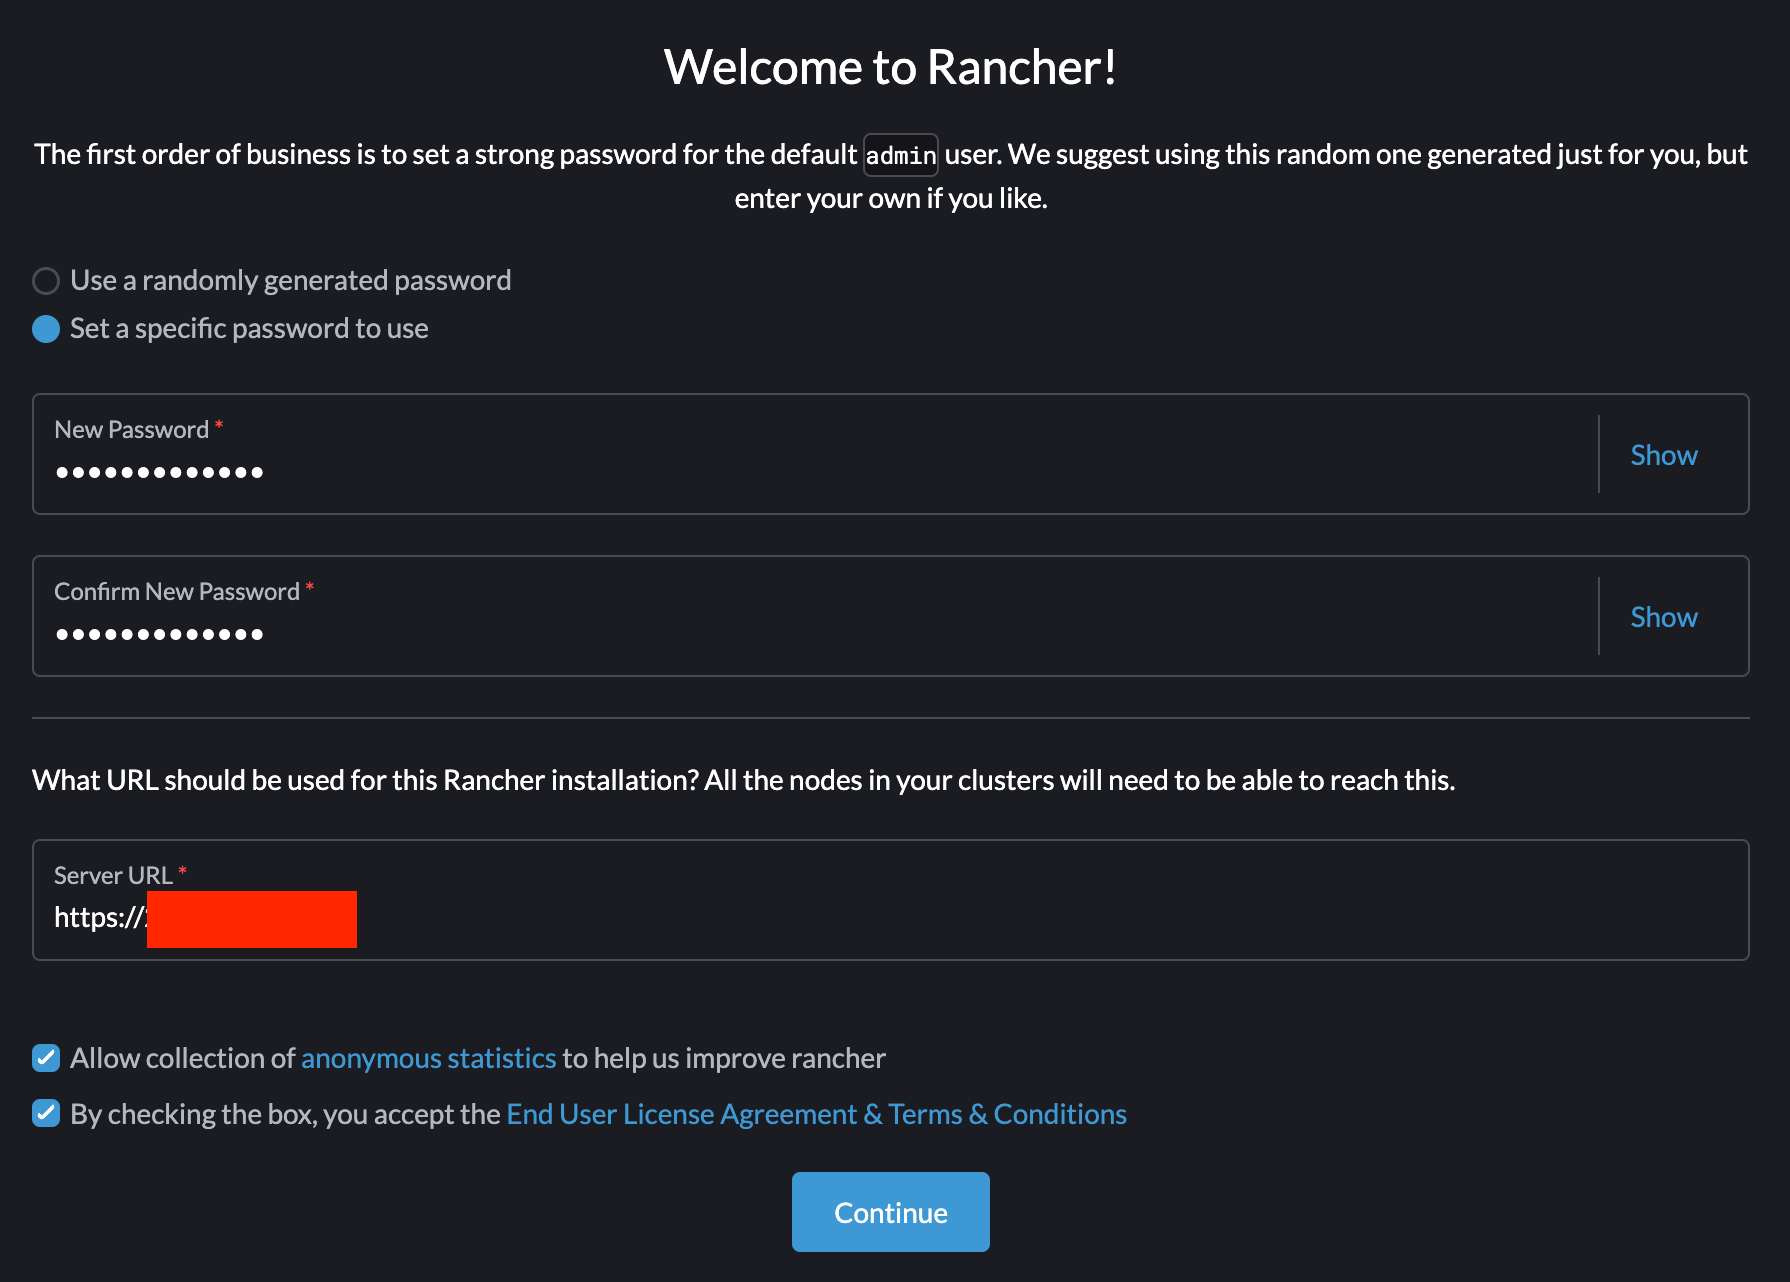
Enter the private IP of the VM instance as the Server URL.
# Server URL
https://${VM_PRIVATE_IP}
환경변수 설명 VM_PRIVATE_IP🖌︎ Check private IP in Virtual Machine > Instances tab -
To integrate Rancher with KakaoCloud Kubernetes Engine, download the YAML file. Navigate to Cluster Management > Import Existing > Generic, enter the required values, and select Create.
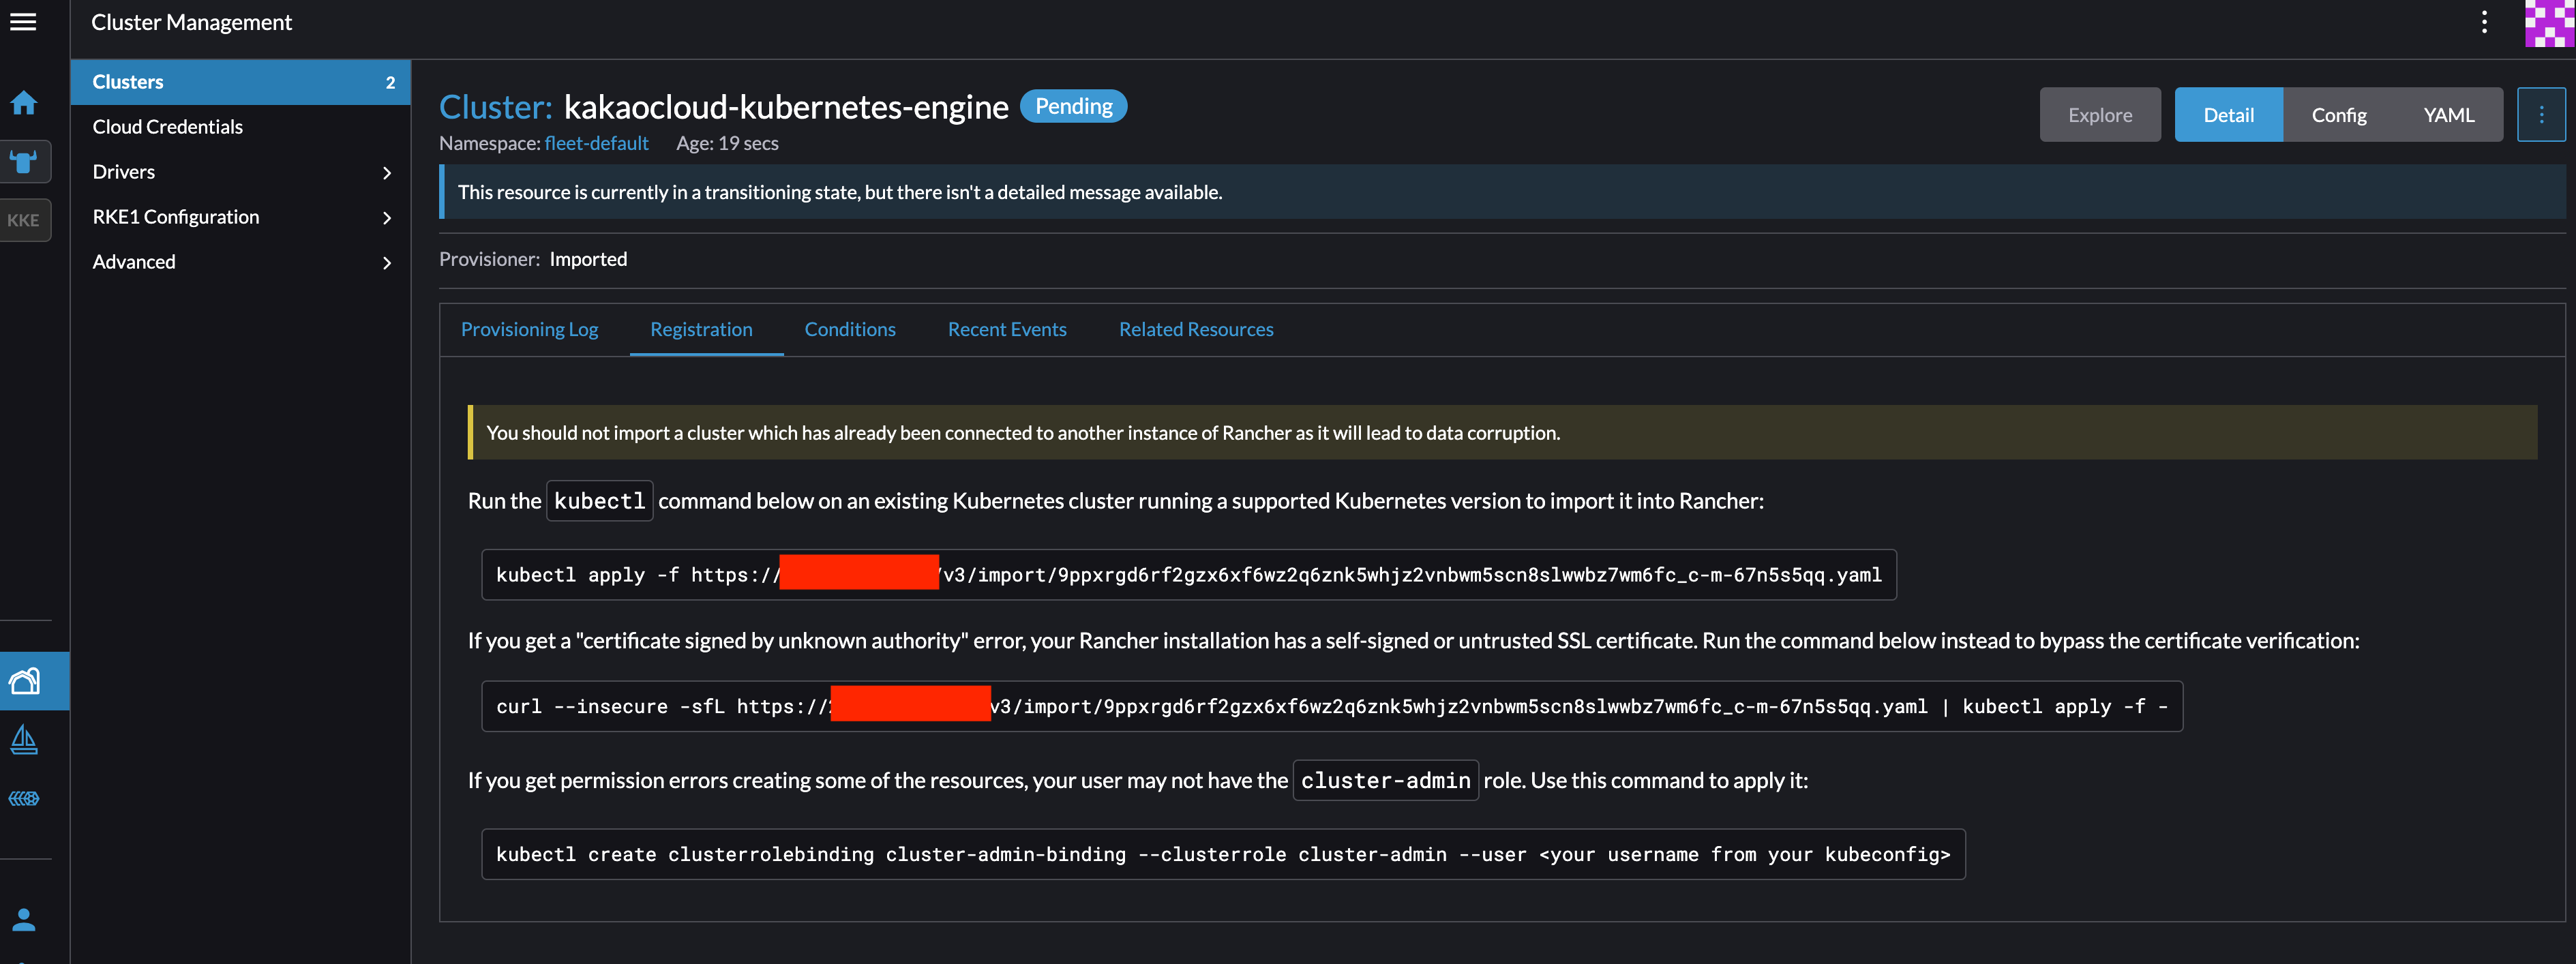
Download the YAML file by running the URL provided in the Rancher web console on the VM where Rancher is installed.
  # yaml file download
  curl --insecure -sfL https://${VM_PRIVATE_IP}/v3/import/9ppxrgd6rfgz6xf6wz2q6znk5whjz2vnbwm5scn8slwwbz7wm6fc_c-m-67n5s5qq.yaml > kakaocloud_ke.yaml
The downloaded YAML file creates Kubernetes resources for Rancher integration. Below is an example:
  # Sample YAML file
  ---
  apiVersion: rbac.authorization.k8s.io/v1
  kind: ClusterRole
  ...
  ---
  apiVersion: rbac.authorization.k8s.io/v1
  kind: ClusterRoleBinding
  ...
  ---
  apiVersion: v1
  kind: ServiceAccount
  metadata:
    name: cattle
    namespace: cattle-system
  ---
  apiVersion: rbac.authorization.k8s.io/v1
  kind: ClusterRoleBinding
  ...
  ---
  apiVersion: v1
  kind: Secret
  ...
  ---
  apiVersion: rbac.authorization.k8s.io/v1
  kind: ClusterRole
  metadata:
    name: cattle-admin
  ...
  ---
  apiVersion: apps/v1
  kind: Deployment
  metadata:
    name: cattle-cluster-agent
    namespace: cattle-system
  ...
  ---
  apiVersion: v1
  kind: Service
  metadata:
    name: cattle-cluster-agent
    namespace: cattle-system
  ...
Step 3. Apply YAML file to Kubernetes Engine
Apply the YAML file to Kubernetes Engine to complete the integration with Rancher.
-
Apply the downloaded script using the
kubectlcommand. This command creates Kubernetes resources required for integrating Rancher with Kubernetes Engine.kubectl apply -f kakaocloud_ke.yaml -
Since the master nodes are not part of the container network, you need to configure a WebHook. Deploy a WebHook YAML file with the
hostNetwork=truesetting.rancher_webhook.yamlapiVersion: v1
kind: ConfigMap
metadata:
name: rancher-config
namespace: cattle-system
labels:
app.kubernetes.io/part-of: "rancher"
data:
rancher-webhook: '{"global": {"hostNetwork": true}}' -
Apply
rancher_webhook.yamlfile to KakaoCloud Kubernetes Engine using the kubectl command.kubectl apply -f rancher_webhook.yaml -
Verify that Kubernetes Engine is successfully connected to Rancher and is in the Active state. At this point, confirm that the Master Nodes are also visible in Rancher.
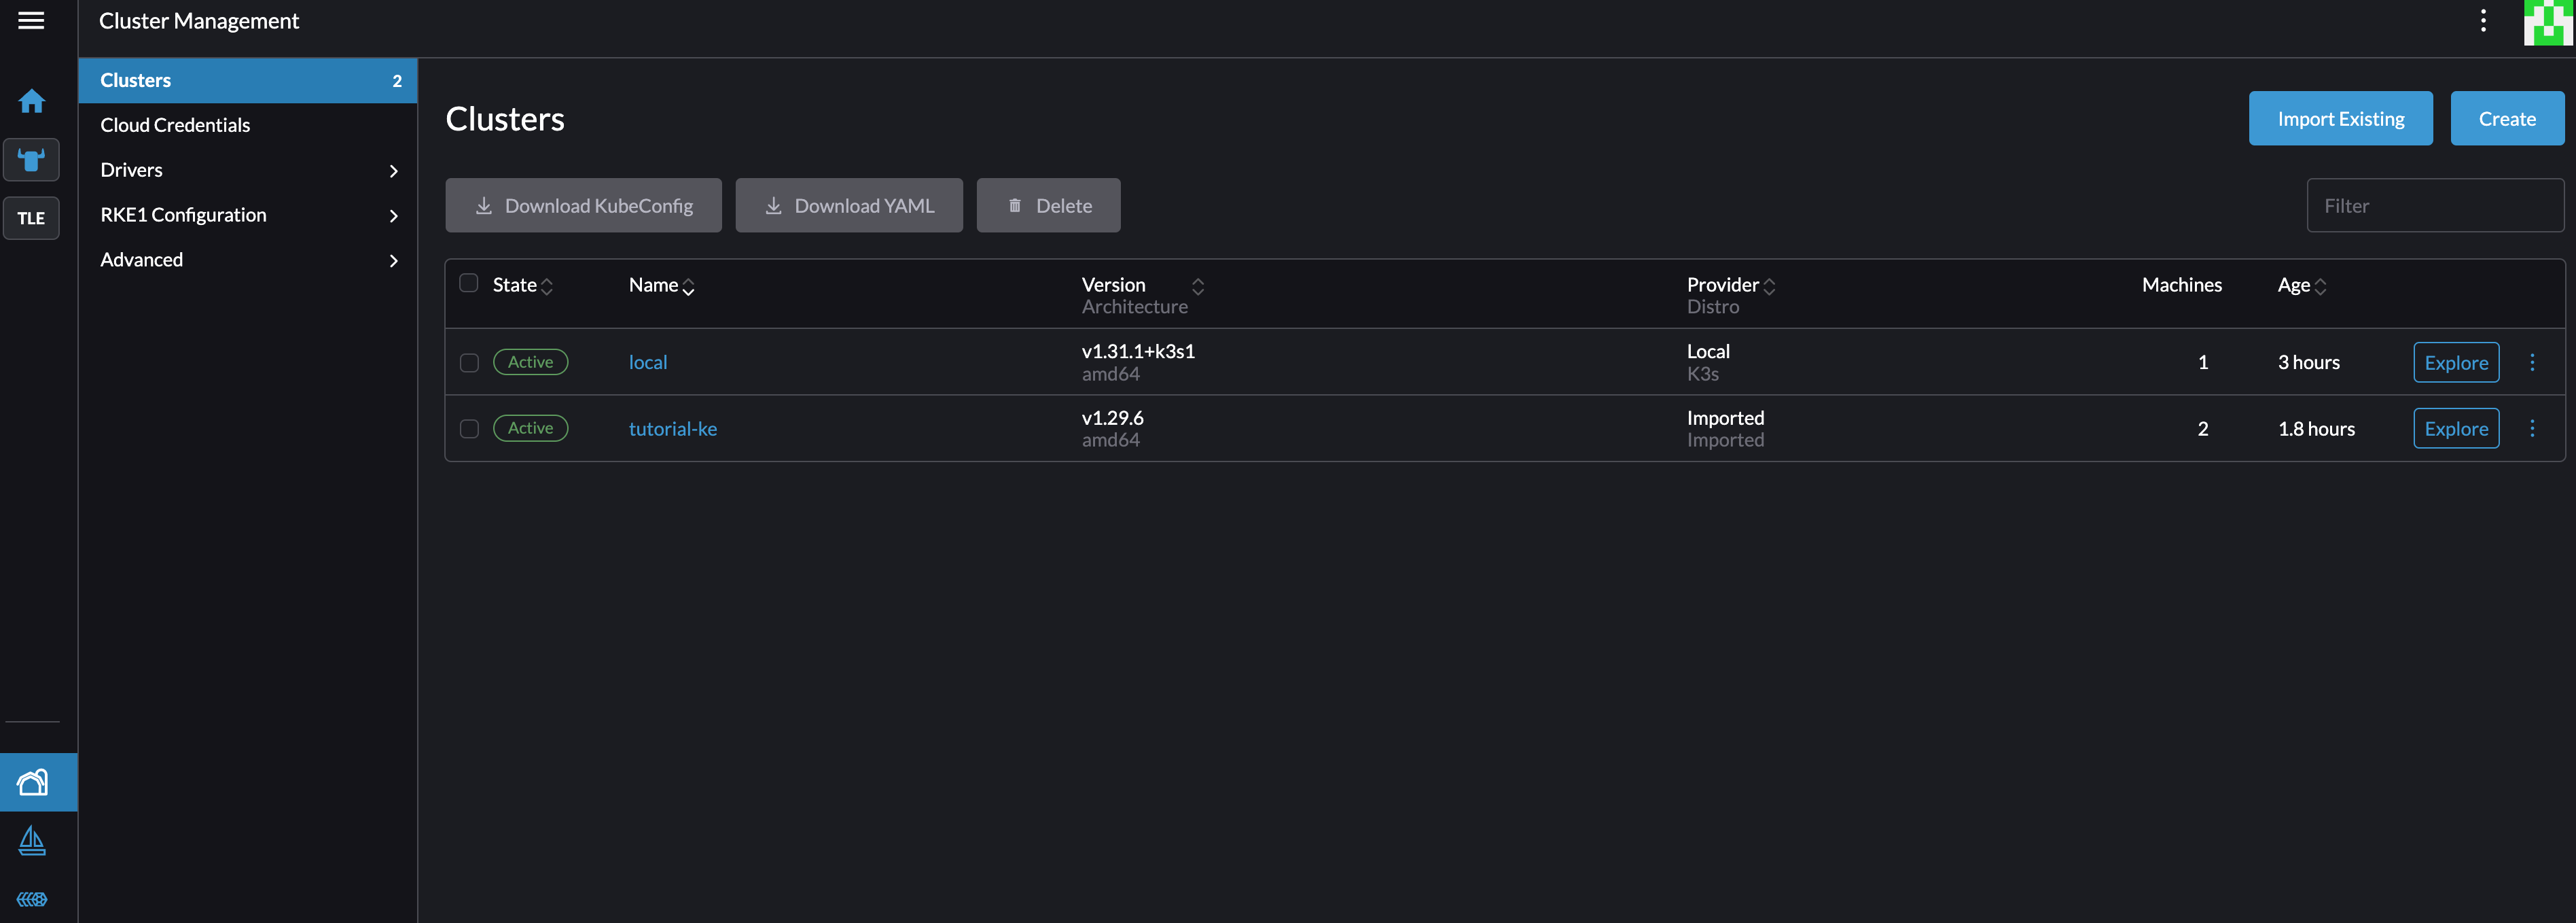
- Check and manage the Kubernetes Engine, including Master Nodes, from the Rancher web console.