Integrate KakaoCloud with Microsoft Entra ID as IdP
Microsoft Entra ID (formerly Azure AD) is an external identity provider provided by Microsoft that allows you to log in to KakaoCloud with a Microsoft account.
This tutorial explains how to manage a KakaoCloud organization by integrating Microsoft Entra ID as an IdP.
- Estimated time: 40 minutes
- Pre-requisites
- Create a KakaoCloud organization as an Org Owner
- Create a Microsoft Entra ID tenant and register users
- User accounts registered in the Microsoft Entra ID tenant
After setting the login method to an IdP account, you cannot change it back to the KakaoCloud account login method.
IdP integration
- This tutorial uses the OAuth integration method.
- For the SAML integration method, refer to the Service Guide > IdP SAML integration tab.
Step 1. Issue integration information from Microsoft Entra ID
-
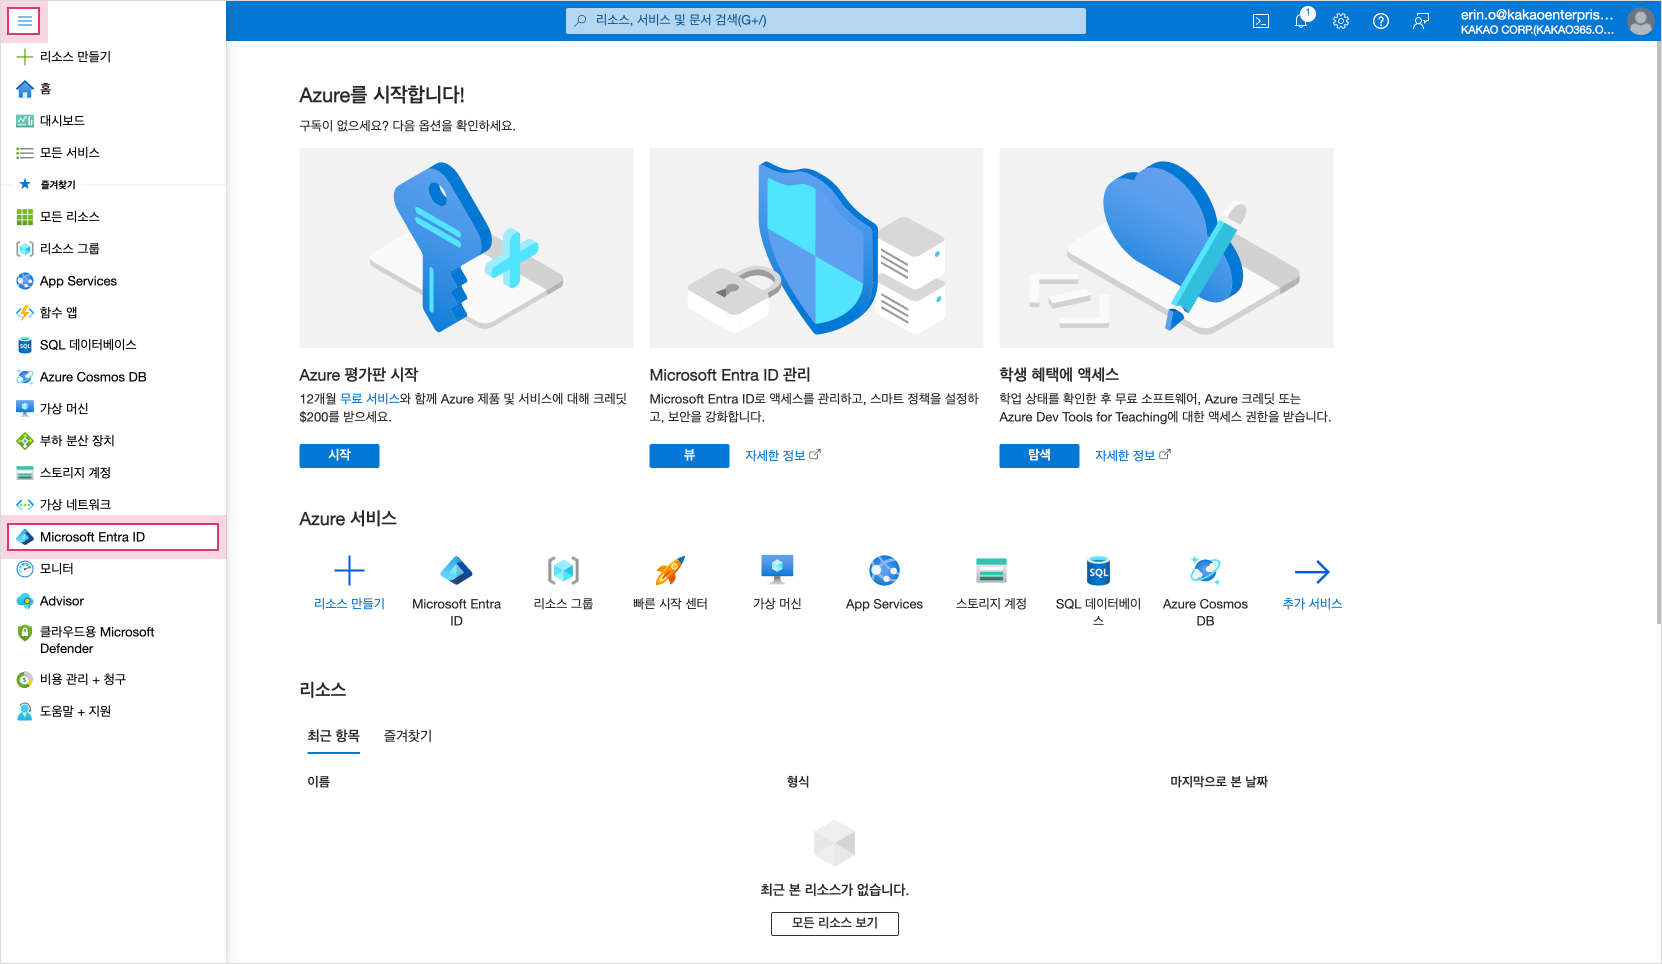
After logging in to the Microsoft Azure Portal, select the menu icon in the upper left corner and select the Microsoft Entra ID menu.
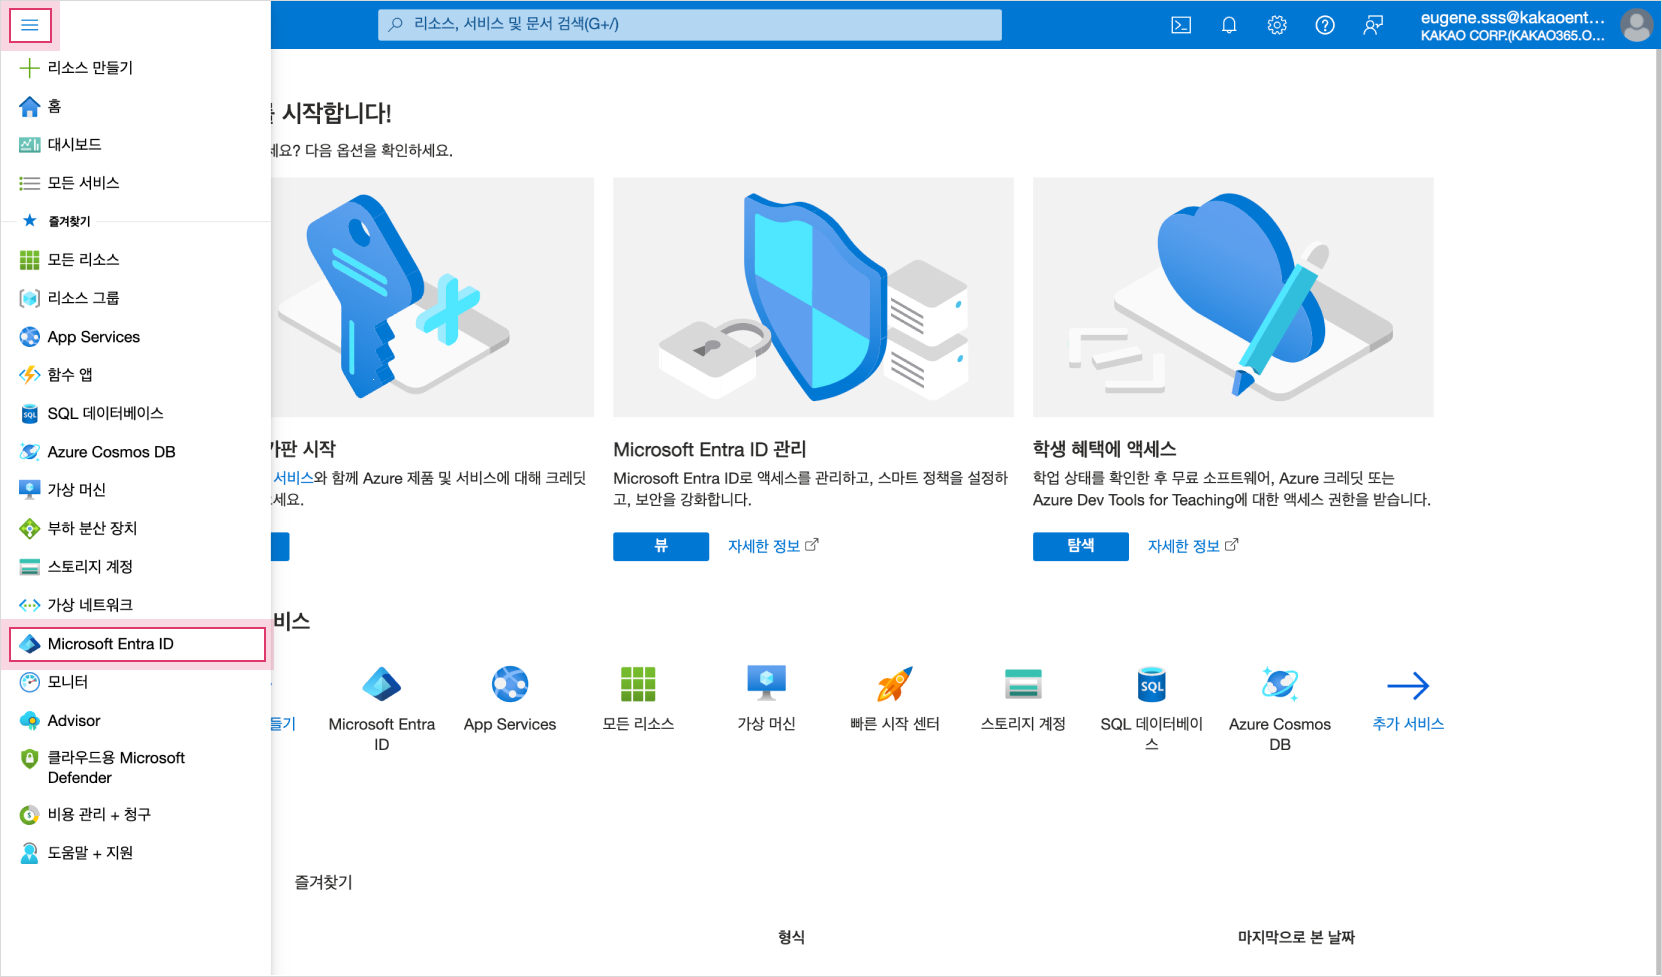 Microsoft Entra ID
 -
Select Manage > App registrations in the left sidebar of Microsoft Entra ID, and then select New registration to register KakaoCloud as an app.
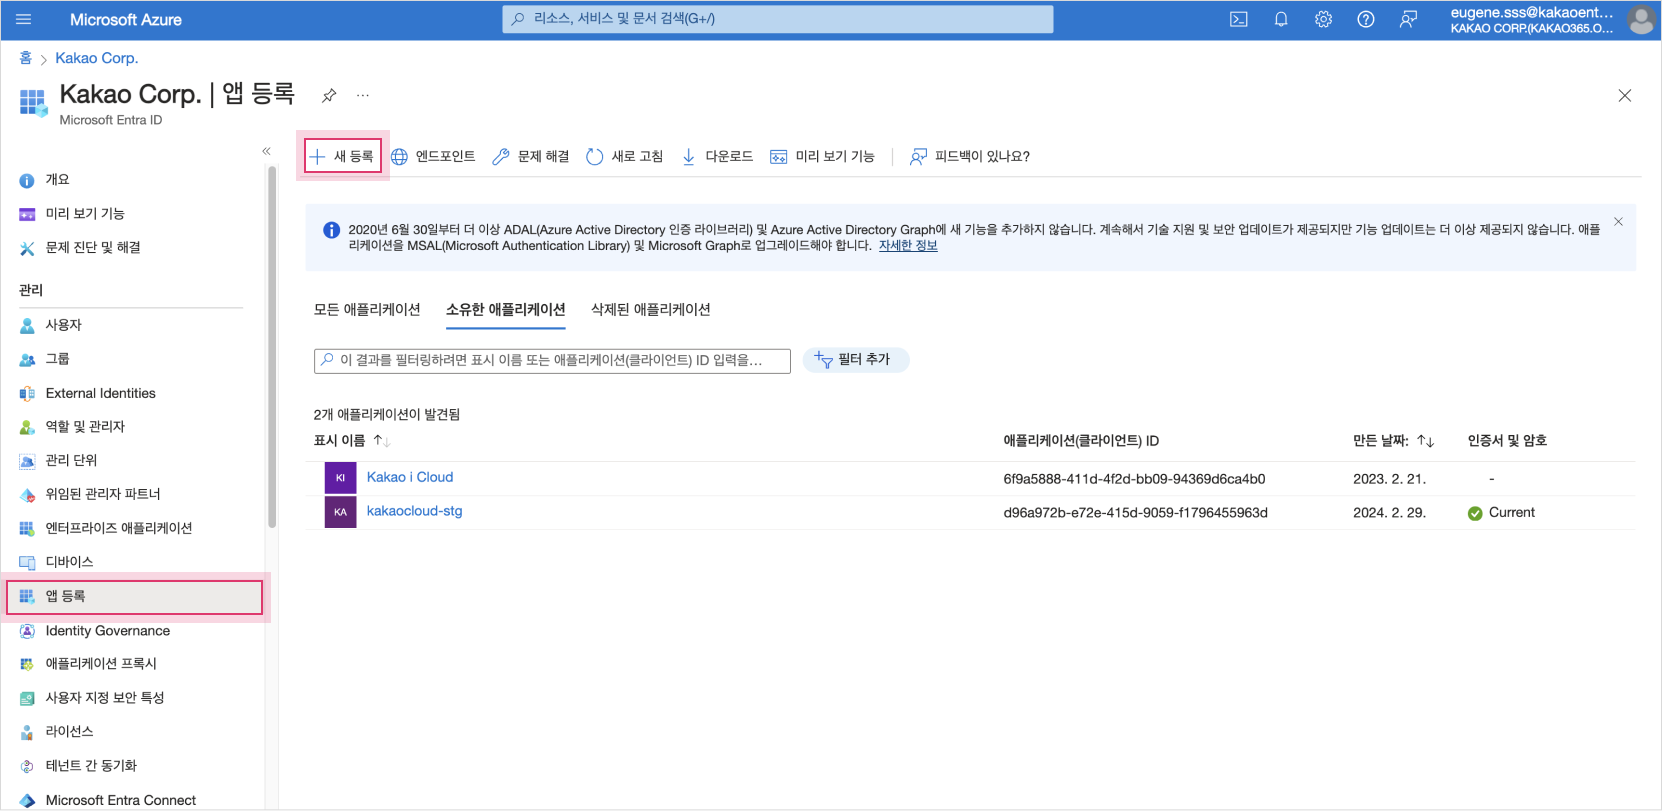 App Registration > New Registration
 -
In Register an application, enter the information so that the authentication response is returned to the specified URI after user authentication.
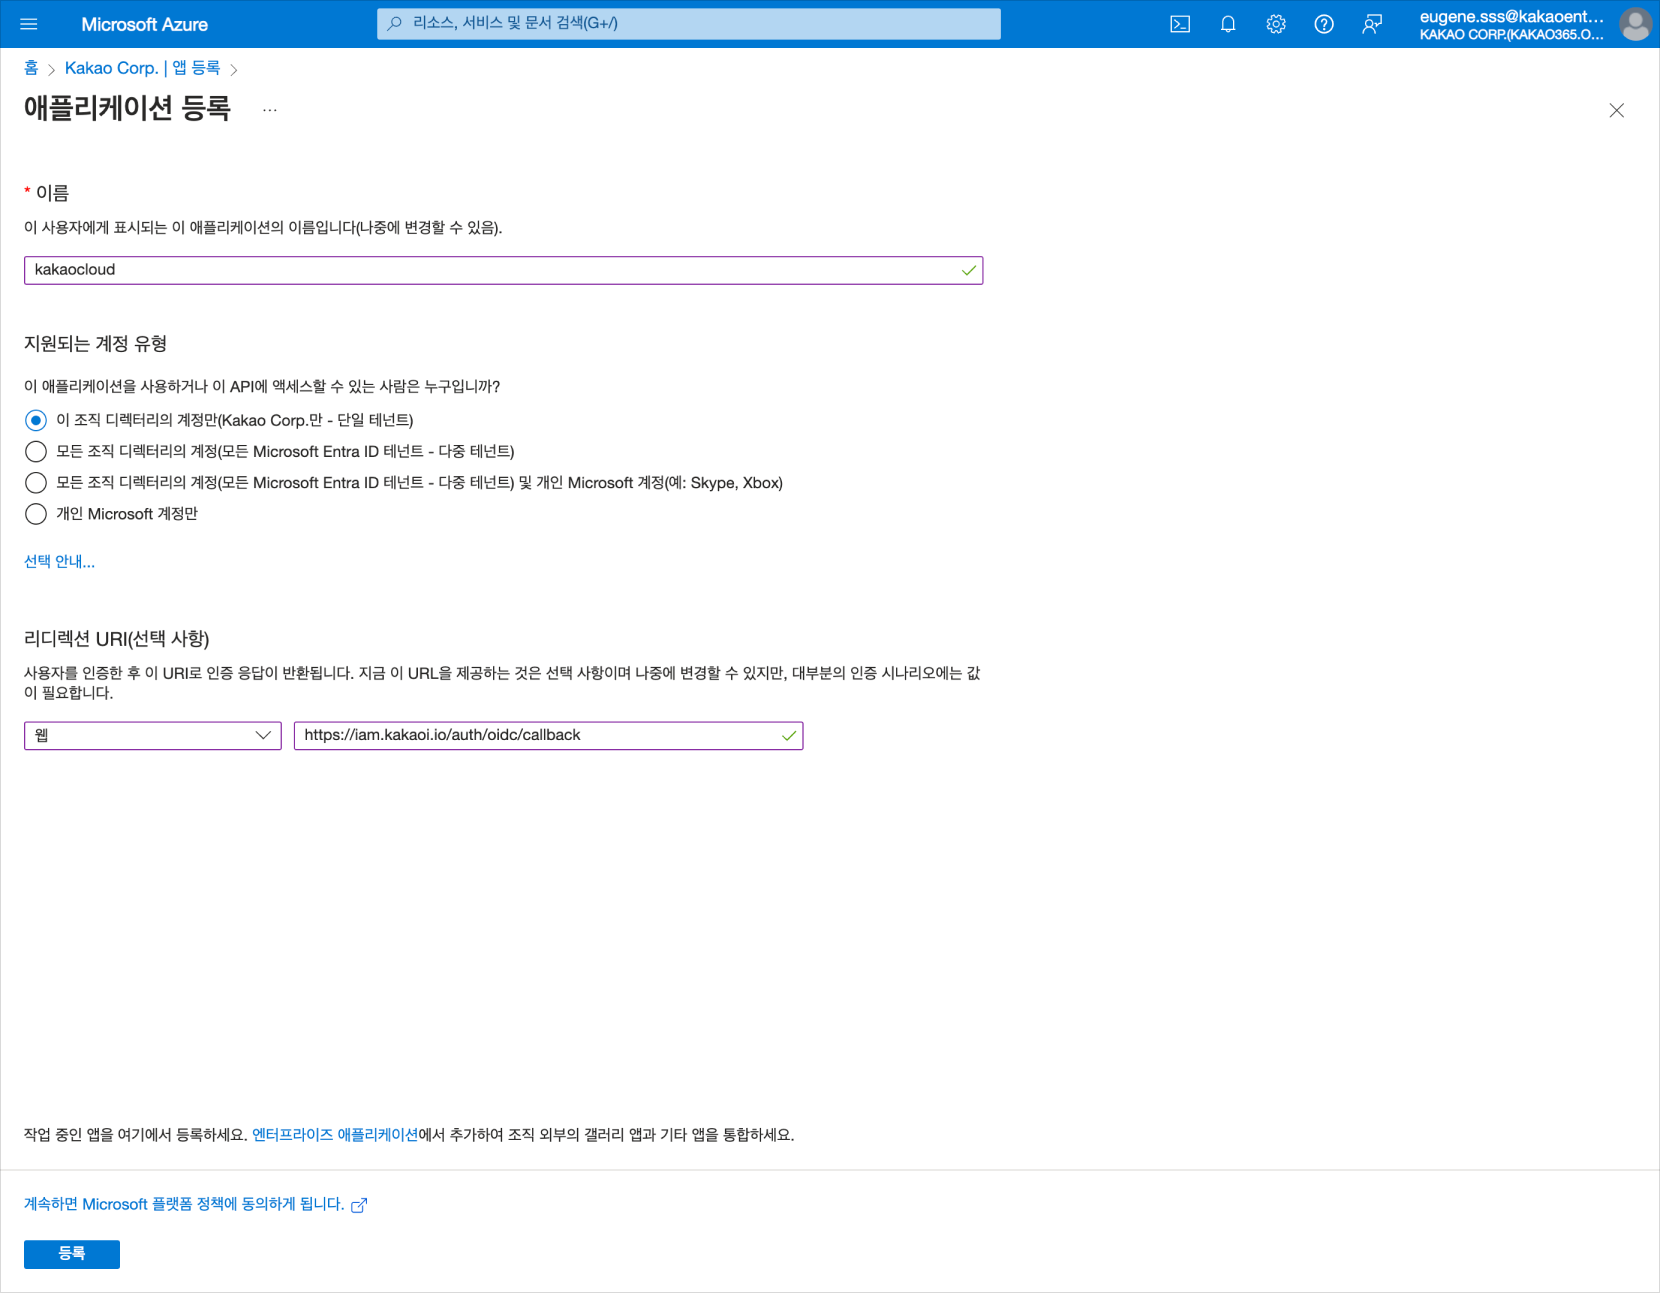 Application Registration
Category Description Name Enter kakaocloud(name to be displayed as an application)Supported account types Select Single tenant only - Default Directory so that only users in the specified tenant can log in Redirect URI (optional) Type: Select Web
Redirect URI: Enter a fixed URI,https://iam.kakaocloud.com/auth/oidc/callback -
In Basic information, copy the Application (client) ID, which corresponds to the
Client ID.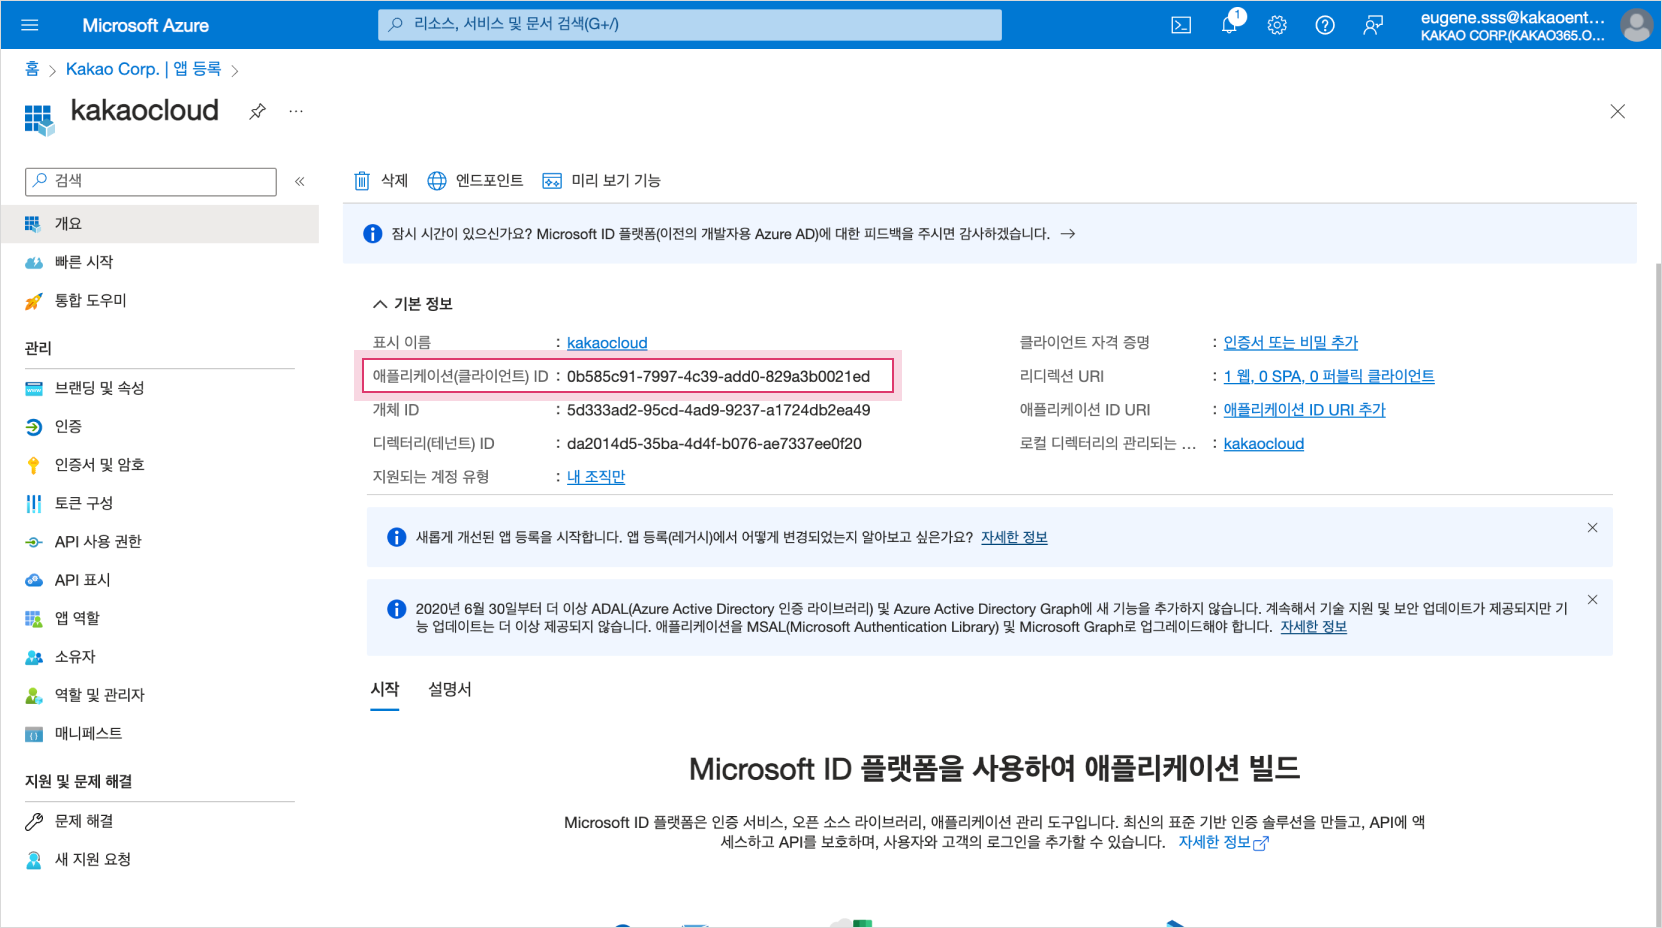 Registered application basic information
 -
Select Endpoints, and then copy the OAuth 2.0 authorization endpoint (v2) and OAuth 2.0 token endpoint (v2).
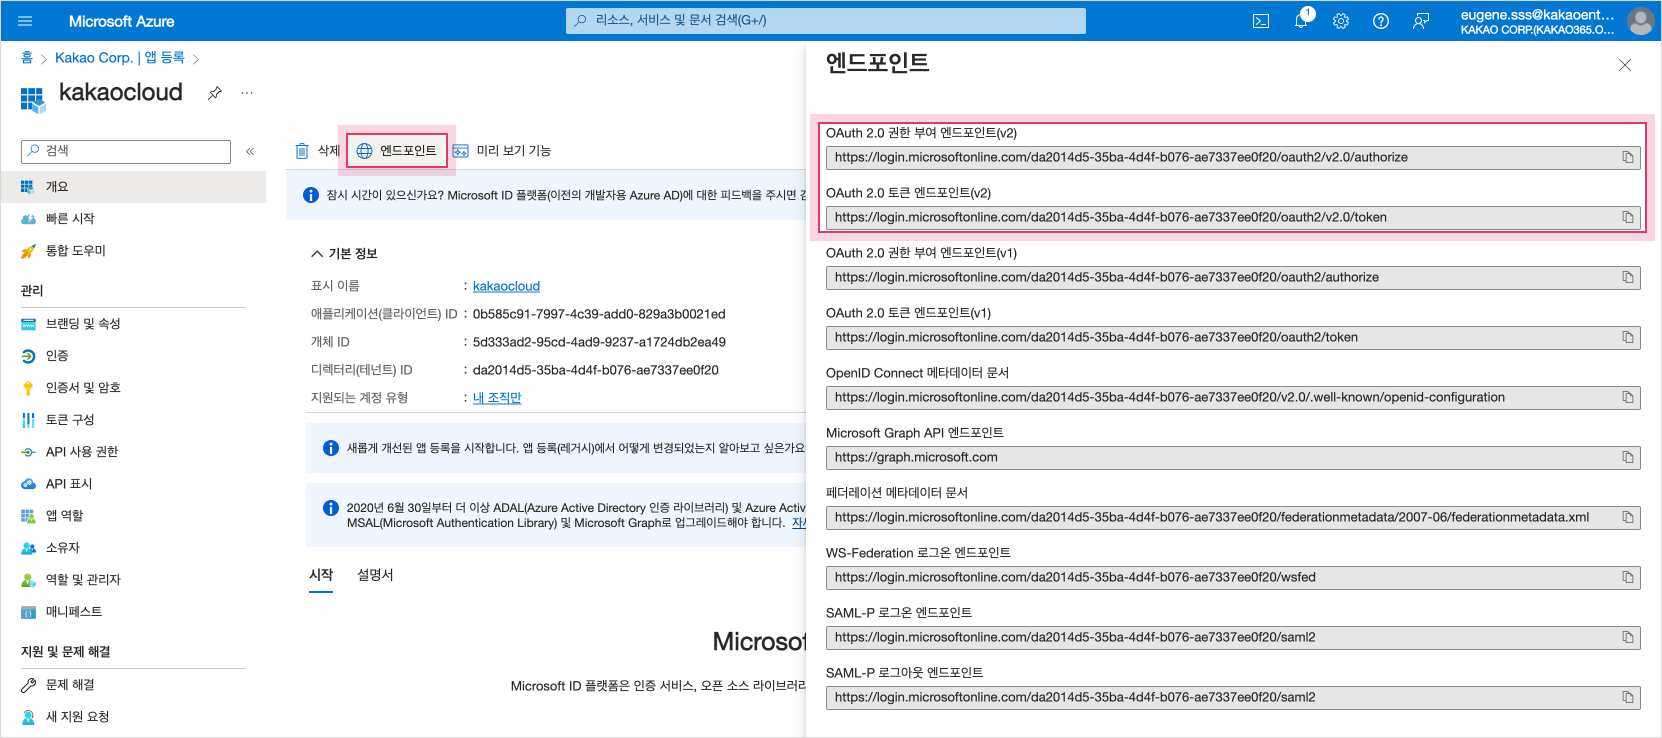 Copy Endpoint Information
Endpoint Information Description OAuth 2.0 Authorization Endpoint (v2) Information entered in the Authorization URL field when registering a credential provider OAuth 2.0 Token Endpoint (v2) Information entered in the Token URL field when registering a credential provider -
Select Add a certificate or secret to create a
Client Secret.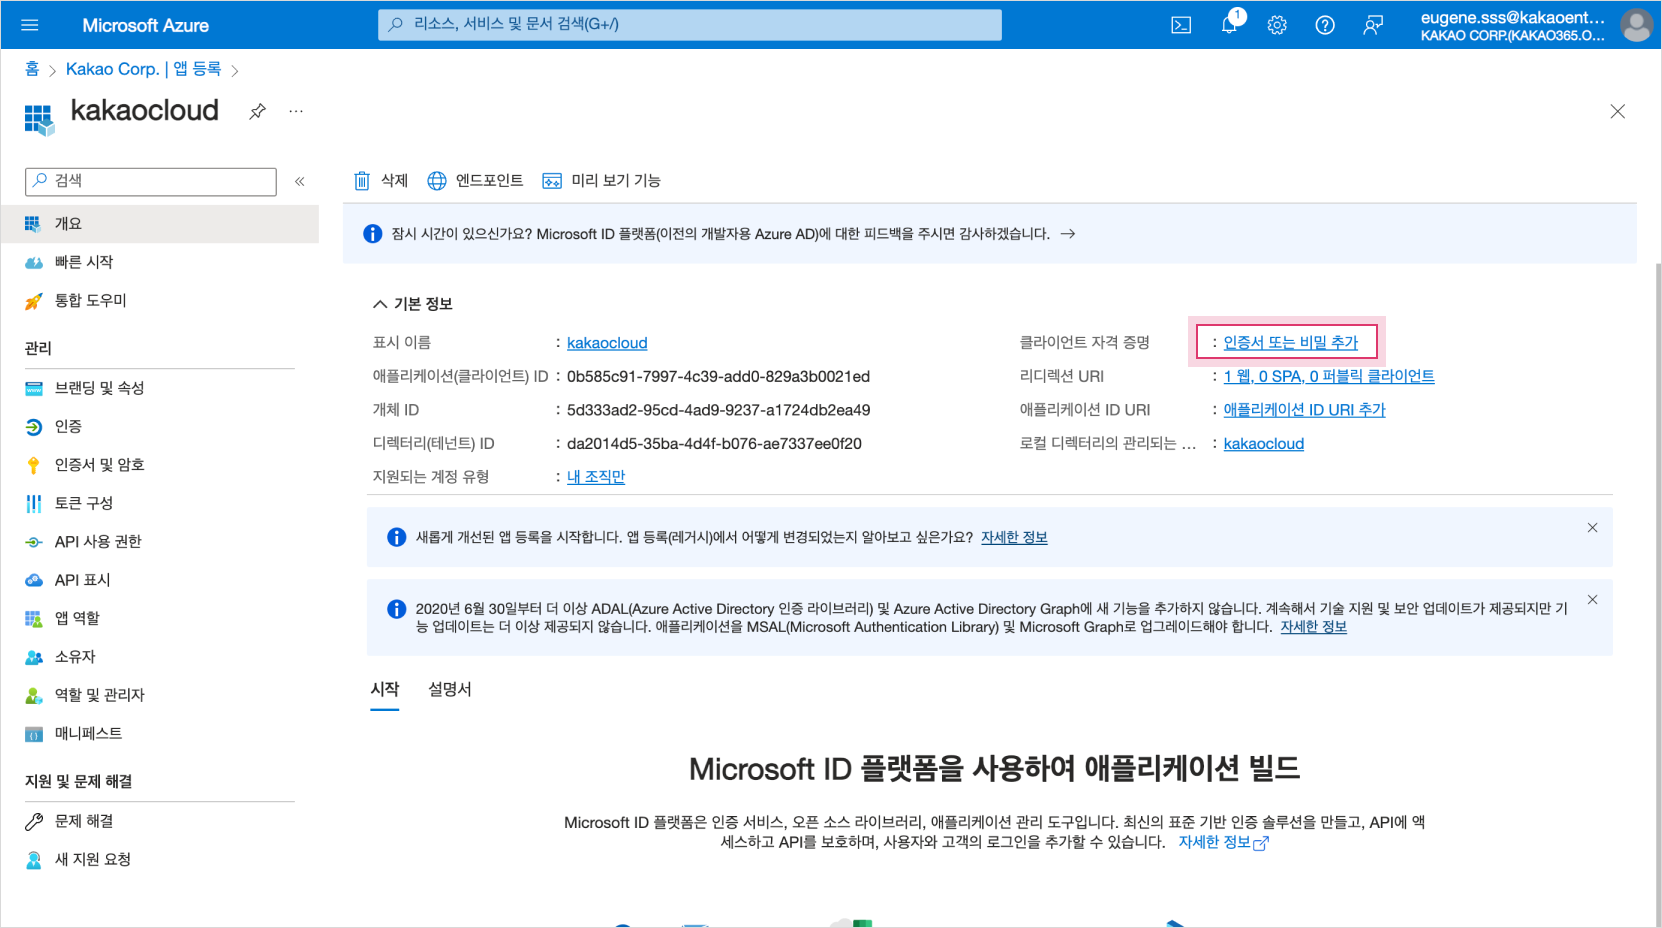 Add a certificate or secret
 -
Select New client secret to add a client secret.
The client secret is valid only until the configured expiration date. Before it expires, issue a new secret and update the IdP integration information.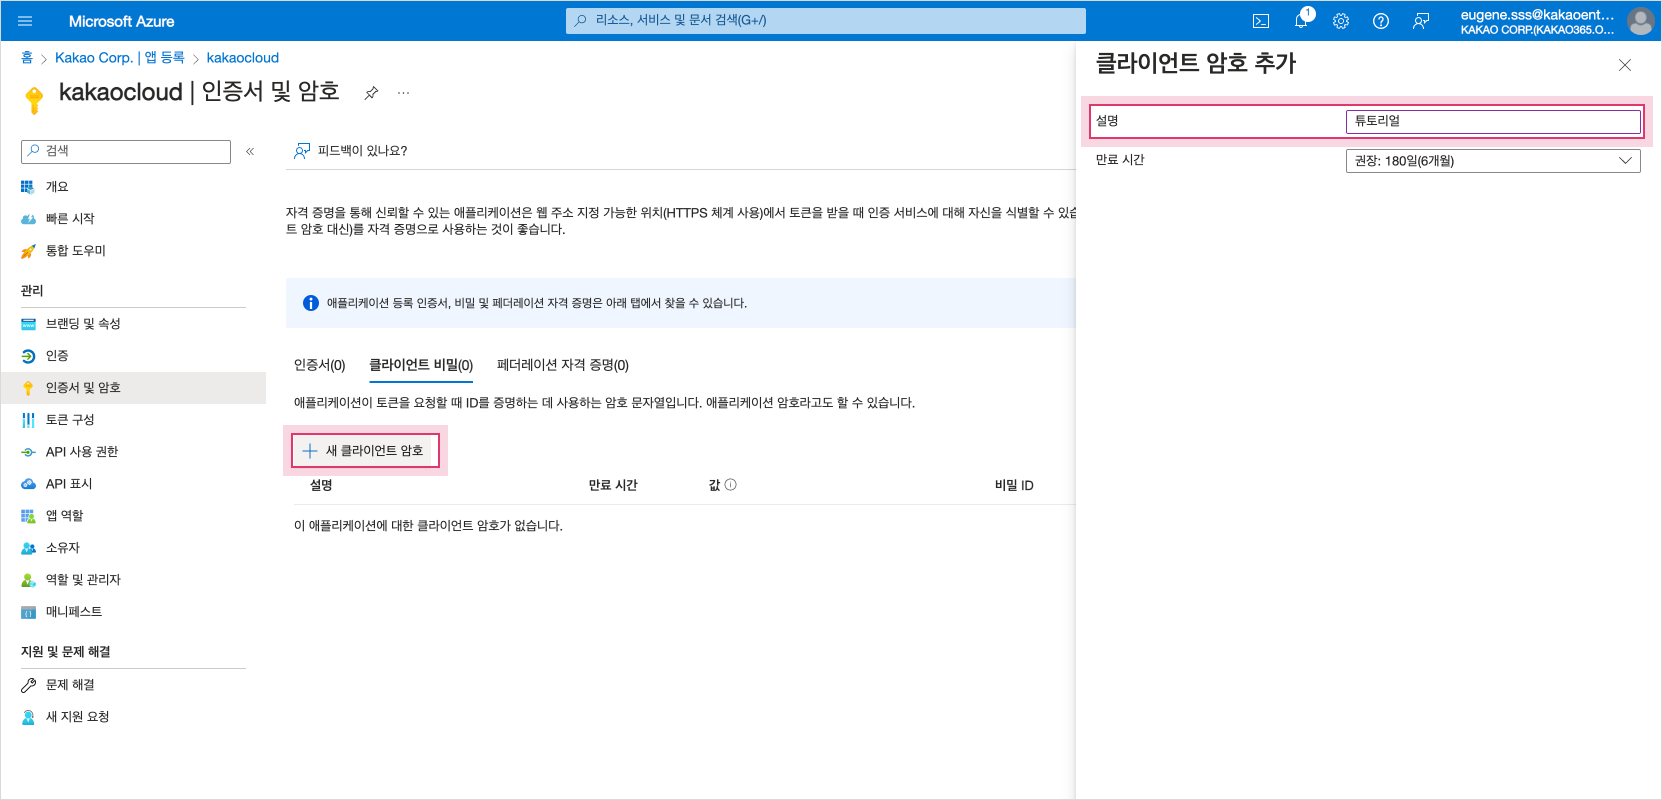 Add client secret
 -
Copy the newly created client secret value, which corresponds to the
Client Secret. If you leave this screen, you cannot view theClient Secretagain. Make sure to store the value.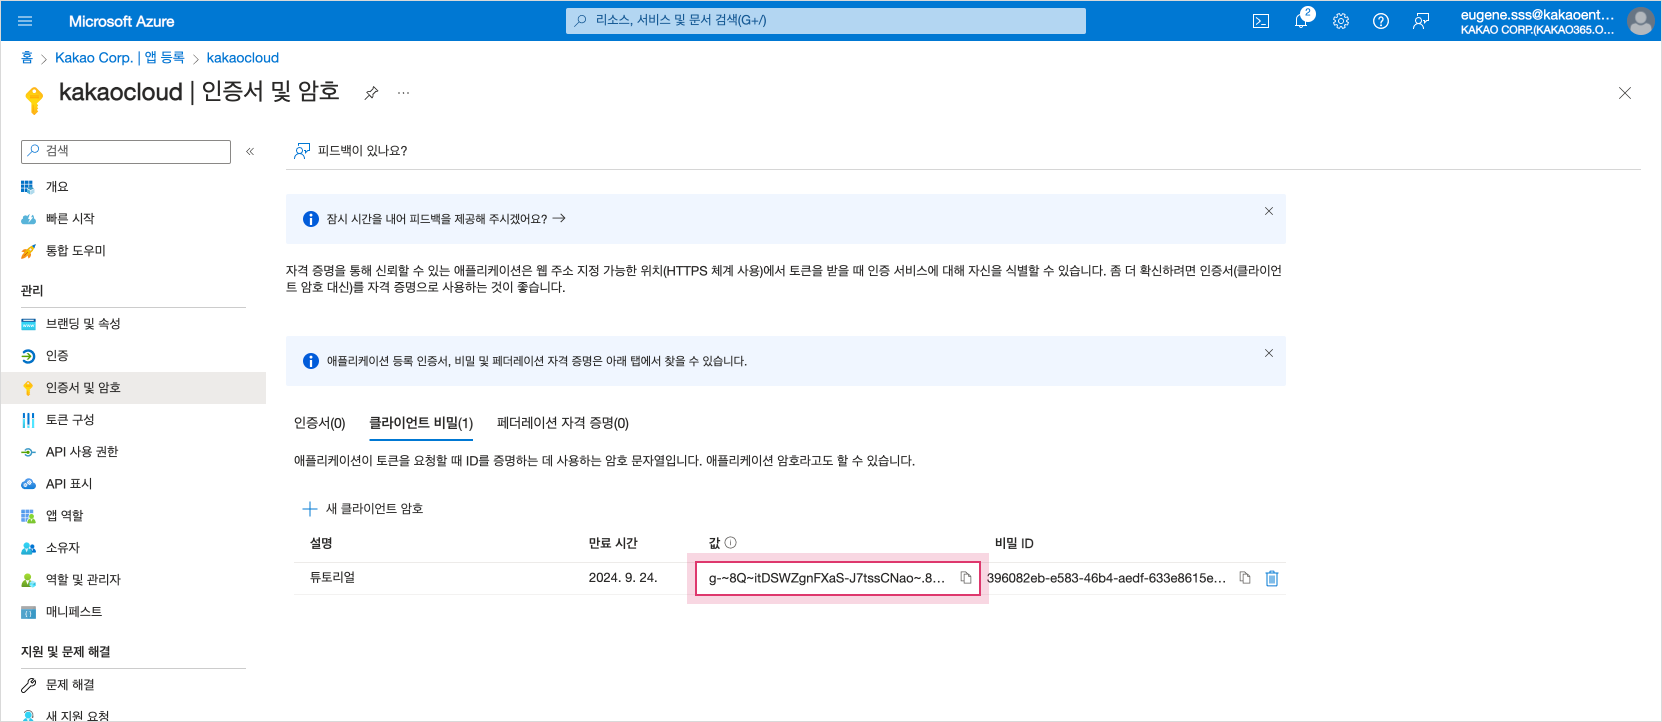 Copy client secret value
 -
After completing the steps above, you can confirm the following four values:
Client ID,Client Secret,Authorization URL, andToken URL.
Use these values when registering the IdP in the KakaoCloud console.
Step 2. IdP registration
After preparing the integration information in Step 1, access the KakaoCloud console and register the IdP.
- Only the Org Owner can integrate an IdP.
-
Enter the organization name in the KakaoCloud console and log in with the Org Owner account.
-
Select IAM > Organization Management.
-
Select the [Login Settings] button.
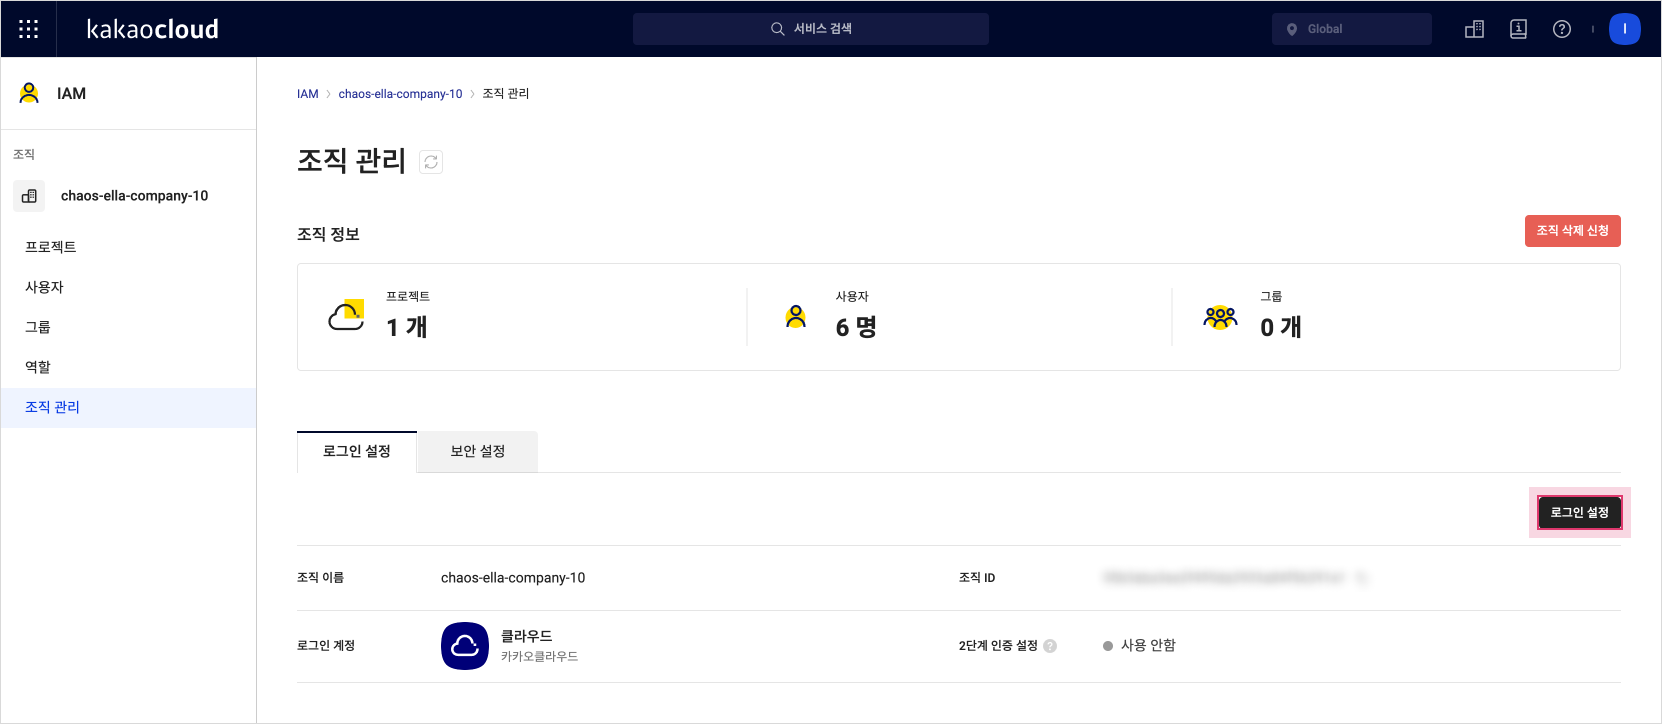 Login settings
 -
On the login settings details page, check the organization information and select IdP Account. Then enter the integration protocol and integration information using the values prepared in Step 1.
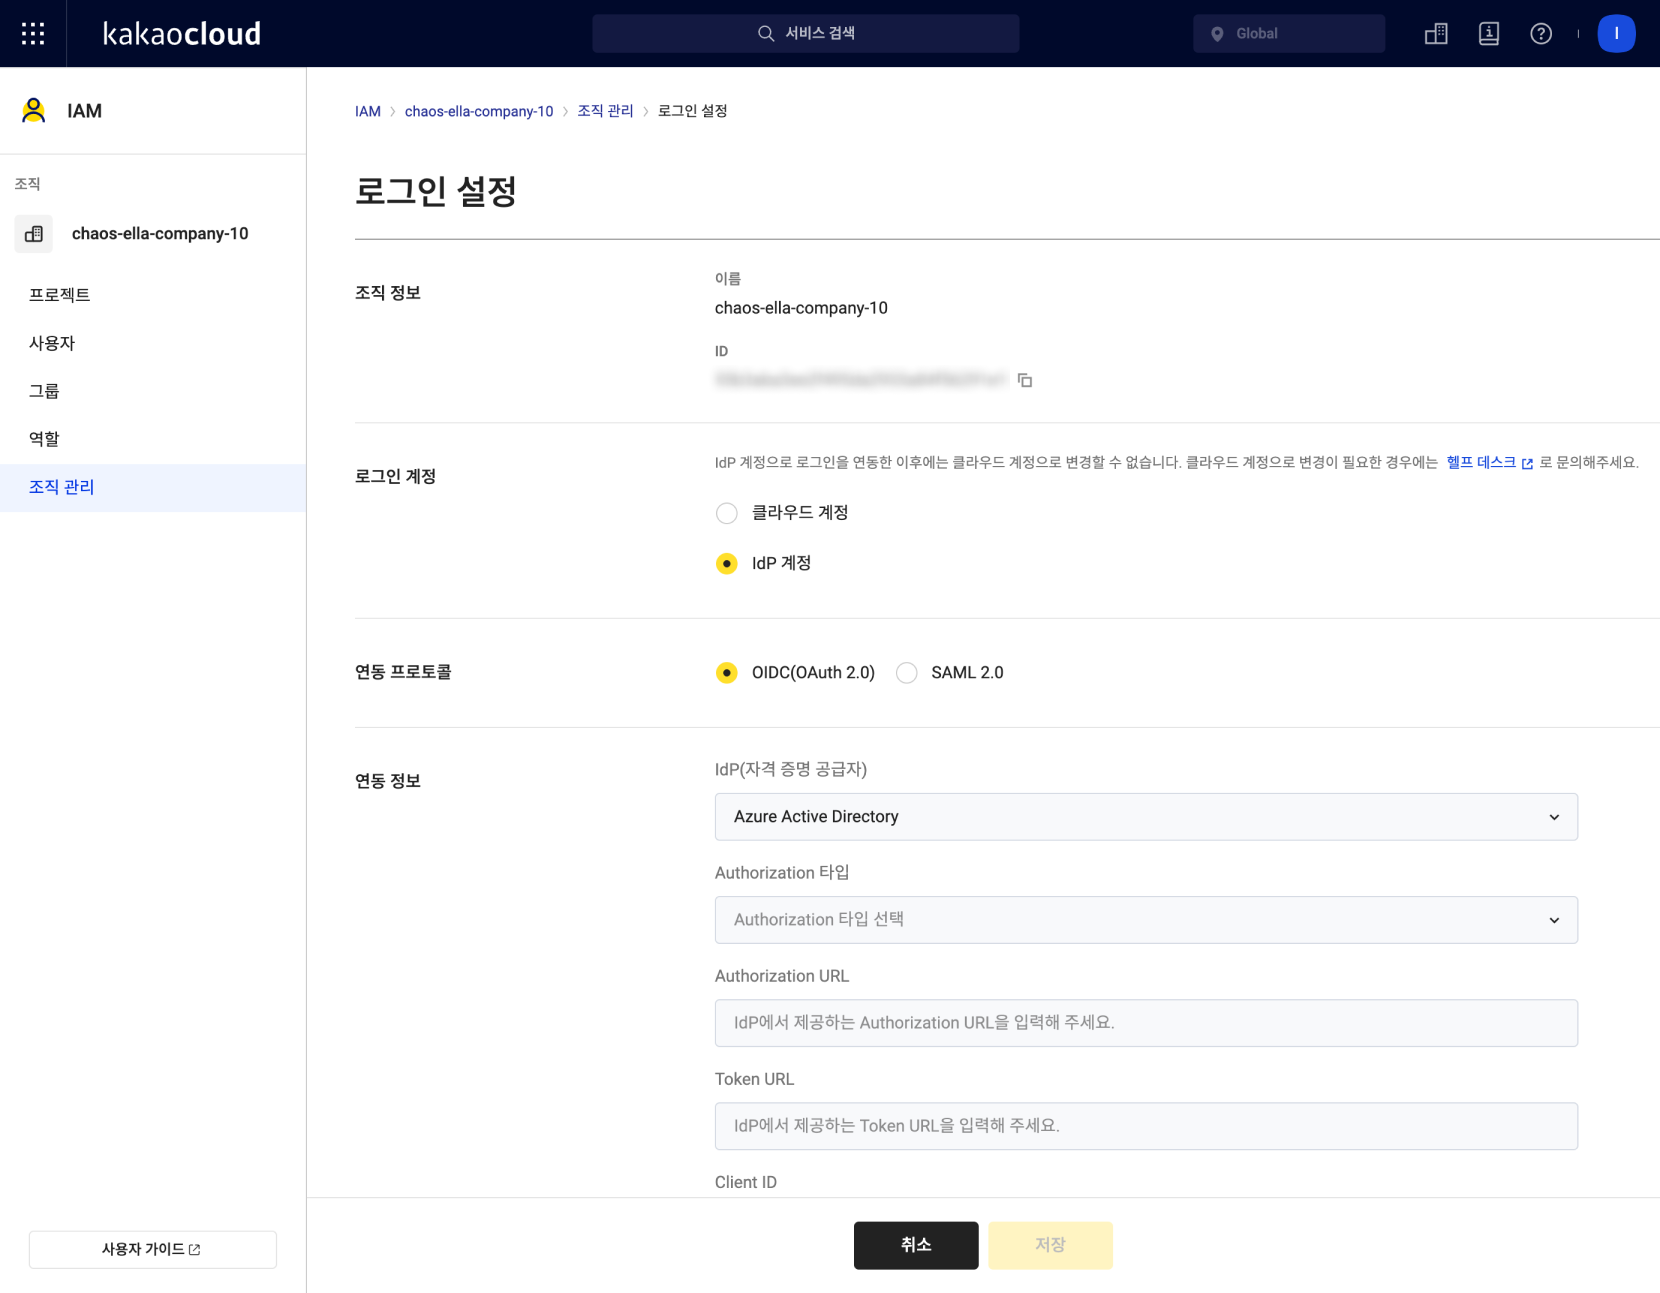 Enter integration information
Item Category Description Integration Protocol Select OIDC (OAuth 2.0) Integration Information IdP (Identity Provider) Select Azure Active Directory Authorization Integration Type Select POST body Authorization URL Enter the OAuth 2.0 authorization endpoint (v2) value Token URL Enter the OAuth 2.0 token endpoint (v2) value Client ID Enter the application (client) ID value Client Secret Enter the client secret value copied after creating the client secret -
Select Test Integration to run the IdP integration test. Enter the ID and password on the external identity provider login screen. If the integration succeeds, the test is complete.
Step 3. Log in to KakaoCloud console
Switch the KakaoCloud console login method to the external credential provider account linked to the IdP, and then verify the login.
-
After accessing the KakaoCloud console, log out of the KakaoCloud account you previously logged in to.
-
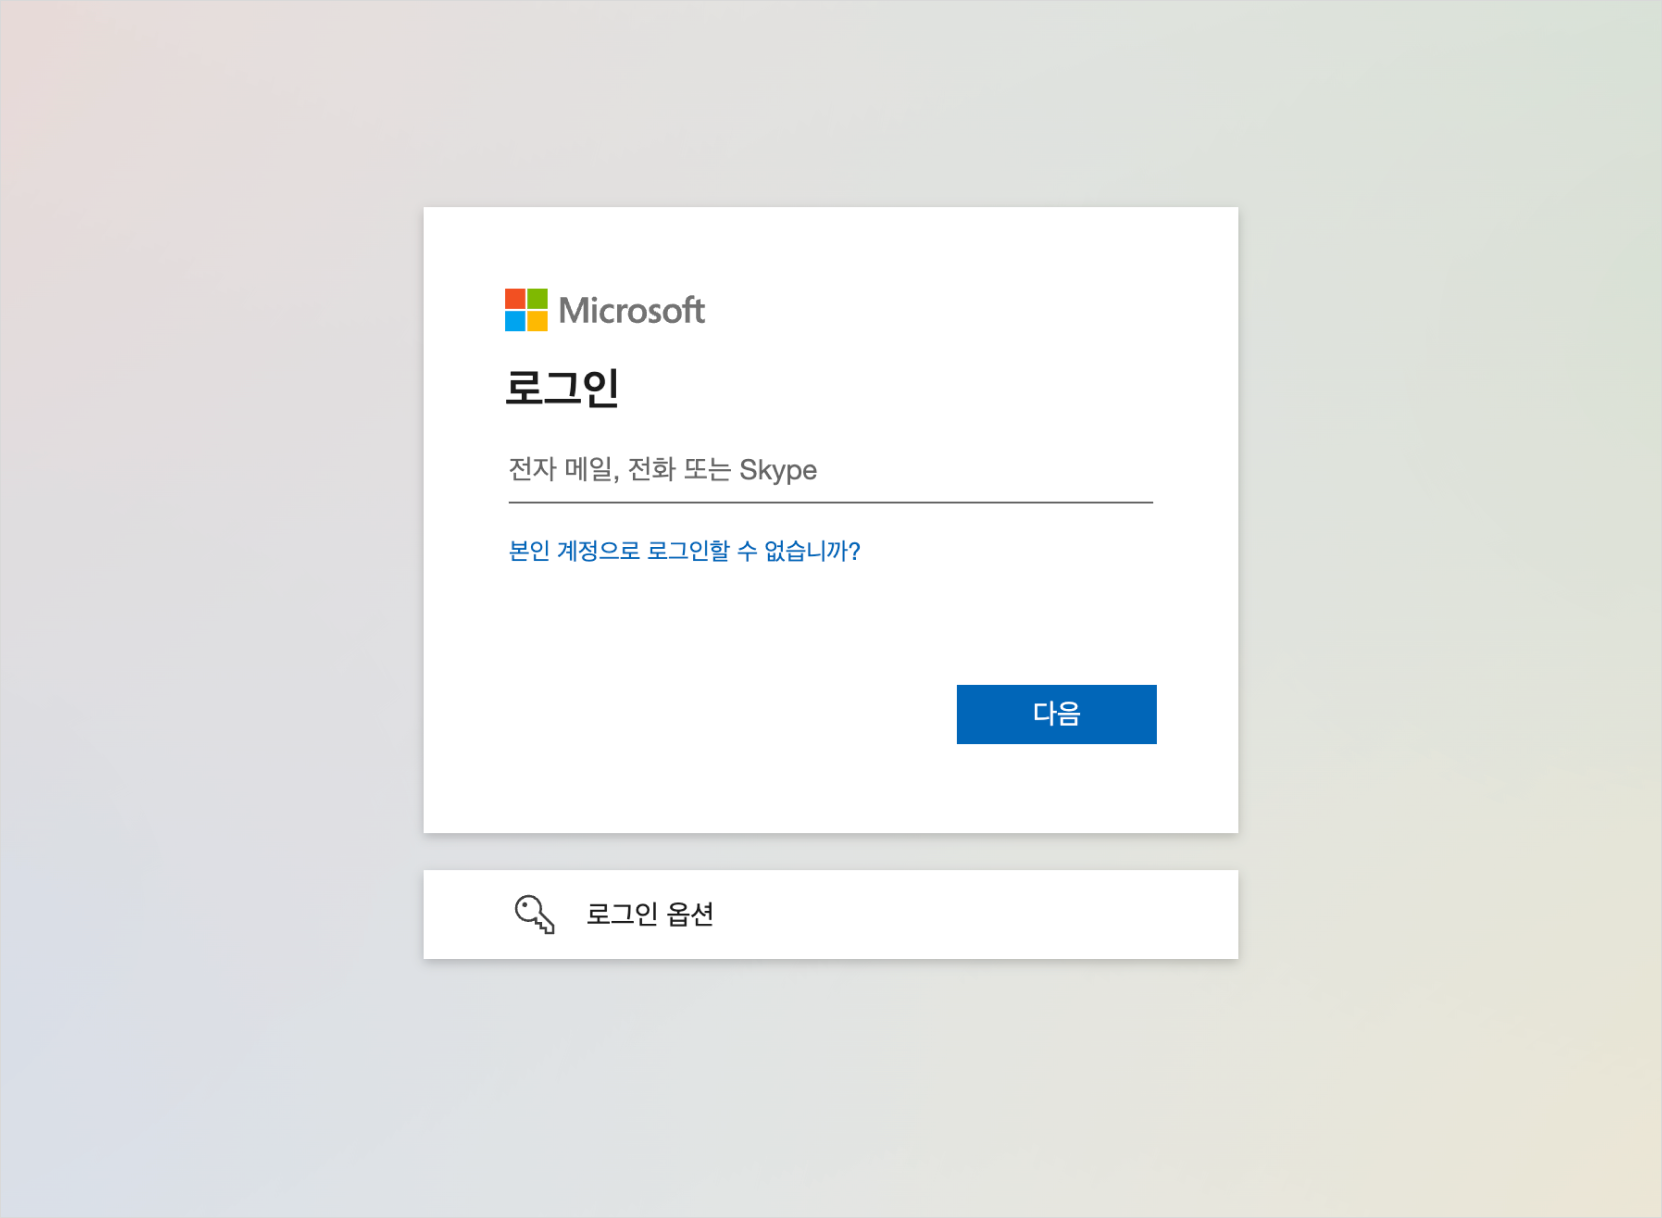
On the KakaoCloud console login screen, enter the organization name and select the [Next] button.
-
In Microsoft Azure Login > Select Account, log in with the Microsoft Entra ID account linked to the IdP.
-
Confirm that you are logged in with the external credential provider account.
Register and manage users in your organization
- Setting up IdP integration does not automatically add all users in the Microsoft Entra ID tenant to the KakaoCloud organization.
- A user is added only after the user first logs in to the KakaoCloud console with a Microsoft Entra ID account.
- If the email address of a user already registered in the KakaoCloud organization matches the Microsoft Entra ID email address, the user logs in as the registered IAM user.
Step 1. Register users in your KakaoCloud organization by logging in with IdP account
The process of automatically registering users in your KakaoCloud organization by logging in to the KakaoCloud console with a Microsoft Entra ID account is as follows.
If a user is not in the Microsoft Entra ID tenant (ex. a new employee), register the user in the tenant before the user logs in to the KakaoCloud console.
-
Log in to the KakaoCloud console with one account among the Microsoft Entra ID tenant users.
 Login
Login -
Log out again and log in with the Org Owner account.
-
Select IAM > User.
-
Confirm that the user who logged in in step 1 is registered in the KakaoCloud organization.
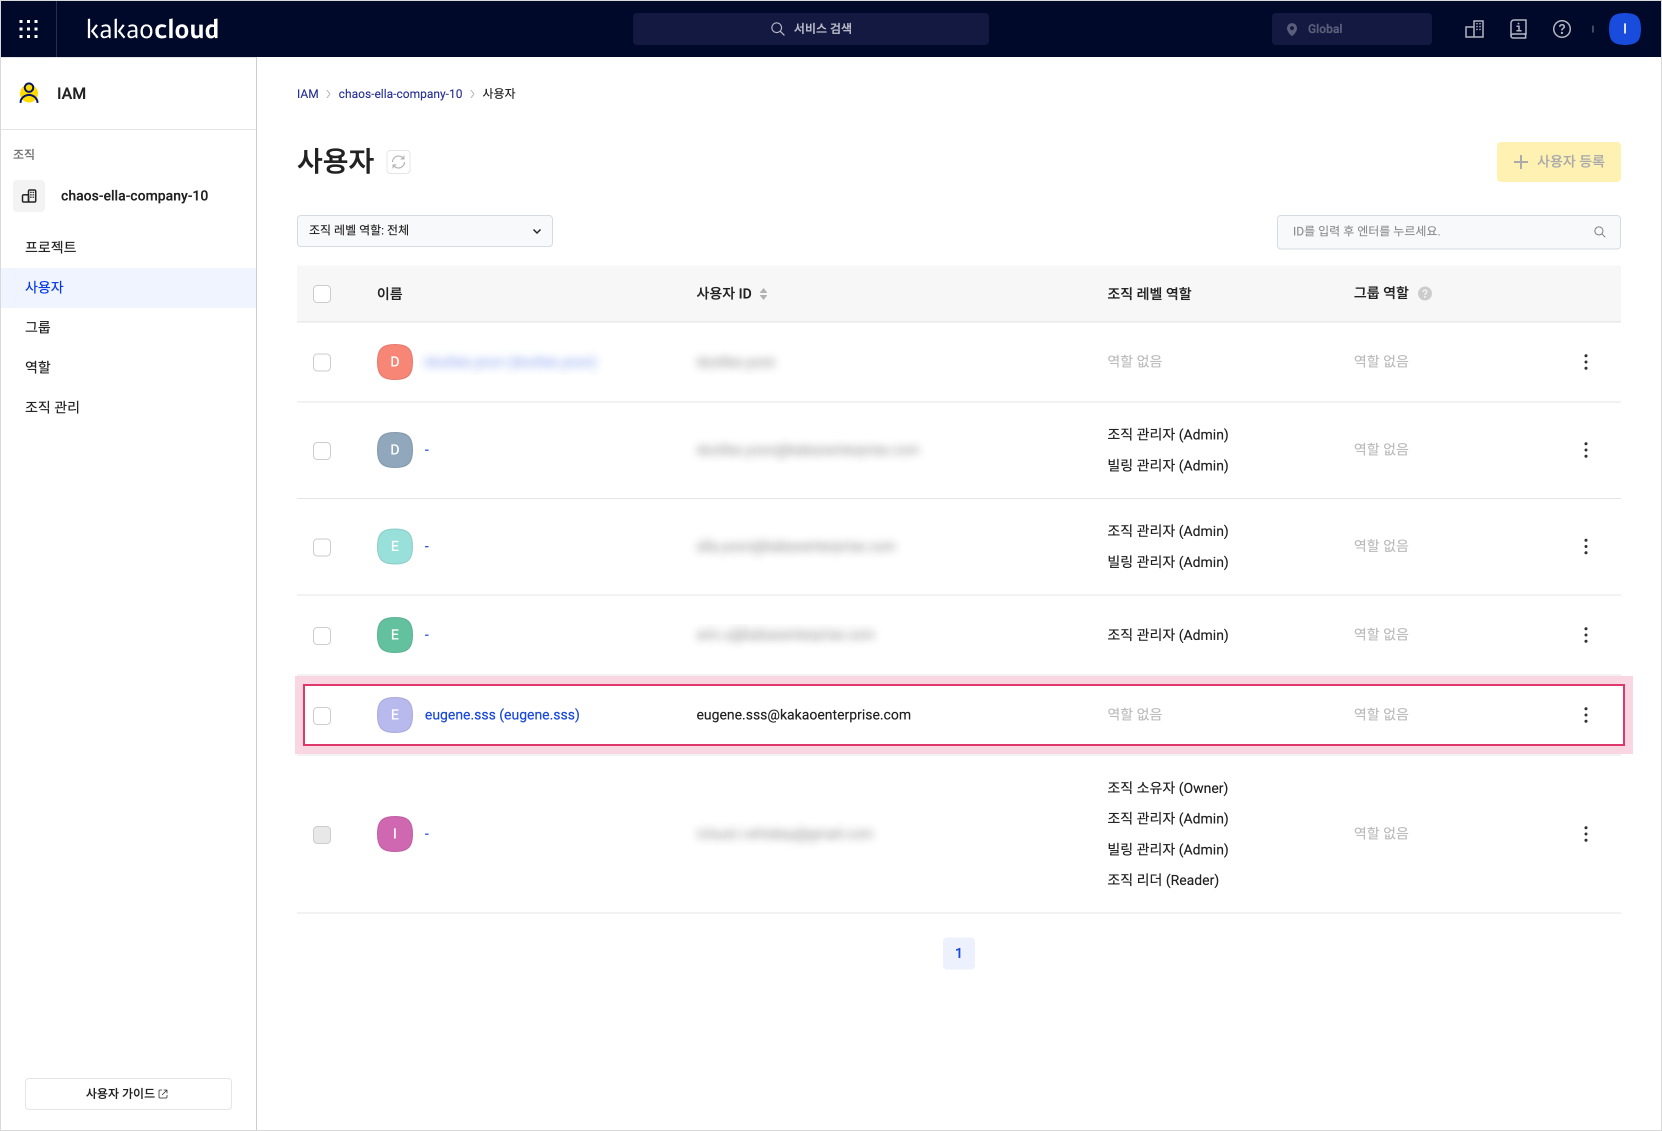 Check registered users
Step 2. Grant and delete organization roles to users
If the email address of a user already registered in the KakaoCloud organization matches the Microsoft Entra ID email address, the user logs in as the registered IAM user.
Therefore, the roles and permissions granted to the user are maintained.
The process of granting and deleting organization roles (organization leaders) to the user registered above is as follows.
Grant roles
-
Log in to the KakaoCloud console with the Org Owner (Owner) account.
-
Select IAM > User.
-
Click the cloud account of the user to grant a role to. In the bottom panel, select Organization Role > Edit Role.
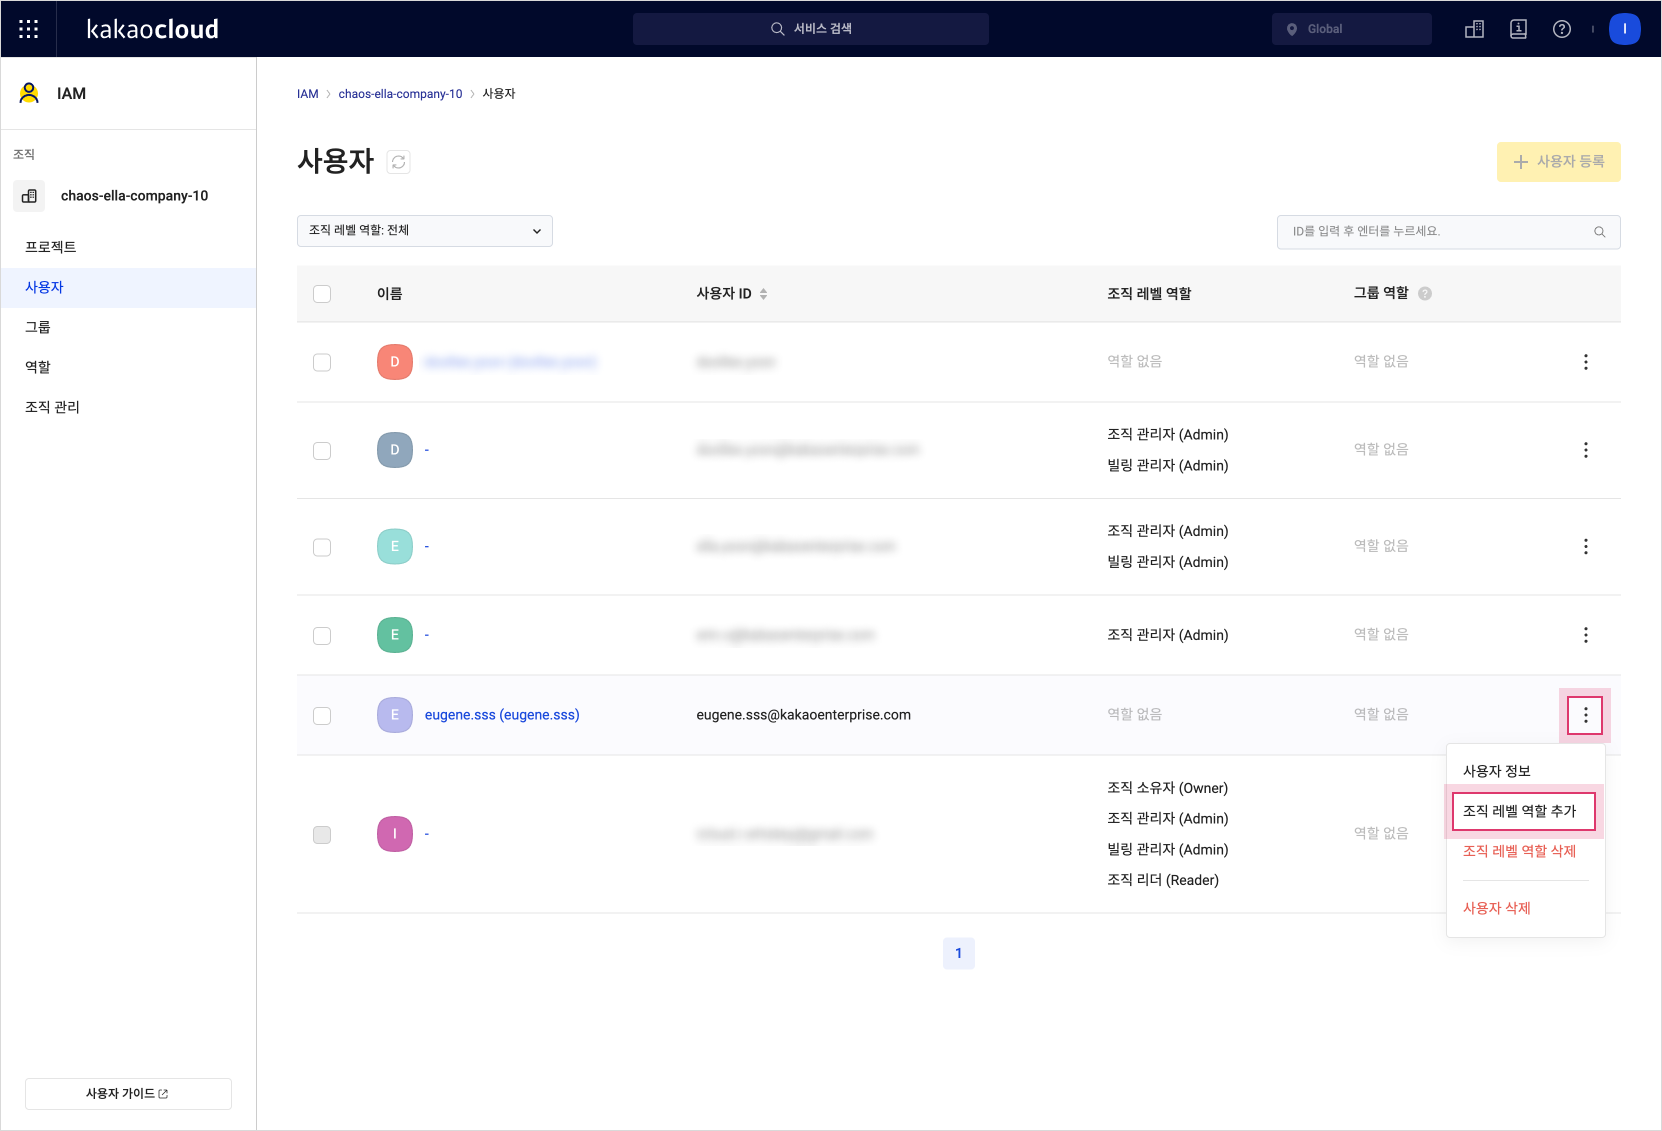 Edit organization role
 -
Select one of the available organization roles. In this example, select Organization Reader and then select the [Edit] button.
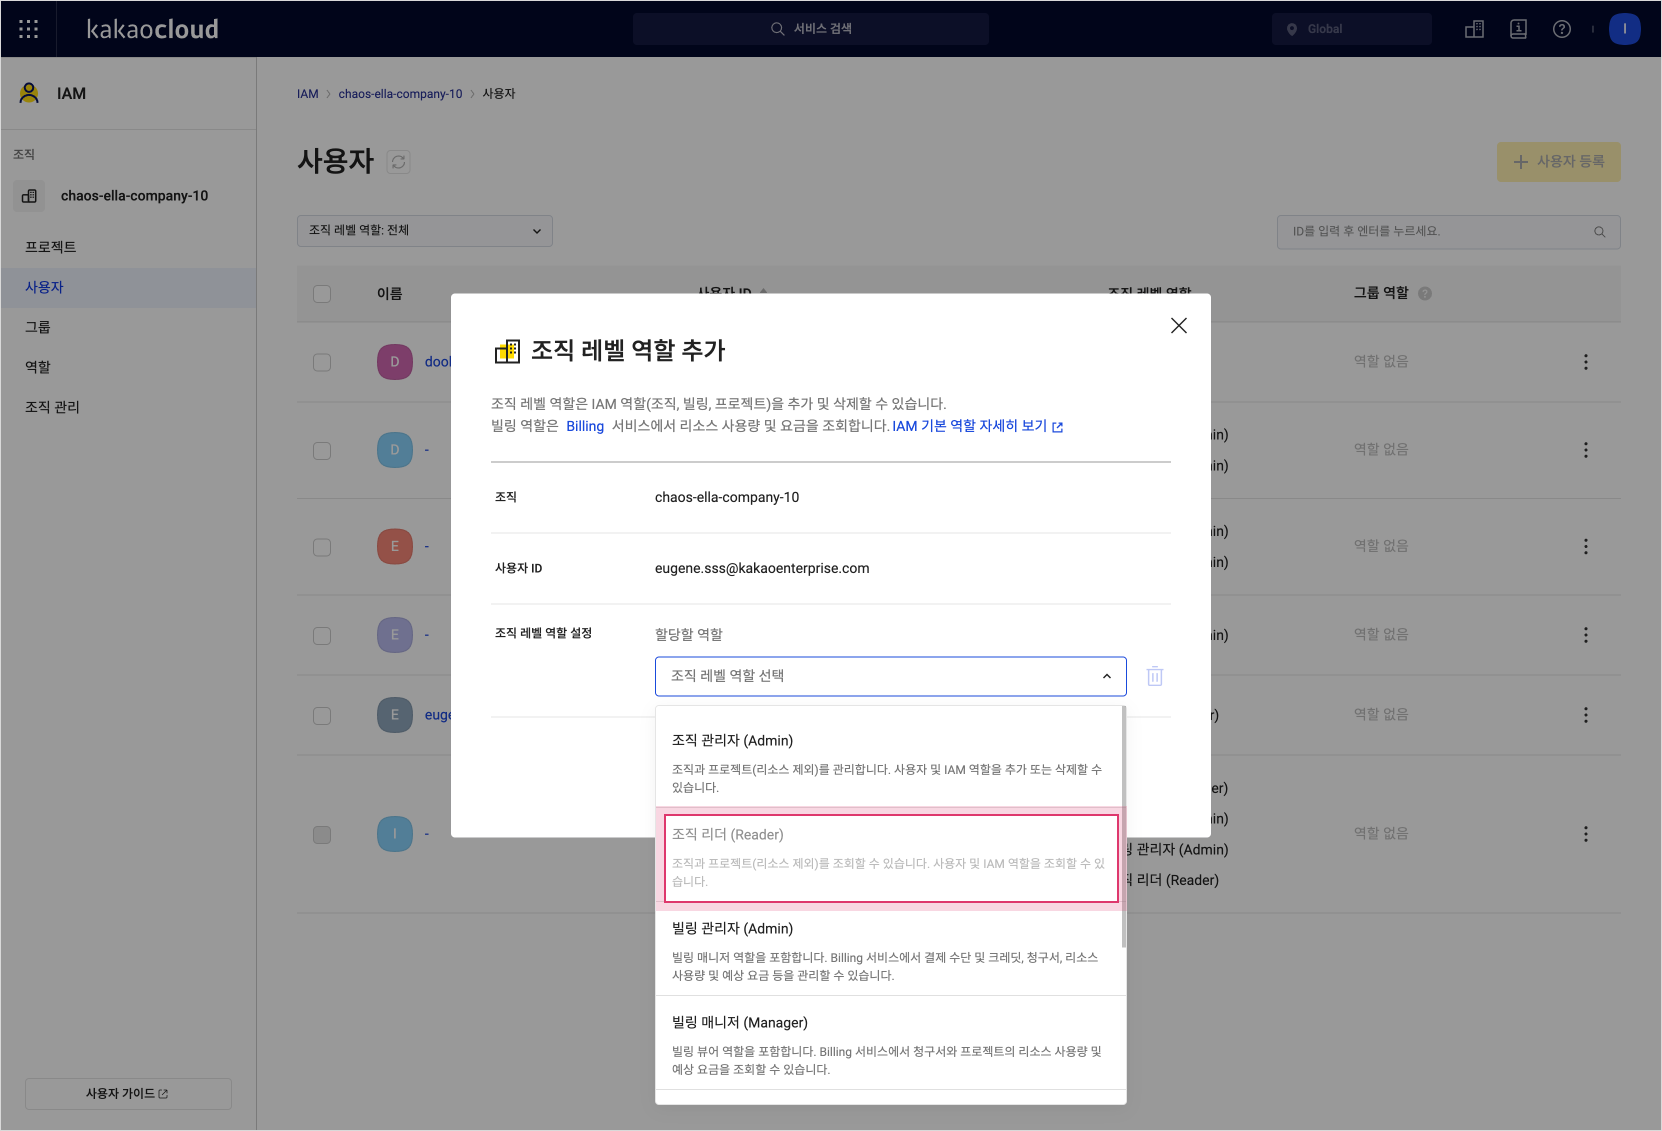 Select Organization Reader role
 -
The Organization Reader role is granted.
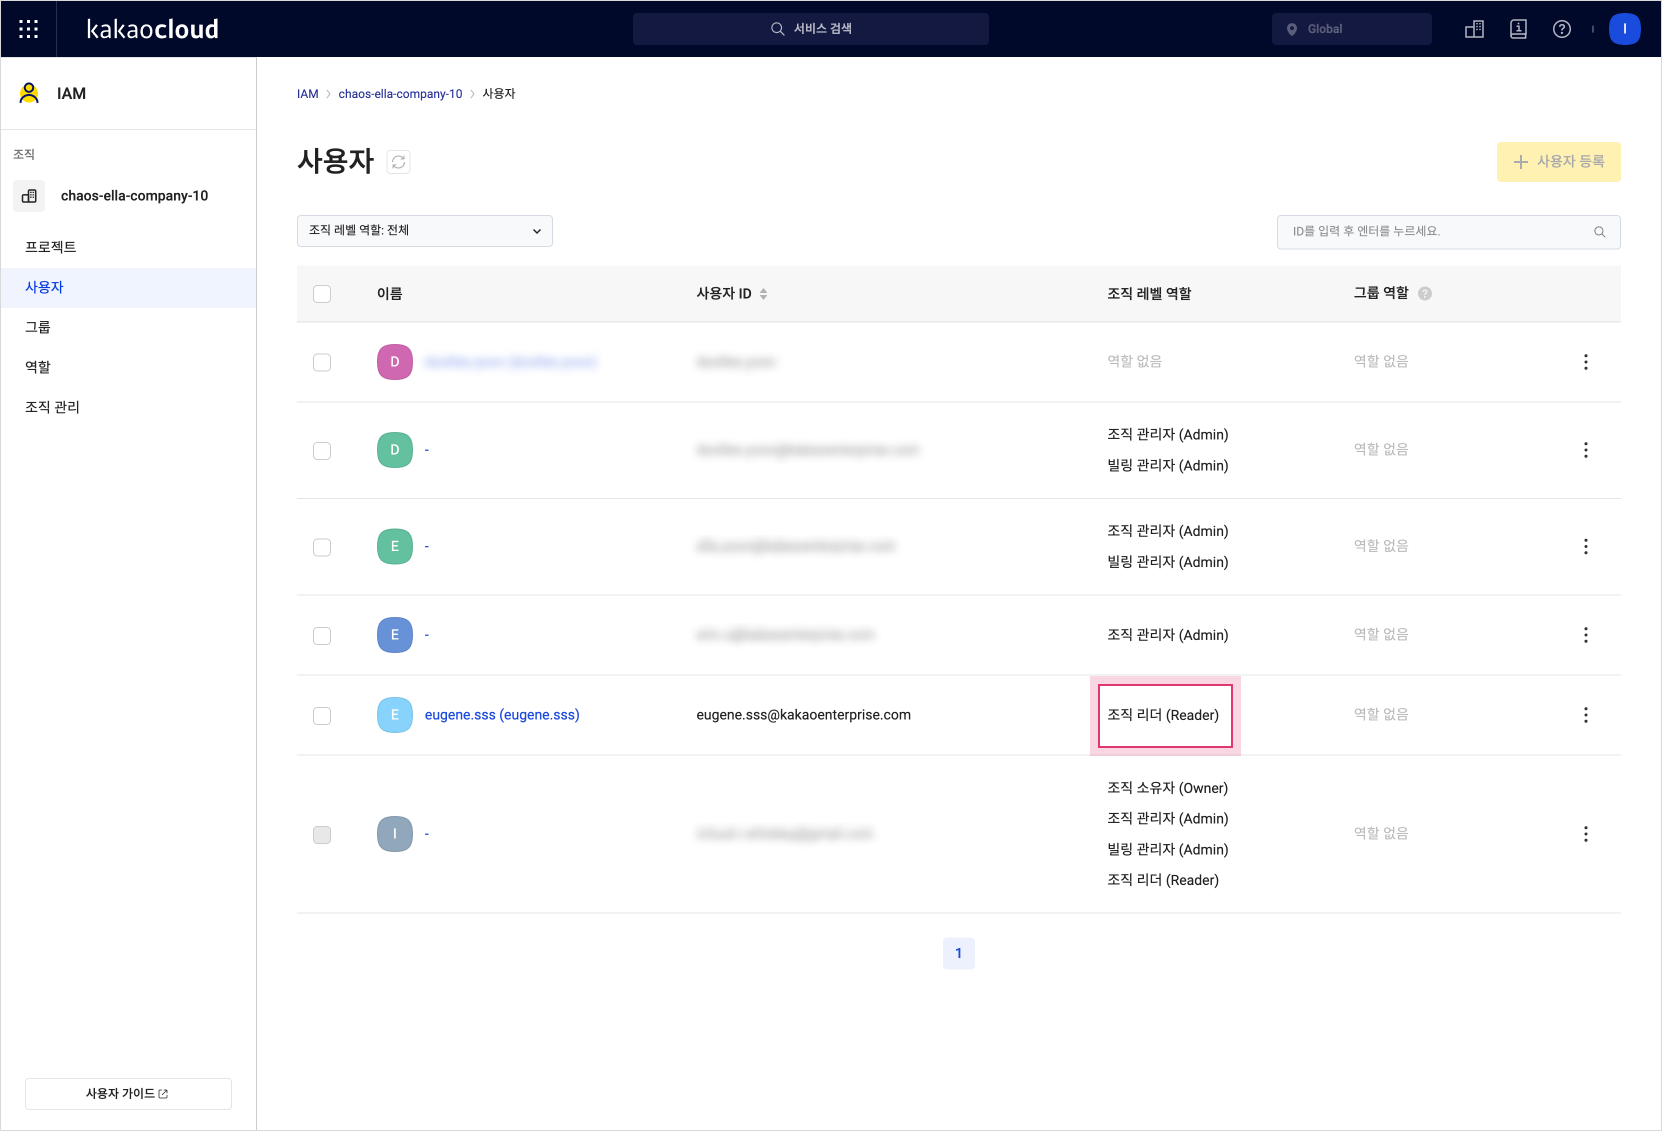 Role granted
Delete role
-
Log in to the KakaoCloud console with the Org Owner account.
-
Select IAM > User.
-
Select the user whose role you want to delete, and then select [Edit Organization Role] from the [⋮] button.
note- To remove only a specific role, use Edit Organization Role. To remove all organization roles granted to the user, use Bulk Remove Organization Role.
- A user must have at least one organization role. The last remaining organization role cannot be removed.
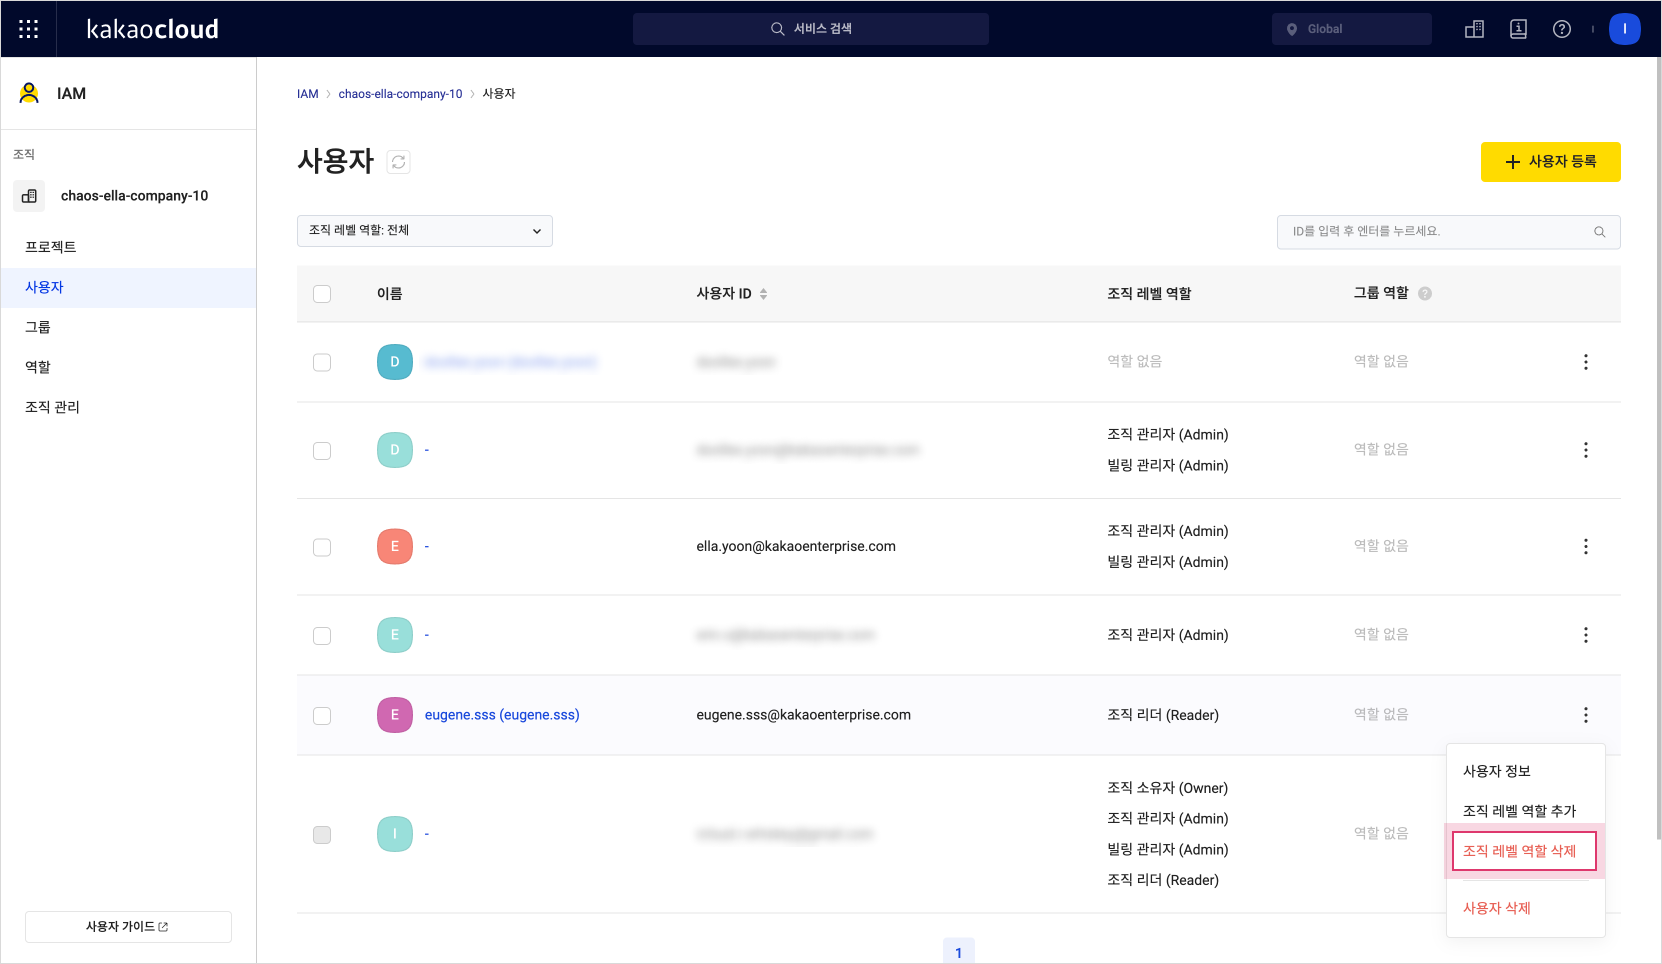 Edit organization role
 -
In the organization role list, select the Organization Reader role to delete and move it from the selected role list to the available role list.
-
Confirm that the role has been removed from the selected role list, and then select the [Edit] button. The role deletion is complete.
Delete user in organization
If you need to completely delete a user from the organization (ex. a former employee), follow the procedure below.
- If you delete a user only in the KakaoCloud console, the user is registered again when the user logs in with the external credential provider account.
- If you delete a user only in the Microsoft Entra ID tenant, the user is not deleted from the KakaoCloud organization.
- Therefore, delete the user from both the
Microsoft Entra IDtenant and theKakaoCloud console.
Step 1. Delete user within the Microsoft Entra ID tenant
-
Log in to the Microsoft Azure Portal with an account that has user administrator permissions, and then select Microsoft Entra ID.
 Microsoft Entra ID
 -
Select Members, and then search for and check the user to delete.
 Check the user to delete
 -
Select the [Remove] button at the top to remove the user.
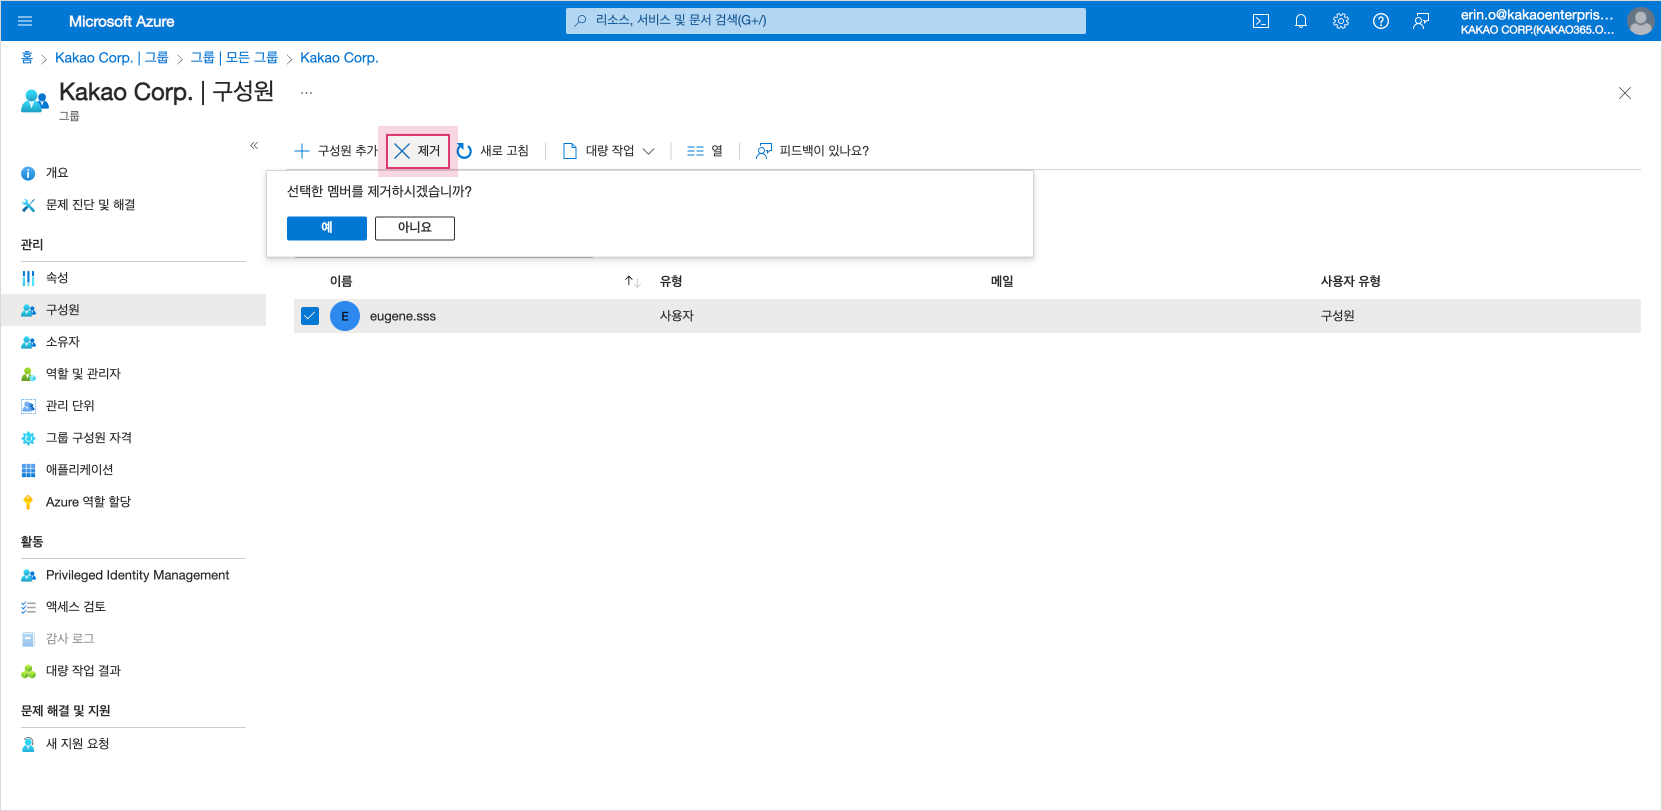 Delete Microsoft Entra ID User
Step 2. Delete user in KakaoCloud organization
-
Log in to the KakaoCloud console with the Org Owner account.
-
Select IAM > User.
-
Check the user to delete and select Delete User at the top.
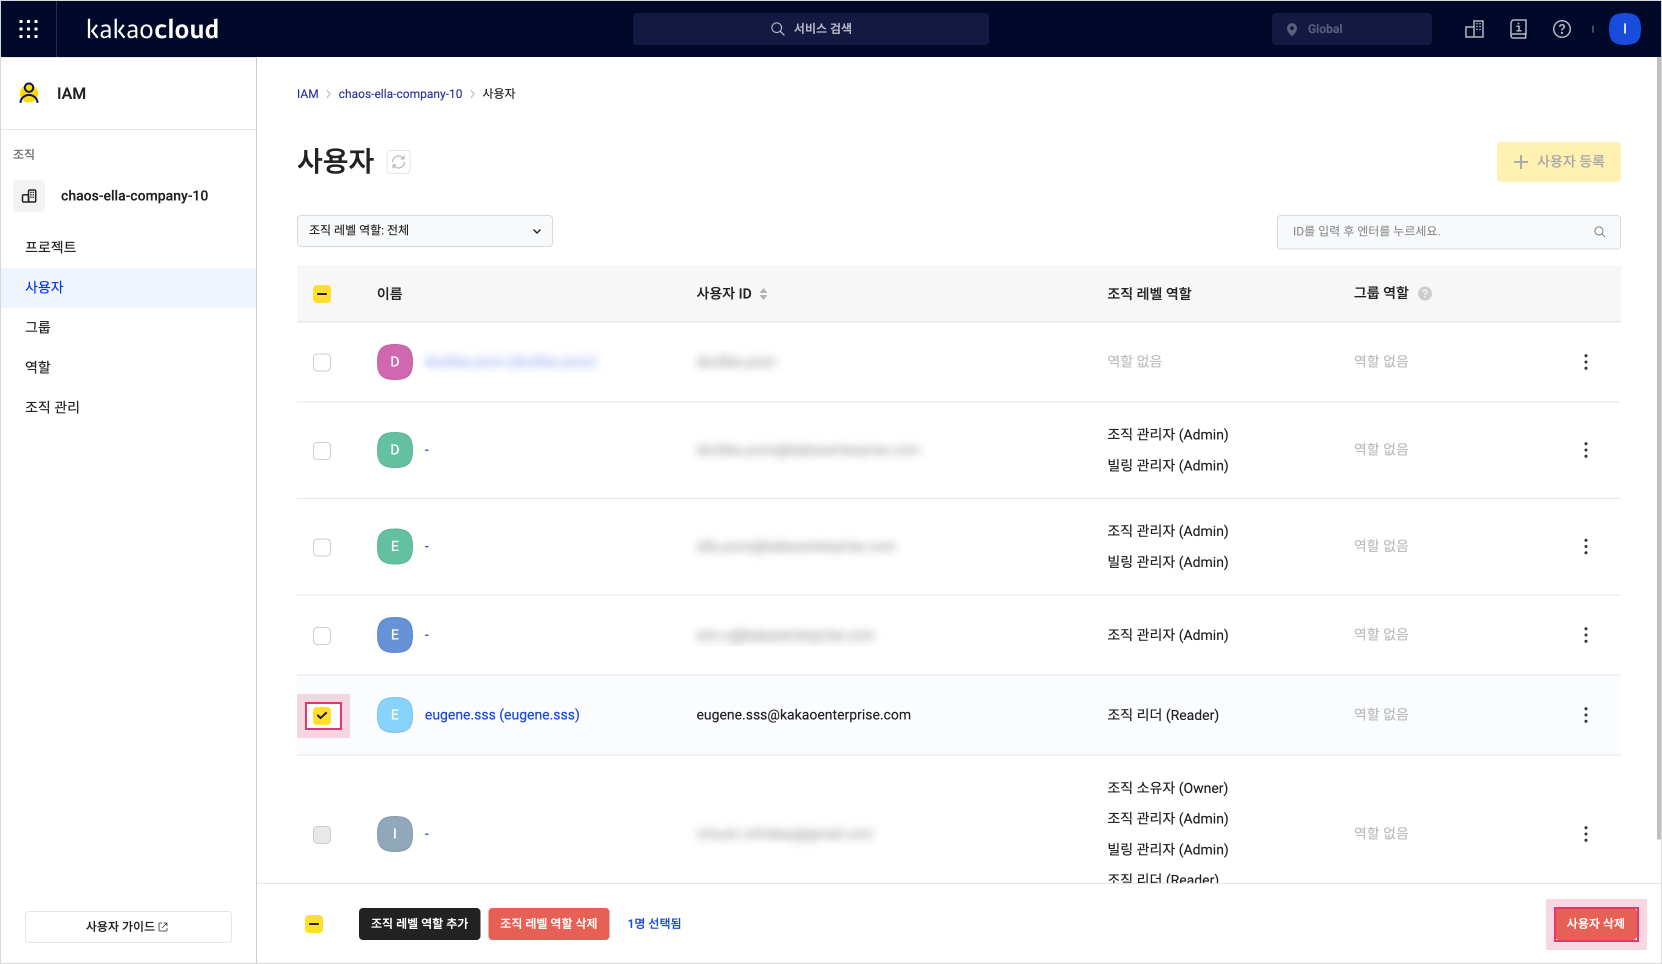 Delete user
 -
In the pop-up window that appears, enter "Permanent deletion" and select [Delete]. The user is also deleted from the KakaoCloud organization.
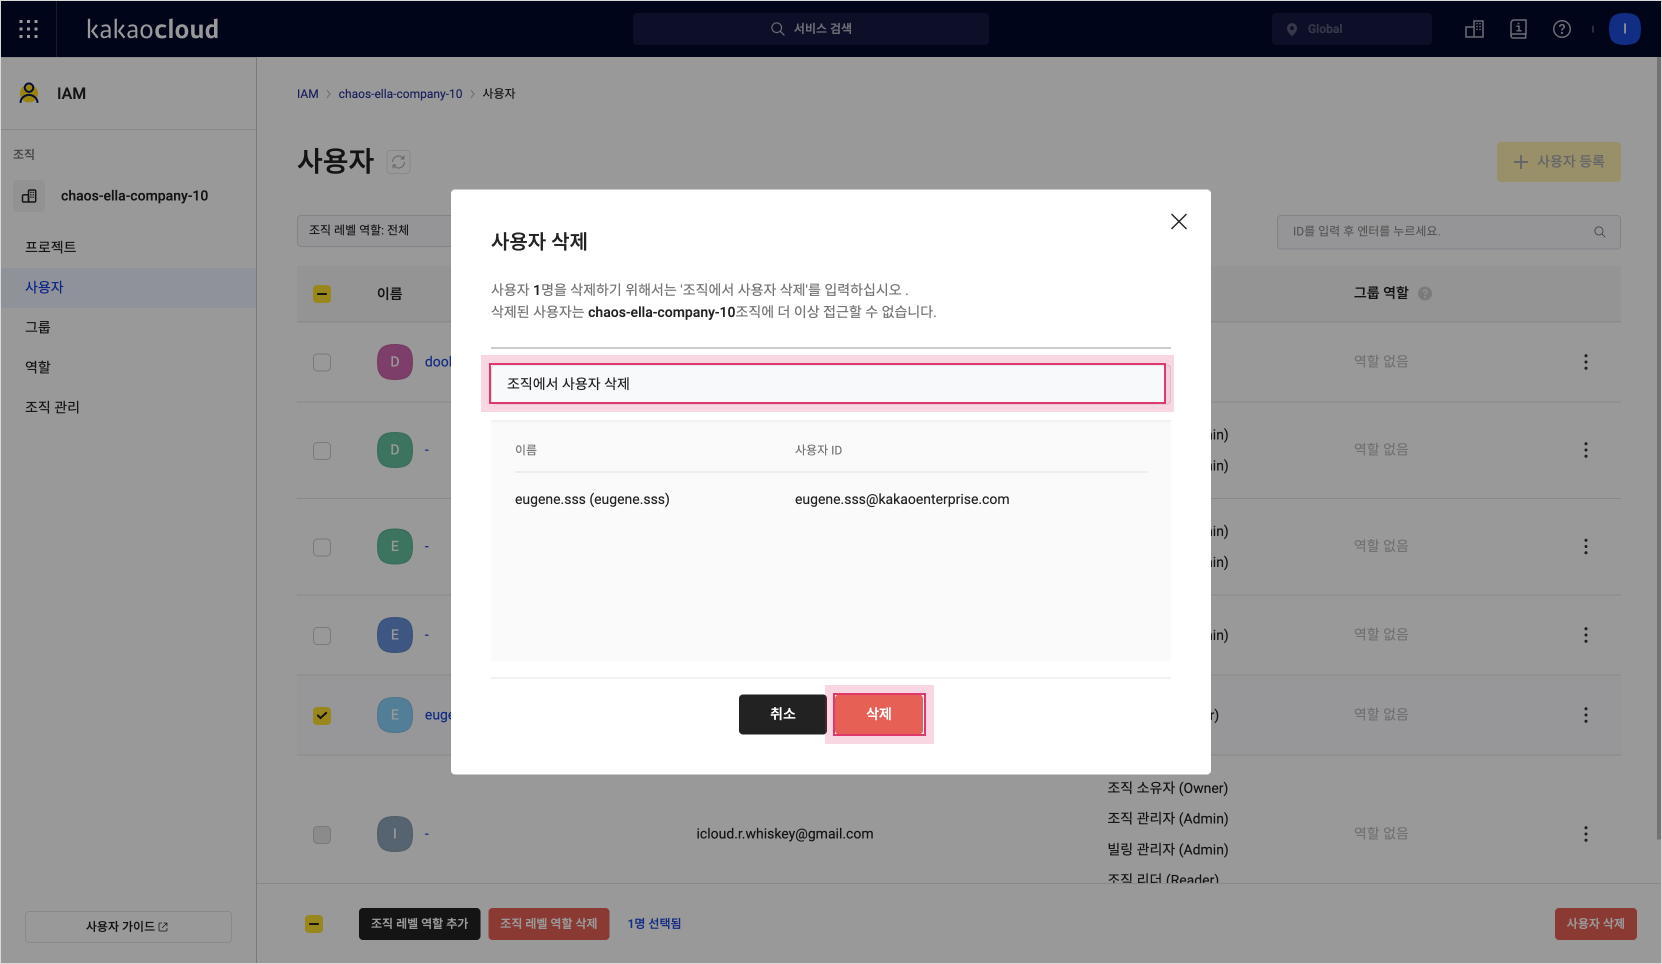 User deletion pop-up
Step 3. Confirm user deletion
Log out of the KakaoCloud console, and then try to log in with the deleted user account. Confirm that the error message below appears and that you cannot log in.
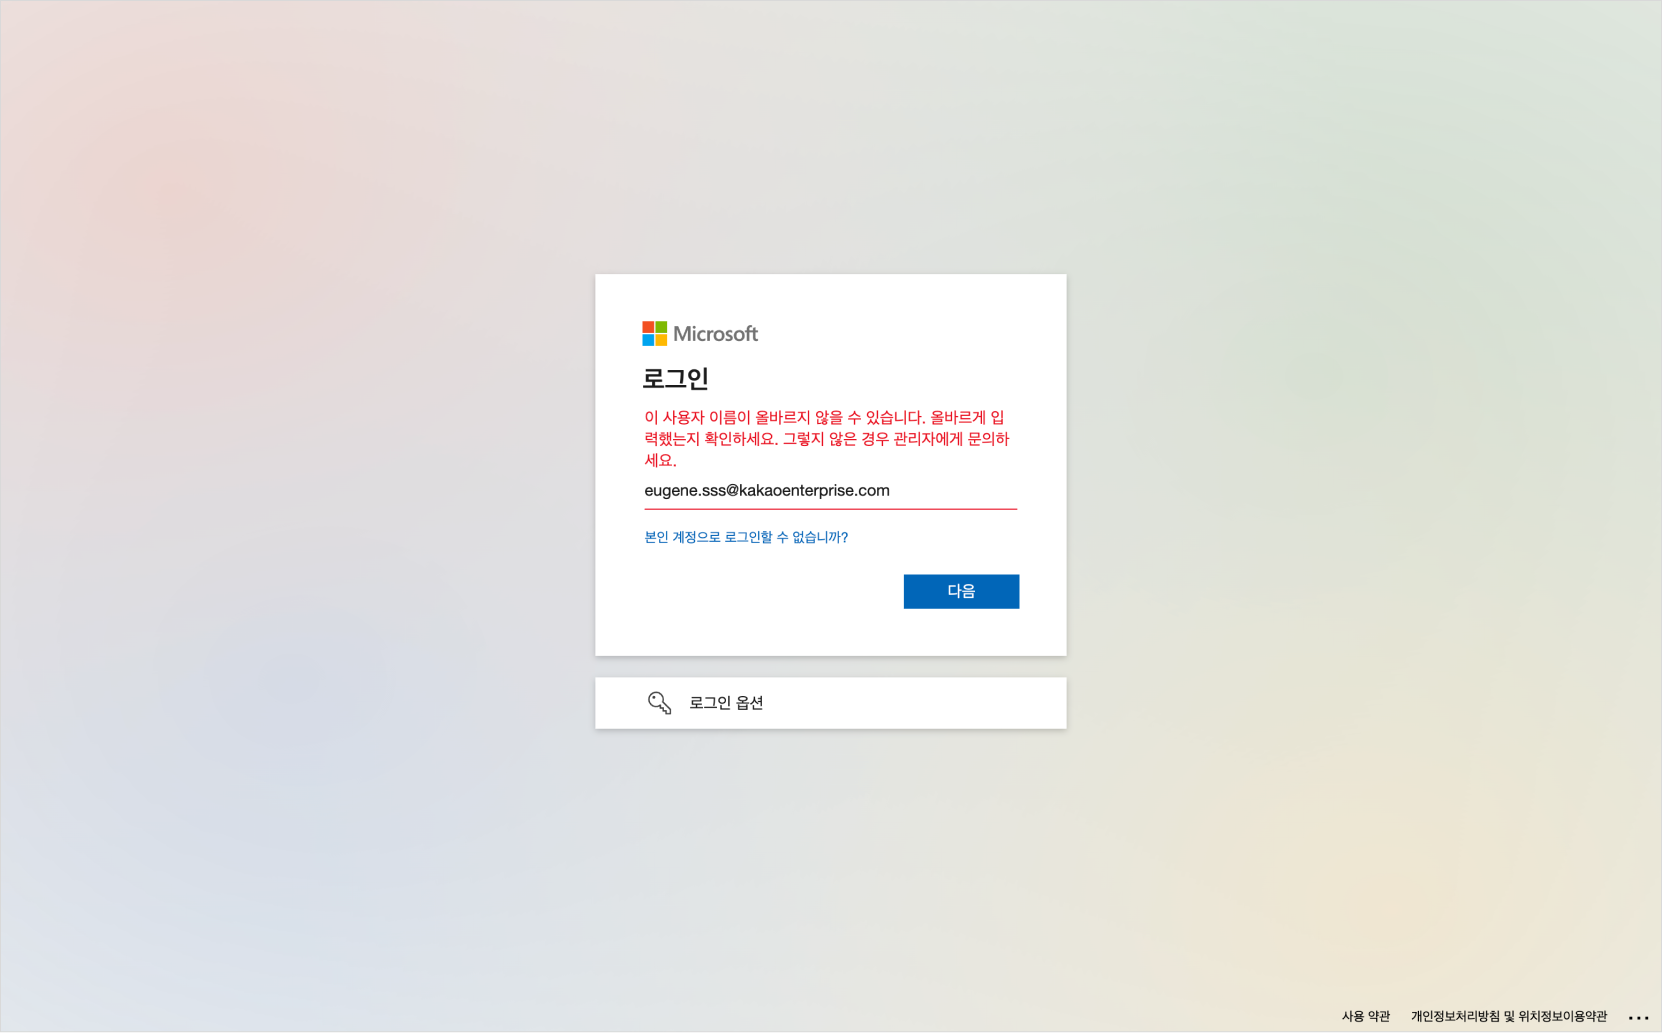 Unable to log in as a deleted user