Kubeflow model serving API setup
This tutorial explains how to build a machine learning pipeline using a sample dataset in the Kubeflow environment on KakaoCloud, and serve the trained model as a web API.
- Estimated time: 20 minutes
- Recommended OS: MacOS, Ubuntu
- Reference docs:
- Note:
- File downloads may not work properly in private network environments.
About this scenario
This tutorial walks you through how to use KServe in the KakaoCloud Kubeflow environment to serve a trained model as a real-time prediction API. You will learn how to efficiently deploy and manage your model with scalability and minimal infrastructure setup.
You’ll implement the model serving API process using KServe and understand how to manage real-time prediction systems.
Key topics include:
- Creating and configuring a KServe model server instance in Kubeflow
- Deploying a trained model as a real-time prediction API
- Managing and optimizing the serving process using KServe
Supported tools
| Tool | Version | Description |
|---|---|---|
| KServe | 0.15.0 | - Model serving tool that supports fast deployment, updates, high availability, and scalability. - Automatically handles common ML serving tasks such as load balancing, versioning, and failure recovery. |
For more information about KServe, refer to the Kubeflow > KServe official docs.
Before you start
This section explains the required setup and resources to use the model serving API.
1. Verify Kubeflow domain connection
To proceed with this tutorial, a domain must be configured in the Domain Connection (Optional) step when creating Kubeflow. Also, if a namespace quota is set, it may interfere with this tutorial, so make sure to proceed without quota restrictions.
See the Create Kubeflow and Configure Kubeflow Quotas docs for more details.
2. Prepare training data
You’ll implement a model that predicts restaurant review ratings using Yelp restaurant review data from the 2015 Yelp challenge.
- Download sample datasets:
| Item | Description |
|---|---|
| Goal | Build a model to predict review ratings based on text |
| Data | Restaurant review texts and ratings from Yelp users |
Original Yelp challenge dataset
3. Prepare GPU-based Notebook
This tutorial uses a GPU node pool for the notebook environment.
If you haven't prepared the Kubeflow environment, refer to the Create Jupyter Notebook guide to create a notebook with a GPU image.
Getting started
Step 1. Create pipeline and model server in Notebook
If you encounter errors at the Serve a model with KServe step, it may be due to insufficient node pool resources. In that case, increase the number of worker nodes and re-run the pipeline.
-
Download the example notebook:
-
Access your notebook instance and upload the file via the browser.
-
After uploading, check the content on the right pane and enter required information in the second cell:
- Kubeflow domain address
- Kubeflow account email
- Kubeflow account password
-
Execute all steps in the notebook up to the [Model Serving API Test] section. This will create the training model, serving component, model component, and pipeline.
-
After model creation, go to the Models tab to access the serving API.
(In Kubeflow v1.8, the menu name has changed to Endpoints.)
Step 2. Use model serving API
Test from within Kubeflow Notebook or internal network
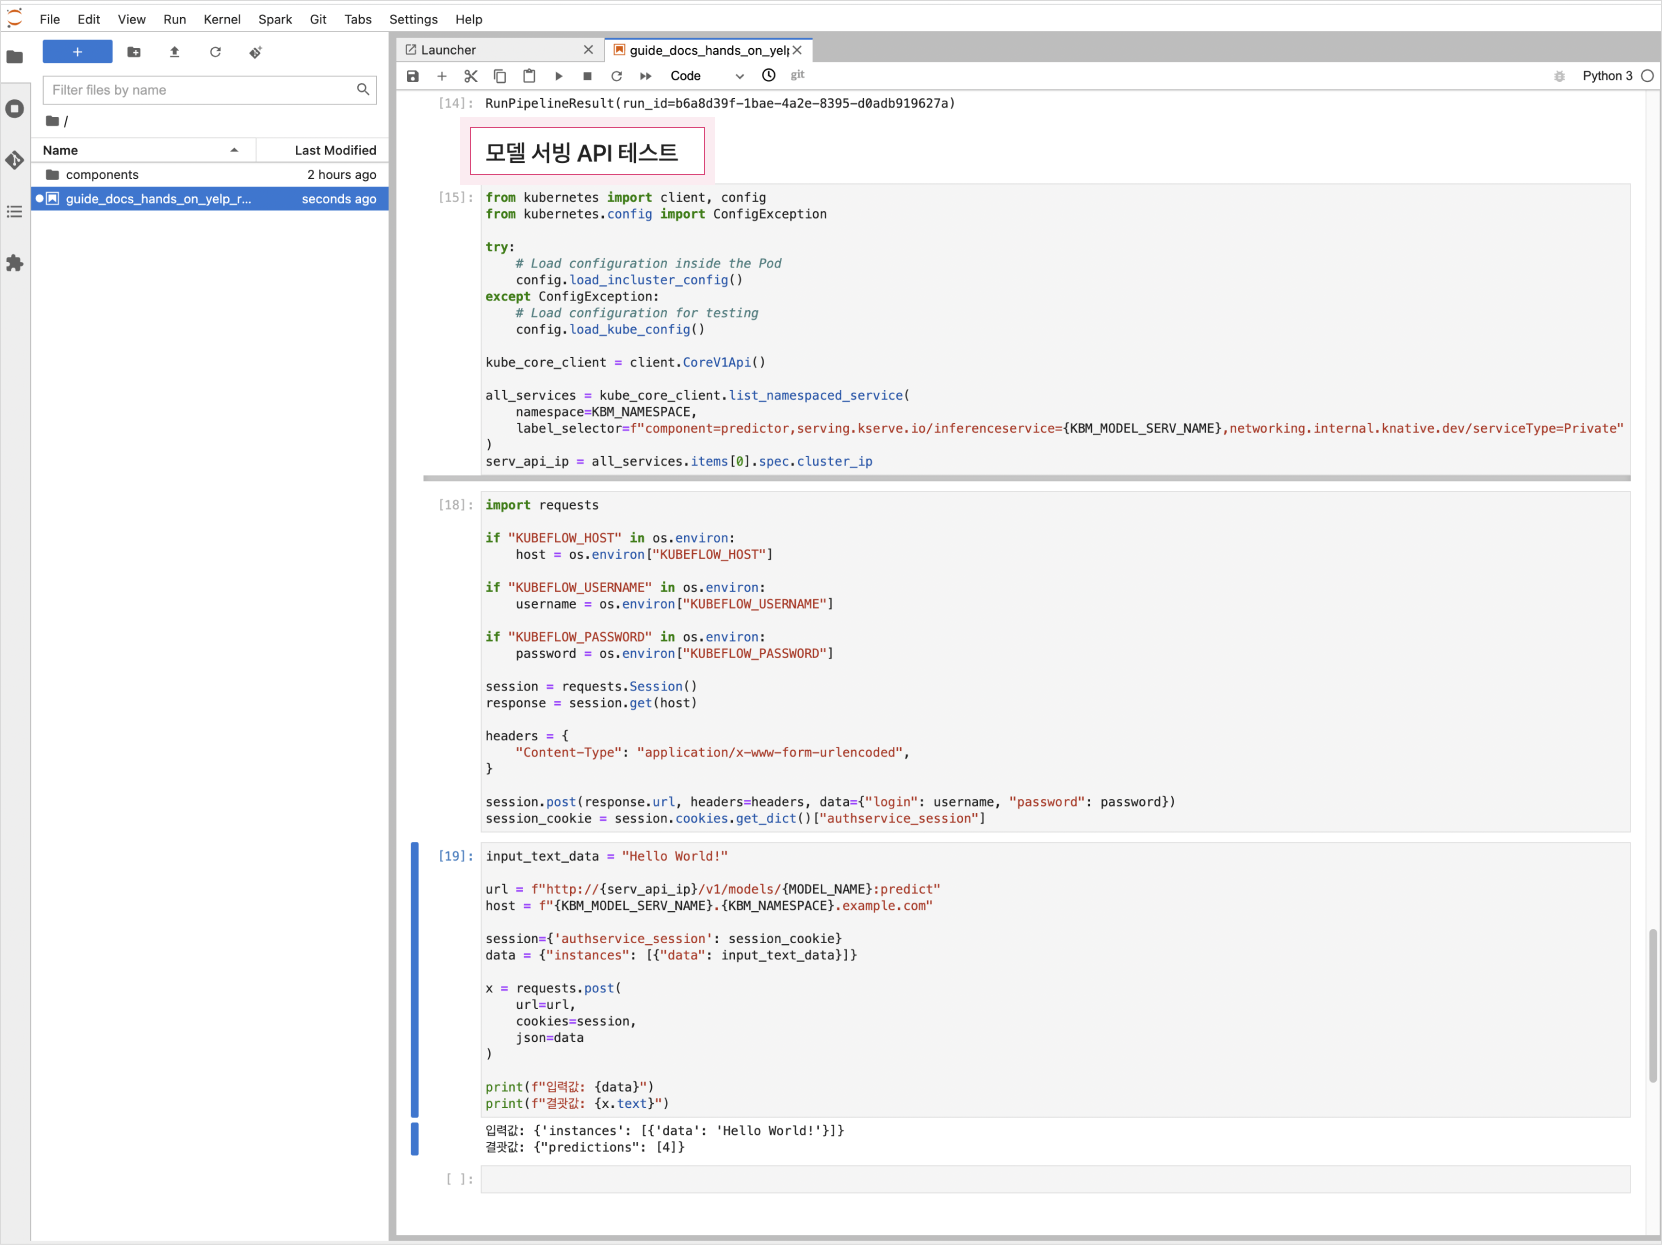
You can use the Cluster IP to test the serving API from within the notebook or the internal Kubernetes network where Kubeflow is installed.
-
In the notebook, run the [Model Serving API Test] section.
Test inference API from outside of Kubeflow
To access the serving API externally, you must set a domain when creating Kubeflow. If you've done so, you can use the script below to test:
-
Fill in the appropriate host, kbm_namespace, username, password, and run the script:
Sample scripthost = "${HOST}"
kbm_namespace = "${NAMESPACE}"
username = "${USER_EMAIL}"
password = "${USER_PASSWORD}"
input_text_data = "Hello World!" # test string
model_name = "torch-model"
model_serv_name = "torchserve"
session = requests.Session()
_kargs = {
"verify": False
}
response = session.get(
"https://" + host, **_kargs
)
headers = {
"Content-Type": "application/x-www-form-urlencoded",
}
session.post(response.url, headers=headers, data={"login": username, "password": password})
session_cookie = session.cookies.get_dict()["authservice_session"]
print(session_cookie)
url = f"http://{host}/v1/models/{model_name}:predict"
host = f"{model_serv_name}.{kbm_namespace}.{host}"
print(url)
print(host)
session = {'authservice_session': session_cookie}
data = {"instances": [{"data": input_text_data}]}
headers = {
"Host": host,
}
x = requests.post(
url=url,
cookies=session,
headers=headers,
json=data
)
print(f"Input: {data}")
print(f"Result: {x.text}")환경변수 설명 HOST🖌︎ domain without 'http://' e.g., testkbm.dev.kakaoi.io NAMESPACE🖌︎ kubeflow namespace e.g., kbm-admin USER_EMAIL🖌︎ kubeflow email e.g., kbm@kakaoenterprise.com USER_PASSWORD🖌︎ kubeflow password e.g., kbm@password -
Sample output:

Step 3. Delete the model server
For more on KServe, refer to Kubeflow > KServe documentation.
To delete a model server, go to the Models tab and click the [Delete Server] button on the corresponding row.
(In Kubeflow v1.8, the menu is called Endpoints.)
Step 4. Delete the Run
It is recommended to delete completed or unused Runs for resource management.
-
Go to the Runs tab in the Kubeflow dashboard, select the Run to delete, and click [Archive].
-
Go to the Archived section of the Runs tab, select the archived Run, and click [Delete].
-
The corresponding pod will also be deleted.