Predictive modeling in Kubeflow Notebooks
This tutorial walks through the process of building a taxi fare prediction model in the KakaoCloud Kubeflow environment using the TLC Trip Record Data.
- Estimated time: 10 minutes
- Recommended OS: MacOS, Ubuntu
- Reference:
- Note:
- In private network environments, downloading training files may not work properly.
About this scenario
This tutorial guides you through implementing a taxi fare prediction model in a Jupyter Notebook using KakaoCloud's Kubeflow environment. Through steps from data preprocessing to model training and evaluation, you will gain a practical understanding of building ML models with real-world datasets and learn how to use Kubeflow for training and pipeline automation.
Using the TLC Trip Record Data, you will implement a taxi fare prediction model in Kubeflow. The main topics covered include:
- Creating and using Jupyter Notebook instances in Kubeflow
- Data preprocessing and exploratory data analysis (EDA)
- Building and training a simple ML model in the notebook
- Automating model training with Kubeflow Pipelines
Before you start
1. Prepare training dataset
You will use the publicly available TLC Trip Record Data from New York City and the sample pipeline manifest files to run preprocessing and training exercises.
| Item | Description |
|---|---|
| Goal | Build a taxi fare prediction model |
| Dataset | Yellow Taxi fare data from NYC Taxi & Limousine Commission (2009–2015) Includes pickup/dropoff times and locations, trip distance, fare amount, payment type, passenger count, etc. |
2. Set up Kubeflow environment
This tutorial assumes you're working in a CPU node pool environment.
If you haven't already set up Kubeflow or the notebook environment, refer to Create a Jupyter Notebook and create a CPU-based notebook instance.
Notebook practice
This tutorial includes two practice scenarios: one for training a prediction model in a notebook, and one for building a pipeline to train the model.
Practice 1. Train predictive model in Notebook
-
Download the required file: nyc_taxi_pytorch_run_in_notebook.ipynb
-
Access the Kubeflow Notebook instance you created earlier. Click the Upload Files button in the top-left to upload the notebook file.
 Upload file to Jupyter Notebook console
 -
Once uploaded, locate the file in the left panel and open it to view the notebook contents on the right.
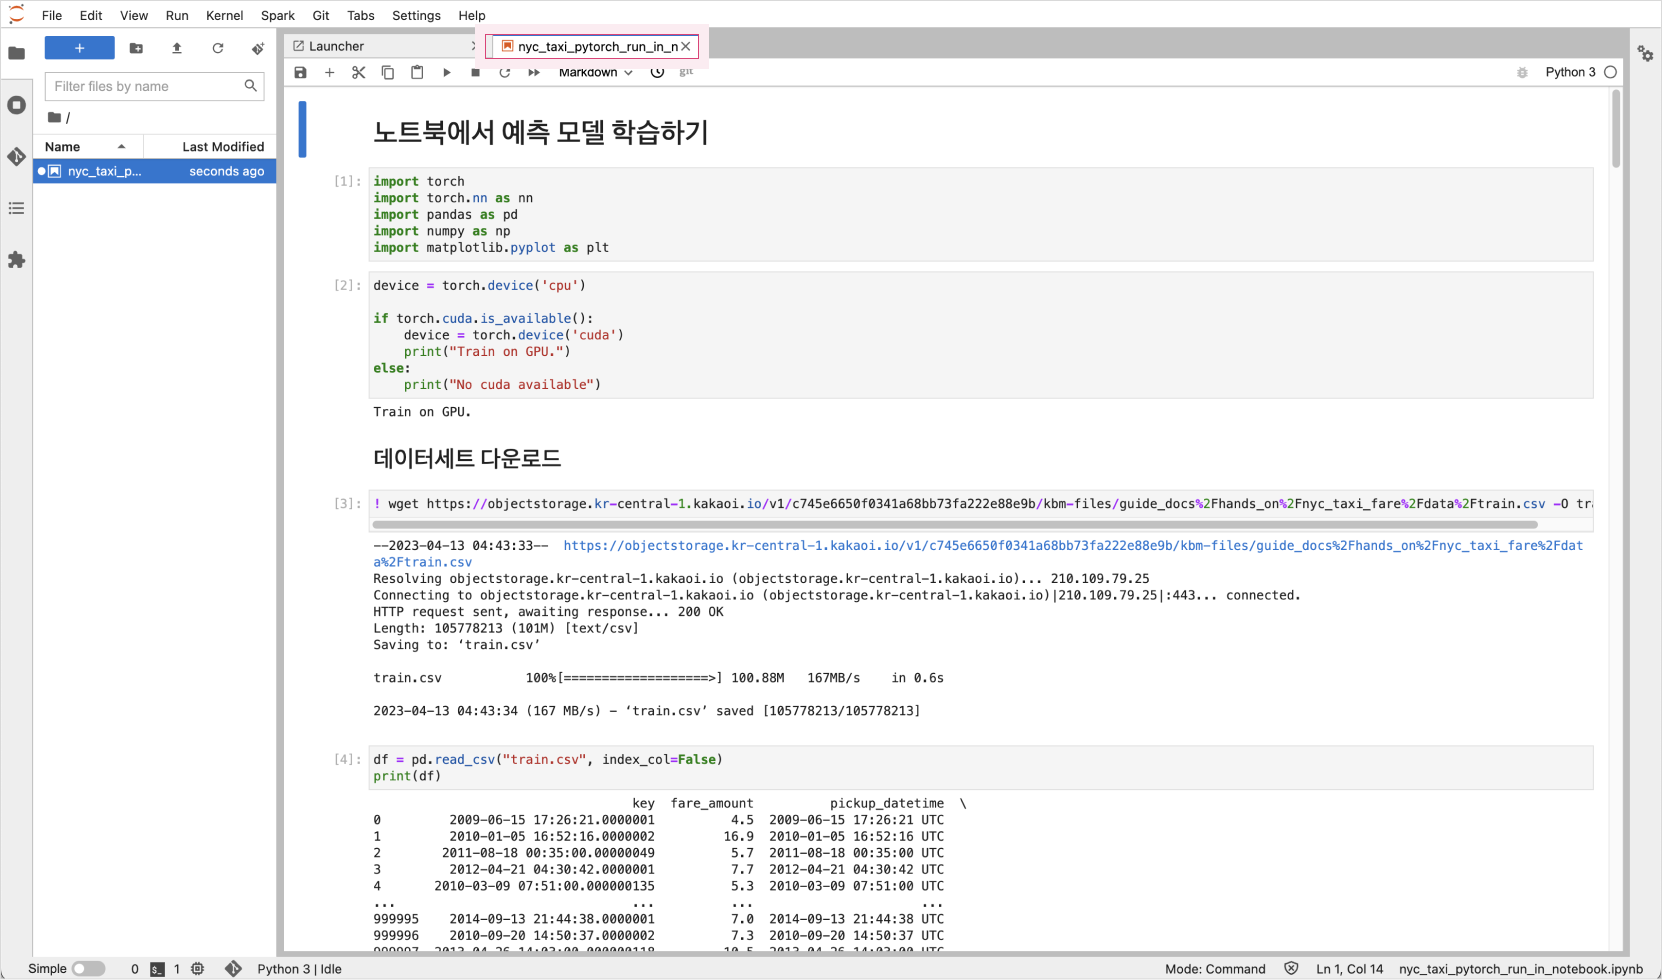
-
Follow the notebook steps to run training.
Practice 2. Build pipeline and train model from Notebook
-
Download the required file: nyc_taxi_pytorch_build_pipeline_cpu.ipynb
-
Access your Kubeflow Notebook instance. Click Upload Files in the top-left corner and upload the file.
-
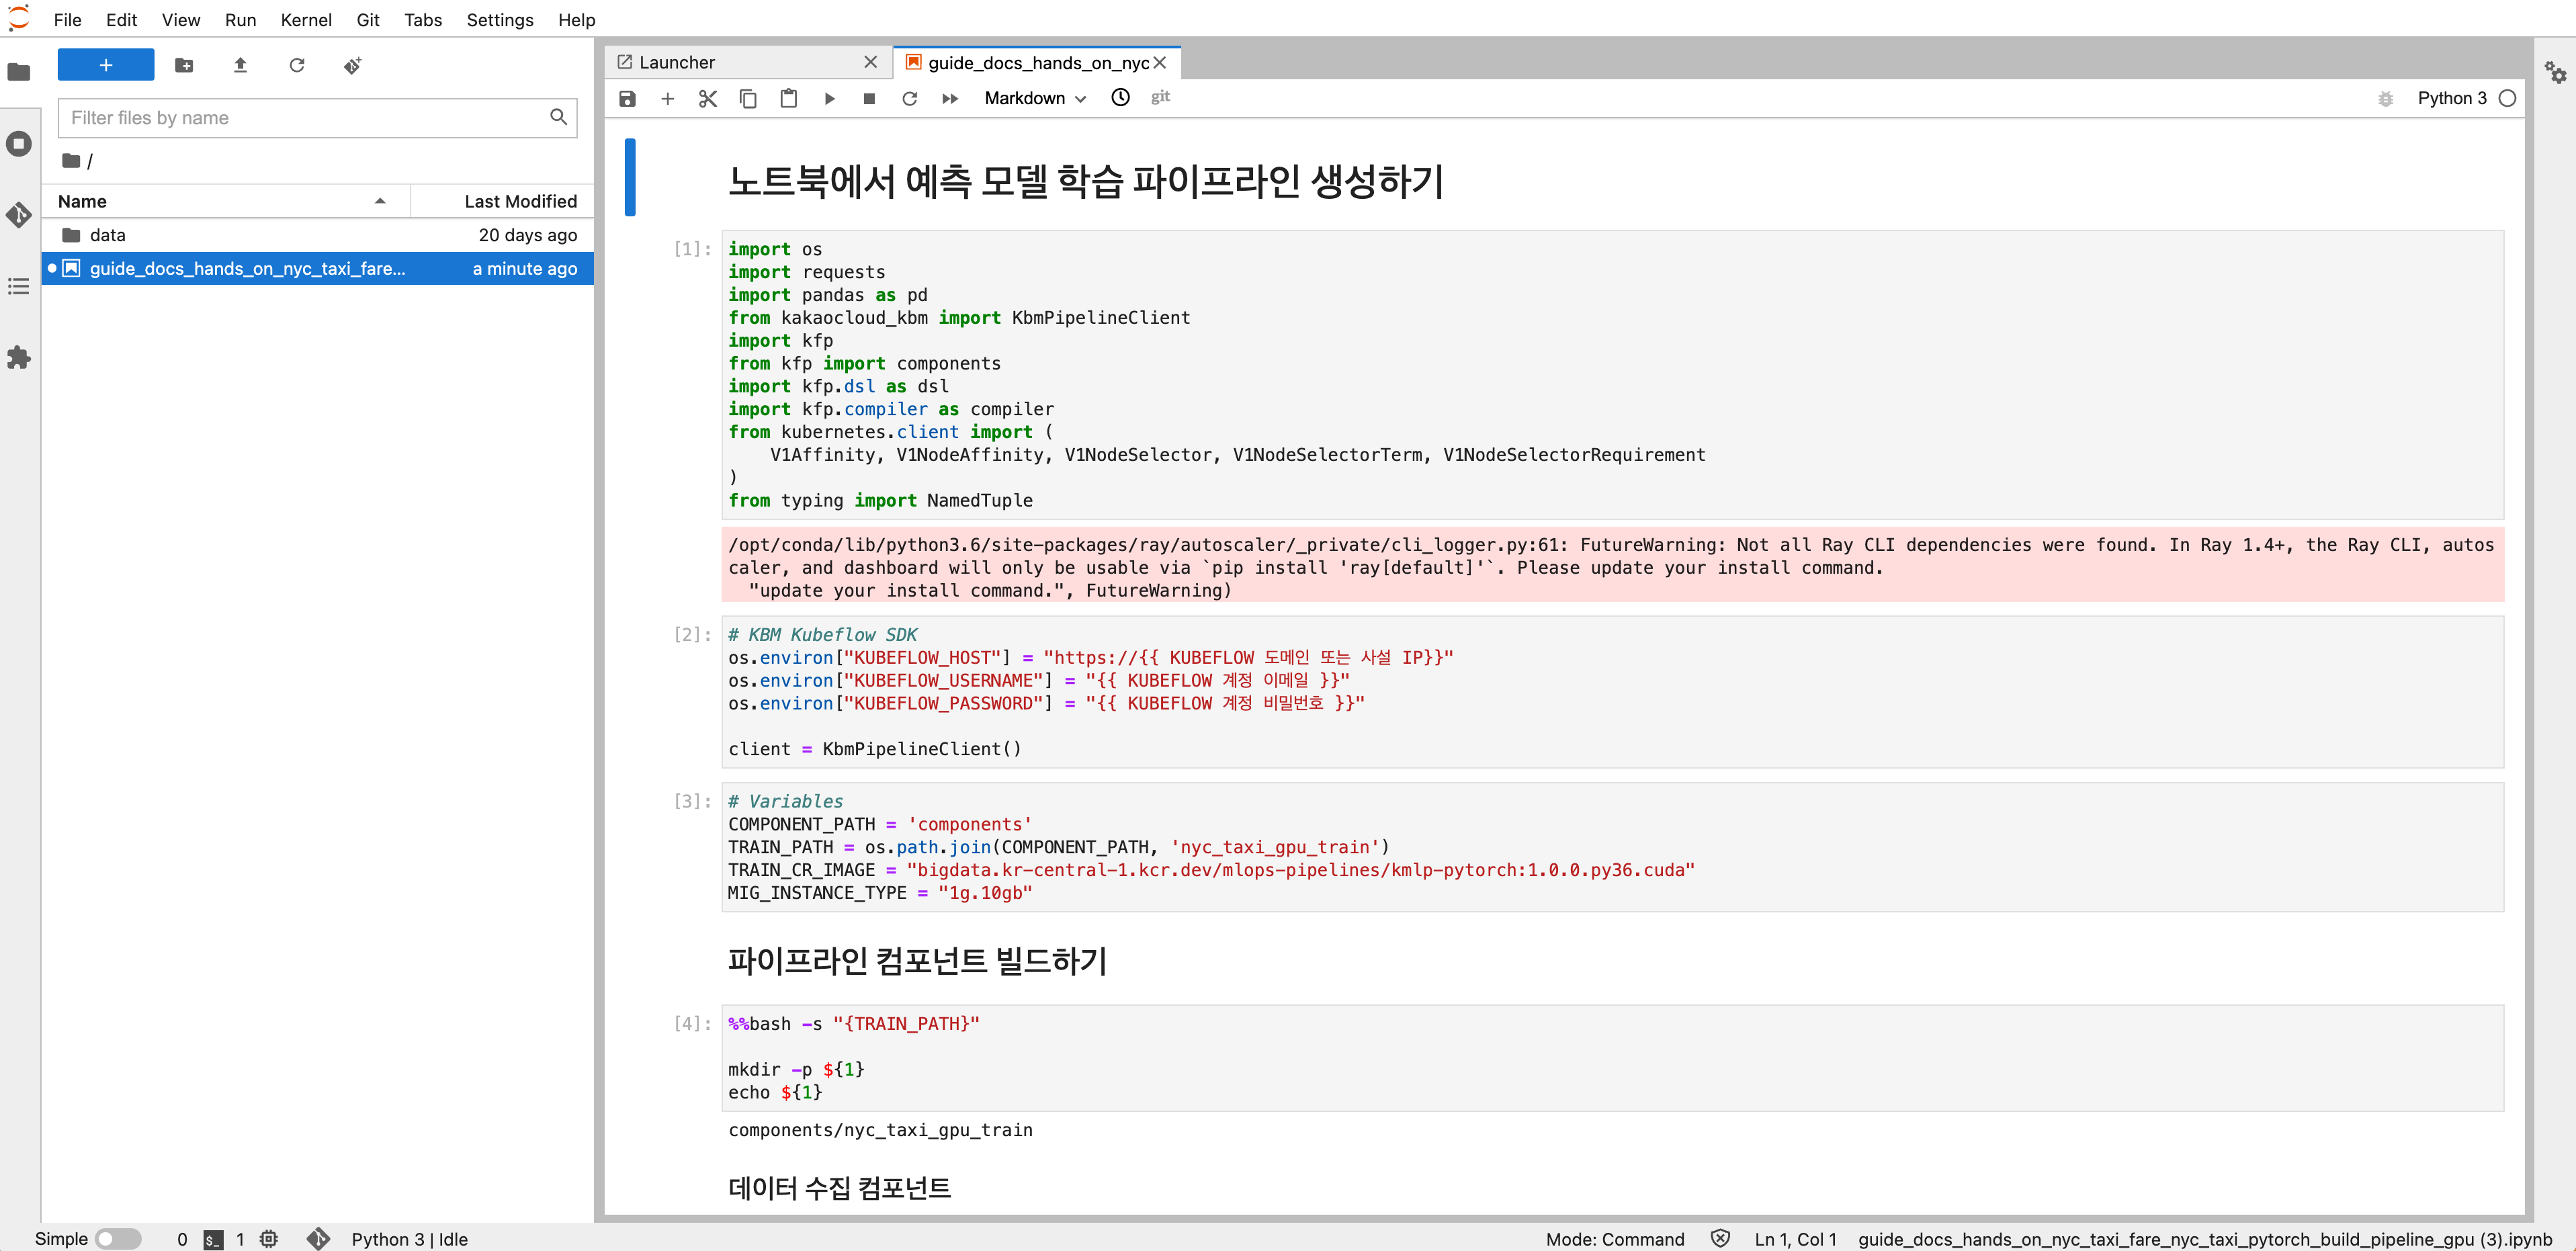
After uploading, locate and open the notebook in the left panel to begin the practice.
-
Set environment variables for your Kubeflow connection, such as the private IP of the load balancer and your Kubeflow email and password.
-
Follow the notebook instructions to run training.
Delete resources (optional)
After completing the tutorial or when no longer needed, it's recommended to delete unused resources.
-
In the Kubeflow dashboard, go to the Runs tab to view executions. After confirming completion, archive the run and click Delete.
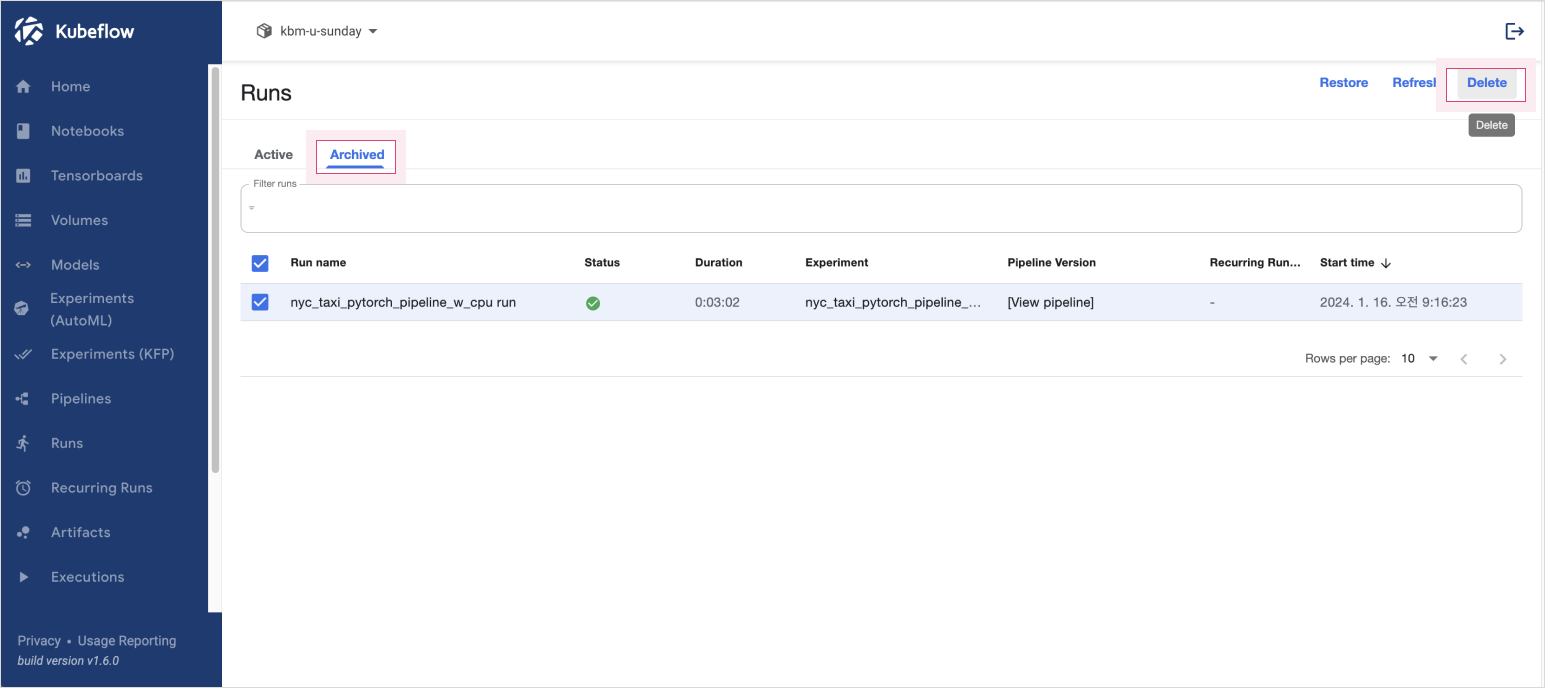 Delete a run
 -
Verify that the associated pods have also been deleted.
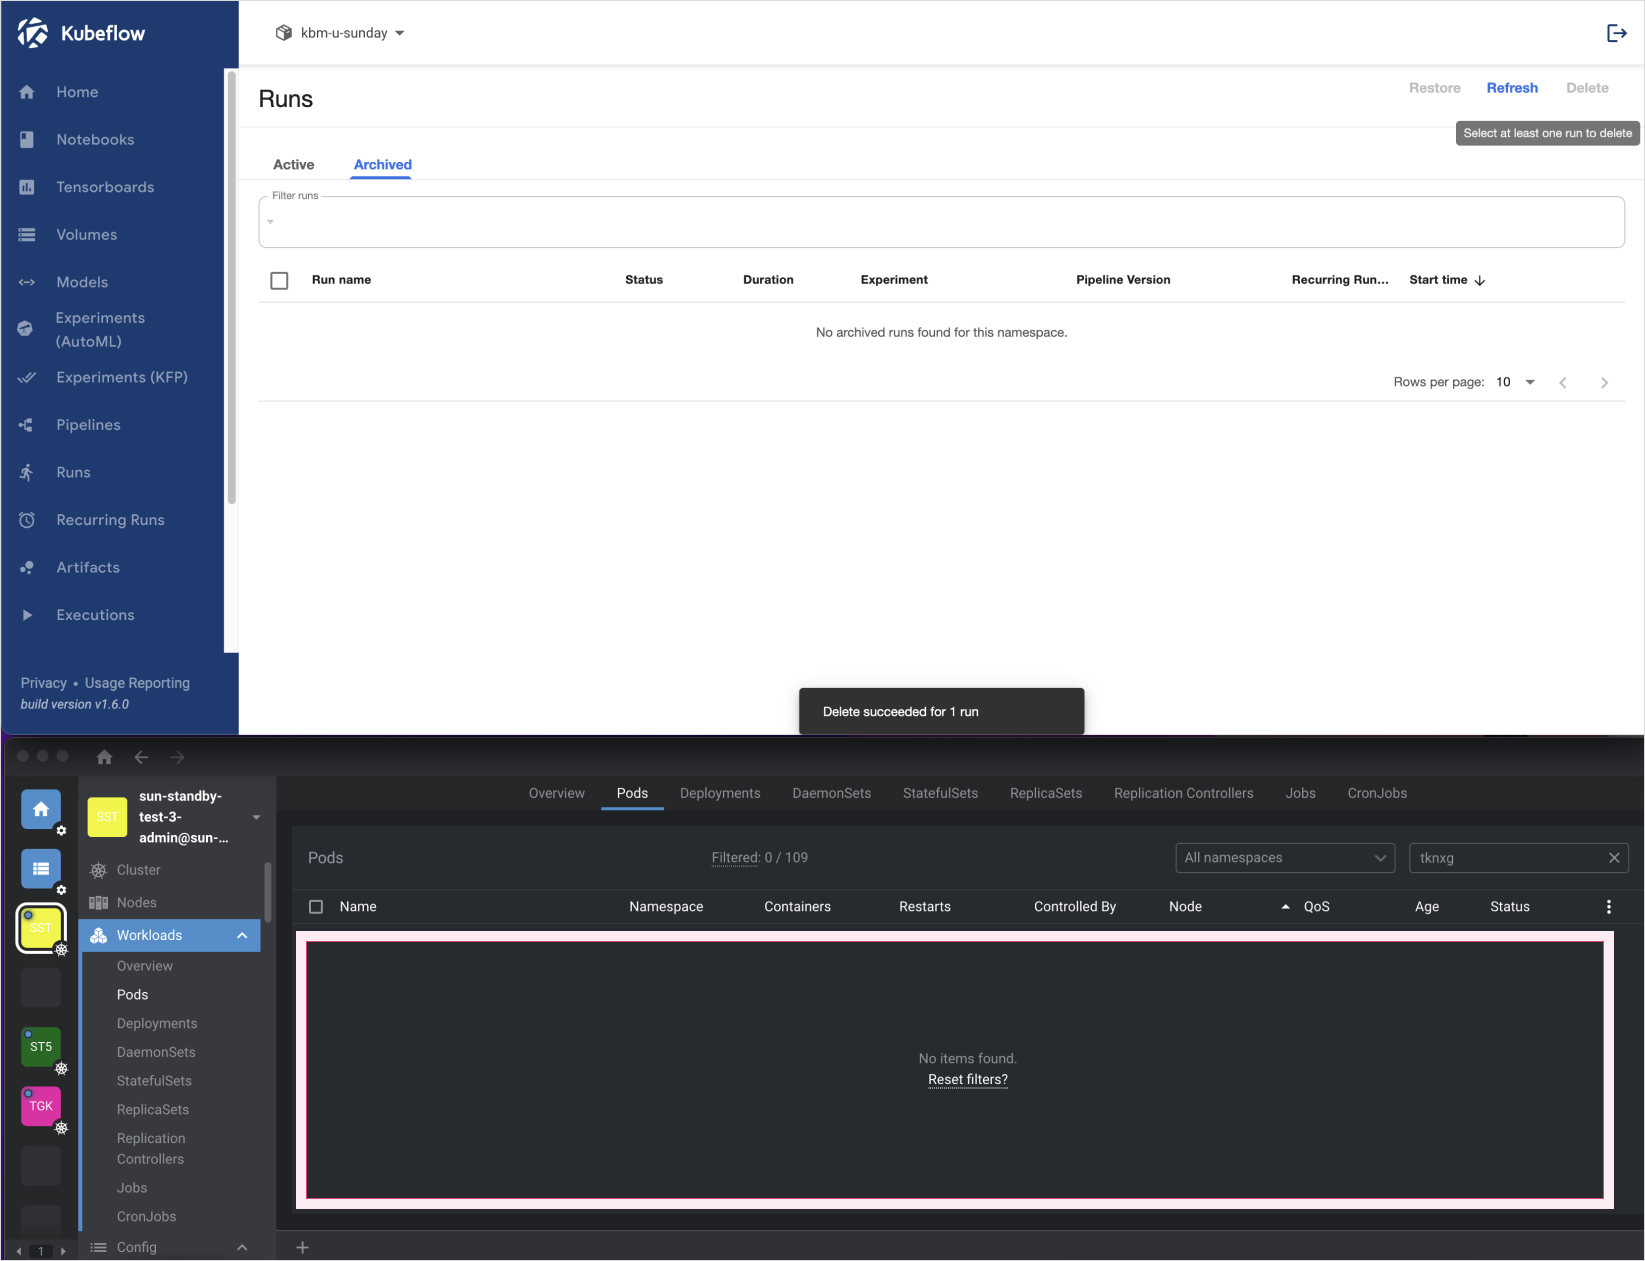 Pod deletion confirmation