Upload images via Object Storage API
This guide explains how to upload an image to Object Storage using Python code and the KakaoCloud Object Storage API.
KakaoCloud allows users to manage Object Storage programmatically via the Object Storage API. This guide provides an example of how to manage Object Storage buckets and objects using Python code to call the Object Storage API.
- Time required: 20 minutes
- Prerequisites
- Set up a Python runtime environment
- Install pip: Python package manager
Before you start
Get access key
The Access key, which consists of an access key ID and a Secret access key, is required for issuing API authentication tokens as part of the IAM user credentials.
Refer to the API Preparation document and follow the steps in the Get access key guide to get Access keys.
Once you close the popup, the Access key ID and Secret access key information cannot be retrieved again. Therefore, it's advised to copy and securely store this information.
Get API authentication token
The API authentication token replaces your KakaoCloud account ID and password and allows you to authenticate applications or services via CLI or API.
After issuing the Access key, you can use the Access key ID and Secret access key to obtain an API authentication token.
Refer to the API usage preparation document and follow the steps in Get API authentication token to issue the token.
By default, API authentication tokens expire after 12 hours, although they may expire or change sooner depending on the situation.
Install Python requests module
Use the pip command to install the Python requests module, which is used for handling HTTP requests in Python.
pip install requests
Manage buckets via API calls
In this guide, we will write the API call code in Python. Create a Python file (.py) and perform the tasks in that file.
Step 1. Create bucket
-
Write the API call code to create a bucket in Object Storage.
Create a bucketimport requests
import json
def createBucket():
headers = {
'X-Auth-Token': '{X_AUTH_TOKEN}',
'Content-Type': 'application/json'
}
data = {
"name": "{BUCKET_NAME}",
"type": "STANDARD",
"use_encryption": true,
"encryption_configuration": {
"type": "managed"
}
}
res = requests.put('https://objectstorage.kr-central-2.kakaocloud.com/v1_ext/bucket', headers=headers, data=json.dumps(data))
print(res.status_code)
createBucket()Variable Description X_AUTH_TOKEN API authentication token BUCKET_NAME Name of the bucket to be created -
The result of the execution will output the Status code of the HTTP request. You can check the result of the request execution through the Status value.
Response Status Code information for bucket creation requests
HTTP Status Response Description 201OK Bucket Success 401Unauthorized Authorization failed 409Conflicts Creation failed
- A bucket with the same name already exists -
You can verify the created bucket in the bucket list of the KakaoCloud console > Object Storage service.
Step 2. Manage bucket access
-
Write the API call code to manage access to the bucket. In this example, public access for all IP addresses is allowed for the bucket.
API call to manage bucket accessimport requests
import json
def manageBucketAccess():
headers = {
'X-Auth-Token': '{X_AUTH_TOKEN}',
'Content-Type': 'application/json'
}
data = {
"name": "{BUCKET_NAME}",
"acl": {
"public": "read-only"
}
}
res = requests.post('https://objectstorage.kr-central-2.kakaocloud.com/v1_ext/bucket/{BUCKET_NAME}', headers=headers, data=json.dumps(data))
print(res.status_code)
manageBucketAccess() -
The result of the execution will output the Status code of the HTTP request. You can check the result of the request execution through the Status value.
Response Status Code information for bucket access management requests
HTTP Status Response Description 200OK Bucket Success 401Unauthorized Authorization failed 404Not found Bucket not found
Manage objects (File & Folder) via API calls
Step 1. Create a folder
-
Write the API call code to create a folder inside the created bucket.
API call to create a folderimport requests
def createFolder():
headers = {
'X-Auth-Token': '{X_AUTH_TOKEN}',
'Content-Type': 'application/directory',
'X-Object-Meta-Company': 'kakao enterprise'
}
res = requests.put('https://objectstorage.kr-central-2.kakaocloud.com/v1/{ACCOUNT}/{BUCKET_NAME}/{FOLDER_NAME}/', headers=headers)
createFolder()Variable Description ACCOUNT Project ID
- Can be checked when issuing the token
- Value oftoken > project > idin the response bodyFOLDER_NAME Name of the folder to be created -
After running the code, go to the KakaoCloud console > Object Storage service and select the bucket. You can verify the created folder under the [Objects] tab.

Step 2. Upload an image file
-
Write the API call code to upload a file into the created folder. Prepare a
jpegimage file in your local environment to upload to Object Storage.API call to upload a fileimport requests
def uploadFile():
headers = {
'X-Auth-Token': '{X_AUTH_TOKEN}',
'Content-Type': 'image/jpeg'
}
data = open('{FILE_PATH}', 'rb')
res = requests.put('https://objectstorage.kr-central-2.kakaocloud.com/v1/{ACCOUNT}/{BUCKET_NAME}/{FOLDER_NAME}/{FILE_NAME}', headers=headers, data=data)
data.close()
uploadFile()Variable Description FILE_PATH Path to the file (in this exercise, the path to the jpeg file) FILE_NAME Name of the file to be created (uploaded) -
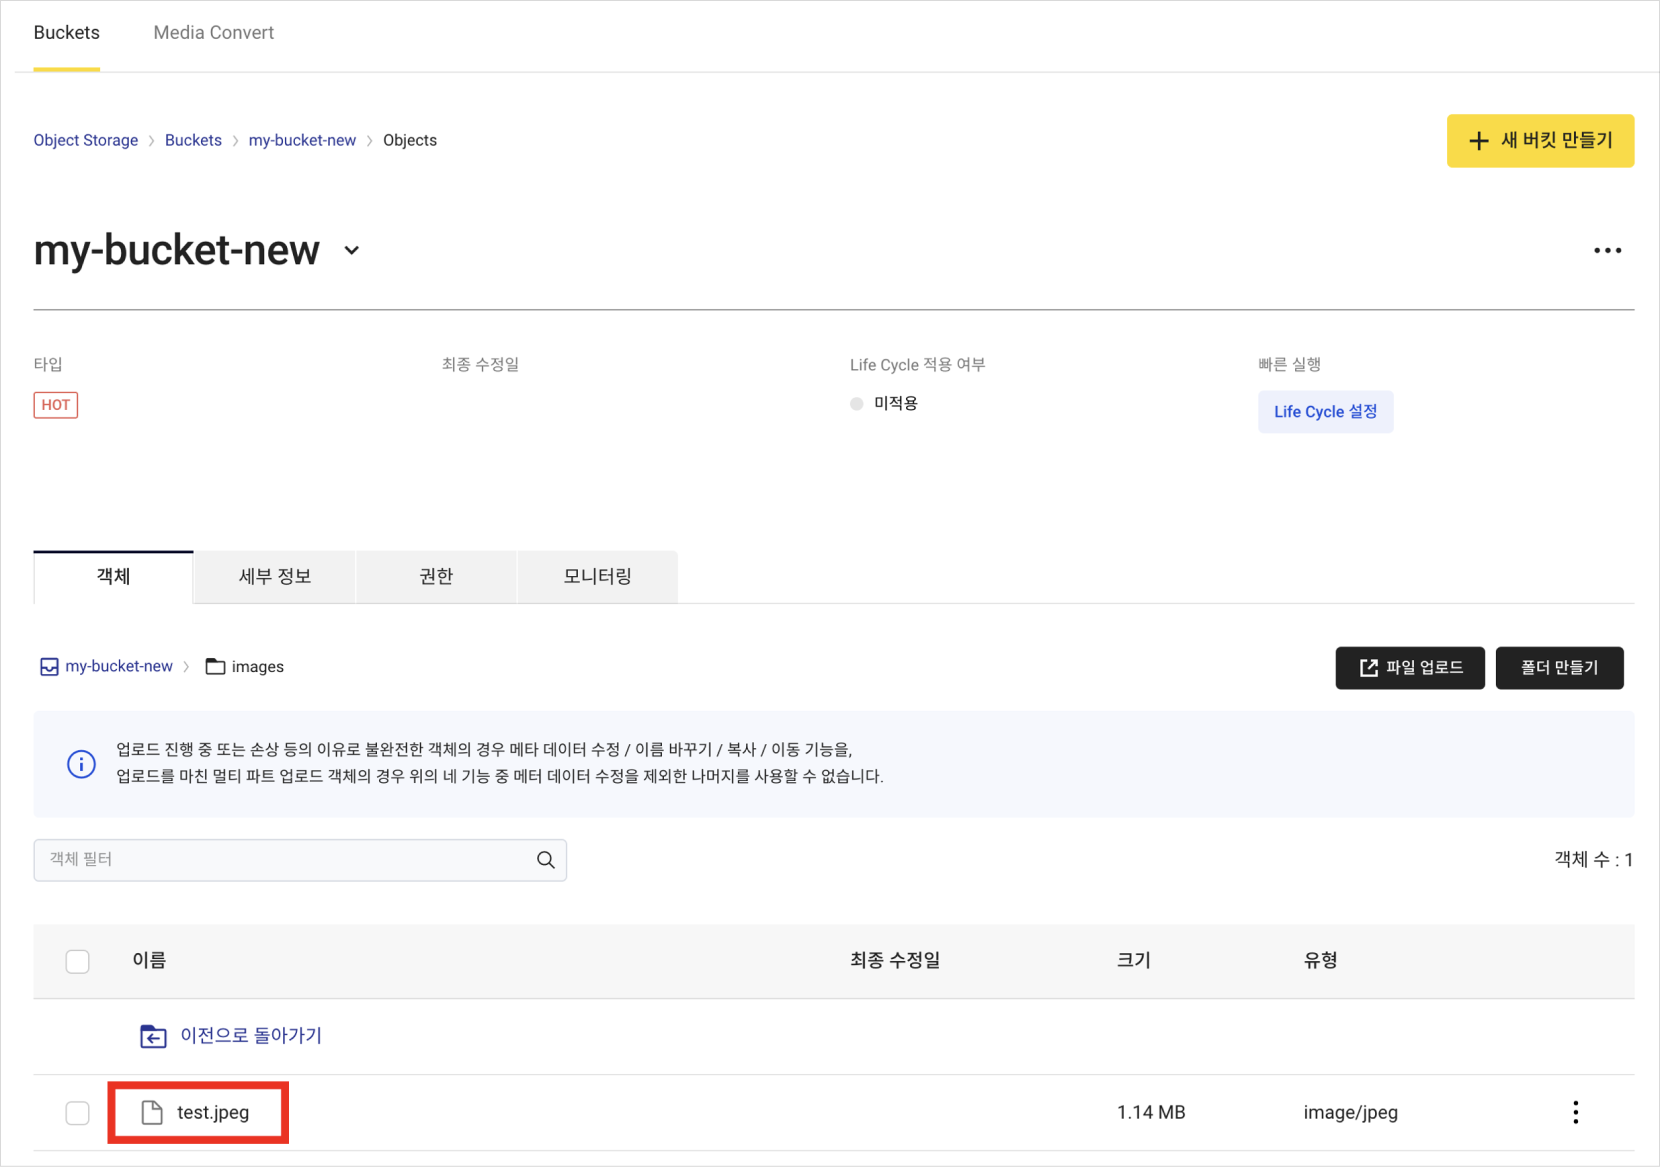
After running the code, go to the KakaoCloud console > Object Storage service, select on the bucket, and check the [Objects] tab. You should see the
test.jpegfile uploaded inside the folder created in Step 1. -
Copy the location URL from the file information of the uploaded image. You can access the image file by navigating to this URL.