Manage bucket permissions
This document describes how to manage permissions in Object Storage.
List of roles
You can view the list of roles currently assigned to the bucket.
-
Go to KakaoCloud console > Beyond Storage Service > Object Storage.
-
In the Standard bucket menu, select the bucket where you want to view roles.
-
Select the Permission tab, then open the Roles section to view the roles assigned to the bucket.
Field Description Type Type of member with assigned role
- Options:User,Group,Service account,Role groupMember Entity receiving the role ID KakaoCloud console login ID Role Permission granted to the member
Add role
You can add roles for project members to individually grant access to objects.
Currently, permissions can only be configured for a single bucket. Object-level (file/folder) permission settings are not supported.
Depending on the role, some operations (e.g., creating a bucket, viewing objects, granting permissions) may be restricted. For details, refer to Roles and permissions.
-
Go to KakaoCloud console > Beyond Storage Service > Object Storage.
-
Select the target bucket in the Standard bucket menu.
-
Go to the Permission tab > Roles tab, then select [Add role].
-
Select the type (User account, Role group, Service account), assign a role, and select [Save].
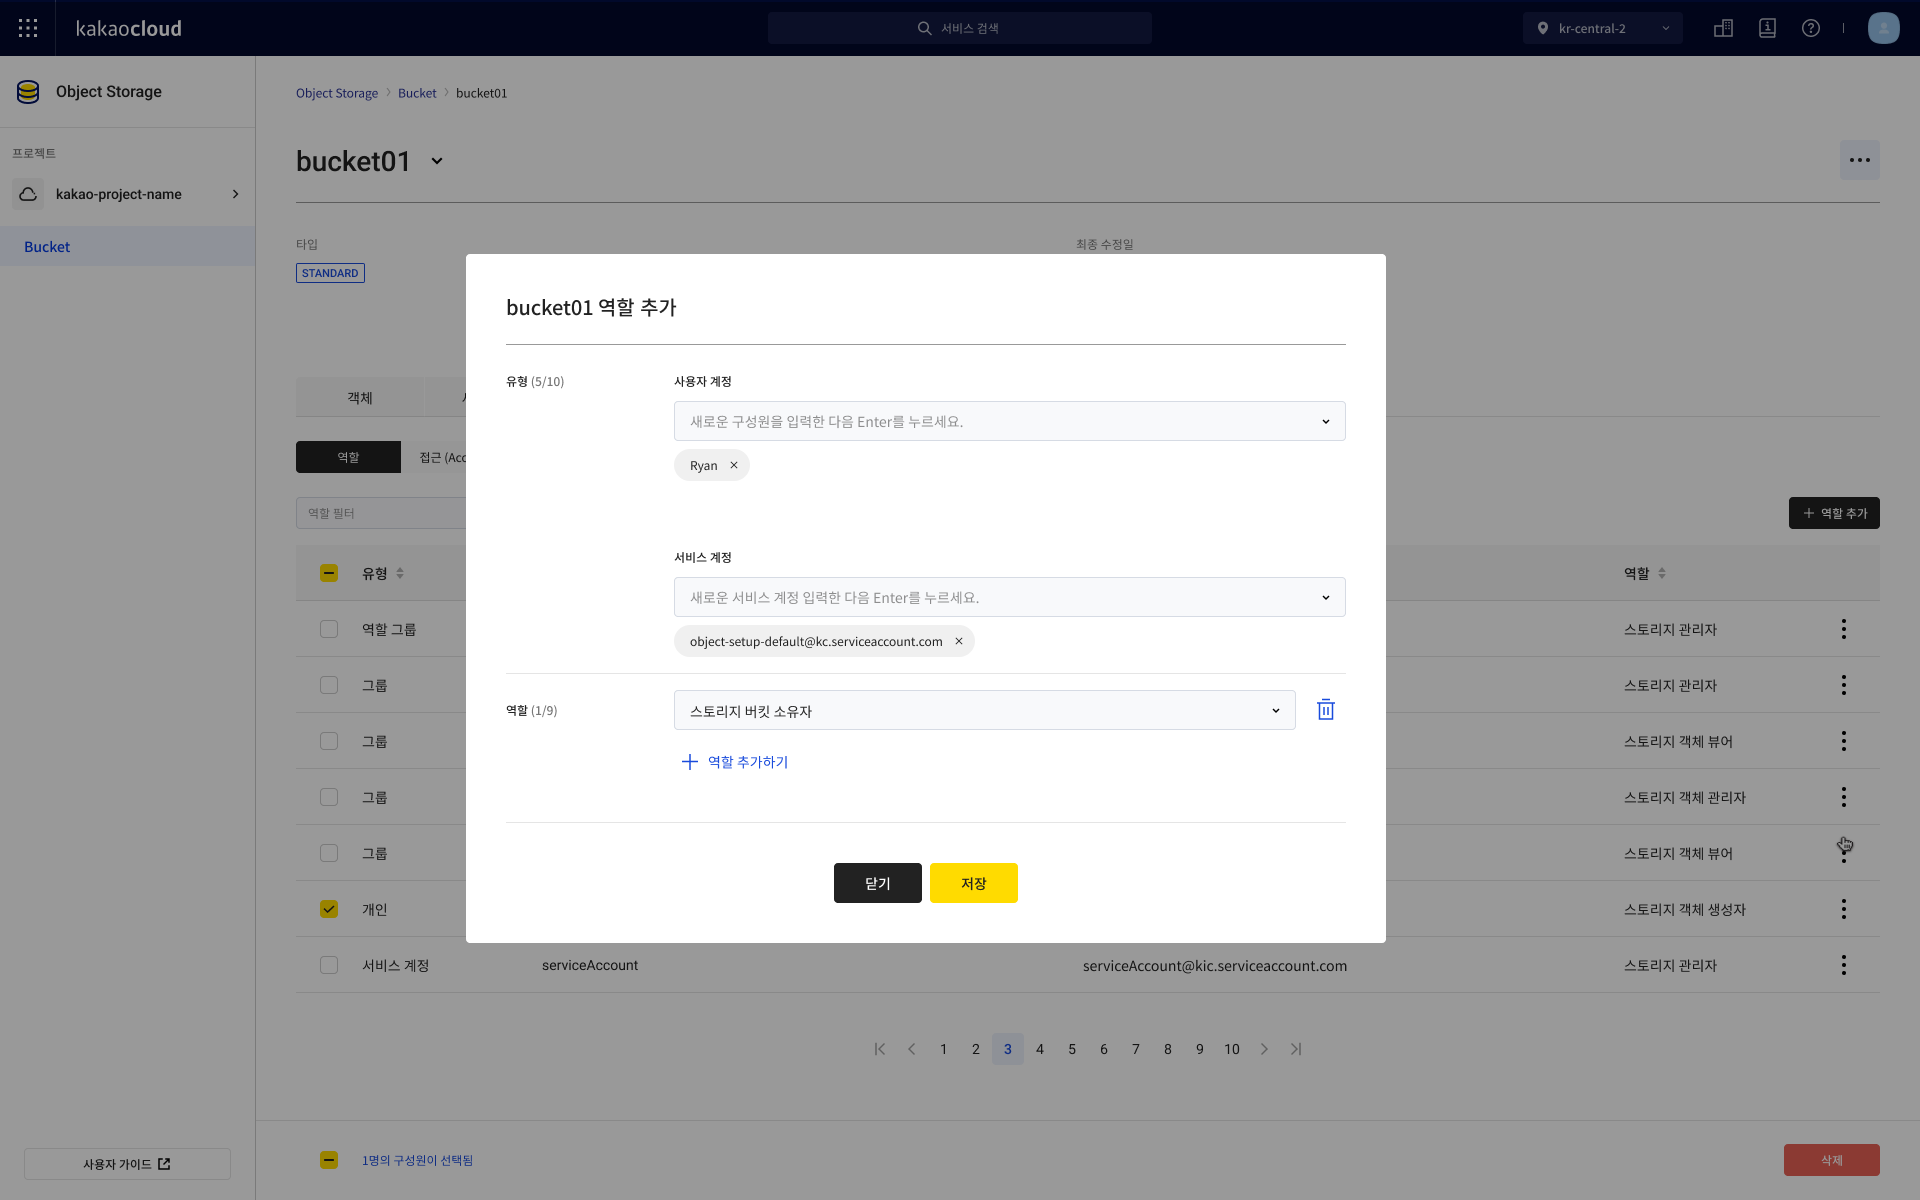 Bucket role list
Modify role
You can modify the role of a member. However, if there is only one storage admin, their role cannot be changed.
- Go to KakaoCloud console > Beyond Storage Service > Object Storage.
- Select the target bucket.
- In the Permission tab, select the [More] icon for the member > Modify role.
- In the Modify role popup, enter the information and select [Save].
Delete role
You can remove roles from members who no longer need access.
At least one storage admin must remain to maintain access. Access revocation typically takes about 1 minute but may take longer. While the change is immediately reflected in metadata, the user may still temporarily access objects.
- Delete single role
- Delete multiple roles
You can delete the role of an individual member.
- Go to KakaoCloud console > Beyond Storage Service > Object Storage.
- Select the target bucket.
- In the Permission tab, select the [More] icon for the member > Delete role.
- In the Delete role popup, review the details and select [Delete].
You can delete roles from multiple members.
- Go to KakaoCloud console > Beyond Storage Service > Object Storage.
- Select the target bucket.
- In the Permission tab, check the boxes next to the members and select [Delete].
- In the Delete role popup, review the details and select [Delete].
Configure bucket access settings
Enable public access
You can configure whether the bucket allows public access.
Allowing public access enables external users without permissions to access the bucket. Use with caution.
-
Go to KakaoCloud console > Beyond Storage Service > Object Storage.
-
Select the bucket where you want to allow public access.
-
In the Permission tab, open the Access-Control tab, then select [Configure access].
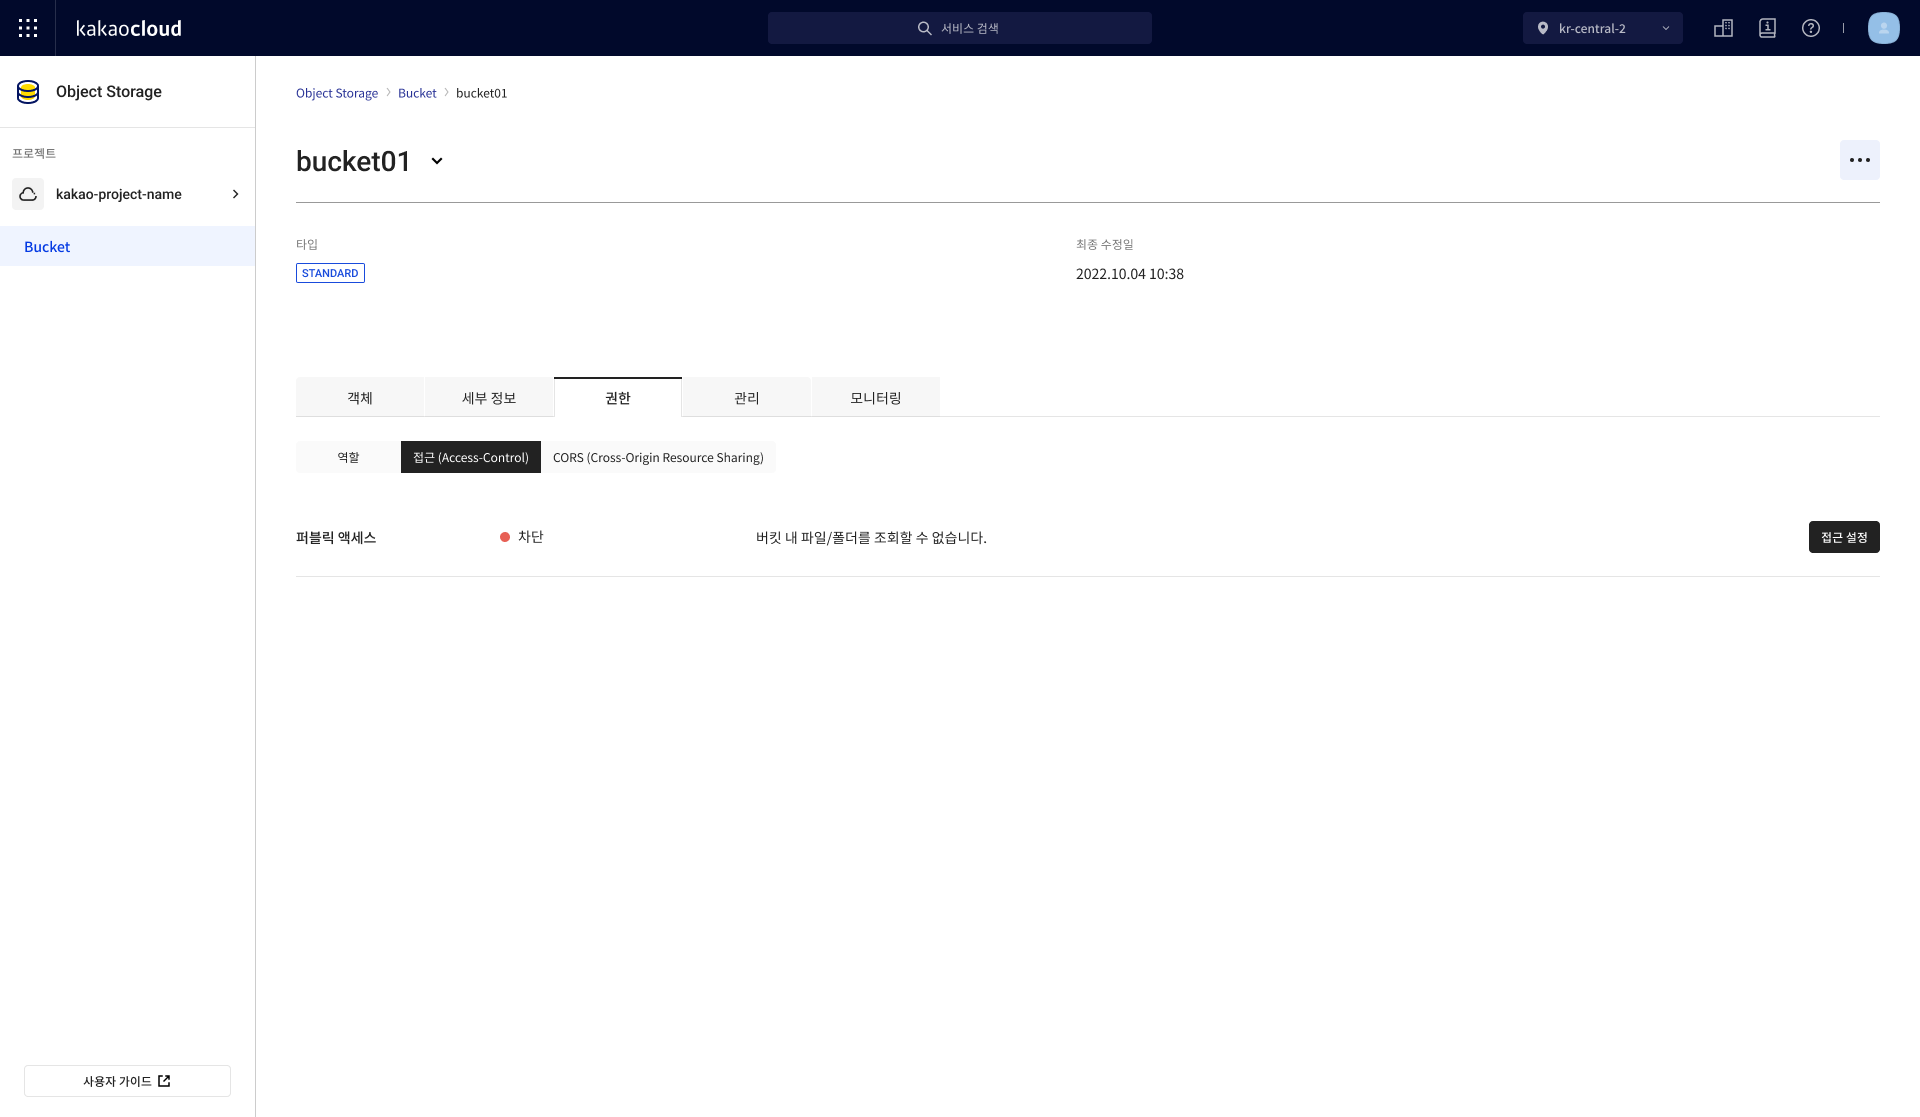 Access tab
Field Description Public access External access status of the bucket -
In the Access settings popup, select Allow public access, enter the required information, and click the [Save] button.
- When public access is allowed, the AllUserGroup - Storage Object Viewer role is automatically configured in the bucket permissions.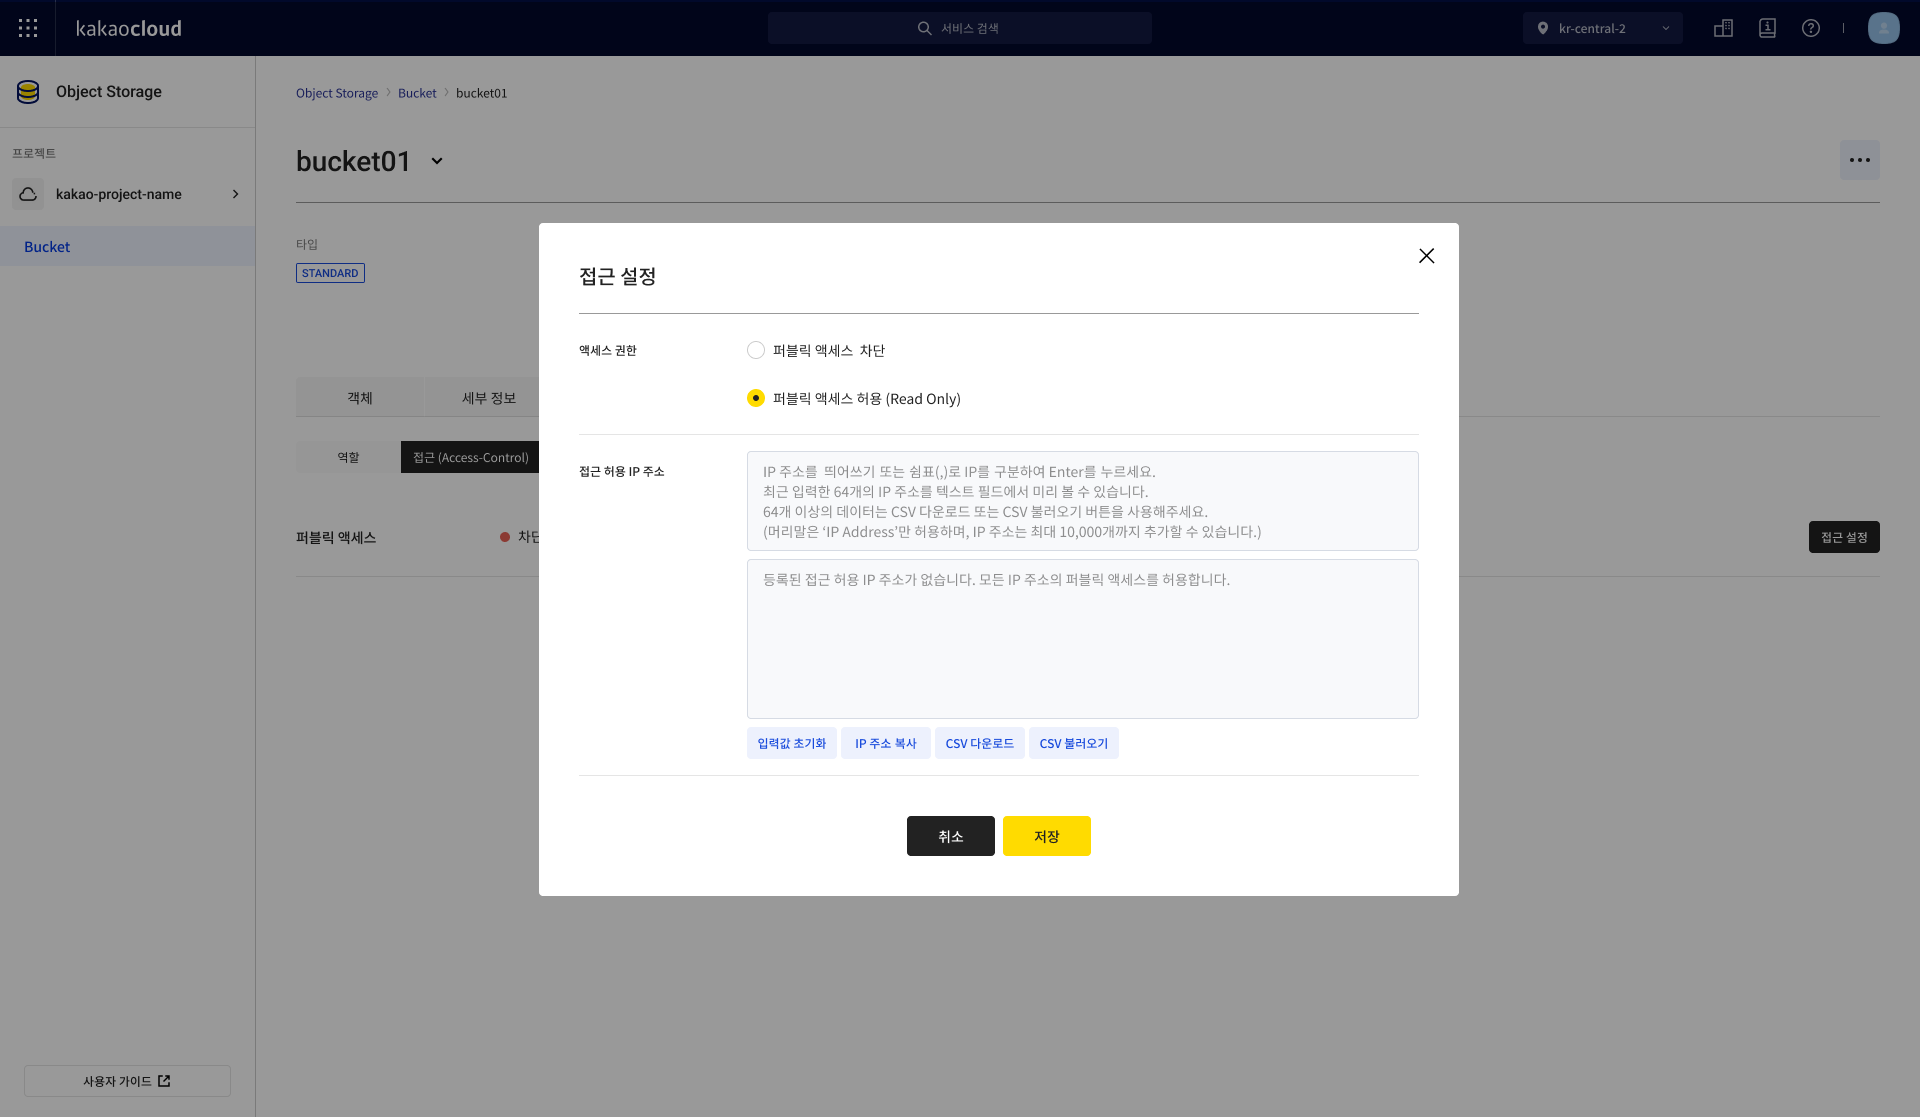 Access settings
Category Description Access Permission Select the type of access permission
- Block public access (Default): Blocks public access; only authorized users can access the bucket
- Allow public access: Allows public access to the bucket (The AllUserGroup - Storage Object Viewer role is set in bucket permissions)Allowed IP Addresses Configure detailed IP address settings
- Number of IP addresses: Up to 10,000 can be entered
- Up to 63 IP addresses entered via text or CSV upload are displayed in the text field; for 64 or more, they can be verified via the [Download CSV] button
- Duplicate IP values are automatically removed
- [Reset input] button: Clears all entered IP addresses
- [Copy IP addresses] button: Copies all entered IP addresses
- [Download CSV] button: Downloads the entered IP addresses as an Excel file
- [Upload CSV] button: Uploads multiple IP addresses from an Excel file at once
ㄴ Configures allowed IP addresses for public access
ㄴ Enter IP addresses one by one in the text field, or multiple addresses separated by commas (,)
ㄴ Supported file extensions for CSV upload: csv / xlsx / xls -
In the Review access settings popup, confirm the information and select [OK].
It may take about 1 minute for the changes to take
Configure bucket CORS
For detailed information about bucket CORS settings, refer to Bucket CORS policy.