Building a CI/CD environment using DevOps Pipeline
This document covers examples of easily creating DevOps Pipelines on the KakaoCloud Console and building and managing CI/CD environments.
- Estimated time: 20 minutes
- Recommended Operating system: MacOS, Ubuntu
- Region: kr-central-1
- Prerequisites
- GitHub account
- Install git and set up account in local environment
- Reference document
Prerequisites
Create container image repository
-
Create a repository by going to KakaoCloud Console > Container Pack > Container Registry > Repository tab and click the [Create repository] button.
Public Repository name Overwrite tags Scan images Public test-cr Available Manual
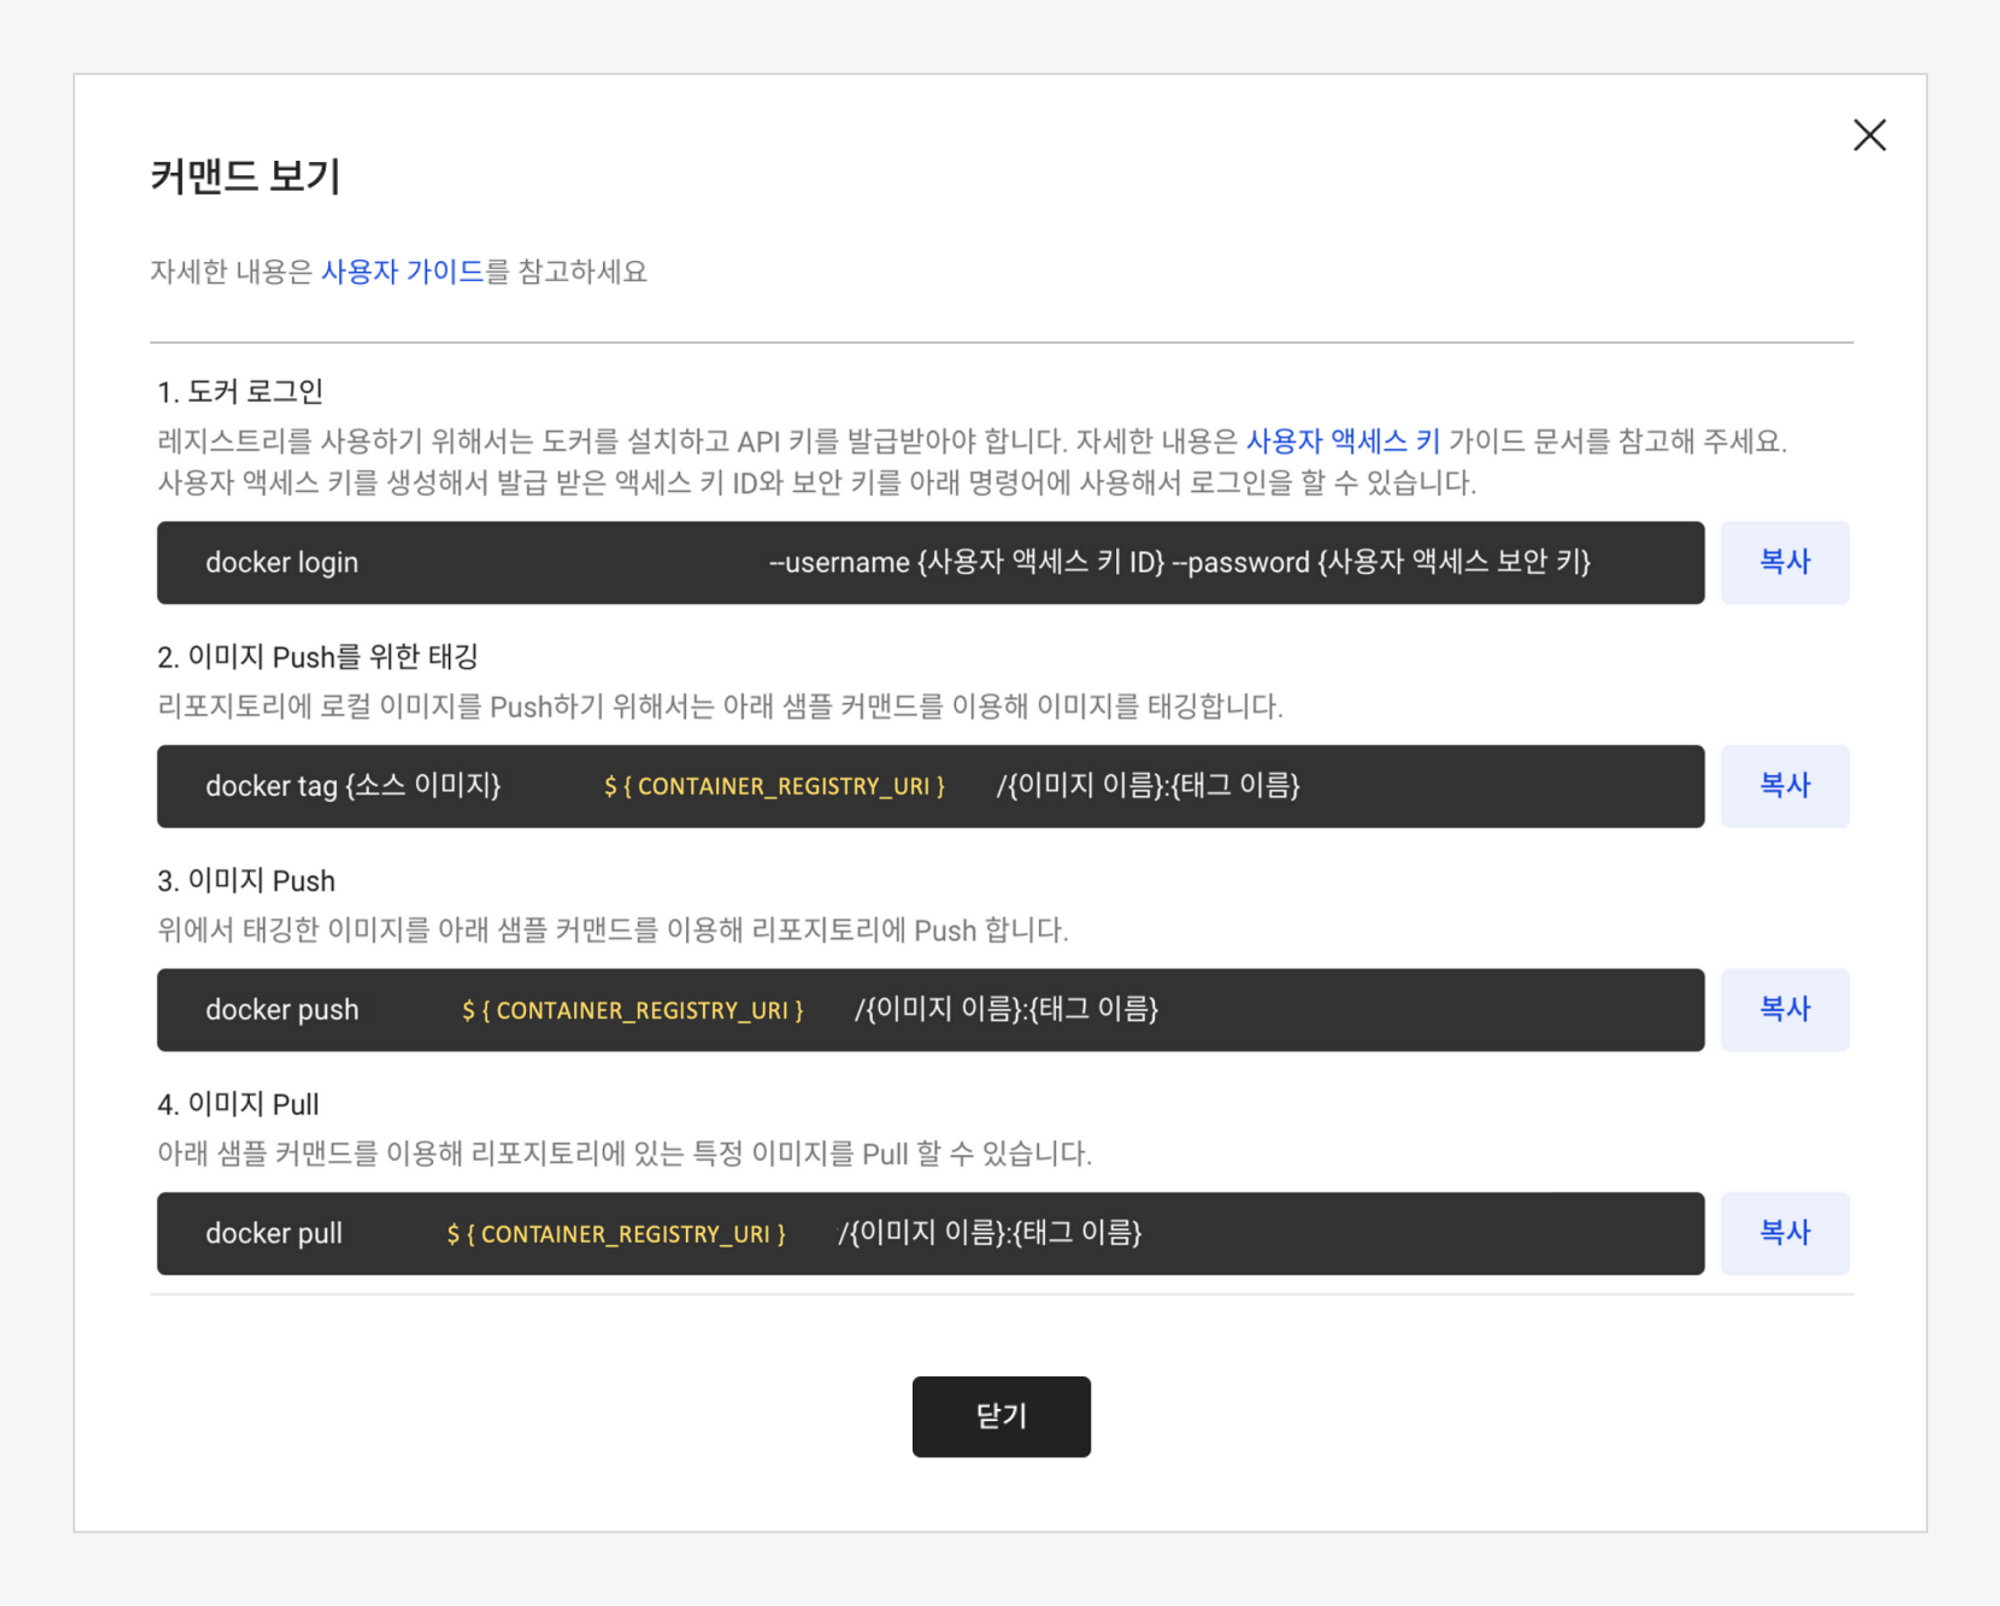
Check access URI for container registry
Click on the repository you created in the repository list to go to the details screen, then click the [View command] button.
Create Kubernetes cluster using Kubernetes Engine
For a detailed guide on building a Kubernetes environment using Kubernetes Engine, see Setting up Kubernetes cluster with Kubernetes Engine document.
-
Create a cluster using Kubernetes Engine according to Step 1. Create Kubernetes Cluster.
-
Proceed with Step 2. Call Kubernetes API with kubectl.
Install Helm
Install the Helm package by entering the brew install helm command in the terminal. Helm is a Kubernetes package manager that allows you to search, share, and use software for Kubernetes.
brew install helm
Set up example repository
-
Create a working directory with the command below and clone the repository provided as an example. The example repository contains Dockerfile for Docker build and settings for Helm deployment.
mkdir ~/handson-pipeline
cd ~/handson-pipeline

git clone https://github.com/kakaoenterprise/kic-library-monolithic.git -
The values.yaml file defines the default settings used in the Helm chart. Set the image uploaded to Container Registry to be distributed as a LoadBalancer type. Enter the command below and change the
${CONTAINER_REGISTRY_URI}value to set the values.yaml file.cat <<EOF | sudo tee ~/handson-pipeline/kic-library-monolithic/chart/values.yaml
app:
name: library-k8s
profile:
replicaCount: 1
hostAliases: []
image: ${CONTAINER_REGISTRY_URI}/test-img:latest
# 예시) test-project.kr-central-1.kcr.dev/hands-on/test-img:latest
resources: {}
service:
type: LoadBalancer
EOFVariable Description ${CONTAINER_REGISTRY_URI}Container Registry access URI -
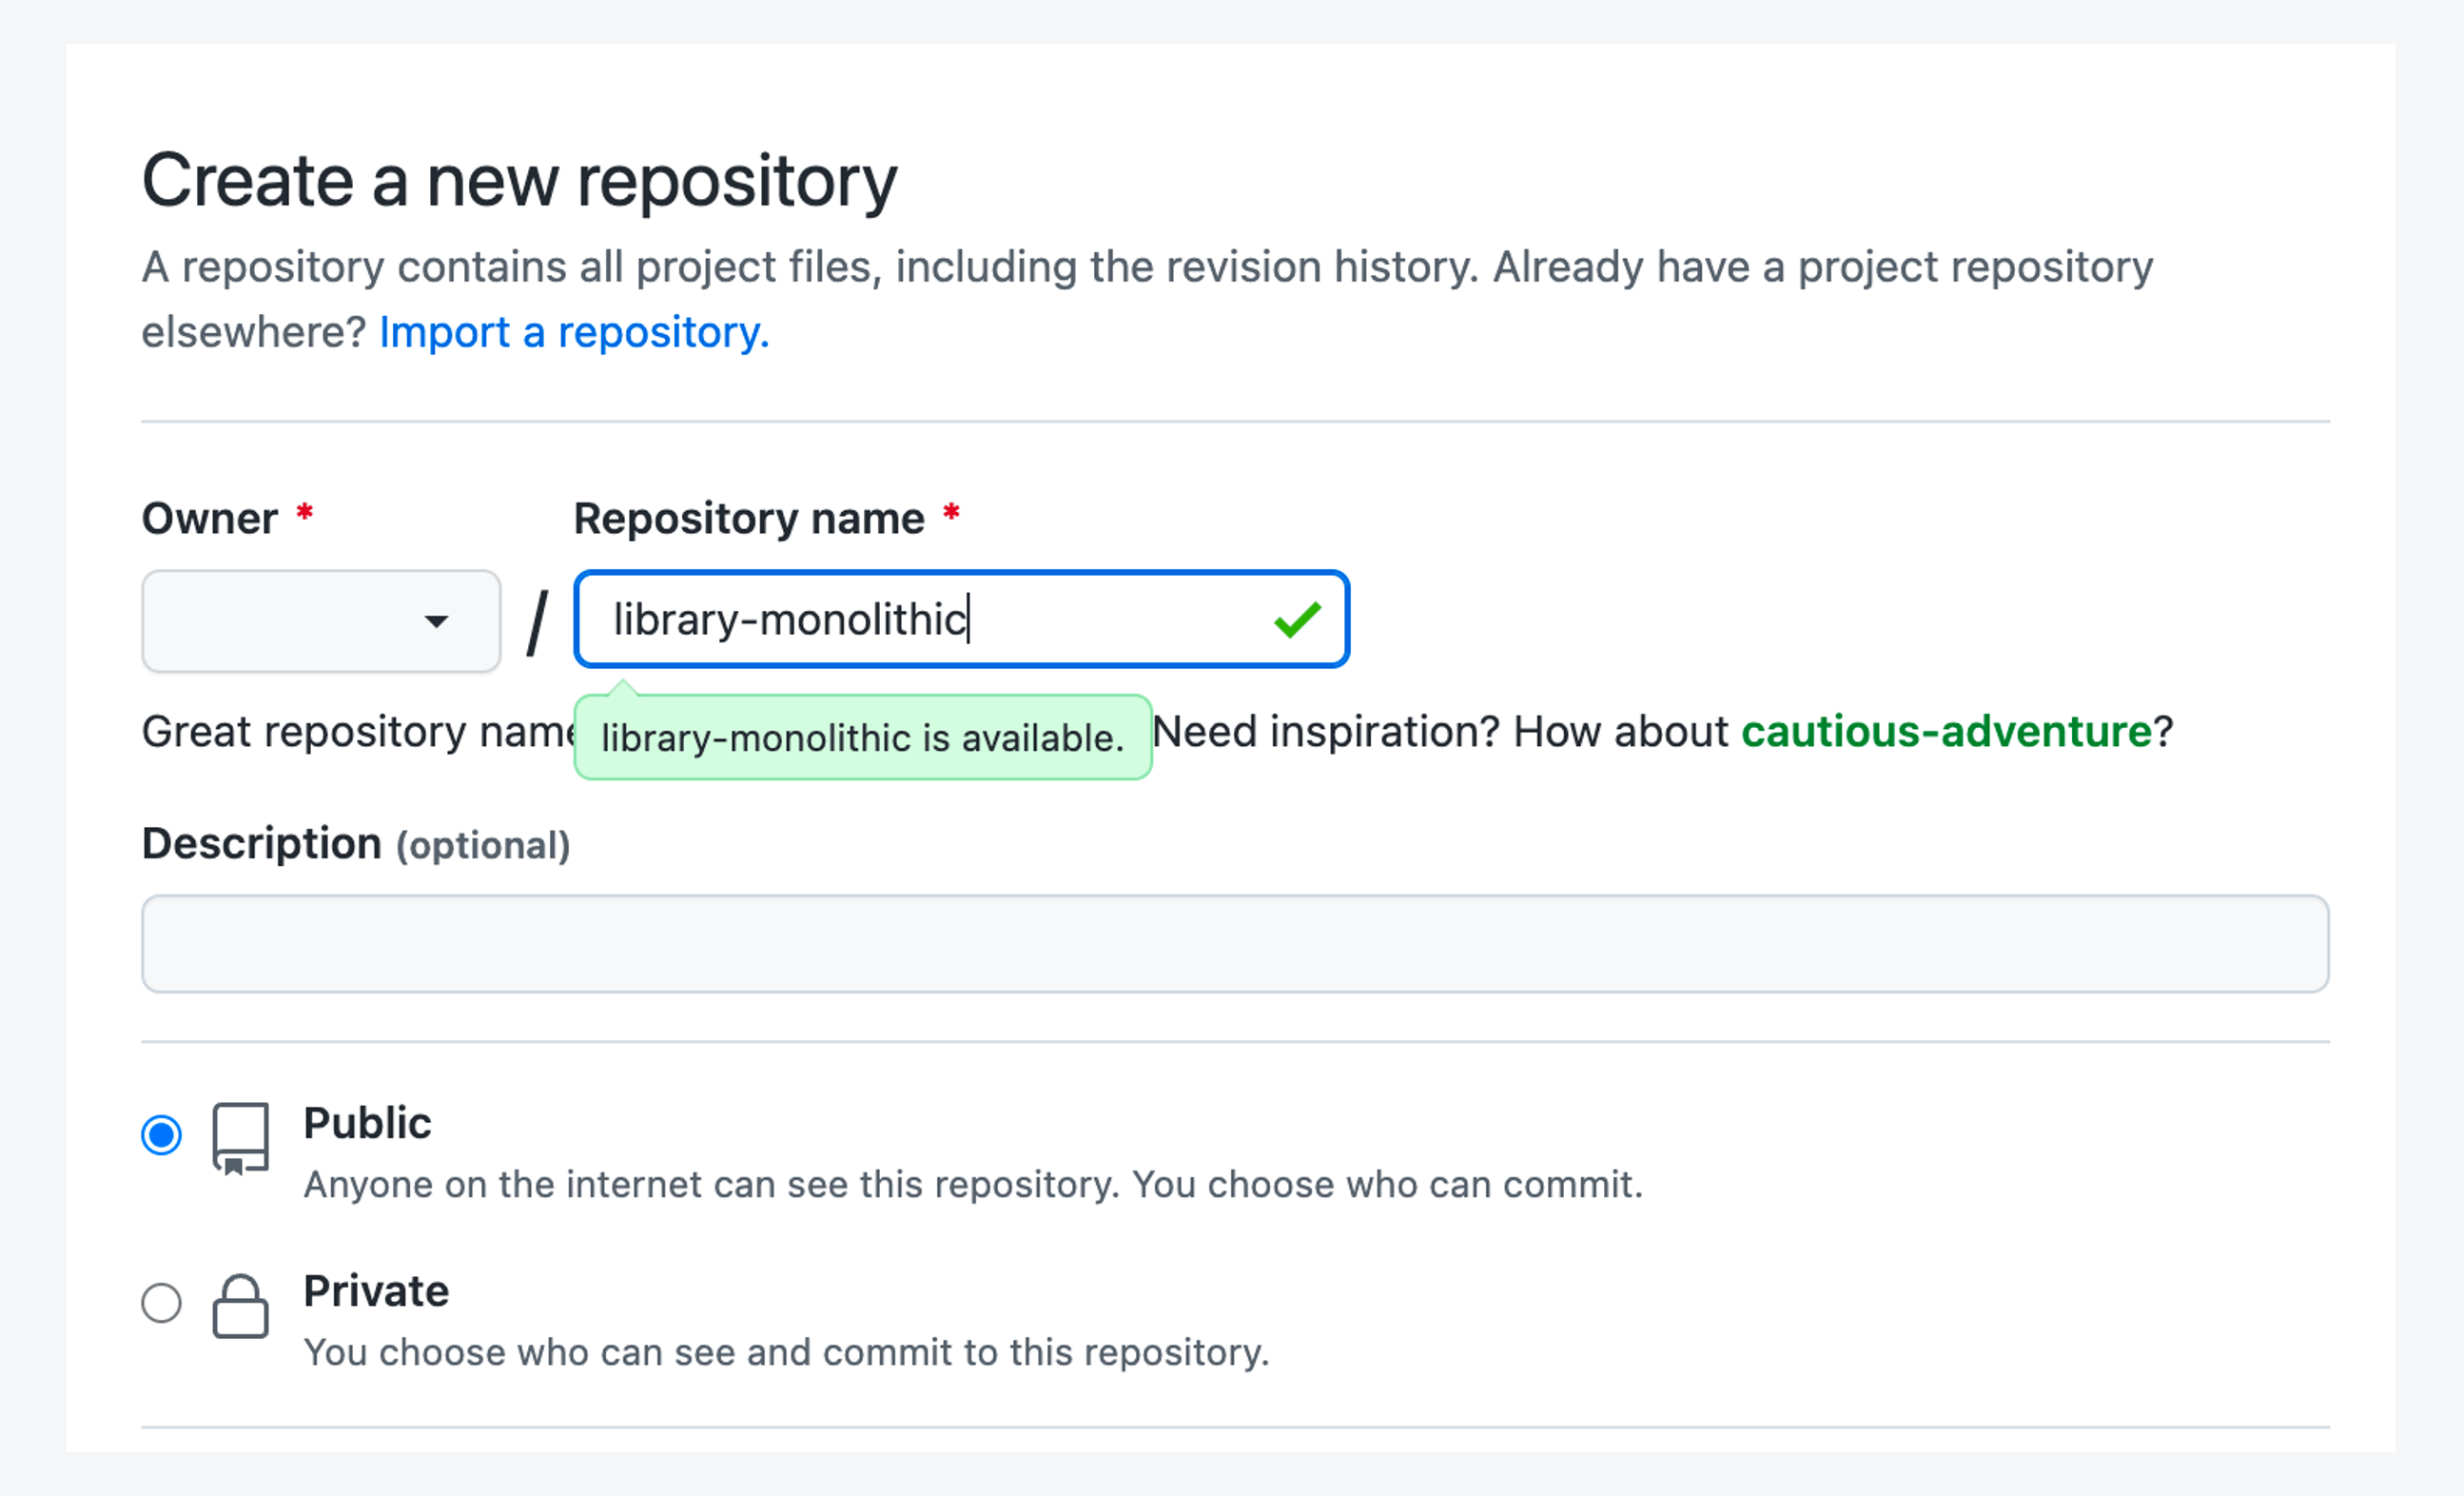
Log in to GitHub and create a public repository with the name library-monolithic.
-
Upload the files in the kic-library-monolithic folder to the library-monolithic GitHub repository using the following command.
cd ~/handson-pipeline/kic-library-monolithic

git init
git add .
git commit -m "Upload Files"
git branch -M main
git remote add origin https://github.com/${GITHUB_USER_NAME}/library-monolithic.git
git push -u origin main
Variable Description ${GITHUB_USER_NAME}The GitHub ID of the account that created the library-monolithicrepository
Step 1. Set DevOps Pipeline environment
Create external service (source)
An external service stores information that can access external services. Enter the endpoint URL, and you can mainly set access to the source repository.
In the DevOps Pipeline > Configuration > External Service tab, click the [Create External Service] button, and then enter the setting information as shown in the table below in the Create External Service screen.
| External service name | Service type | Endpoint URL |
|---|---|---|
| library-git | Github | https://github.com/${GITHUB_USER_NAME}/library-monolithic |
For ${GITHUB_USER_NAME}, enter the GitHub ID of the account that created the library-monolithic repository.
Create credentials for Container Registry access
In the DevOps Pipeline > Configuration > Credentials tab, click the [Create credential] button, and then register credentials (authentication information) to access Container Registry as shown in the table below.
| Credential name | Authentication type | User name | Password |
|---|---|---|---|
| cr-secret | User name / Password | Access key ID | Security access key |
For detailed instructions on issuing and managing access keys, please refer to the Create access keys.
Create external service (build)
Enter the information to build a Docker image as shown in the table below.
| External Service Name | Service Type | Endpoint URL | Credentials |
|---|---|---|---|
| docker-image | Docker | https://${CONTAINER_REGISTRY_URI} | cr-secret |
In ${CONTAINER_REGISTRY_URI}, enter the Container Registry access URI created in the preparatory steps.
Create credential for accessing Kubernetes cluster
Enter the information to access a Kubernetes cluster as shown in the table below.
| Credential Name | Authentication Type | Kubeconfig file |
|---|---|---|
| k8se-cluster-secret | Kubeconfig | Import kubeconfig file |
The Kubeconfig file imports the kubeconfig file (.yaml) set in the Setting up Kubernetes cluster with Kubernetes Engine.
When you import a Kubeconfig file, the corresponding Kubeconfig file is read and automatically converted and entered. If you import when there is already entered content, it will be overwritten.
Create approval line template
An approval task requests approval from the designated approver during pipeline execution, and only members within the same project can be assigned as approvers or consensus members. Set approvers before deploying the service to initiate approval for the deployment decision.
Go to DevOps Pipeline > Configuration > Approval template tab and click the [Create approval template] button, then register the approval information as below. The Step 1 approver must be entered, and you can add an approval step.
| Approval Template Name | Step 1 |
|---|---|
| approval-template | Select approver > Enter approver email |
Step 2. Build CI/CD Pipeline
With DevOps Pipeline, you can easily build a CI/CD pipeline with just a few clicks.
Create pipeline
-
Click the DevOps Pipeline > [Create pipeline] button.
-
In the pop-up window, select Create from scratch and click the [Create] button.
-
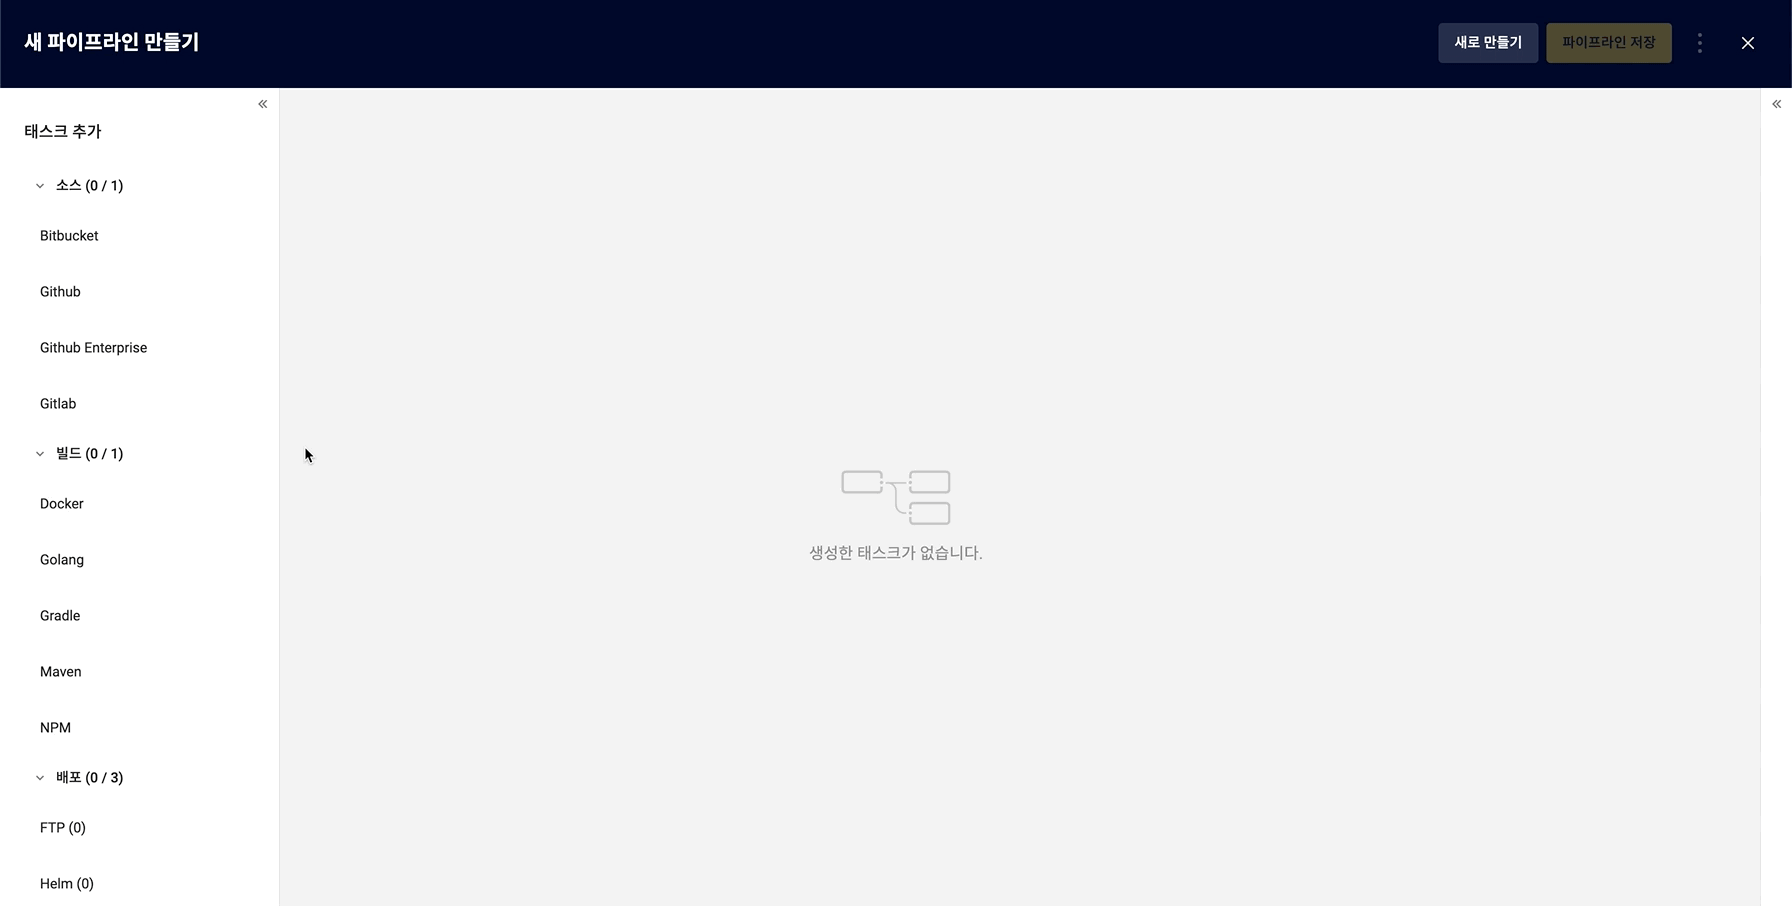
In the Create new pipeline screen > Add task tab on the left, add tasks by referring to the following, and then connect tasks in the order of Source → Build → Approval → Deployment.
Task Source Build Approval Deployment Type Github Docker Approval Helm -
In the Task Settings tab on the right, enter settings for each task.
- Github
- Docker
- Approval
- Helm
External Service Revision library-git main External Service Docker File Path Docker Image Name Tag docker-image ./Dockerfile test-img latest Load Approval Template > Select approval-template template
| Deployment Chart Path | Credentials | Helm Chart Name | Namespace | Value File | | ---- | ---- | ---- | ----- | | chart | k8se-cluster-secret | app | default | values.yaml |
-
Click the [Save pipeline] button to save.
Execute and check pipeline
-
Go to KakaoCloud Console > DevOps Pipeline > Pipeline tab.
-
Select the pipeline to check the details of from the pipeline list.
-
Click the [Execute] button on the pipeline details page to execute the pipeline and check the execution history.
-
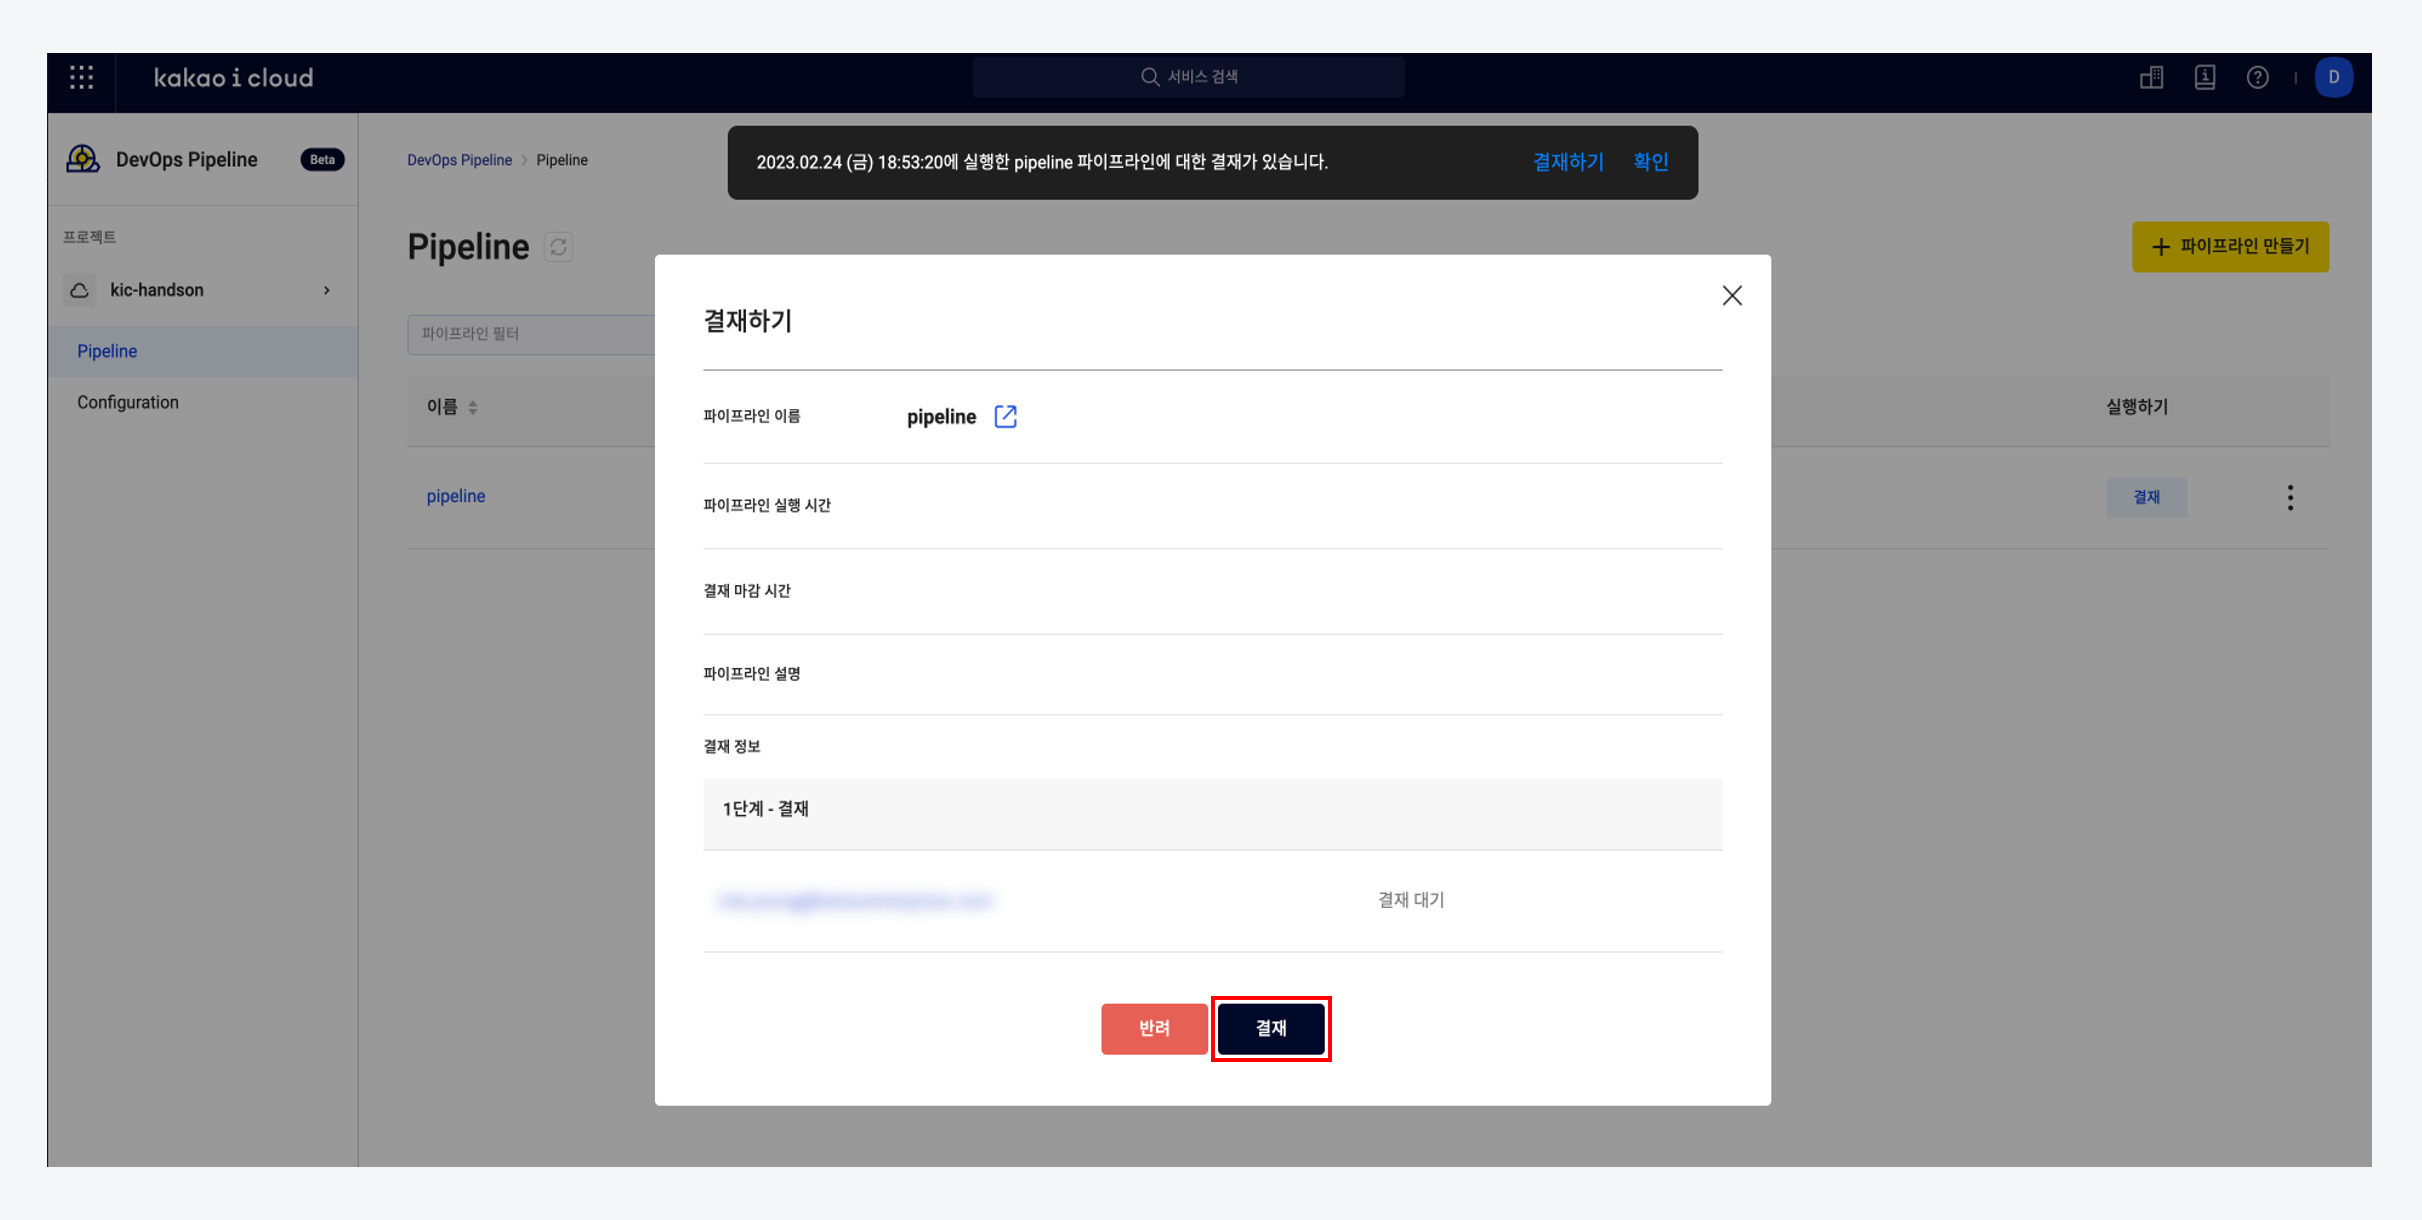
You can check the execution results of the pipeline from the pipeline list. If the execution results are in the payment pending status, click the [Approve] button to approve the payment.
Set up load balancer in the console
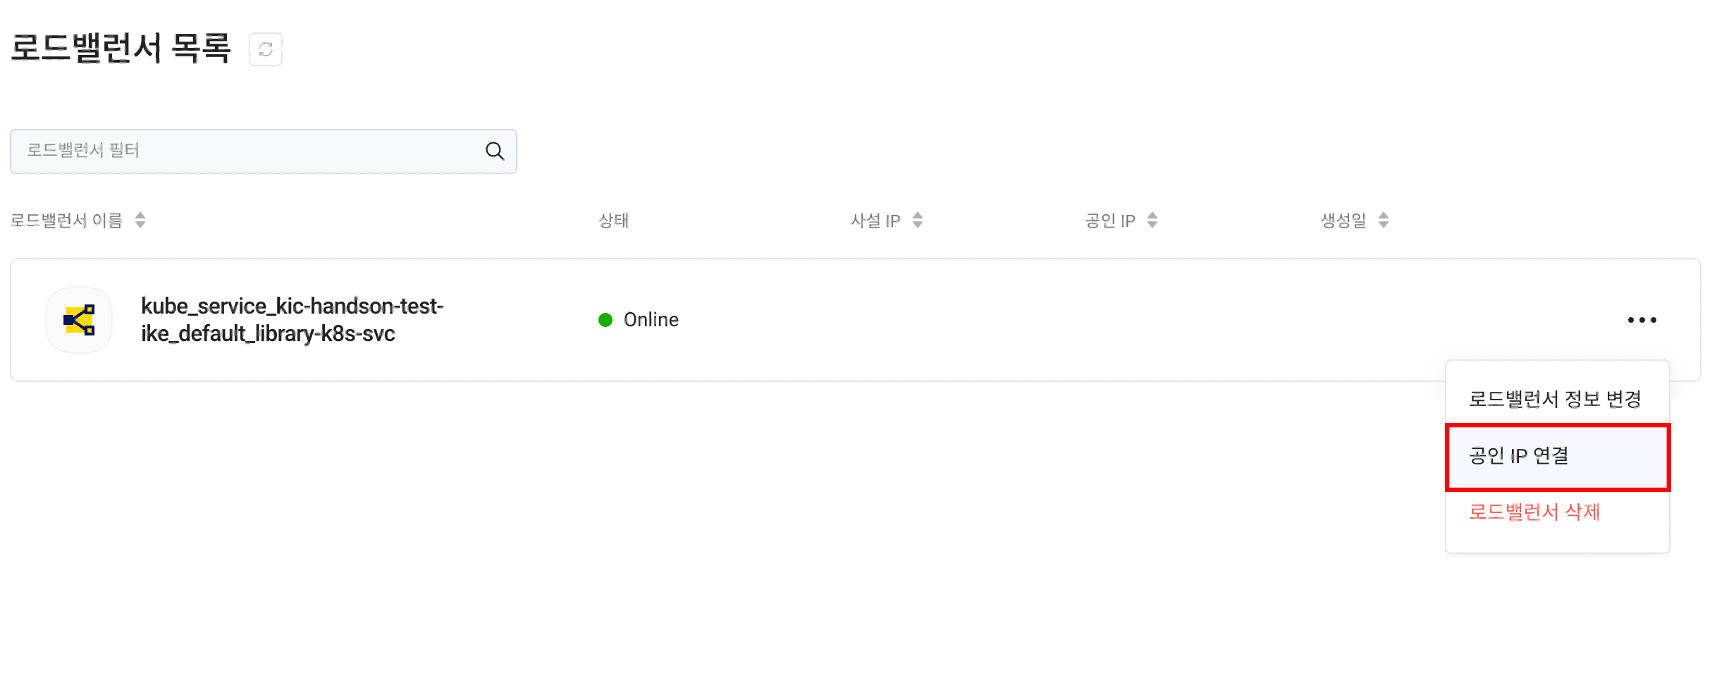
If the pipeline execution result is successful, the service deployment is complete. Since it was deployed as a LoadBalancer type, you can check that the deployed load balancer has been added to the load balancer list in KakaoCloud Console > Load Balancer.
Connect a public IP to the newly created load balancer to allow external access to the library-monolithic service.
Step 3. Check service access
Service deployment through pipeline and Kubernetes cluster is complete. Please access the public IP assigned to the load balancer to check if the service is properly deployed. It may take some time to access the service.