Configure kubectl control
kubectl is the Kubernetes command-line tool used to control clusters. To configure kubectl control, first install the kubectl client, then proceed to set up the control configuration. The steps are as follows:
Step 1. Install kubectl client
Install the kubectl client to configure kubectl control.
For detailed installation instructions, refer to the Kubernetes official documentation.
Please check your OS environment and install the appropriate version of kubectl.
Step 2. Configure kubectl control
After installing the kubectl client, proceed to configure kubectl access for your cluster.
Configure kubeconfig
When setting up kubectl control, download the kubeconfig file for cluster access and set the environment variable.
-
Go to the KakaoCloud console > Container Pack > Kubernetes Engine.
-
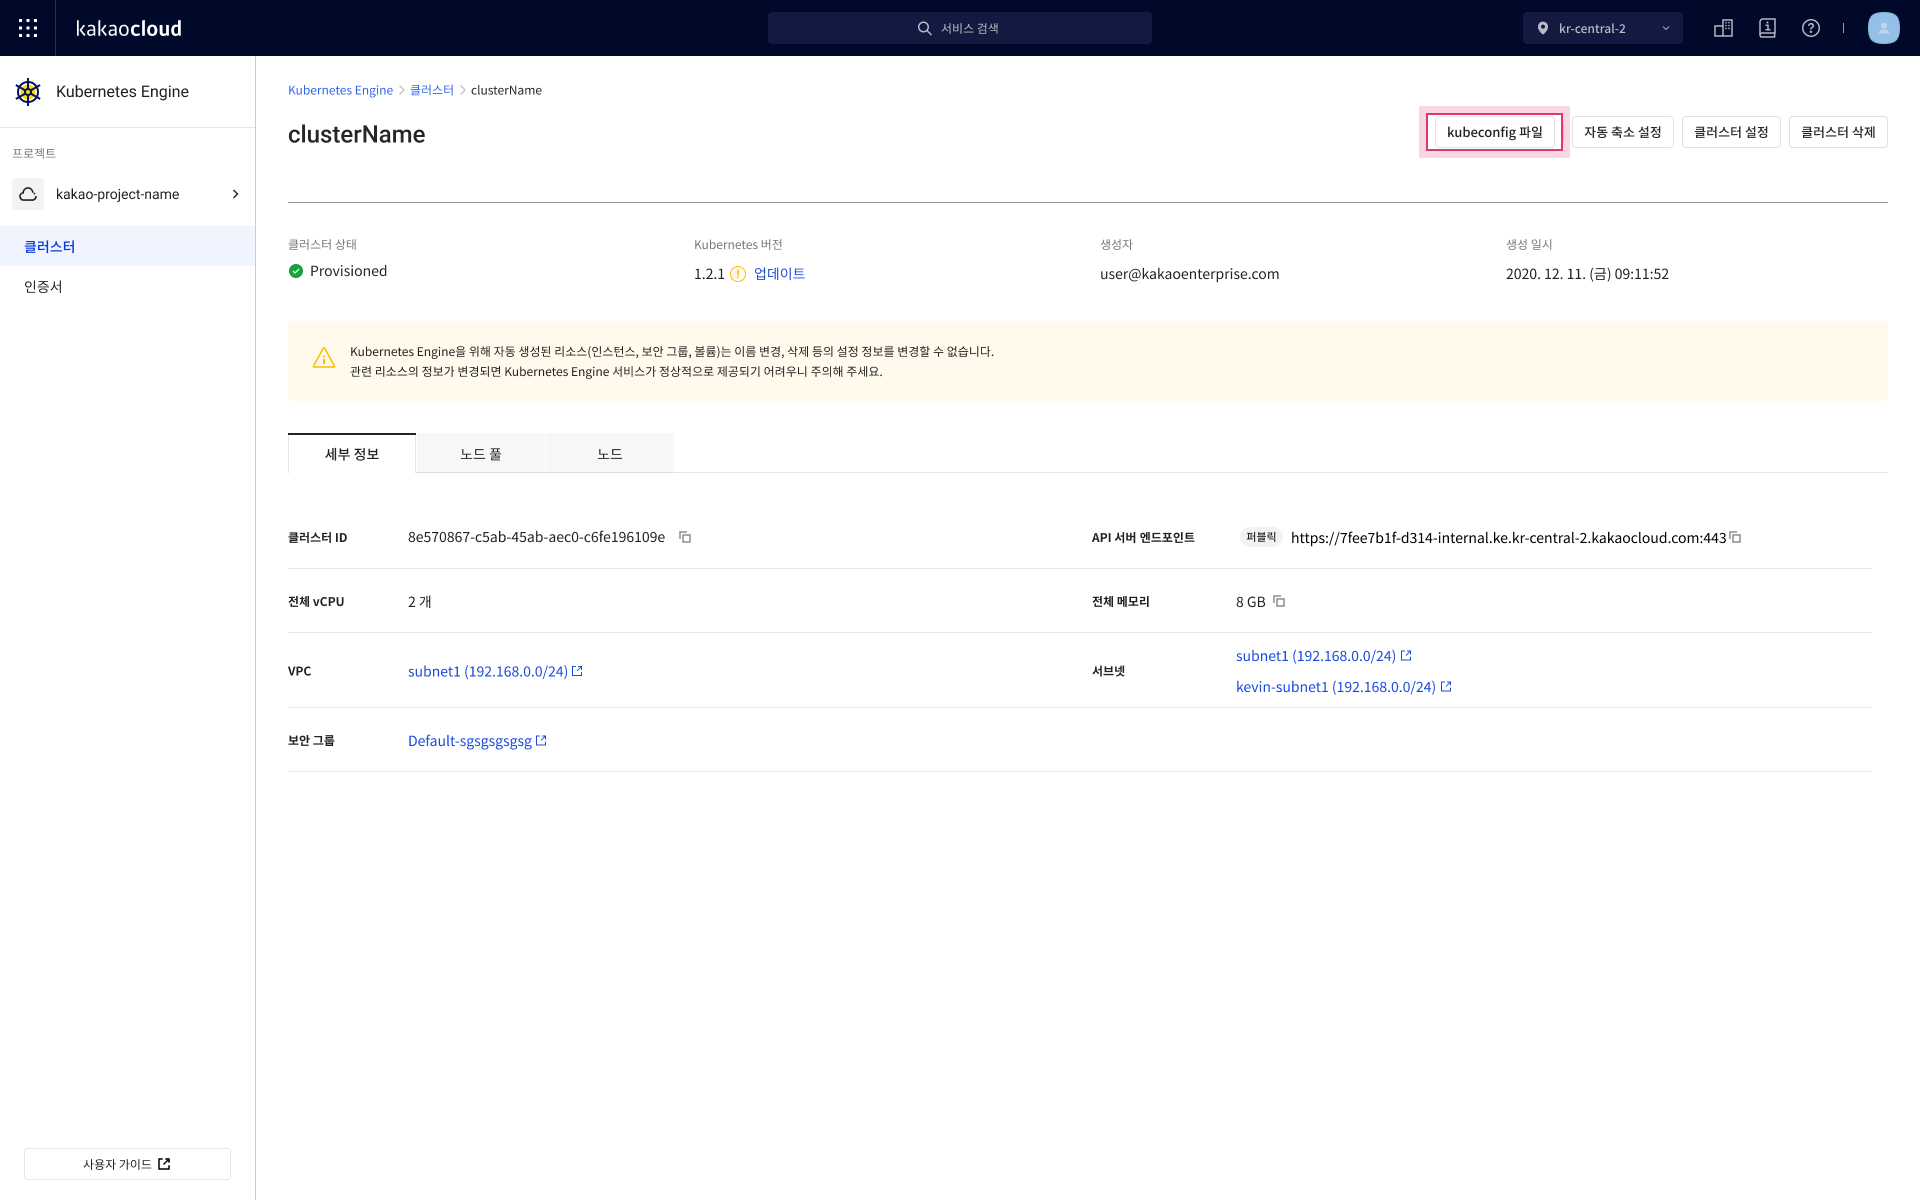
In the Cluster menu, select the cluster you wish to configure for kubectl.
- Select the [kubeconfig file] button for the desired cluster.
-
In the kubectl control setup popup, select [Download kubeconfig file].
- A kubeconfig file will be downloaded with the format
kubeconfig-{clusterName}.
- A kubeconfig file will be downloaded with the format
-
Set the kubeconfig environment variable for convenient declaration.
- Mac/Linux
- Windows(Command Prompt)
Set the
KUBE_CONFIGenvironment variable in the terminal:Set KUBE_CONFIG environment variableexport KUBE_CONFIG="{DownloadPath}/{kubeconfigFile}"Parameter Type Required Description DownloadPath String Yes Enter the path where the kubeconfig file is located kubeconfigFile String Yes Enter the filename and extension
- Example: kubeconfig-cluster.yamlSet the environment variable in the command prompt:
Set OS environment variableset KUBE_CONFIG={DownloadPath}\{kubeconfigFile}Parameter Type Required Description DownloadPath String Yes Enter the path where the kubeconfig file is located kubeconfigFile String Yes Enter the filename and extension
- Example: kubeconfig-cluster.yaml
Configure KakaoCloud authentication client
Download the KakaoCloud authentication client and set the appropriate environment variables.
After downloading the KakaoCloud authentication client, you may need to allow the app to run depending on your OS. On Windows, antivirus software like Windows Defender may block or delete the executable. If so, register it in your antivirus whitelist.
-
Download the KakaoCloud authentication client:
File Version Download link Linux x86_64 64Bit 0.1.2 Download Linux ARM_64 64Bit 0.1.2 Download Linux i386 32Bit 0.1.2 Download Windows x86_64 64Bit 0.1.2 Download Windows i386 32Bit 0.1.2 Download Mac x86_64 64Bit 0.1.2 Download Mac ARM_64 64Bit 0.1.2 Download -
Rename the downloaded file to
kic-iam-auth.kic-iam-auth -
Set the environment variables required to run the client.
- Mac/Linux client setup
- Windows(Command Prompt)
a. Grant execution permission:
Grant execution permissioncd {DownloadPath}
chmod +x kic-iam-authb. Register the path:
Register PATH variableexport PATH="{DownloadPath}:$PATH"Or copy the file to an existing directory in your PATH:
Copy file examplecp {DownloadPath}/kic-iam-auth /usr/local/binSet the PATH variable:
Set PATH variableset path=%PATH%;{DownloadPath}
Get IAM access key
Generate an access key for authentication.
Be sure to select the project where your target cluster resides.
For detailed instructions, refer to the Credentials page.
If you already have an access key, you may skip this step.
Configure user authentication
Use the access key credentials to set environment variables inside your kubeconfig file.
Use default values for all other fields, and replace the credential ID/secret as shown below.
-
Open your kubeconfig file and set the variables under
users > user > exec > env:Example kubeconfig user blockusers:
- name: {cluster-name}-admin
user:
exec:
apiVersion: client.authentication.k8s.io/v1beta1
args: null
command: kic-iam-auth
env:
- name: "OS_AUTH_URL"
value: "https://iam.kakaocloud.com/identity/v3"
- name: "OS_AUTH_TYPE"
value: "v3applicationcredential"
- name: "OS_APPLICATION_CREDENTIAL_ID"
value: "{your access key ID}"
- name: "OS_APPLICATION_CREDENTIAL_SECRET"
value: "{your access key secret}"
- name: "OS_REGION_NAME"
value: "{your cluster region}"
Step 3. Verify kubectl functionality
Once setup is complete, use the command below to verify:
- Replace
$KUBE_CONFIGwith%KUBE_CONFIG%on Windows. - See the kubectl reference for more commands.
- See Access multiple clusters for multi-cluster configurations.
kubectl --kubeconfig=$KUBE_CONFIG get nodes
NAME           STATUS   ROLES    AGE     VERSION
{node-name}    Ready    <none>   2d2h    v1.18.17
{node-name}    Ready    <none>   2d2h    v1.18.17