Create and connect instance
The following describes how to create and connect an instance in the Bare Metal Server service.
Create instance
Create a new instance.
If you configure network bonding on a Bare Metal Server, you can combine multiple network interfaces into a single logical interface. This provides higher bandwidth and higher availability.
If you update the OpenSSL package on the Rocky 9 image, the OpenSSH package may not automatically update to the same version, causing a version mismatch. This can lead to SSH connection errors, so check and update the OpenSSH package as well when updating OpenSSL.
-
Go to Compute > Beyond Compute Service > Bare Metal Server in the KakaoCloud console.
-
Click the Instance menu, then click the [Create instance] button.
-
Enter the required information in Create instance, then click the [Create] button.
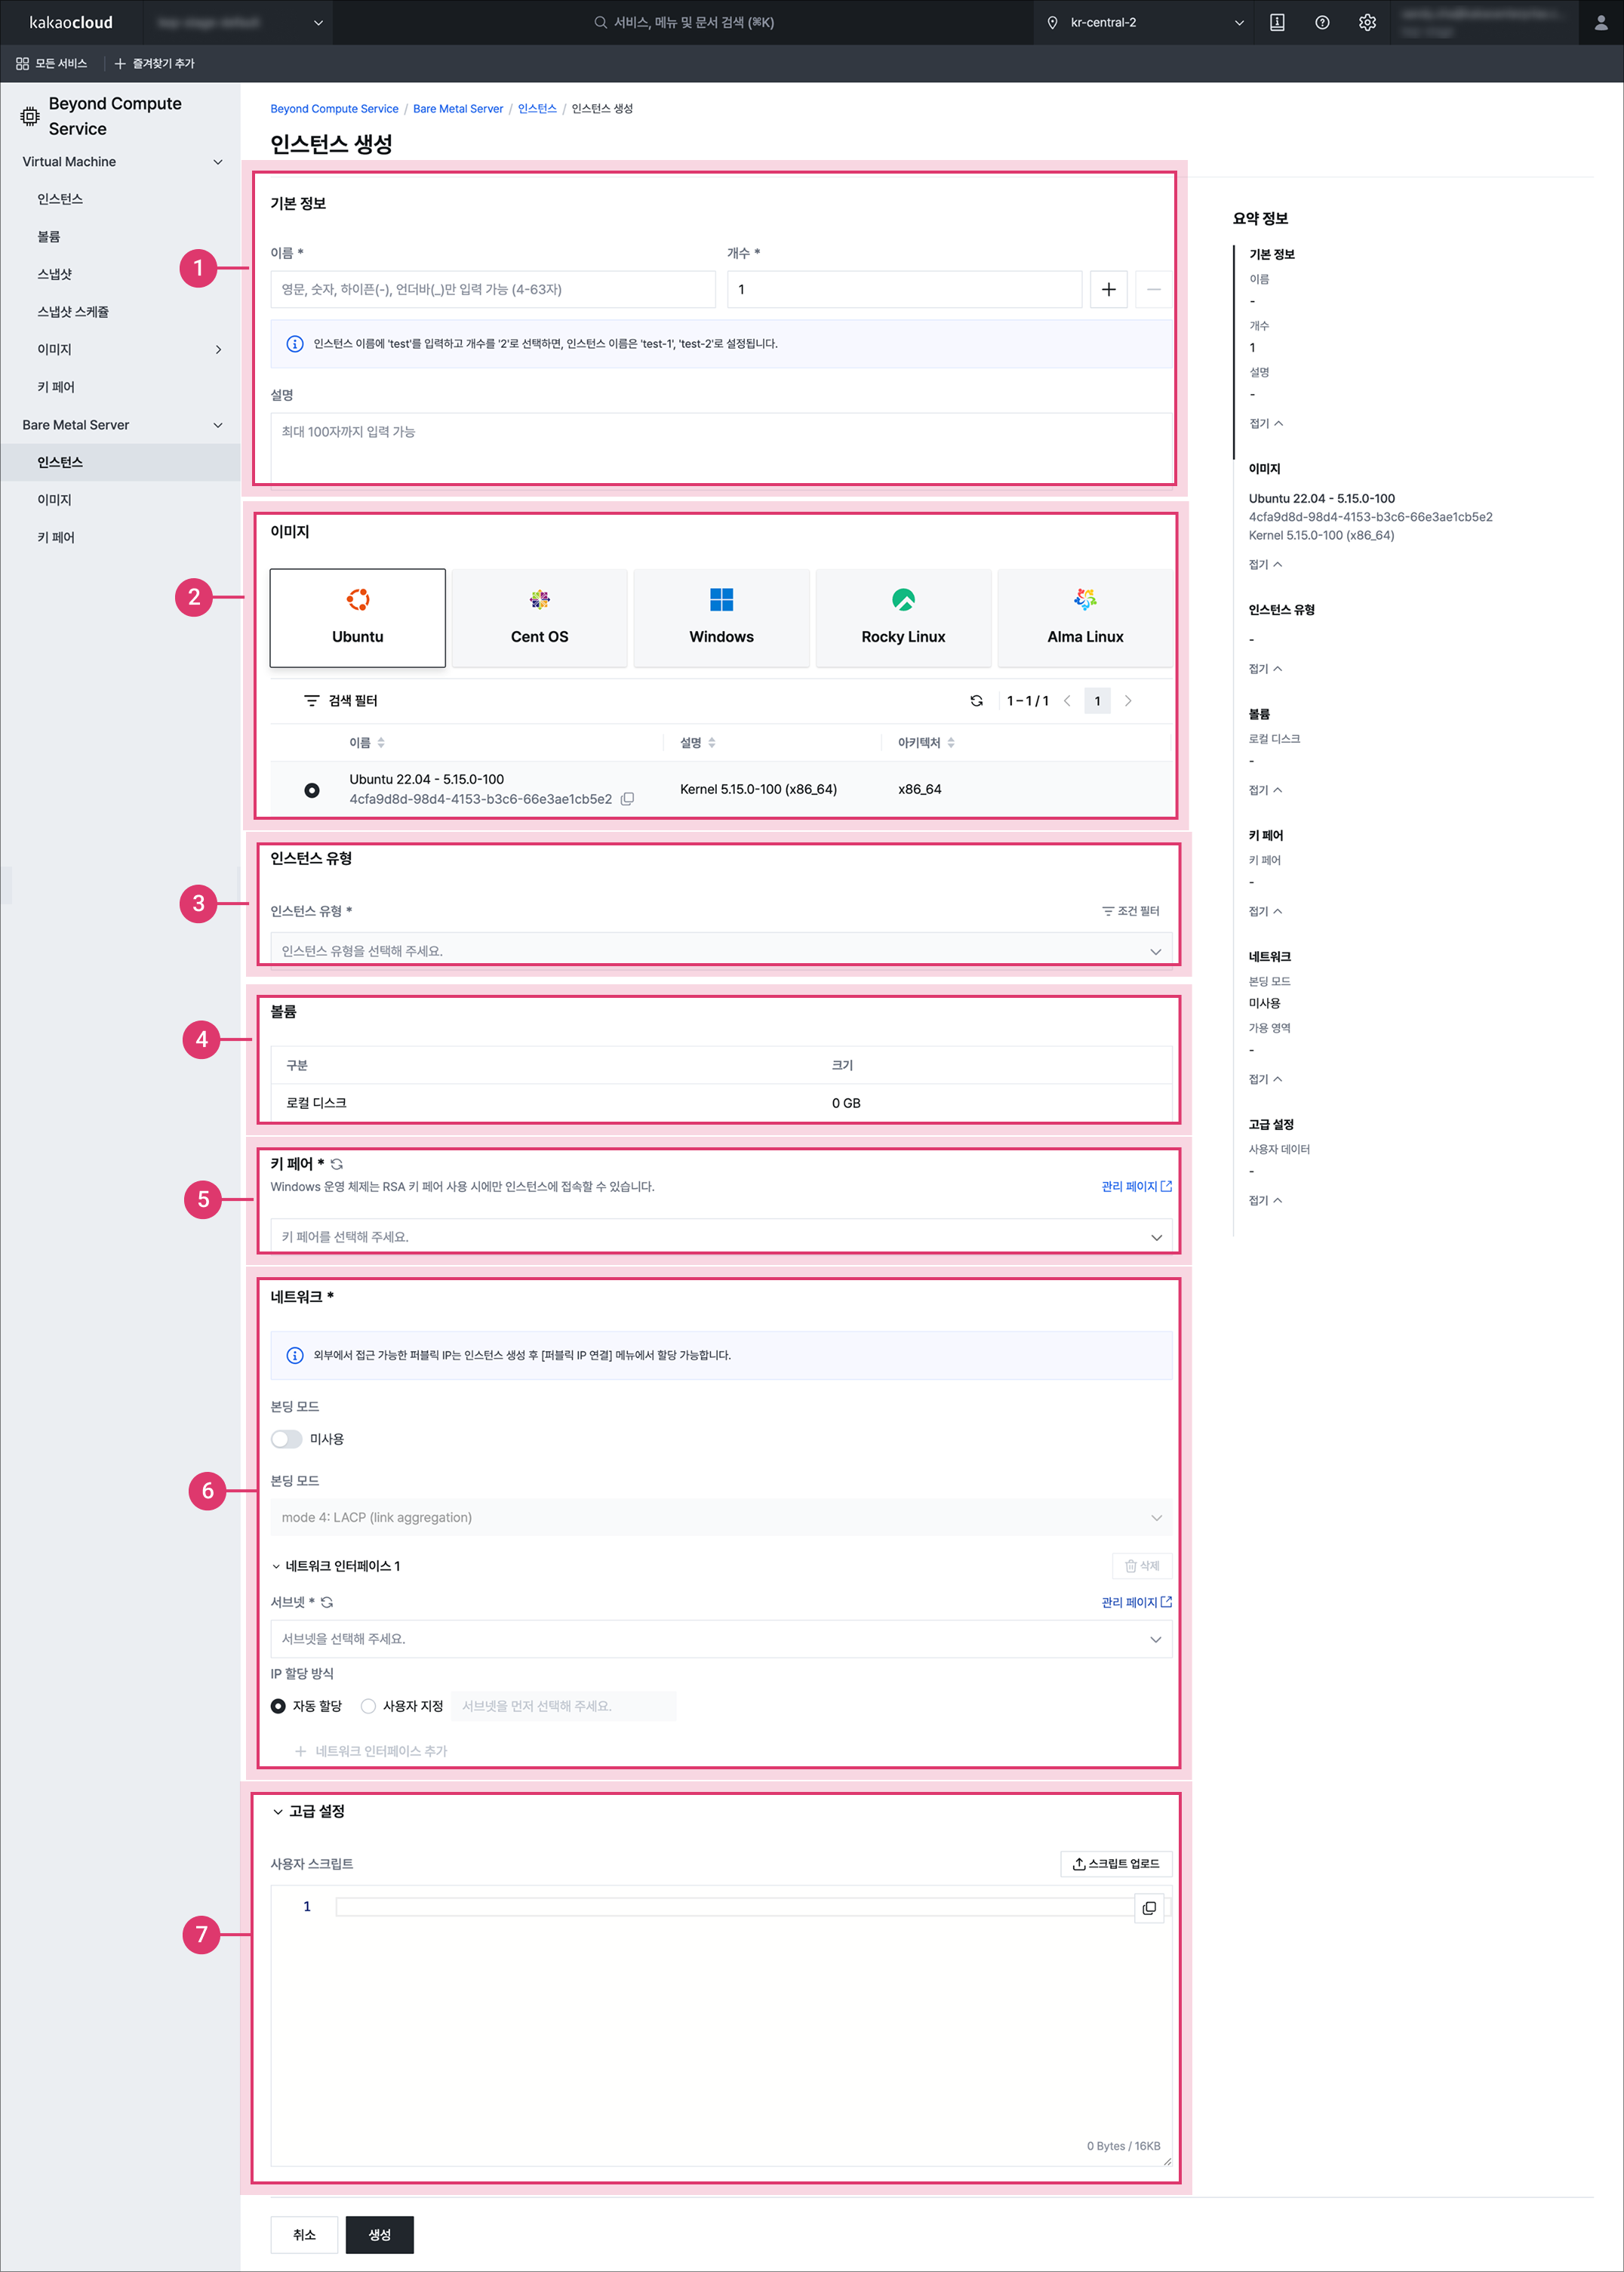
Create Bare Metal Server instanceItem Description ① Basic information Name: Name of the instance
- Duplicate instance names can be used within the same project
- The host name is automatically set to the private IP format of the primary network interface (example:host-100-100-17-22)
Quantity: Number of instances to create. If you create two or more instances, the names are automatically generated based on the first instance name
Description: Description of the instance② Image Image to use
- Default tab: Images provided by KakaoCloud
- Custom image tab: Images created in the account③ Instance type See Instance type specifications ④ Volume Local disk provided with the instance
- Local disk capacity is determined by the instance type
- Attaching additional volumes and changing local disk capacity are not supported⑤ Key pair Key pair to apply to the instance ⑥ Network Subnet: Select one of the subnets created in the network
- If a new VPC and subnet are required, create them in VPC
Network interface type: Primary network interface of the instance to create
IP allocation method: IfNew interfaceis selected, an IP address can be randomly assigned within the subnet CIDR block excluding reserved IP addresses
Security group: Security group applied to the instance
Applied rules
- Inbound rules tab: Inbound rules applied to the selected security group
💡 To connect to the instance, allow the following inbound ports depending on the selected image (required)
ㄴ Linux: Allow TCP port 22
ㄴ Windows: Allow TCP port 3389
ㄴ Windows + MSSQL: Allow TCP ports 3389 and 1433
- Outbound rules tab: Outbound rules that allow all protocols and ports⑦ Advanced settings User script: Script that runs user data at instance startup to automatically configure the initial environment (runs only on the first startup)
- Enter a user data script andcloud-initcommand within 16KB or upload a file
- The script is copied and executed under/var/lib/cloud/instances
- Run the following command to check the script execution log
ㄴ Ubuntu:sudo cat /var/log/syslogorsudo journalctl -u cloud-final.service
ㄴ CentOS:sudo cat /var/log/messagesorsudo journalctl -u cloud-final.service
⚠️ If an invalid user script is entered or the script does not complete execution, the instance may fail to boot.
CPU multithreading: Option to optimize performance by assigning a single thread per CPU core
- Recommended to disable for specific workloads such as high performance computing (HPC). -
Click the [Create] button to create the Bare Metal Server instance. After creation, you can connect to the instance using an SSH client or other tools. Additional tasks such as installing and configuring the operating system may be required.
- If two or more network interfaces are connected to the same subnet on an instance, networking issues such as asymmetric routing may occur and additional configuration may be required for proper communication. Therefore, it is recommended to connect each network interface to a different subnet. For more information, see the Using multiple network interfaces document.
- When a Bare Metal instance starts, the base server boots and checks all hardware and firmware components. It may take about 20 minutes before the instance becomes available over the network.
Connect to instance
Connect to the instance using SSH or RDP depending on the operating system. To connect to the instance, prepare an environment that allows access through a public or private IP.
If you update the OpenSSL package on the Rocky 9 image, the OpenSSH package may not automatically update to the same version, causing a version mismatch. This can lead to SSH connection errors, so check and update the OpenSSH package as well when updating OpenSSL.
Connect to linux instance with ssh
Connect to the Linux instance using an SSH client.
-
Install an SSH client to use the SSH command.
Operating system Requirement Linux/macOS Download and install OpenSSH
- For more information, see the OpenSSH official site -
Use the SSH command in the terminal to connect to the instance. Enter the private key path and file name, the instance username, and the instance address.
SSH commandssh -i {PATH_TO_PRIVATE_KEY} {USERNAME}@{INSTANCE_IP}Command Description {PATH_TO_PRIVATE_KEY}Private key path {USERNAME}Username required to connect to the instance
- Pre-created depending on the operating system provided by the default image{INSTANCE_IP}IP address of the instance
- Enter either a public IP or private IP depending on the connection environment